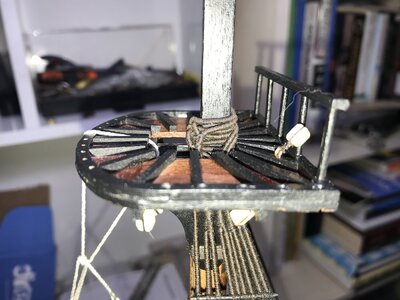
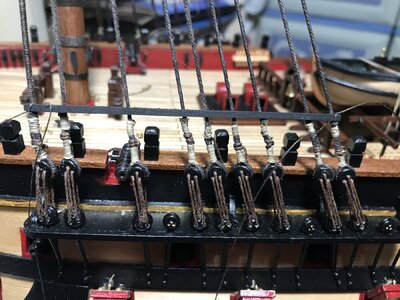
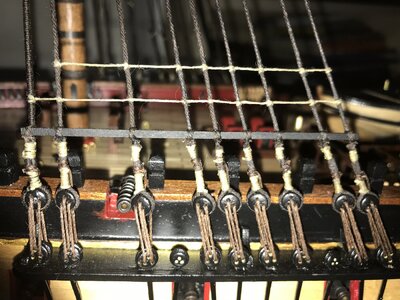
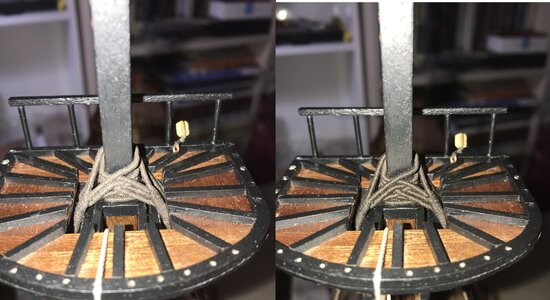
Montañes by Occre Build Log

Sorry Understood at last. :)

I'll correct it tonight.
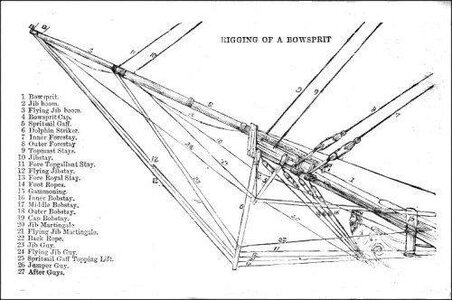
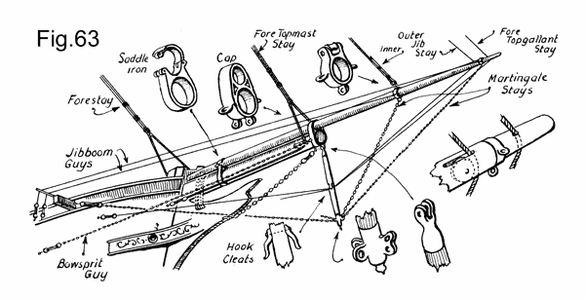
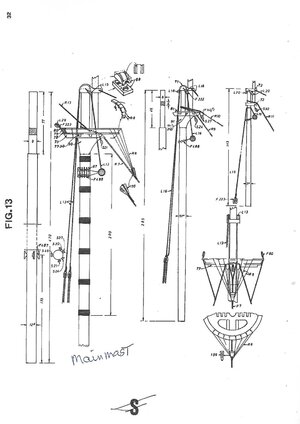
Hi my Frind from Turkey and to all who debating here. I just found my instruction manual Yesterday -in a bad shape after 20 Years - but cannot find the Drawings -have a lot of info the rig correctly the Baupress, so I will come back on that.
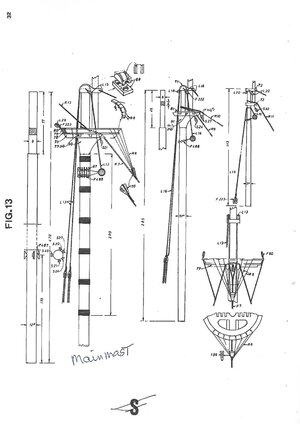
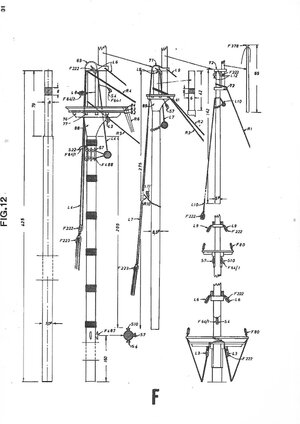
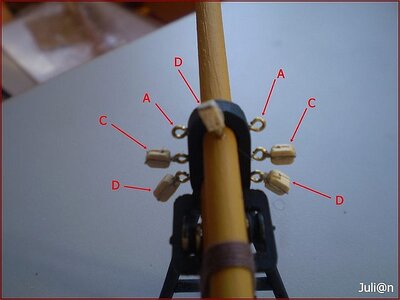
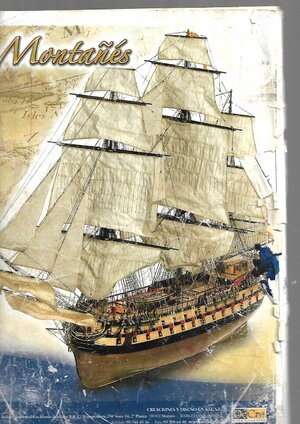
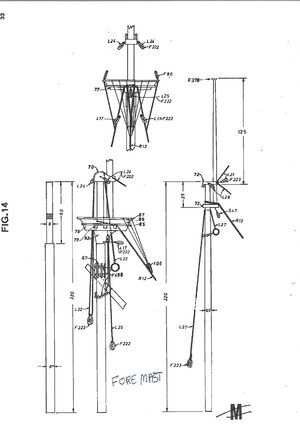
As we had some discussion over Mast caps- the Oriental way and the British, and as there was some misunderstanding I have too found "How to Righ the Mast Note: They are about 40 years old. The Capital letters are german, but it is foremast, mainmast and mizzen. there is a small difference in the riggen. the lower yard on the foremast and the mainmast
To all of you have a nice Build and Stay Safe
MONTAÑES BUILDING INSTRUCCION-16.jpgScan_0001.jpgScan_0002.jpgScan_0005.jpg920-BAUPRESS.jpg921-BAUPRESS-BOWSPRIT (1).gif944-BAUPRESS-BOWSPRIT (31).jpg945-BAUPRESS-BOWSPRIT (12).jpg
 
Good morning Bilal.
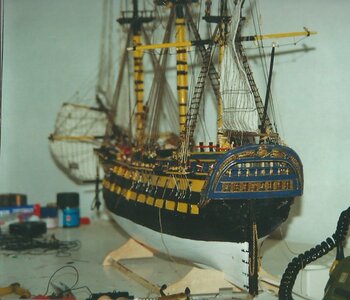
At least I could find the pictures of my build. Is the San Juan Nepomuceno that is not exactly the same type of ship (The Montañés was more modern and better) but in this special feature, I think, were the same.
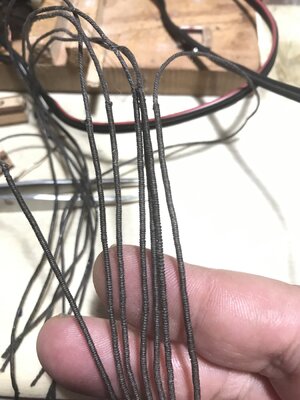
The wrapping or the threads were made in order to protect them from extreme friction or tension. Thats the reason why the prow shrouds were covered, to prevent them from being severely frictioned by the yards coming up and down and from the continous beating of the sails. In the same way, the stays were also wrapped, because were in high tension, provided they support the stability of the masts.
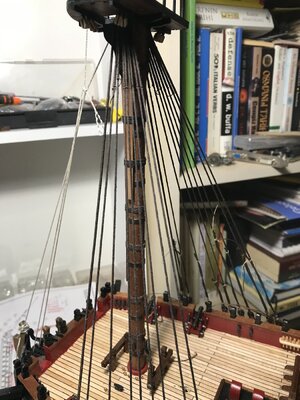
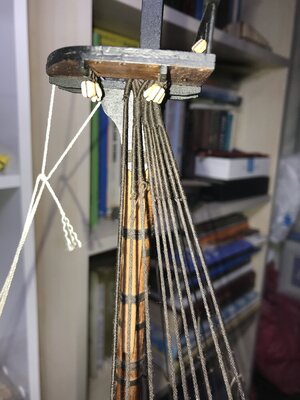
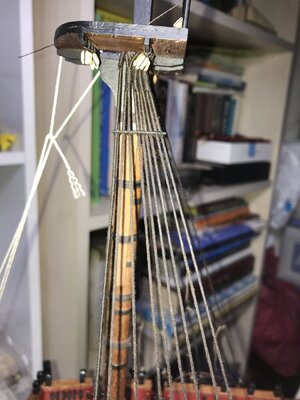
Besides all the shrouds were wrapped in the part they embrace the masts, just in the crosstrees and until the futtocks.
I show you all of this in some images.
Please let me know if there is something you want me to explain further.
Greetings and good job.
Jaime

PD. The instruction manual is very simple, all of this is an improvement of the model that will make it unique.View attachment 208660

See the prow shroud wrapped

View attachment 208661

Detail

View attachment 208663

The shrouds supporting the masts. That part is also wrapped.

View attachment 208664

Wrapped until the futtocks.

View attachment 208665

Main stay and preventer stay, wrapped.

View attachment 208666

General view.
I build San Juan Nepusano too -just before Montañes -but both ships is rigged with Oriental CAPS -as well as Norske Love Denmark. Now, what is important IS, the BUILDER is in the Driving seat-we others can comment, helps etc. my build was built 1996 and for the 1Th. time, I got anelectric Tool- a Proxcon

Scan_0002.jpg7-nepusano.jpg
 
I build San Juan Nepusano too -just before Montañes -but both ships is rigged with Oriental CAPS -as well as Norske Love Denmark. Now, what is important IS, the BUILDER is in the Driving seat-we others can comment, helps etc. my build was built 1996 and for the 1Th. time, I got anelectric Tool- a Proxcon

Attachments​

 
Past weekend I varnished the hull. I used flat varnish. View attachment 208383View attachment 208384View attachment 208385

Photo was taken just after varnishing. Shining will fade as the varnish dries.

Here are some photos after varnish dried.

View attachment 208386View attachment 208387View attachment 208388View attachment 208389

After this process I started to rigging.

First I installed the bowsprit. Checked the aligment first and then tie down necesarry ropes to install fore mast lower section.

View attachment 208397View attachment 208398

After bowsprit installement. Before gluing, I wanted to check the position of fore mast. I used three temporary ropes to do this. And then glued.View attachment 208399View attachment 208401View attachment 208400

And then begun to prepare the shrouds. There are nine shrouds on each side. So I prepared 8 double and 2 single shrouds.

Shrouds installed to the mast one to the right and one to the left, respectively

View attachment 208402View attachment 208405View attachment 208403View attachment 208404

And then I checked the orientation of the ropes just under the crow's nest as picture below. View attachment 208406View attachment 208407.

Now It's time to tie them up. Fist I installed the support rope (I dont know the technical term in english sorry.) Then begun to tie down the dead eyes. I didnt use any template for deadeyes. Also sorry because I forgot to take photos how I managed this process bu will do with the main mast.

View attachment 208408View attachment 208410

And then two ratlines for warm up and finished for now. I dont use any template for ratlines also. Up to me every shrouds and ratlines unique for each model and using a template is useless for good quality work.


View attachment 208409


Finally my quality control team checked the model.


View attachment 208413View attachment 208414

And yes the brown lady was the manager of QC team. Please take a look at her way of looking. :)

Best Regards from Turkey.ooo

Past weekend I varnished the hull. I used flat varnish. View attachment 208383View attachment 208384View attachment 208385

Photo was taken just after varnishing. Shining will fade as the varnish dries.

Here are some photos after varnish dried.

View attachment 208386View attachment 208387View attachment 208388View attachment 208389

After this process I started to rigging.

First I installed the bowsprit. Checked the aligment first and then tie down necesarry ropes to install fore mast lower section.

View attachment 208397View attachment 208398

After bowsprit installement. Before gluing, I wanted to check the position of fore mast. I used three temporary ropes to do this. And then glued.View attachment 208399View attachment 208401View attachment 208400

And then begun to prepare the shrouds. There are nine shrouds on each side. So I prepared 8 double and 2 single shrouds.

Shrouds installed to the mast one to the right and one to the left, respectively

View attachment 208402View attachment 208405View attachment 208403View attachment 208404

And then I checked the orientation of the ropes just under the crow's nest as picture below. View attachment 208406View attachment 208407.

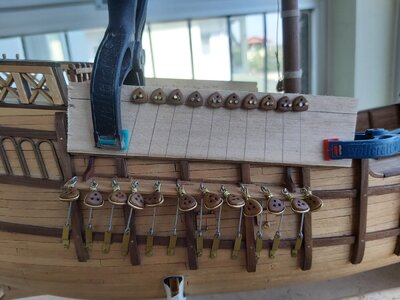
Now It's time to tie them up. Fist I installed the support rope (I dont know the technical term in english sorry.) Then begun to tie down the dead eyes. I didnt use any template for deadeyes. Also sorry because I forgot to take photos how I managed this process bu will do with the main mast.

View attachment 208408View attachment 208410

And then two ratlines for warm up and finished for now. I dont use any template for ratlines also. Up to me every shrouds and ratlines unique for each model and using a template is useless for good quality work.


View attachment 208409


Finally my quality control team checked the model.


View attachment 208413View attachment 208414

And yes the brown lady was the manager of QC team. Please take a look at her way of looking. :)

Best Regards from Turkey.
Hello Bilal,
I am following your build with interest and she looks so beautiful. I want to share my jig that I use for deadeyes. Maybe it makes your life easier in the next steps.

20200417_153300.jpg20200420_144302.jpg
 
Good morning Bilal.
At least I could find the pictures of my build. Is the San Juan Nepomuceno that is not exactly the same type of ship (The Montañés was more modern and better) but in this special feature, I think, were the same.
The wrapping or the threads were made in order to protect them from extreme friction or tension. Thats the reason why the prow shrouds were covered, to prevent them from being severely frictioned by the yards coming up and down and from the continous beating of the sails. In the same way, the stays were also wrapped, because were in high tension, provided they support the stability of the masts.
Besides all the shrouds were wrapped in the part they embrace the masts, just in the crosstrees and until the futtocks.
I show you all of this in some images.
Please let me know if there is something you want me to explain further.
Greetings and good job.
Jaime

PD. The instruction manual is very simple, all of this is an improvement of the model that will make it unique.View attachment 208660

See the prow shroud wrapped

View attachment 208661

Detail

View attachment 208663

The shrouds supporting the masts. That part is also wrapped.

View attachment 208664

Wrapped until the futtocks.

View attachment 208665

Main stay and preventer stay, wrapped.

View attachment 208666

General view.
Dear Jaime

Unfortunately OCCRE instructions are not detailed as you explained above. Look at the photo below.

1611682567827.png

I want to thank you and @El Capi again for your guidance. You helped me a lot with my build in details.

While building I learn a lot about Spanish ships. To learn something new always makes me happy.

I think this is "SOS Privilige" :)

I built the caps as @El Capi described before. They are waiting for their turns. :)

Now, all stays and fore shrouds on every mast completely, the rest of the shrouds partially (as you defined in your post) will be wrapped.

This is the job. :)

Best regards from Turkey
 
Last edited:
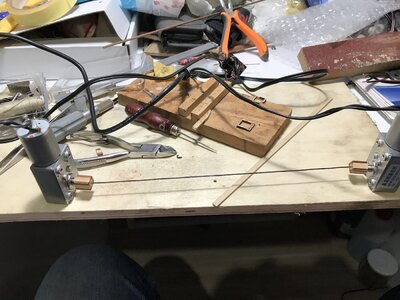
Last two days I was a little busy with the seizing. I didnt like the ones which I made by hand. Then I decided to make a seizing machine.
Lets begin with the BOM

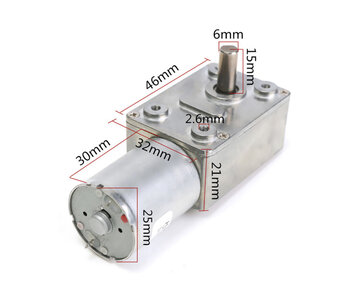
1. 2 Dc motorswith gear boxes, 12 VDC, 0,80 mA, 40 Rpm
DCA73234-2F1E-4B81-A39E-12606120C915.jpeg

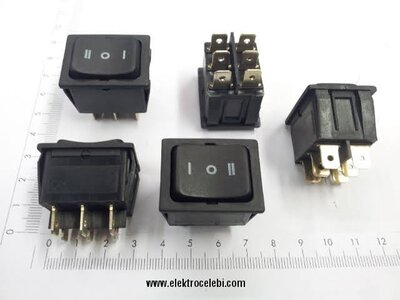
2. 3 positioned on-off switch to turn the motors both CW and CCW directions.
16A30625-16DD-4290-88C2-51361FFC3752.jpeg
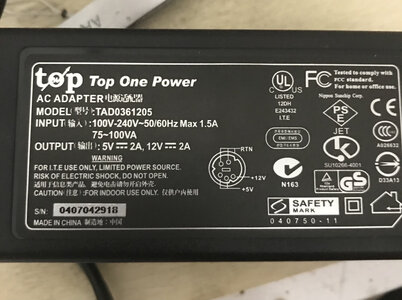
3. 12Vdc power supply (I used a laptop power supply’s 12 vdc out)

DCC35DF7-9247-4A84-826A-40BAE650CC51.jpeg

4. 2x0.50 mm cable

5. 2x6 mm and 2x2 mm wood strip to make mandrels.

I aranged the cabling so that motor #1 turns CW while the other turns CCW in order not to twist the rope.

3 positioned swich used for changing the direction reverse.

And I positioned the motors so that shafts are facing to each other.

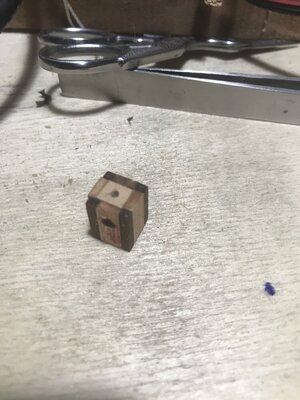
I made temporary wood mandrels to try the prototype.

95DA34DF-EFD0-4FE2-A4C7-E8F552CD26EE.jpeg

Finally it’s time to see what’ll happen.

521D03AB-3B84-4E53-8346-24545E18CA65.jpeg

After 2 or 3 trials it begun to work. (Actually I learned to use it :) )

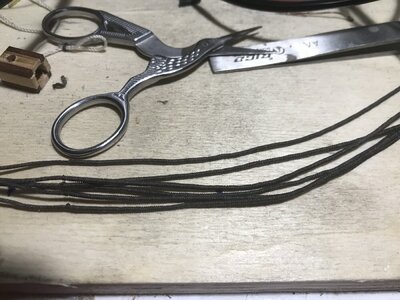
And result.


89C2A99D-11BB-4D17-BB44-3B4A744CEDA6.jpeg7A4089F0-786D-4518-8A4C-854E6429839F.jpeg
 
Last edited:
Last two days I was a little busy with the seizing. I didnt like the ones which I made by hand. Then I decided to make a seizing machine.
Lets begin with the BOM

1. 2 Dc motorswith gear boxes, 12 VDC, 0,80 mA, 40 Rpm
View attachment 209539

2. 3 positioned on-off switch to turn the motors both CW and CCW directions.
View attachment 209540
3. 12Vdc power supply (I used a laptop power supply’s 12 vdc out)

View attachment 209543

4. 2x0.50 mm cable

5. 2x6 mm and 2x2 mm wood strip to make mandrels.

I aranged the cabling so that motor #1 turns CW while the other turns CCW in order not to twist the rope.

3 positioned swich used for changing the direction reverse.

And I positioned the motors so that shafts are facing to each other.

I made temporary wood mandrels to try the prototype.

View attachment 209544

Finally it’s time to see what’ll happen.

View attachment 209545

After 2 or 3 trials it begun to work. (Actually I learned to use it :) )

And result.


View attachment 209550View attachment 209552
YOU ARE NOW REACHING A POINT, WHERE I STAND OF. I am and have never been engineering. nor rope machine nor this. have luck with it. Minor seizing was done by hand. stay safe.
 
A little progress at weekend.

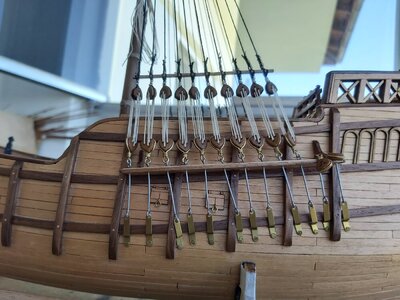
I made all necessary wrapping and placed all fore mast lower shrouds. All deadeyes tied down to the shrouds.

I wrapped the shrouds slightly long more than needed. I didnt glue the edges of wrapped thread, just tied . So I can easly untie them and unwrapped the excess lenght.


1.JPG2.JPG3.JPG

So far so good I think.


6.JPG

5.JPG

Ant it's time to warm up for thousands of clowe hitches. :)

7.JPG

I use beeswax on threads. I realized from the photos that real colors of threads cant be seen because of beeswax. So I decided to use hot air with hair drying machine on threads. I satisfied with the result. Check this before and after photo :

8.jpg

That's all for now.

Best regards from Turkey.
 
Last edited:
Back
Top