Follow along with the video below to see how to install our site as a web app on your home screen.
Note: This feature may not be available in some browsers.
Win a Free Custom Engraved Brass Coin!!!
As a way to introduce our brass coins to the community, we will raffle off a free coin during the month
of August. Follow link ABOVE for instructions for entering.
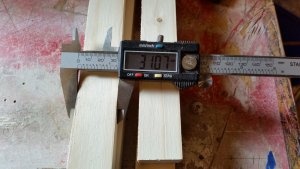
The thinnest mill I had was 1.3mm, I made some planks in this thickness
and made the cut halfway into the planks.
Well, then it was tried, the planks have to be sanded a little on the thickness to fit in each other.
Knut: A common problem I see is making the grating spaces too large. They need to be small enough so boot heels wouldn't get wedged in them. About 3" maximum. At 1:32 scale, that's about 3/32" or 2.4mm.
Nicely done, Knut considering this was your first ever milling experience. If I allowed, I would suggest a bit different approach. Instead of using a precision vise, use the XY table top and set of step clamps.
1. secure the entire timber (not strips) to the tabletop using step clamps
2. mill the grooves to the correct size (deep and width)
3. Using the table saw and thin blade 0.2~03mm, slice the timber to correct thickness (should be the same size as your mill endpoint)
I think this way has some advantages compared to using precut timber strips and vise. The groove will be the same hights across all of the timber. You can mill more useful surface without additional alignment (compared to vise). Let me know if you understand what I mean (sorry for my technical English)
Thanks for the attention guys, I just have to say this was just to try the machine and see how it works.
Jim, I understand what you mean and are going to try this method, milling traces in timber and then the rib timber with saw.
Dave, good points, next attempt will be with 2.5 mm tracks as you say, if you look at the pictures I show then there is a difference betven
grating pattern and floor plan hmm ?, can you give me the measurements on the actual grating, upper and lover deck in mm ?, that would have been of great help.
Great work, Knut! The frames look great. The clamps are great! It would be worth an afternoon in the shop building a couple dozen of them! Thanks for the photos.
If you wanted to put together a little tutorial with measurements and a bill of materials, I’m sure we could get it bookmarked so others could build the clamps too. Admin/moderators, what do you think?
Thanks guys, I can make an explanation with measurements of materials and bolts,
and an explanation of tools and show this with pictures.
It's nice that an amateur like me can also contribute some information here on SOS.
Greeting-
I got the idea from Brian's loog, see link at the bottom.
I took the picture / print to see how I think it will fit in my jig.
Furthermore, the order of tools follows to make the materials.
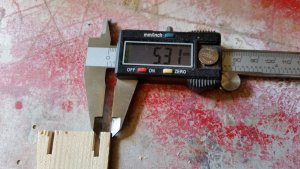
, fit the width of the material.
Slight bonding, grinding and adjustments.
The spasers I glue with super glue.
The clamps can be used both from the inside and outside.
Ending with some goals, the last picture is corrected goals in my opinion.
The clamps are made of pine forests that are a soft material that will not damage the frames.
Finally, I want to say that it is up to the individual to create their own goals according to their wishes / needs.
Hope this explanation may be for someone out there.
Greeting-
Hi gang, I recently purchased on the internet some planking clamps for POF ship building from China. They were so simple to make, and worked so wonderfully well, I decided to make some myself. Photo below is the eBay purchased clamp, they were around $30-US plus delivery.