Wonderful Tobias! I can only imagine the pile of sawdust!
-

Win a Free Custom Engraved Brass Coin!!!
As a way to introduce our brass coins to the community, we will raffle off a free coin during the month of August. Follow link ABOVE for instructions for entering.
-

PRE-ORDER SHIPS IN SCALE TODAY!
The beloved Ships in Scale Magazine is back and charting a new course for 2026!
Discover new skills, new techniques, and new inspirations in every issue.
NOTE THAT OUR FIRST ISSUE WILL BE JAN/FEB 2026
You are using an out of date browser. It may not display this or other websites correctly.
You should upgrade or use an alternative browser.
You should upgrade or use an alternative browser.
POF La Palme (L'Amarante) Corvette 1744 1:36 (Ancre Monograph) by Tobias
Looks very good.
She shows het lines more and more, Tobias. Nice sanding progress.The first grind with the machine was successful, 6.5 hours with the delta grinder, my hands are still feverish. For the time being I'm quite satisfied. Tomorrow we'll do the fine-tuning.
View attachment 364169
View attachment 364170
View attachment 364171
View attachment 364172
View attachment 364173
Regards, Peter
@Uwek @dockattner @pianoforte @Peter Voogt @RDN1954 @Steef66 @shota70 @Mirek
Thank you, yes Uwe she is sexy and Paul the sawdust was neat.
Thank you, yes Uwe she is sexy and Paul the sawdust was neat.
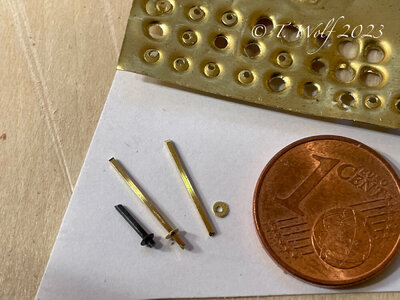
Tobi, I love the washers and square bolts. Every detail attended to!
Tobi, I love the washers and square bolts. Every detail attended to!
Thank you Paul, the diameter of the washer is 1.5mm
An excellent method to do washers. Always wonder how many talented people are across the globe. Just because of such people, I learn every day! 
- Joined
- Dec 9, 2019
- Messages
- 961
- Points
- 403

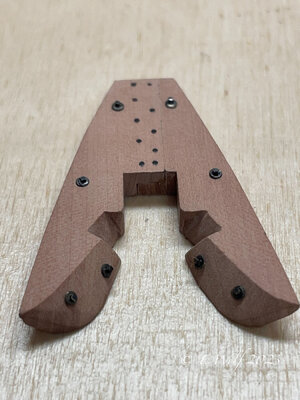
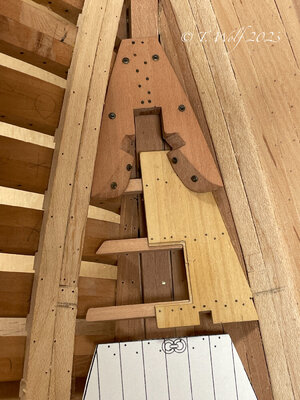
WitajMała aktualizacja w kierunku wystroju wnętrz. Dla porównania po raz pierwszy moneta 1 centowa.
View attachment 365845
View attachment 365843
View attachment 365844
Jestem ciekawy w jaki sposób i czym robiłeś podkładki. Piękna praca pozdrawiam Mirek
Hello
I'm curious how and what you made the pads. Beautiful work, greetings Mirek
Last edited by a moderator:
A small update towards the interior design. For comparison, the first time a 1 cent coin.
View attachment 365845
View attachment 365843
View attachment 365844
Hallo Tobias, a very nice and clean solution you have found, looks very elegant, even if later you do not see that it exists, but you know it, that's the point. Saubere Sache das.

The bolts with the heads are looking extremely good - which tool did you use to prepare the washer?
I guess first the inside hole and afterwards the outside ring.....
just my subjective taste:
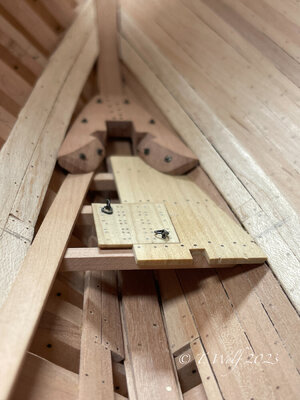
the "nailing" of the hatch cover is maybe a little bit too much (what I mean are too much nails for this small cover) - it is looking like a french nailed gunport-lid - is it wooden nails or metal? which diameter?
Thank you very much for your interest.
I would like to answer or explain a couple of questions.
Mirek and Uwe I bought punches from Amazon with which I drive the discs out of the brass sheet. First I punch the sheet metal lightly, then I drill the hole and then I punch it out completely.
Here is the link to Amazon
So now to the hatch Uwe, yes, it almost looks like a gunport, but it is correct, there are two layers of boards offset by 90 degrees, with the lower layer of boards being smaller to fit into the chamfer. The nails are made of wood and are 0.4 mm thick.
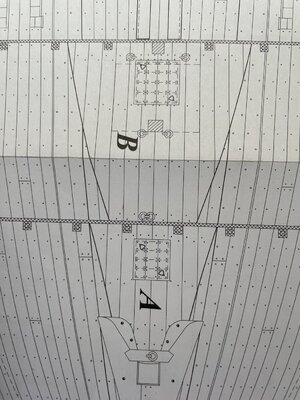
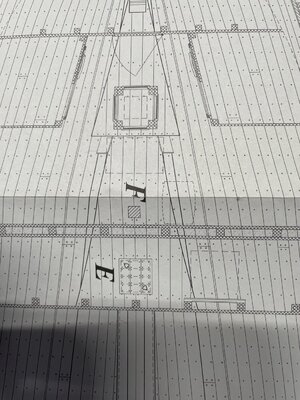
I hope I was able to answer all questions and thoughts.
I would like to answer or explain a couple of questions.
Adi yes you are partly right that you can't see it later, but I would like to always remove three frames to see better the inside, i.e. open it.Hallo Tobias, a very nice and clean solution you have found, looks very elegant, even if later you do not see that it exists, but you know it, that's the point. Saubere Sache das.
Witaj
Jestem ciekawy w jaki sposób i czym robiłeś podkładki. Piękna praca pozdrawiam Mirek
Hello
I'm curious how and what you made the pads. Beautiful work, greetings Mirek
The bolts with the heads are looking extremely good - which tool did you use to prepare the washer?
I guess first the inside hole and afterwards the outside ring.....
just my subjective taste:
the "nailing" of the hatch cover is maybe a little bit too much (what I mean are too much nails for this small cover) - it is looking like a french nailed gunport-lid - is it wooden nails or metal? which diameter?
Mirek and Uwe I bought punches from Amazon with which I drive the discs out of the brass sheet. First I punch the sheet metal lightly, then I drill the hole and then I punch it out completely.
Here is the link to Amazon
So now to the hatch Uwe, yes, it almost looks like a gunport, but it is correct, there are two layers of boards offset by 90 degrees, with the lower layer of boards being smaller to fit into the chamfer. The nails are made of wood and are 0.4 mm thick.


I hope I was able to answer all questions and thoughts.
Last edited:
- Joined
- Dec 9, 2019
- Messages
- 961
- Points
- 403

Dziękuję za działanie.
Po prostu lub oryginalne kilka pytań.
Adi tak, po części masz rację, że później tego nie widać, ale zawsze poprawiłbym trzy ramki, żeby lepiej zobaczyć wnętrze, czyli otwarcie.
Mirek i Uwe Kupiłem wykrojniki z Amazona, oprócz wybijam krążki z blachy mosiężnej. Najpierw lekko dziurkuję blachę, następnie wiercę średnicę, a następnie wybijam go całkowicie.
Oto link do Amazona
Więc teraz do włazu Uwe, tak, wygląda to prawie jak port strzelniczy, ale do prawdy, są dwie warstwy desek przesunięte o 90 stopni, przy czym dolna różnica desek jest mniejsza, aby podziała do fazy. Gwoździe wykonane są z drewna i mają grubość 0,4 mm.
[ZAŁĄCZ=pełne]365894[/ZAŁĄCZ]
[ZAŁĄCZ=pełne]365895[/ZAŁĄCZ]
Mam nadzieję, że udało mi się uzyskać na wszystkie pytania i przemyślenia.W
WitajDziękuję bardzo za zainteresowanie.
Chciałbym odpowiedzieć lub wyjaśnić kilka pytań.
Adi tak, po części masz rację, że później tego nie widać, ale zawsze wolałbym usunąć trzy ramki, żeby lepiej zobaczyć wnętrze, czyli otworzyć.
Mirek i Uwe Kupiłem wykrojniki z Amazona, którymi wybijam krążki z blachy mosiężnej. Najpierw lekko dziurkuję blachę, następnie wiercę otwór, a następnie wybijam go całkowicie.
Oto link do Amazona
Więc teraz do włazu Uwe, tak, wygląda to prawie jak port strzelniczy, ale to prawda, są dwie warstwy desek przesunięte o 90 stopni, przy czym dolna warstwa desek jest mniejsza, aby pasowała do fazy. Gwoździe wykonane są z drewna i mają grubość 0,4 mm.
View attachment 365894
View attachment 365895
Mam nadzieję, że udało mi się odpowiedzieć na wszystkie pytania i przemyślenia.
Dzięki ciekawy sposób. Pozdrawiam Mirek


