sgtmik's HMS Blandford cross section build

Hi Mike,
Very nice clean work, it does look like you know what you are doing because you do. You are developing an impressive set of skills that will give you a good start on the Naiad.
I would suggest you varnish the inside of the frames and lower part of the deck clamps before you glue the deck beams in place, they make things harder to get to.
Mike
 
Hi Mike,
Thanks for your visit to my build log and for your kind comments. I will follow your advice and do some more varnishing. The European Beech really looks nice I'm glad you recommended it.
 
Hey Mike!

I just thought of something. Have you glued your well and lower deck beams in place yet? The well should have a door on the side for access to the pumps! The plans don't show it, but it would be necessary. David Anscherl mentions in his Swan series books that the door is missing from Admiralty drafts of several ships in that class, but should be there. I don't think it's a big deal at all, but if you still can, consider adding one. ;-)
 
Hi Dave,
I haven't glued the well in yet but I have installed Deck Beams 2 & 3, and the Arm Beams. I'm not sure I could get the well out now. Maybe on my next cross section.
 
Hi Mike, Dave
If you would like to add an access door to the well you can add a false door without cutting an opening in enclosure on the side opposite the shot locker, the access doors were usually small I would suggest two feet wide by four feet tall. David Antscherl does mention in volume 1 page 226 of his Swan series book that an access door is required but doesn’t give a size. Please remember this is an introductory exercise and not a Swan Class model by David Antscherl.
Mike
 
Mike41 post_id=25364 time=1514741974 user_id=4781 said:
Hi Mike, Dave
If you would like to add an access door to the well you can add a false door without cutting an opening in enclosure on the side opposite the shot locker, the access doors were usually small I would suggest two feet wide by four feet tall. David Antscherl does mention in volume 1 page 226 of his Swan series book that an access door is required but doesn’t give a size. Please remember this is an introductory exercise and not a Swan Class model by David Antscherl.
Mike

Sometimes I get carried away, Mike. I realize this is an introductory project; the basic concept is so cool that I can't help thinking of details to add to it. The larger scale makes that possible.
 
Thanks Mike & Don for visiting my build log and for you kind comments. I have made note of those dimensions and don't be suprised if you see one appear.
 
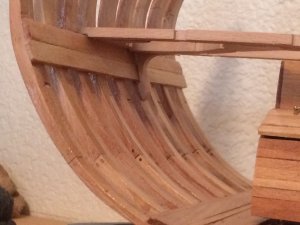
I have been busy crackin the whip in my ship yard. I have varnished the inside frames and planking, and before it gets too crowded. I'm going to install the rest of the strakes and footwalings now that I have the locations of all the hanging knees.
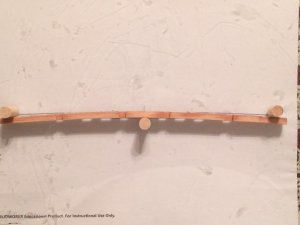
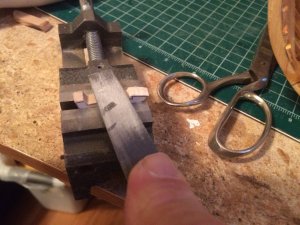
I had already cut my deck beams when Mike posted the new plan sheet so I used a new skill that I learn from JosephH. I used Solidworks and printed just the template for the deck beam arch. I then used another skill I learned from Andy (Fishknots) useing a piece of glass to cover the template and super gluing some pieces of dowel the glass I was able to soak the bam in hot water then put it in my make shift jig and bent the beams to the correct arch.

IMG_1907.JPG

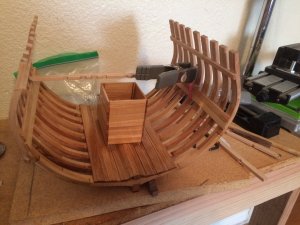
Next I installed the #2 deck beam and the #2 Lower deck knee.IMG_1908.JPG

IMG_1909.JPG

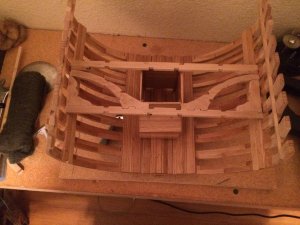
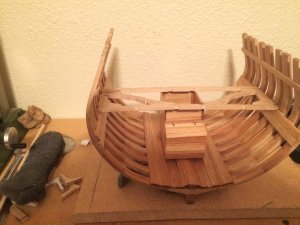
Next I installed the beam arms and the framing started to take shape.
IMG_1914.JPG

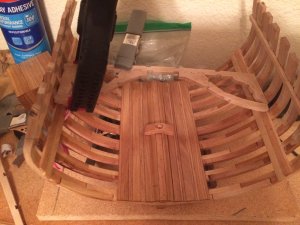
I then cut the hanging knees and dry fitted LDHK#'s 2 & 5.
IMG_1915.JPG

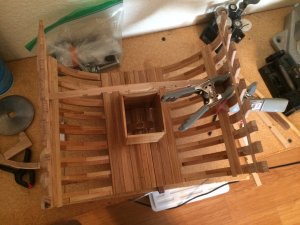
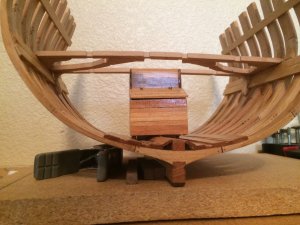
I the installed the two hanging knees and deck beam 3.
IMG_1916.JPGIMG_1917.JPGIMG_1918.JPGIMG_1919.JPG

Well that's my story and I'm sticking with it.
Thanks for your visit to my build log.
 
Good Morning Mike & Dave,
A very Happy New Year to you both. Thanks for visiting my build log and for you too kind comments. I plan to Finish the planking up the sides of the inside and get them trimmed to make way for varnish. A few more tasks before I continue with the lower deck beams.
 
Mike, you are really getting a lot done on this build, and done quickly! And looks great! Good job buddy. Hopefully I can get back on track with you guys so I can catch up.

Andy
 
Hi Andy,
Thanks for your visit to my build log. Yes I have been on a roll lately. I made a big booboo. I let one of my frames get too close to my belt sander and put a big divot in my starboard side #9 aft frame. I've been thinking about some ways to repair it but as yet have not.
Glad yo see you are back. I hope you and your family had a Happy New Year.
 
Hi Mike,
If you post a photo of frame 9 we may be able to help with the repair.
 
Back
Top