I really like the caulking technique tip; one of the things that always bothered me about using graphite to represent caulking is the that the plank edges would not really bond with each other. This acrylic technique makes an edge bond with better integrity. I also like your use of formica for patterns, bridged closely enough with battens; that's a real time-saver.
-

Win a Free Custom Engraved Brass Coin!!!
As a way to introduce our brass coins to the community, we will raffle off a free coin during the month of August. Follow link ABOVE for instructions for entering.
-

PRE-ORDER SHIPS IN SCALE TODAY!
The beloved Ships in Scale Magazine is back and charting a new course for 2026!
Discover new skills, new techniques, and new inspirations in every issue.
NOTE THAT OUR FIRST ISSUE WILL BE JAN/FEB 2026
You are using an out of date browser. It may not display this or other websites correctly.
You should upgrade or use an alternative browser.
You should upgrade or use an alternative browser.
Soleil Royal- Re-engineering Artesania Latina's New Kit by NMBROOK
I really like the caulking technique tip; one of the things that always bothered me about using graphite to represent caulking is the that the plank edges would not really bond with each other. This acrylic technique makes an edge bond with better integrity. I also like your use of formica for patterns, bridged closely enough with battens; that's a real time-saver.
Formica,now that's a blast from the past Marc. Must be forty years since I have seen any of that. It is simply cut up cardboard cereal packet.It is actually quite good in that it can lightly sanded for fine adjustment.I am not that good with scissors

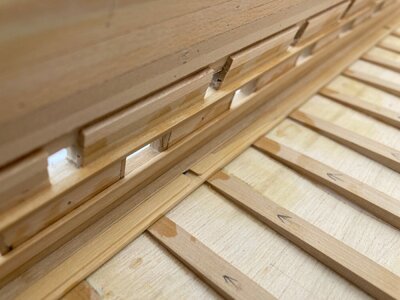
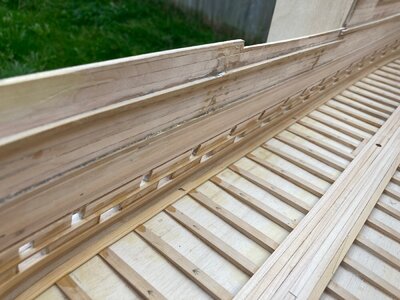
I have the second section of waterway in position on the Port side.The four pieces are glued together into a length before fitting.I find it better to assemble the scarfs off the model as it gives a better fit.Possibly too good as you can hardly see them now .I intentionally did not caulk any off these parts, the caulking starts on the deck planking proper.
This section is milled on the inboard edge to match the thickness of the deck planking, actually a smidge less to allow for sanding the deck.The square edge of the step should be 45 degrees but this will be added with a custom scraper after the deck is sanded.
Kind Regards
Nigel
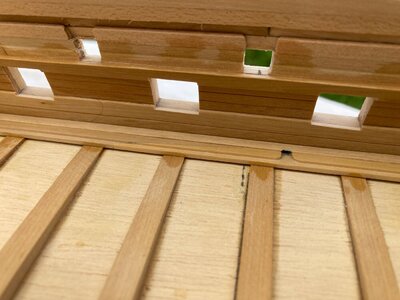
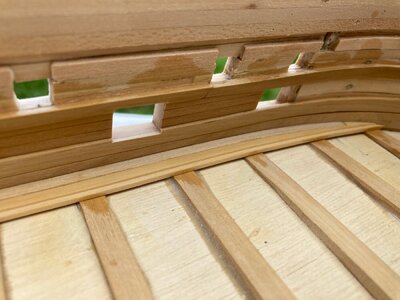
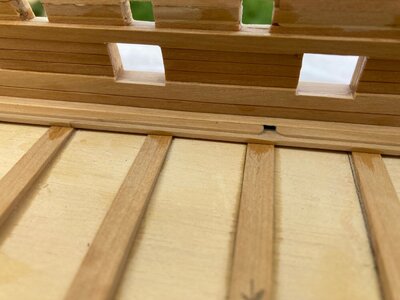
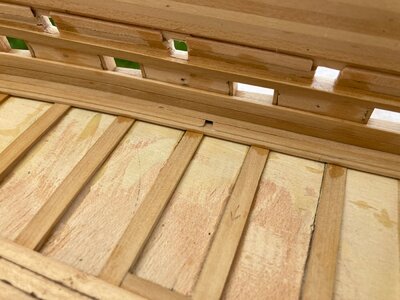
This section is milled on the inboard edge to match the thickness of the deck planking, actually a smidge less to allow for sanding the deck.The square edge of the step should be 45 degrees but this will be added with a custom scraper after the deck is sanded.
Kind Regards
Nigel


Well, if it can possibly be done better than that, I have yet to see it.
Like I said earlier - perfection multiplied. Your craftsmanship, Nigel, is simply astonishing. You have previously deferred to your many years in the hobby - but you are also naturally gifted. Inspiring stuff.Well, if it can possibly be done better than that, I have yet to see it.
I really like the caulking technique tip; one of the things that always bothered me about using graphite to represent caulking is the that the plank edges would not really bond with each other. This acrylic technique makes an edge bond with better integrity. I also like your use of formica for patterns, bridged closely enough with battens; that's a real time-saver.
I think the main thing that made me adopt this caulking technique was that I find black caulking is too stark for me, the dark brown blends better with wood tones.I used normal pencil for many years but was never quite happy with the result. Black may be technically correct, but aesthetically I find it not as harmonious.
Thankyou very much Guys
Paul if you saw my first attempt at wooden shipbuilding, I would say it is YOU with the natural ability I have just had a lot of practice and made a plethora of mistakes that I have learnt from
In case you ask, my first attempt got destroyed in a house move.Probably the best thing for it

Kind Regards
Nigel

Paul if you saw my first attempt at wooden shipbuilding, I would say it is YOU with the natural ability

In case you ask, my first attempt got destroyed in a house move.Probably the best thing for it


Kind Regards
Nigel
Good morning Nigel. Wow. Your work is “off the charts” good. Cheers GrantI have the second section of waterway in position on the Port side.The four pieces are glued together into a length before fitting.I find it better to assemble the scarfs off the model as it gives a better fit.Possibly too good as you can hardly see them now.I intentionally did not caulk any off these parts, the caulking starts on the deck planking proper.
This section is milled on the inboard edge to match the thickness of the deck planking, actually a smidge less to allow for sanding the deck.The square edge of the step should be 45 degrees but this will be added with a custom scraper after the deck is sanded.
Kind Regards
Nigel
View attachment 328886View attachment 328887View attachment 328888View attachment 328889
Thankyou Grant
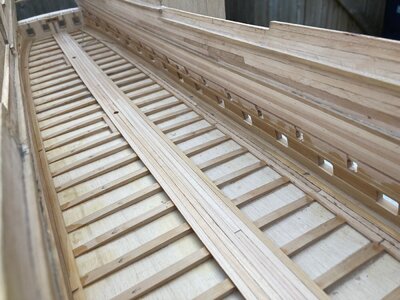
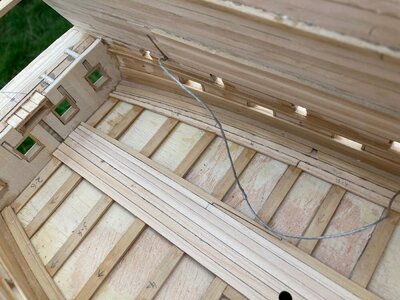
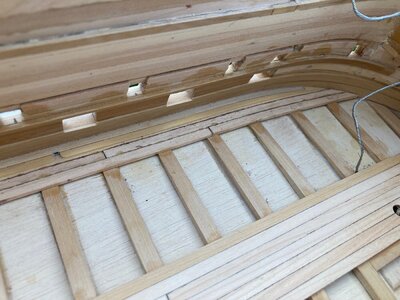
I have fitted the last section of water way on the starboard side and am now planking the deck.This is a job where it will look scruffy until all complete and scraped.
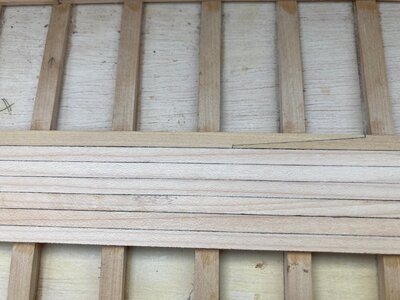
It is also time consuming as all the planks need tapering at the ends and all the binding strakes are scarped together.
I have given the middle section the lightest of scrapes to see how my caulking has come out (not done this on anything other than pear before) Still some more scraping required as you can see glue marks in the low spots.
Kind Regards
Nigel


My friend - Very good work
BTW: I like the result of "painted" lead
BTW: I like the result of "painted" lead
Thanks UweMy friend - Very good work
BTW: I like the result of "painted" lead
The lead idea came to me whilst making the items, firstly I was just going to mill a slot.Then thought I can't easily mill it all the way through, so paint the inside black, the silver paint came to me as the black was drying.The detail is there but I wasn't going overboard making a lining that will only ever be seen through a gunport
It all looks a bit of a "dog's breakfast" at the moment but once the deck is finished and scraped, all should be tidy again
Kind Regards
Nigel
Work is still continuing on the deck, but I needed a brief change as I have spent quite a few hours on it so far.
About four years ago I purchased a boxwood log of Ebay that had been felled in Sussex.It had not been stored very well and had a split it in it but I did get it cheap.I bought it knowing it would come in and it has now been sliced up to make deck fittings.
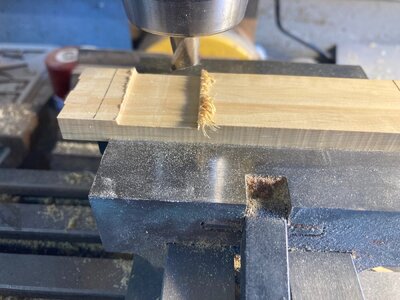
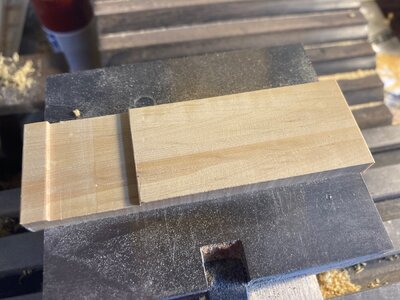
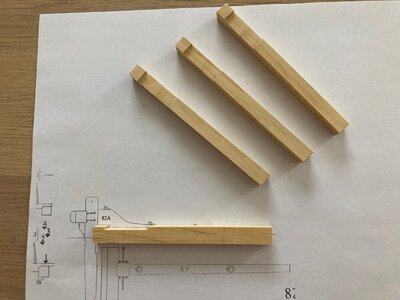
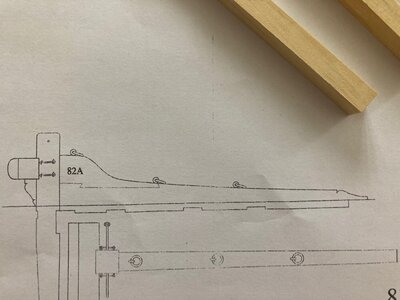
I have started on the anchor bitts which will go on the deck I am currently planking.
As they says picture is worth a thousand words
Kind Regards
Nigel
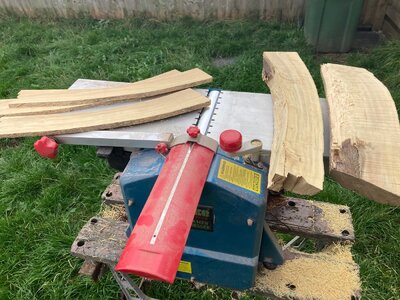
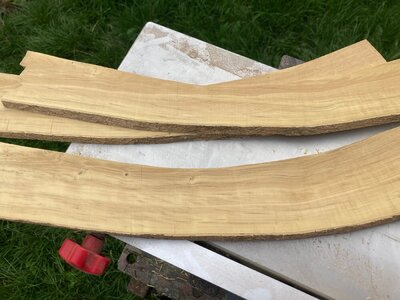


Look at you - progress on the ship and mulch the yard all at the same time! I’ll have to find ways to make my hobby waste seem like a value-added benefit 
Work continues, the bolsters have been laminated to their other section, the dovetail was a step too far,I currently don't have a cutter and doing it by hand would not have been as neat.
Having said that, you can barely seen the join anyway.The main body is also two pieces glued together, but again the joint is nearly invisible.
The posts have been milled and my last job today was to carefully taper the bolsters on the belt sander ( without reducing the thickness of my fingers )
)
Everything has been milled in batches as fortunately the two sets of Bitts are nearly identical.
Next job is to glue some copies of the drawing to the bolsters so I can profile them on the bandsaw and finish by hand.
Kind Regards
Nigel
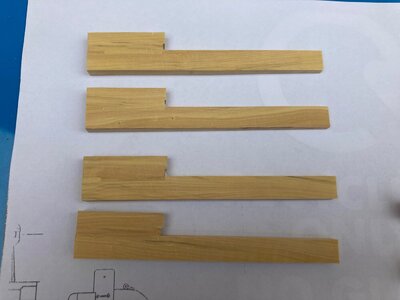
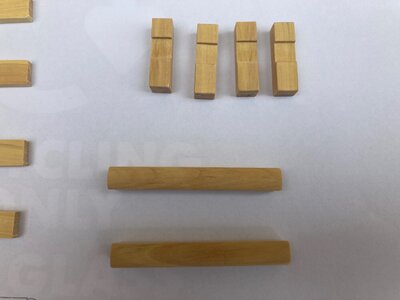
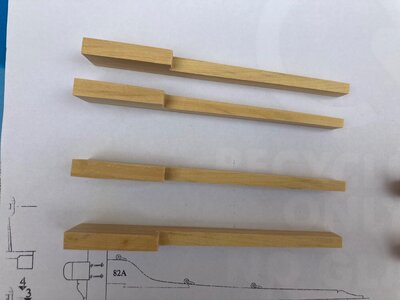
Having said that, you can barely seen the join anyway.The main body is also two pieces glued together, but again the joint is nearly invisible.
The posts have been milled and my last job today was to carefully taper the bolsters on the belt sander ( without reducing the thickness of my fingers
Everything has been milled in batches as fortunately the two sets of Bitts are nearly identical.
Next job is to glue some copies of the drawing to the bolsters so I can profile them on the bandsaw and finish by hand.
Kind Regards
Nigel


Nigel, I am curious as to whether you will fully fit-out and arm the lower two gun decks before finish planking and setting the wales and painting the exterior. I can understand the desire to put-off the eventuality of a scuffable painted surface for as long as possible, but it would be a lot more challenging to do this with the lower and middle battery in-place. I suppose you could set the barrels in the carriages through the port holes, but interior dust from sanding the exterior plank would be another challenge to artfully dodge.
Hi Nigel,
It must be extra satisfying building with your own sourced lumber.
It must be extra satisfying building with your own sourced lumber.
Nigel, I am curious as to whether you will fully fit-out and arm the lower two gun decks before finish planking and setting the wales and painting the exterior. I can understand the desire to put-off the eventuality of a scuffable painted surface for as long as possible, but it would be a lot more challenging to do this with the lower and middle battery in-place. I suppose you could set the barrels in the carriages through the port holes, but interior dust from sanding the exterior plank would be another challenge to artfully dodge.
That is a very good question and one I am currently wrestling in my mind.I keep tweaking the build sequence as I look at details in more depth.There is an added complication in that the Wales will be varnished but the planking is painted either side.Plus I am also going to add a further layer of planking around the waste to feather into the lower hull.In reality, certainly on this ship, the lower hull planking finishes flush with the lower wale.I most certainly am going to have to fit temporary ABS plastic Wales to work against then remove these to paint the hull planking.The boxwood Wales will then be fitted last.
I plan on doing the initial fit out inside the hull as far as I can regarding gunport linings and production of deck beams.Then revert to the outside and first establish the top sheer of the hull and then my wale positions.The sheer of the hull's top edge needs to be harmonious with the wale sheer, something that is lacking in some of the models I have seen
Essentially,I am creating a "kit" of parts that will all come together at once in the final stages.I intend to hold off Arming the model for as long as is possible.One unusual plan is that I will fit the lower section of mainmast early on in the build as I need to run wiring for the lantern that is mounted to it.The wiring will be concealed inside the mast and lower deck beams, no wiring will be visible anywhere inside the model.
It is all good fun and numerous "chicken and egg" scenarios that result in more think time than actual building.
Last edited:
Hi Nigel,
It must be extra satisfying building with your own sourced lumber.
Hi Maarten
Yes it is but at the same time it is quite wasteful as you are working around the knots rather than the supplier.One thing I will say is this chunk of boxwood carves really, really well so there will be the odd detail I will hand carve.More will be revealed later
I would add though,I didn't quite go as far as you, no chainsaw involved, just clicking buy it now on Ebay

Incidentally there was a batch of felled boxwood logs on Ebay,probably one third of your stash for £600! No I haven't bought them
Kind Regards
Nigel
Looking forward to the carving Nigel.
With your skills I expect Ivan Tartanj level of carving.
With your skills I expect Ivan Tartanj level of carving.
Looking forward to the carving Nigel.
With your skills I expect Ivan Tartanj level of carving.
Mmmm no pressure then Maarten

Last edited:


