-

Win a Free Custom Engraved Brass Coin!!!
As a way to introduce our brass coins to the community, we will raffle off a free coin during the month of August. Follow link ABOVE for instructions for entering.
-

PRE-ORDER SHIPS IN SCALE TODAY!
The beloved Ships in Scale Magazine is back and charting a new course for 2026!
Discover new skills, new techniques, and new inspirations in every issue.
NOTE THAT OUR FIRST ISSUE WILL BE JAN/FEB 2026
You are using an out of date browser. It may not display this or other websites correctly.
You should upgrade or use an alternative browser.
You should upgrade or use an alternative browser.
Soleil Royal- Re-engineering Artesania Latina's New Kit by NMBROOK
Nigel, your woodworking skills are on another level. I find myself asking over and over: how did he do that? I suppose for you it's just rather routine - but if you are so inclined along the way I'd love to have a peak behind the curtain and see some production steps.
One example: the notched breasthook. I wouldn't have a clue where to even begin fabricating and fitting that part with such precision...
One example: the notched breasthook. I wouldn't have a clue where to even begin fabricating and fitting that part with such precision...
Fantastic work, Nigel. I’m wondering whether the bowsprit step gets sandwiched by another beam.
Nigel, your woodworking skills are on another level. I find myself asking over and over: how did he do that? I suppose for you it's just rather routine - but if you are so inclined along the way I'd love to have a peak behind the curtain and see some production steps.
One example: the notched breasthook. I wouldn't have a clue where to even begin fabricating and fitting that part with such precision...
Thankyou Paul
The breasthook was firstly done in card cereal packet then cut out in Boxwood with 1mm of "green" left on to allow for final tweaking.The planking above is then fitted covering any small gaps.It is less above cutting everything perfectly and more about thinking about the order of assembly to cover up any areas I know may be problematic.
I will be copying the spiral stair design from Saint Philippe and work is starting on the lower level very soon.I will do a bit of a mini tutorial on how I make them.In 1/65, their design is quite frankly bonkers and will challenge me.This is a nice little side project and the lower level will need fitting as the next deck goes in.i am also going to depict the stairs going down into the hold which will involve removing another chunk of deck.I will detail that.Why I cut these holes afterwards? Simply because I get a smoother run of deck planking treating it as solid and then cutting the holes afterwards.
Kind Regards
Nigel
Fantastic work, Nigel. I’m wondering whether the bowsprit step gets sandwiched by another beam.
Thanks Marc and yes it does, just not got to that stage.There will also be hanging knees on the next beam and every other beam thereon so quite a bit of work involved in that
Kind Regards
Nigel
Ok,whilst waiting for some glue to dry,I shall start on the staircases.
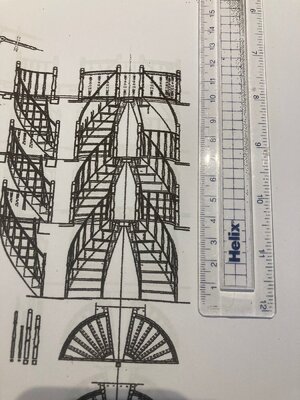
The drawing shows the arrangement going through three decks on Saint Philippe.I will be copying the design on this model.The drawing has been printed at 1/65 so this is full size.
The construction will mainly be Boxwood but the risers and the outside of the stringers will be in my `blue veneer.
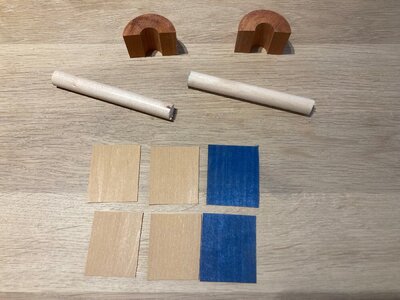
First job is to make a couple of forms which will be shaped later to make moulds for building the stairs.The stringers will be made of three layers of veneer which will need laminating to these forms to follow the required curve.
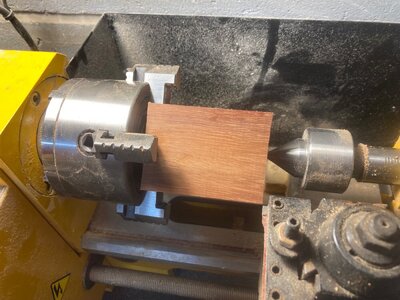
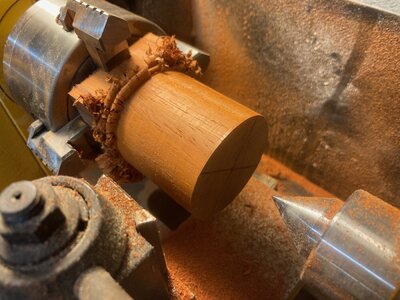
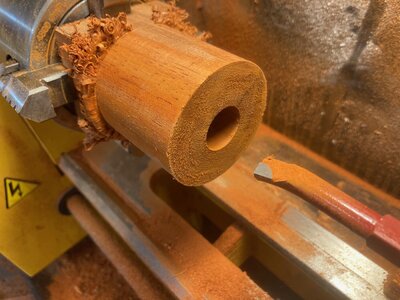
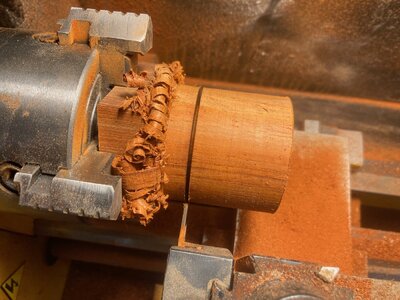
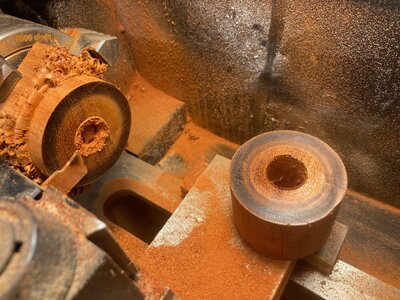
I first found the only hardwood I had big enough the turn the forms on the lathe, which happen to be Padauk.The internal and external diameters correspond to the edges of the treads.
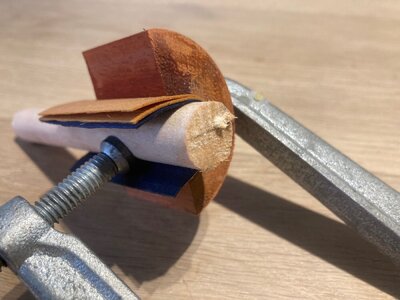
The piece was then split in half with the bandsaw.I am laminating the internal stringer first which is an extremely tight radius.The pieces were soaked in water for 20 mins and then clamped in the form using a dowel which happen to work out exactly the correct internal diameter.The fit was so good that excess water was squeezed out.These will be left clamped until next weekend to dry out when they will be removed and glue added then reclamped.
Kind Regards
Nigel


Brilliant stuff!
I jumped the gun a little last night in that I released the laminated veneer from the form and it was only a little damp. I applied Aliphatic over the faces and reassembled the pieces.I did not need the clamp so laminated the outer stringers as well.These did not require any soaking as the radius is much larger.
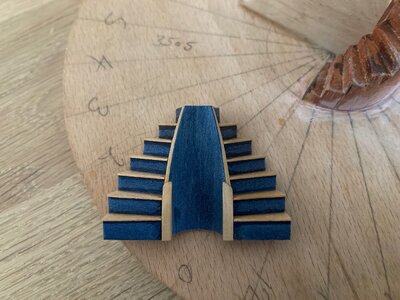
Below is the inner and outer stringers, clearly blue on the outside and plain box on the insides that go to the treads.
I taped the items together and will start the assembly jig next weekend.
Kind Regards
Nigel
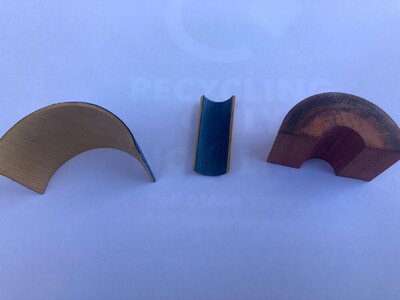
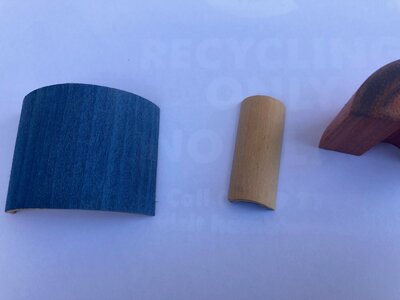
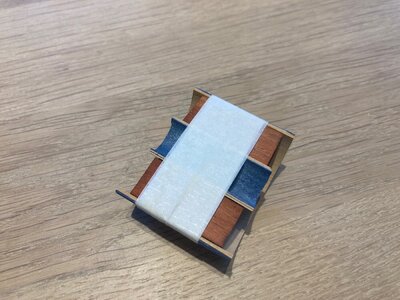
Below is the inner and outer stringers, clearly blue on the outside and plain box on the insides that go to the treads.
I taped the items together and will start the assembly jig next weekend.
Kind Regards
Nigel


If the model remains indoors, does it really need sunblock 4000?
Hi Kurt,
We want our models to grow old.
Even indoor you have UV light, offcourse it depends on where your model stands and even what colour you use. I have used yellow Ecoline on my Alert and this is not covered with a layer of lacquer yet. After half a year I don t see any fading of colour.
But as Nigel said better safe than sorry.
Last edited:
This is beautifull work Nigel
Thankyou Peter.
Work continues on the spiral stairs.
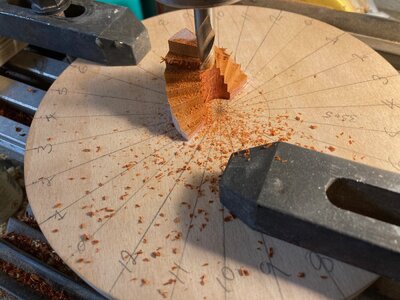
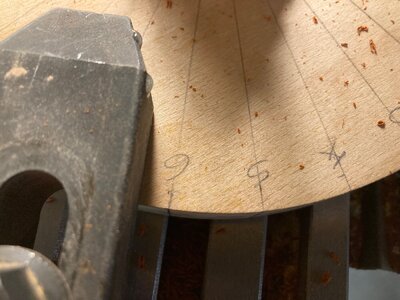
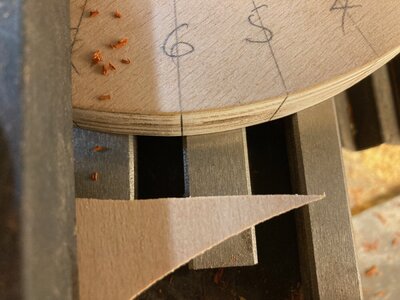
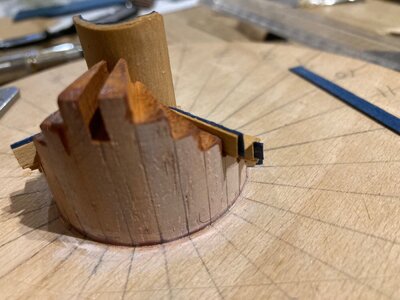
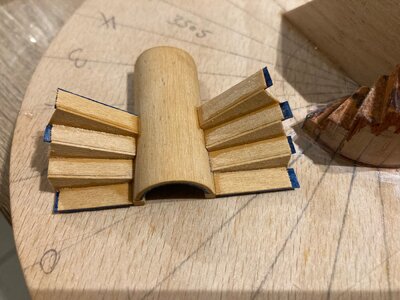
The Paduk "half donut" was thoroughly glued to a disk of 19mm ply after first marking out the segments of the treads.These lines run right across allowing me to line them up with the edges of the T slots on the mill table.The assembly was then put in my large mill and the stairs milled starting from the top and working downward.
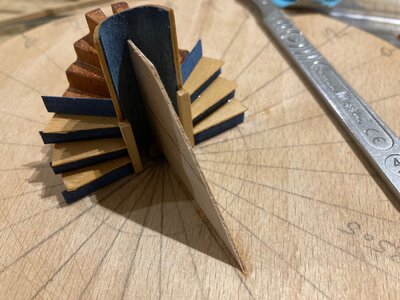
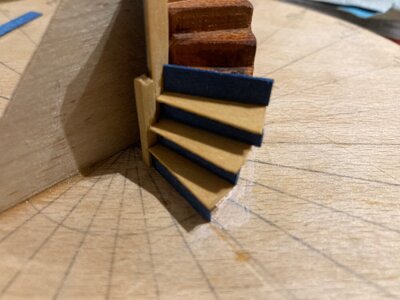
I am now assembling the staircase proper starting from the base and working upward.After each level is assembled the item is slid out and glue run on all the joints, cleaned up then refitted as I only tack glue in the jig so it does not get stuck.
The outside edge and noses of the treads all need trimming as does the stringer once the stairs are together.The slot in the jig at the top is to allow a beam to be fitted that runs from one deck beam to another allowing the pair of stairs to remain in 1 unit for easier alignment in the model.
Kind Regards
Nigel


Pure genius.
Those stairs are going to be an exquisite peace of work. Thanks for showing us your construction methods.
What a clever way to index these parts. Do you wax the jig to hep prevent adhesions?
Thanks again Guys
Marc, no wax just very carefully spot glued with CA then removed from the jig and a fine bead of thick CA applied.The glue marks will vanish when the poly is applied
Kind Regards
Nigel
Marc, no wax just very carefully spot glued with CA then removed from the jig and a fine bead of thick CA applied.The glue marks will vanish when the poly is applied
Kind Regards
Nigel
How BEAUTIFUL is that little microproject?! Creativity and talent and skill melded into one guy - a winning combination. Can't wait to see more!
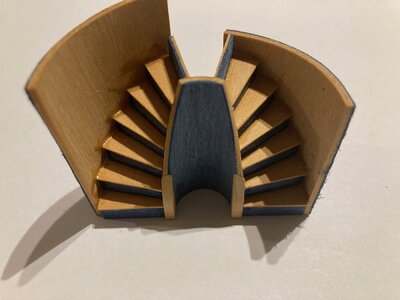
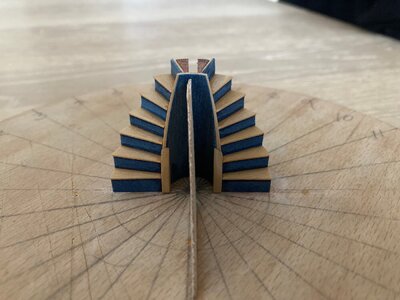
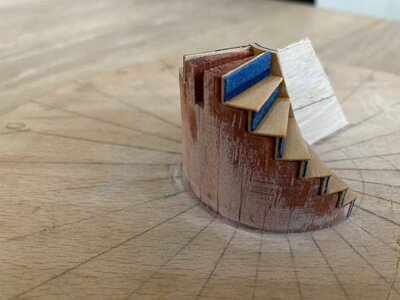
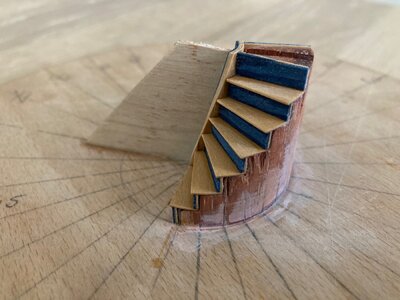
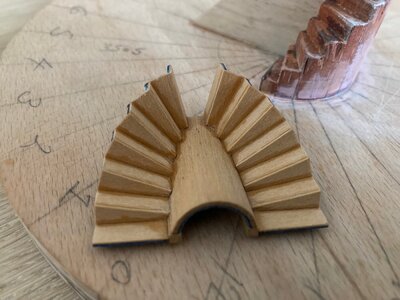
Good afternoon Nigel. No words. Cheers GrantWith all the treads assembled the next job was to carefully file all the ends flush to the former,trim the tread noses and shape the top of the stringer.
Kind Regards
Nigel
View attachment 338790View attachment 338791View attachment 338792View attachment 338793View attachment 338794
Thanks Guys
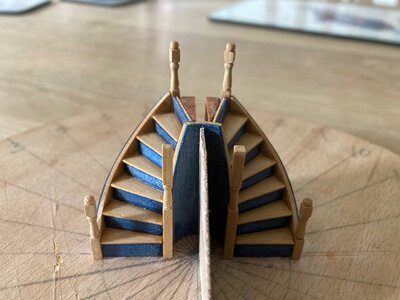
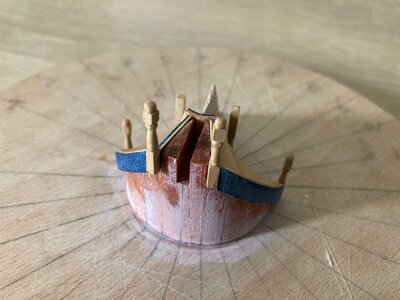
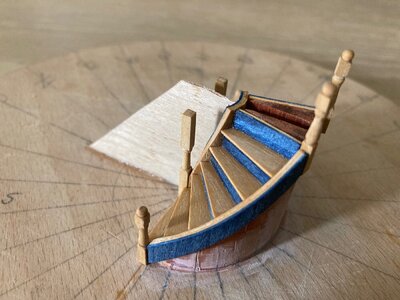
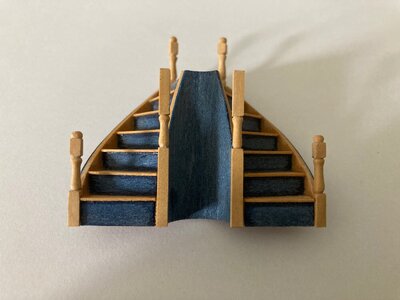
I fitted the outer stringer " blanks" then shaped the top and bottom edges.
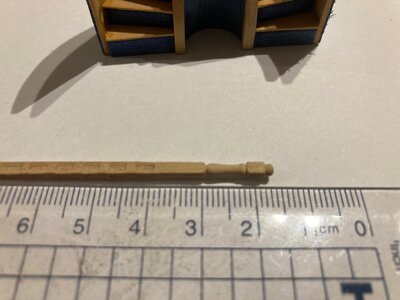
Next job was to "turn" some Newel posts.These are 2.5mm square box turned on the metal lathe using needle files.Downside is the four jaw chuck destroys the piece that is clamped so quite a bit of wastage.
I wasn't happy with the two centre posts I fitted earlier and these were carefully cut away with a sharp scalpel blade.Replacements were made and fitted that will run up to the deck beam above.
That is it for this week after putting some serious hours into this mini project.
Next weekend Baluster shaping.
Kind Regards
Nigel


 A joy to follow this project.