Your are bringing your ship along well. Were the cannon carriages with the kit or did you make those? Reason for asking is that the single photo from above seems to have the carriage well past/behind the cascabel (knob). Typically the carriage should have ended there as well as the elevation bolsters as the gundecks needed as much free space a possible and not have the carriage intruding there. Of course the inhaul tackle would be there. If the guns were run out for firing they would be tight against the bulwark and a restraining recoil hawser set to take the firing recoil load but I don't see that line. Just wondering. Rich (PT-2)On with the rails which are pre-painted 1mm x 4mm strip. First the straight bits -
View attachment 194963
View attachment 194964
Now we need to bend some wood. I measured the deflection of the curve at the widest point and clamped to that. Wood soaked in very hot water for a couple of minutes.
View attachment 194965
All finished -
View attachment 194966
Outboard belaying rails fixed in place -
View attachment 194967
View attachment 194968
Next are the anti-boarding netting supports. I am now out of CA glue and my local model shop is closed due to the lockdown in my area. Seems it is not an essential business, but at the moment it's pretty bloody essential to me and my sanity! However, I am sure Amazon will come good by the time I have shaped the supports. We live in strange times, eh?
-

Win a Free Custom Engraved Brass Coin!!!
As a way to introduce our brass coins to the community, we will raffle off a free coin during the month of August. Follow link ABOVE for instructions for entering.
-

PRE-ORDER SHIPS IN SCALE TODAY!
The beloved Ships in Scale Magazine is back and charting a new course for 2026!
Discover new skills, new techniques, and new inspirations in every issue.
NOTE THAT OUR FIRST ISSUE WILL BE JAN/FEB 2026
You are using an out of date browser. It may not display this or other websites correctly.
You should upgrade or use an alternative browser.
You should upgrade or use an alternative browser.
The Mary Rose
- Thread starter Graham
- Start date
- Watchers 53
-
- Tags
- caldercraft mary rose
The channels need a strip on the outside so I fitted those (the gold bits) -
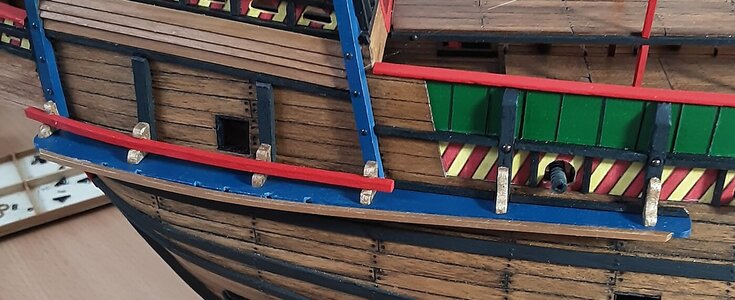
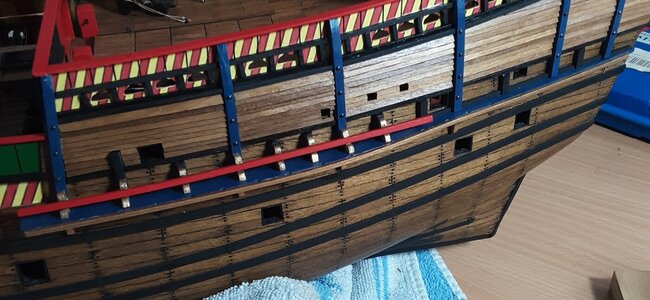
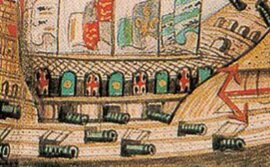
The Anthony Roll clearly shows the anti-boarding netting and a couple of small sections have been recovered from the wreck -
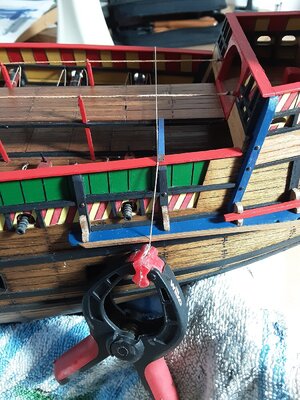
The net is rigged to the edge of the walkway. To get an alignment to the top of the side frames I weighted a length of line across -
All parts cut to size from 2mm x 2mm strip. When possible I drill a small hole and CA a cocktail stick in to the back side of a part as it makes painting a lot easier -
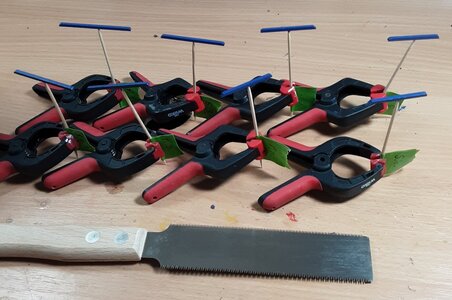
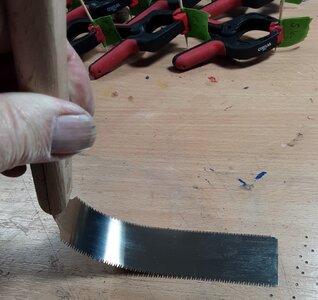
The tool above is a so-called 'Japanese' saw. I got it a few years ago for woodworking, it is still razor sharp and gives a very fine cut. The difference with these saws is that they cut on the pull stroke; it is also very flexible -
The netting will need securing at the edges, so I put in some eyelets through which a tensioning rope will go -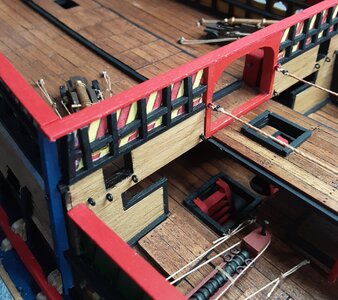
Before fitting the supports I made a template for the netting -
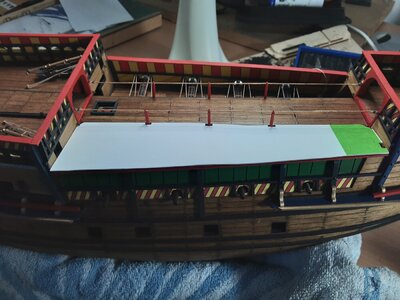
Supports fitted --
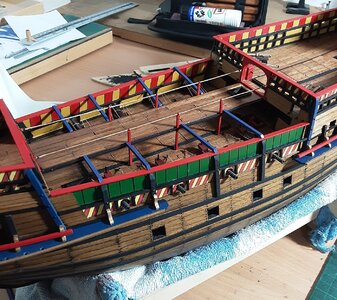
I managed to do that without smashing the rope walk, so that's worth a cold beer (or two).
Next are the deadeyes on the channels.


The Anthony Roll clearly shows the anti-boarding netting and a couple of small sections have been recovered from the wreck -

The net is rigged to the edge of the walkway. To get an alignment to the top of the side frames I weighted a length of line across -

All parts cut to size from 2mm x 2mm strip. When possible I drill a small hole and CA a cocktail stick in to the back side of a part as it makes painting a lot easier -

The tool above is a so-called 'Japanese' saw. I got it a few years ago for woodworking, it is still razor sharp and gives a very fine cut. The difference with these saws is that they cut on the pull stroke; it is also very flexible -

The netting will need securing at the edges, so I put in some eyelets through which a tensioning rope will go -

Before fitting the supports I made a template for the netting -

Supports fitted --

I managed to do that without smashing the rope walk, so that's worth a cold beer (or two).
Next are the deadeyes on the channels.
Very nice, I’m looking forward to seeing the netting in place. What are you using for the netting? Curious...
That, Chris, is a very good question and at the moment I don't have the answer. I have been looking for a while and can't see anything suitable by way of scale and colour, so I will probably end up making it myself. I just need to make a grid, a frame and then find the inclination. If I do end up making it I will post the results and we can all have a good laugh!Very nice, I’m looking forward to seeing the netting in place. What are you using for the netting? Curious...
Last edited:
Have you looked at fishing nets for pet fish? They probably have a weave about the right scale. You can then hopefully colour them the way you want. I'm sure Amazon has something. They may also have the netting material. Maybe something like this https://www.amazon.ca/Annie-Mesh-Fa...etting+fabric+3mm+hole&qid=1606570057&sr=8-13That, Chris, is a very good question and at the moment I don't have the answer. I have been looking for a while and can't see anything suitable by way of scale and colour, so I will probably end up making it myself. I just need to make a grid, a frame and then find the inclination. If I do end up making it I will post the results and we can all have a good laugh!
Netting
If the boarding nets were to stop skinny enemies getting through I guess the pitch would be about 30cm.
On a scale of 1:80 this would be about 4mm
How about taking a piece of coarse cloth and pulling out, say, 3 of every four threads in each direction?
Glue or size applied before/after/progressively according to experimental results.
Have you looked at fishing nets for pet fish? They probably have a weave about the right scale. You can then hopefully colour them the way you want. I'm sure Amazon has something. They may also have the netting material. Maybe something like this https://www.amazon.ca/Annie-Mesh-Fa...etting+fabric+3mm+hole&qid=1606570057&sr=8-13
Thanks, Chris, that is worth looking into. There are several specialist shops and garden centres in my area which stock fish and as soon as the Covid lockdown in my area ends (about a week) I will don my mask an venture out to have a look
Thanks, Chris, that is worth looking into. There are several specialist shops and garden centres in my area which stock fish and as soon as the Covid lockdown in my area ends (about a week) I will don my mask an venture out to have a look
Have a look for tulle, it is a fabric often used for making veils. Comes in different sizes and colours, found easily in fabric shops and of course on amazon.
Thanks, we have some hessian (rather like sacking) and I will try a small section. Initial thought is that the threads are a bit 'hairy', but a wash or two of laquer might calm it down. However, your principle of removing threads from some kind of material is a good one. Cheers.Netting
If the boarding nets were to stop skinny enemies getting through I guess the pitch would be about 30cm.
On a scale of 1:80 this would be about 4mm
How about taking a piece of coarse cloth and pulling out, say, 3 of every four threads in each direction?
Glue or size applied before/after/progressively according to experimental results.
Thanks, Don. She Who Must Be Obeyed does a lot of sewing and has some, but I think the weave is too fine and the holes are hexagonal -Have a look for tulle, it is a fabric often used for making veils. Comes in different sizes and colours, found easily in fabric shops and of course on amazon.
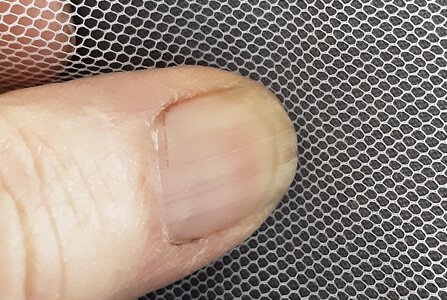
That's not to say that some with a more open weave might not be available, so thanks for the suggestion. I have set her on a quest and she is also looking into cotton gauze bandage which, she says, would take a stain. Who says that shipbuilding isn't fun for all the family?!
@Graham that's a great idea, I seem to recall a fairly open weave gauze cotton wrap from one of my first aid courses, or possibly one of my many self injuries. Came close to giving myself stitches across the thumb a few weeks ago with a very sharp blade while trimming some piece of wood. Another mm or 2 and yikes would have been deep enough for the Dr!!!
Been there, done that. All of my builds have a bit of blood in them, flavoured with a light scattering of ripe language.@Graham that's a great idea, I seem to recall a fairly open weave gauze cotton wrap from one of my first aid courses, or possibly one of my many self injuries. Came close to giving myself stitches across the thumb a few weeks ago with a very sharp blade while trimming some piece of wood. Another mm or 2 and yikes would have been deep enough for the Dr!!!
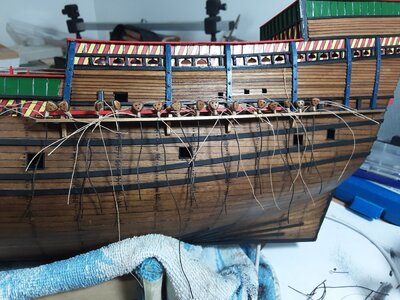
Deadeyes rigged and placed in the channels, Chris will be interested to know that there are 42. They will be tied to a length of chain which is fixed to the upper wale -
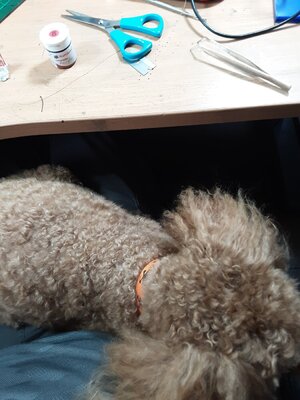
Rigging is made somewhat more difficult when you have a poodle sleeping on your knee -
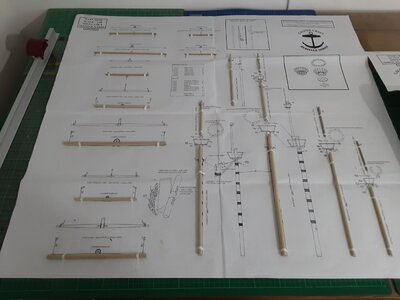
In order to fix the chains I need to know the angle of the shrouds from the futtocks, so I need the lower masts in place. While I was at it I cut out all of the masts and spars -
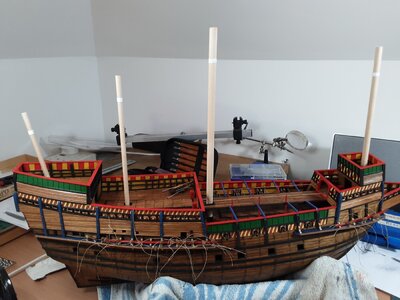
Masts dry fitted. I can now run a line down from the futtock location (denoted by the white tape) to get the angle. Four masts on this ship, the rearmost being the 'Bonaventure' mast which is the only one to be raked.
I now need some eyelets to attach the chain to the wale, but have used most of those supplied with the kit in order to rig the cannon, walkway etc. Hopefully they will arrive tomorrow, but plenty of other things to be getting on with if not.

Rigging is made somewhat more difficult when you have a poodle sleeping on your knee -

In order to fix the chains I need to know the angle of the shrouds from the futtocks, so I need the lower masts in place. While I was at it I cut out all of the masts and spars -

Masts dry fitted. I can now run a line down from the futtock location (denoted by the white tape) to get the angle. Four masts on this ship, the rearmost being the 'Bonaventure' mast which is the only one to be raked.

I now need some eyelets to attach the chain to the wale, but have used most of those supplied with the kit in order to rig the cannon, walkway etc. Hopefully they will arrive tomorrow, but plenty of other things to be getting on with if not.
Last edited:
It seems that kits were stocked by non-builders recognizing the amount that we need with our own hands/fingers. . . maybe a plot for more cash flowing into the aftermarket. Rich (PT-2)Deadeyes rigged and placed in the channels, Chris will be interested to know that there are 42. They will be tied to a length of chain which is fixed to the upper wale -
View attachment 196319
Rigging is made somewhat more difficult when you have a poodle sleeping on your knee -
View attachment 196320
In order to fix the chains I need to know the angle of the shrouds from the futtocks, so I need the lower masts in place. While I was at it I cut out all of the masts and spars -
View attachment 196321
Masts dry fitted. I can now run a line down from the futtock location (denoted by the white tape) to get the angle. Four masts on this ship, the rearmost being the 'Bonaventure' mast which is the only one to be raked.
View attachment 196322
I now need some eyelets to attach the chain to the wale, but have used most of them supplied with the kit in order to rig the cannon, walkway etc. Hopefully they will arrive tomorrow, but plenty of other things to be getting on with if not.
It's nice to see an overall shot of the Mary Rose. I think this is the first in a long time and she's a beauty. You are doing great work. I had a question about mast length. Are you making any changes in the length of the masts based on the addition of decks not called for in the original plans?
How about using the black screen for windows at the hardware store? Its a fine mesh for bugs, not sure about exact scale though?That, Chris, is a very good question and at the moment I don't have the answer. I have been looking for a while and can't see anything suitable by way of scale and colour, so I will probably end up making it myself. I just need to make a grid, a frame and then find the inclination. If I do end up making it I will post the results and we can all have a good laugh!
I was thinking the same thing but then screen material wouldn’t lay down like net material. I think it would be too rigid to sit the way you would want it to.How about using the black screen for windows at the hardware store? Its a fine mesh for bugs, not sure about exact scale though?
Thank you for your kind comments. Yes, I put an extra 25mm on those two masts. I am now pondering the bonaventure mast. The Anthony Roll picture does not show that mast raked -It's nice to see an overall shot of the Mary Rose. I think this is the first in a long time and she's a beauty. You are doing great work. I had a question about mast length. Are you making any changes in the length of the masts based on the addition of decks not called for in the original plans?
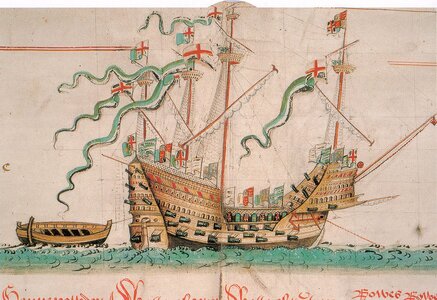
And neither is the Great Harry -
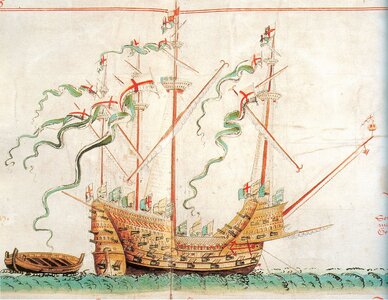
Whilst the artist's sense of perspective is certainly questionable I don't think he would have missed and obvious detail like that. Neither is it clear from the current analysis of the wreck. I think I will look at mounting the bonaventure vertically, but that is going to be fiddly and will probably involve a pin in the mast base into the deck below and some bracing. I need to then see what that might do to the deadeye positions. All good fun.
I an only imagine the effect of that huge hull area in cross winds or when at anchor swinging around like a pendelum. Rich (PT-2)Thank you for your kind comments. Yes, I put an extra 25mm on those two masts. I am now pondering the bonaventure mast. The Anthony Roll picture does not show that mast raked -
View attachment 196428
And neither is the Great Harry -
View attachment 196429
Whilst the artist's sense of perspective is certainly questionable I don't think he would have missed and obvious detail like that. Neither is it clear from the current analysis of the wreck. I think I will look at mounting the bonaventure vertically, but that is going to be fiddly and will probably involve a pin in the mast base into the deck below and some bracing. I need to then see what that might do to the deadeye positions. All good fun.
I have a couple of the Mary Rose reference books, but here's something I never noticed before seeing these AR pictures blown up and maybe you can answer without me having to pore over the books. On both the MR and HGAD there are what look like shields at the rear of all the first fighting tops. Has your research indicated what they might be, are they archer blinds (that's what they look like to me in the Geoff Hunt pictures now that I've noticed them), and do you plan to include them in your build?Thank you for your kind comments. Yes, I put an extra 25mm on those two masts. I am now pondering the bonaventure mast. The Anthony Roll picture does not show that mast raked -
View attachment 196428
And neither is the Great Harry -
View attachment 196429
Whilst the artist's sense of perspective is certainly questionable I don't think he would have missed and obvious detail like that. Neither is it clear from the current analysis of the wreck. I think I will look at mounting the bonaventure vertically, but that is going to be fiddly and will probably involve a pin in the mast base into the deck below and some bracing. I need to then see what that might do to the deadeye positions. All good fun.


