Thanks for the hint. Can you show which part you mean? PleaseLooking very good Uwe, did you use the pre cut parts for the bottom of the shot locker, I didn't realise what they were for until after I had planked it,
Best regards John,
-

Win a Free Custom Engraved Brass Coin!!!
As a way to introduce our brass coins to the community, we will raffle off a free coin during the month of August. Follow link ABOVE for instructions for entering.
-

PRE-ORDER SHIPS IN SCALE TODAY!
The beloved Ships in Scale Magazine is back and charting a new course for 2026!
Discover new skills, new techniques, and new inspirations in every issue.
NOTE THAT OUR FIRST ISSUE WILL BE JAN/FEB 2026
You are using an out of date browser. It may not display this or other websites correctly.
You should upgrade or use an alternative browser.
You should upgrade or use an alternative browser.
USS BONHOMME RICHARD - POF - Cross Section in Pear - 1:48 - by Uwe
They are parts that came with the upgrade,
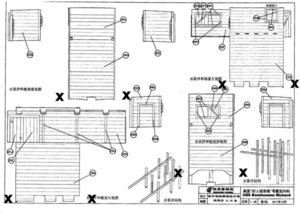
the parts between the X,s at the bottom of the shot locker two of the part No,s are 19c2 and 19d2, see last pic,
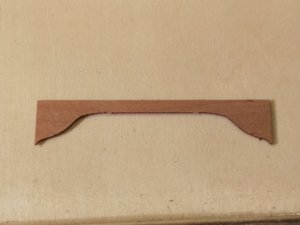
this is the part 19d2,
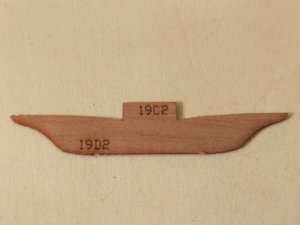
this is the piece of wood that they came out of, you might be able to find them, unless like me you are too late,
it would have helped to be able to speak Chinese,
best regards John,
.

the parts between the X,s at the bottom of the shot locker two of the part No,s are 19c2 and 19d2, see last pic,

this is the part 19d2,

this is the piece of wood that they came out of, you might be able to find them, unless like me you are too late,
it would have helped to be able to speak Chinese,
best regards John,
.
I missed it too//LarsaThey are parts that came with the upgrade,
View attachment 130198
the parts between the X,s at the bottom of the shot locker two of the part No,s are 19c2 and 19d2, see last pic,
View attachment 130199
this is the part 19d2,
View attachment 130200
this is the piece of wood that they came out of, you might be able to find them, unless like me you are too late,
it would have helped to be able to speak Chinese,
best regards John,
.
Hi
The model looks great. Very good planning work.
The notations in Chinese do not help in many cases to see some details.
In the end having several open threads in this forum with the same work is graphic and helps everyone.
Regards
The model looks great. Very good planning work.
The notations in Chinese do not help in many cases to see some details.
In the end having several open threads in this forum with the same work is graphic and helps everyone.
Regards
Many Thanks to John giving the hint to these parts - these wall elements will be the next, so your comment was just in the right time 
Also Many thanks for all your friendly comments and also Likes - it is much appreciated and motivates
In the last days I had not so much free time in my workshop - but next week, will be my modeling week.
My family is going for one week skiing - so I have to take care about our animals (small "zoo" with birds, turtles, cat and dog)
and also to take care of the workshop


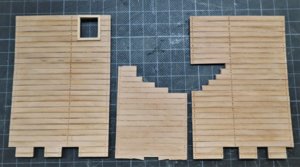
In the meantime I was only able to prepare the next element. Construction was done in the same way like described before
Also Many thanks for all your friendly comments and also Likes - it is much appreciated and motivates
In the last days I had not so much free time in my workshop - but next week, will be my modeling week.
My family is going for one week skiing - so I have to take care about our animals (small "zoo"
and also to take care of the workshop
In the meantime I was only able to prepare the next element. Construction was done in the same way like described before

You live my dream. One week in the mancave ! Only my cats and I. 

Viel Spaß und viel Fortschritt.

Viel Spaß und viel Fortschritt.
The first day of my "workshop-holiday" is partly behind me....... 
I am missing my family very much, but the scroll saw was able to reduce my pain
You can not believe, but the little progress you see in the photos were several hours of "pain-reduction-therapy"
And I realized, that I should have been born as an octopus - two hands are definitely too less for ship modeling.
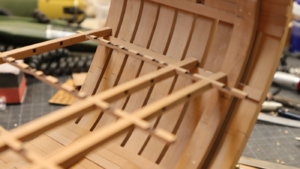
Dryfit of the wall elements together with the small beams passing inside the interior (still with laser char) and also the smaller beam-planks have to fit into the walls.
I know, that later on the plank will not pass through, it will lay only on top of the small "char-beam"
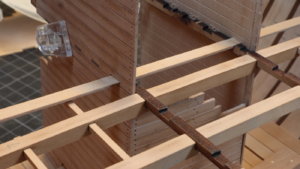
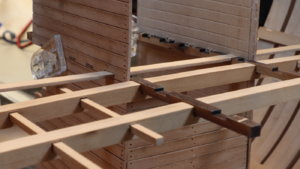
the gap at the bottom is only because the missing hands No 5 and 6
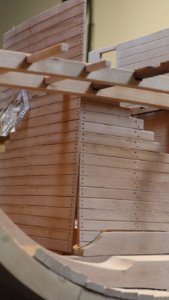
Here you can see the small planks, which have to pass through the wall and end on top of the beam
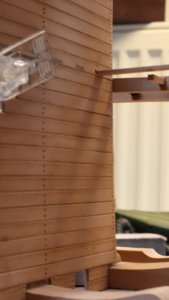
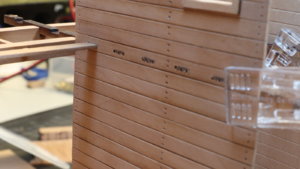
The same situation from inside - one plank is laying on the beam - for the other notches you can see already the drilled holes, prepared for the opening with some small chisels
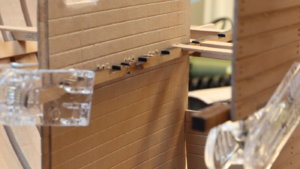
Here you can also see, that I made in the veneer horizontal lines, which shall give the imagination of planks (only for the reason, that somebody will try to take a look inside via the small prepared openings -> pretty sure, that it will be not visible from outside later on, but I did it, so I know, that they are there - something for the modeler-ego I guess
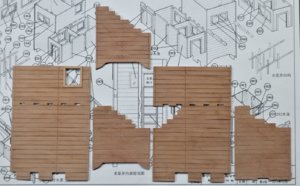
And here finally an overview of the first finished wall elements for the hold
- In the meantime I started also the work on the nine pillars - but this I hope I can show tomorrow
Many Thanks for your interest .... to be continued .....
I am missing my family very much, but the scroll saw was able to reduce my pain

You can not believe, but the little progress you see in the photos were several hours of "pain-reduction-therapy"
And I realized, that I should have been born as an octopus - two hands are definitely too less for ship modeling.
Dryfit of the wall elements together with the small beams passing inside the interior (still with laser char) and also the smaller beam-planks have to fit into the walls.
I know, that later on the plank will not pass through, it will lay only on top of the small "char-beam"


the gap at the bottom is only because the missing hands No 5 and 6

Here you can see the small planks, which have to pass through the wall and end on top of the beam


The same situation from inside - one plank is laying on the beam - for the other notches you can see already the drilled holes, prepared for the opening with some small chisels
Here you can also see, that I made in the veneer horizontal lines, which shall give the imagination of planks (only for the reason, that somebody will try to take a look inside via the small prepared openings -> pretty sure, that it will be not visible from outside later on, but I did it, so I know, that they are there - something for the modeler-ego I guess

And here finally an overview of the first finished wall elements for the hold

- In the meantime I started also the work on the nine pillars - but this I hope I can show tomorrow
Many Thanks for your interest .... to be continued .....
Happy Modeling Uwe, enjoy your week, looking forward to more of your build,
Best regards John,
Best regards John,
Fantastic work Uwe, nice and clean, I am enjoying your build,
Best regards John,
Best regards John,
A week skiing vs a week moddeling hmmm.
Lot s of fun and it is already paying off.
Lot s of fun and it is already paying off.
Your work is amazing!!!
UWE, take good care of the animals and your build. Don
Hallo my friends, first of all many thanks for the wishes, comments and Likes I received......
My morning session is behind me, so I can show you some progress before I will go with the dog into the forest close to Vienna......
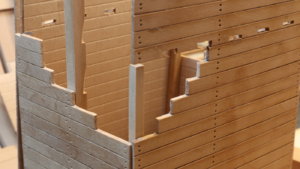
I started to prepare all the 9 pillars for the wall structure
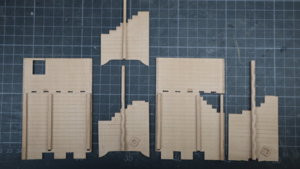
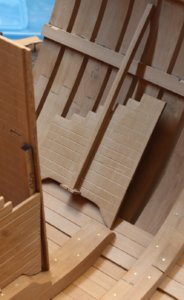
the following two photos showing the step-ladders which were the only possibility to step down into the shot locker and down to the pump-well - here later one also a ladder will be installed - the first for the pump-well
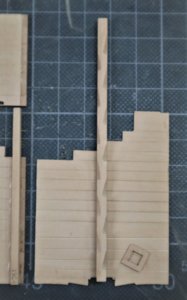
and the shot locker
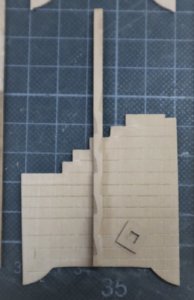
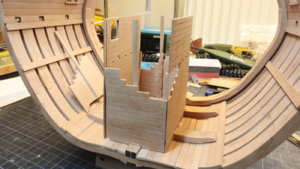
the medium pillars are founded on top of the keel with some small timber - so I had to adjust the three smaller wall-elements, so it fits
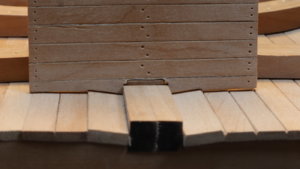
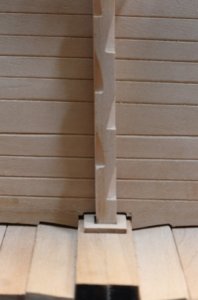
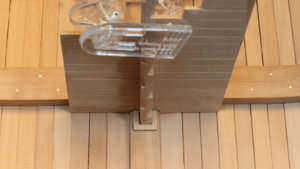
fixing the step-pillars
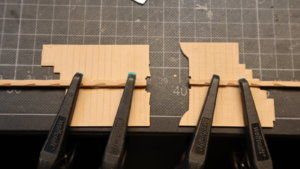
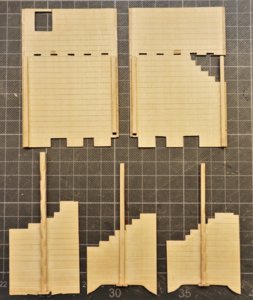
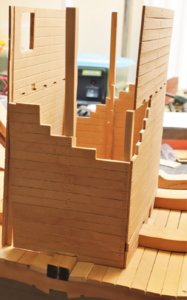
The five wall elements more or less finished for installation (two pillars for the medium wall are still missing)
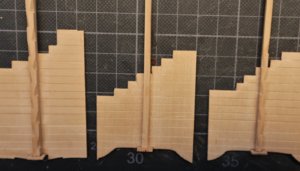
dryfit - you know: to be an octopus would be good
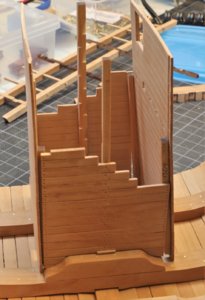
the medium wall (between shot locker and pumps) is waiting outside
Many Thanks for your interest .... hope to show something more in the evening .....
My morning session is behind me, so I can show you some progress before I will go with the dog into the forest close to Vienna......
I started to prepare all the 9 pillars for the wall structure

the following two photos showing the step-ladders which were the only possibility to step down into the shot locker and down to the pump-well - here later one also a ladder will be installed - the first for the pump-well

and the shot locker

the medium pillars are founded on top of the keel with some small timber - so I had to adjust the three smaller wall-elements, so it fits


fixing the step-pillars

The five wall elements more or less finished for installation (two pillars for the medium wall are still missing)


dryfit - you know: to be an octopus would be good

the medium wall (between shot locker and pumps) is waiting outside


Many Thanks for your interest .... hope to show something more in the evening .....
Looking great Uwe.I have been very busy with work recently so I am a little late with my tips for working with Pear veneer.Here goes anyway for future reference.
Cut the veneer sheet when wet.Briefly immerse in water first.You should be able to cut planks on one of those roller paper guillotines when wet.
Do not glue the planks using PVA,the moisture in the glue will make them curl when you try to stick them,I use thick CA,just a line of glue on the backing piece in the centre of where the plank goes.These joints are not structural so you don't need loads of glue.
If you do use PVA,paint it on both surfaces and allow to dry.Then the planks are put in place one at a time and a domestic iron used to fuse the glue(turn the steam setting off).
Kind Regards
Nigel
Many thanks to Nigel for the hints and tips - but unfortunately too late - I learnt it by doing (using PVA water based wood glue - as usual) and will make it different next time (hope so)
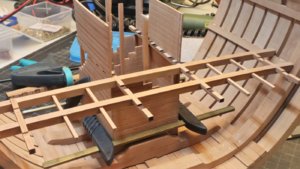
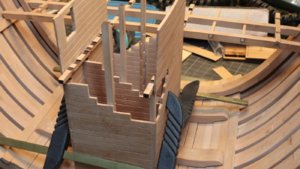
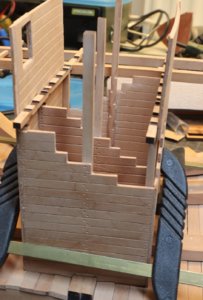
Here is the result of the last days work - the wall elements of the hold are now fixed together (but not finally glued to the section, so I can remove it and can adjust the connection with the beams etc. outside of the section - this is the idea and I will see, if this is working.
As usual some more photos, so somebody else, who will build this model can see how it has to be done (or not)
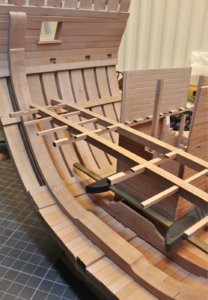
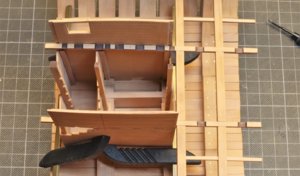
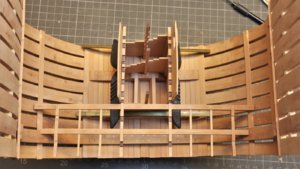
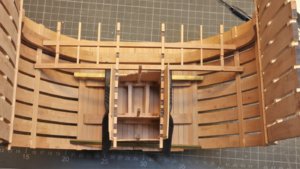
Many thanks for your interest ..... hope to show in the evening the next progress - after I come back from the hair dresser (for the dog) - she is looking like a rastaman better rastagirl - no photos of her, this would be off-topic
Here is the result of the last days work - the wall elements of the hold are now fixed together (but not finally glued to the section, so I can remove it and can adjust the connection with the beams etc. outside of the section - this is the idea and I will see, if this is working.
As usual some more photos, so somebody else, who will build this model can see how it has to be done (or not)


Many thanks for your interest ..... hope to show in the evening the next progress - after I come back from the hair dresser (for the dog) - she is looking like a rastaman better rastagirl - no photos of her, this would be off-topic
Today the glue was dry, so I could check the fit of the interior and the beam(s) together......
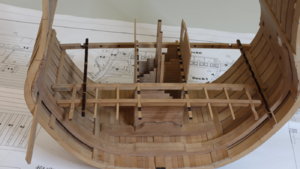
I moved it backwards - frontwards - out and in, but......
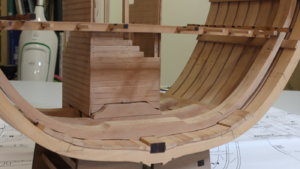
there is somewhere a half or complete mm too much - so I had to check from where this miss-match is coming and what / where I can adjust something
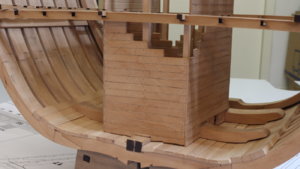
If I take the magazin as fix -> than the framing with the beams will not fit correctly on the raider (and not square with rectangular angles any more)
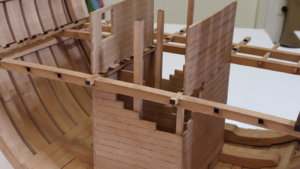
and if I take the beams as fixed -> than I have to adjust slightly the magazin, which is not really square - on one side 1mm too long side and a little bit distorted
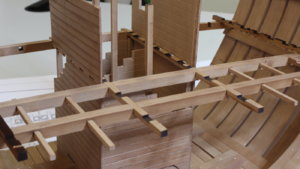
OK - I made today the decision, that the beams structure is more important, otherwise i will have also in the other decks some problems and started to adjsu very carefully the magazin structure
And also I realized, that close to the frames, the short beam has to be changed with the long one (on the photo the beam with char) -> this is the difference between the basic kit with the short one and the add-on with the long one -> I have really to study more the drawings !!!!!
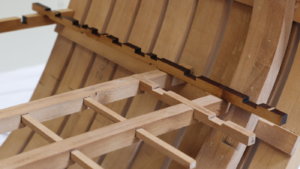
Now it is good to use water based wooden glue - a little bit water and after some minutes the glued joint can be re-opened, without any damage
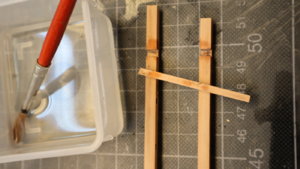
Here the prepared framing of the beams and the magazin in front
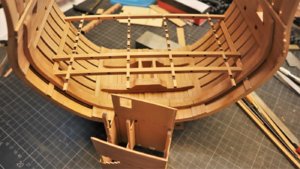
Hope to show you more tomorrow...... many thanks for your interest

I moved it backwards - frontwards - out and in, but......

there is somewhere a half or complete mm too much - so I had to check from where this miss-match is coming and what / where I can adjust something

If I take the magazin as fix -> than the framing with the beams will not fit correctly on the raider (and not square with rectangular angles any more)

and if I take the beams as fixed -> than I have to adjust slightly the magazin, which is not really square - on one side 1mm too long side and a little bit distorted

OK - I made today the decision, that the beams structure is more important, otherwise i will have also in the other decks some problems and started to adjsu very carefully the magazin structure
And also I realized, that close to the frames, the short beam has to be changed with the long one (on the photo the beam with char) -> this is the difference between the basic kit with the short one and the add-on with the long one -> I have really to study more the drawings !!!!!

Now it is good to use water based wooden glue - a little bit water and after some minutes the glued joint can be re-opened, without any damage

Here the prepared framing of the beams and the magazin in front


Hope to show you more tomorrow...... many thanks for your interest
Good to see what you can do in a week, beautiful progress.
Hi
Congratulations. You are doing a very good job.
Regards
Congratulations. You are doing a very good job.
Regards
GREAT and BEAUTIFUL work UWE, hate to give advice to such a master builder such as YOU, because i have been a a RE=DO expert in taking things apart my procedure works well on both PVA and CA what i do is using NAIL POLISH REMOVER it has bto be 100% acotone i swab the joints with a cotton swab and then take i9t apart using an exato blade sometimes you have to do it a couple of times can not rush comes apart and with no damage or discoloring. JUST MY WAY Don


