Good morning Tony. …..what everyone else says! Wow this is good. Cheers GrantHi
Firstly a big thank you to everyone reading and posting likes for this log. Now it's time for me to post an update on my progress.
View attachment 404875
View attachment 404876View attachment 404877
View attachment 404878
Most of my time has been taken finishing the rails and the last few planks above the main rail.
View attachment 404881
View attachment 404880
Next job was to cut the tenons on the masts. The masts where not to bad to do but the bowsprit was troublesome.
View attachment 404879
View attachment 404882
The masts have a little bit of play, final alignment will be done after the deck has been fitted.
-

Win a Free Custom Engraved Brass Coin!!!
As a way to introduce our brass coins to the community, we will raffle off a free coin during the month of August. Follow link ABOVE for instructions for entering.
-

PRE-ORDER SHIPS IN SCALE TODAY!
The beloved Ships in Scale Magazine is back and charting a new course for 2026!
Discover new skills, new techniques, and new inspirations in every issue.
NOTE THAT OUR FIRST ISSUE WILL BE JAN/FEB 2026
You are using an out of date browser. It may not display this or other websites correctly.
You should upgrade or use an alternative browser.
You should upgrade or use an alternative browser.
accurate and precise work - Bravo 

Hello everybody!
Hope you are fine! time for an upgrade...
Rain and more rain all week.
Ideal conditions for working on the ship......
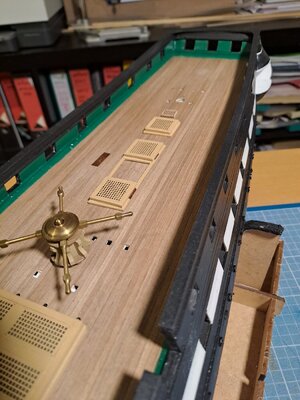
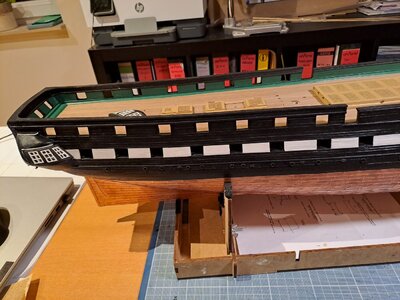
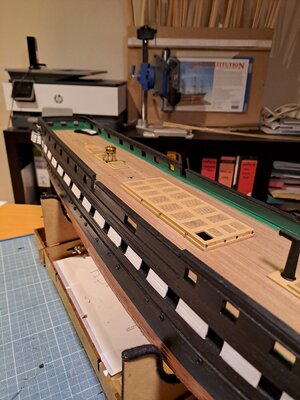
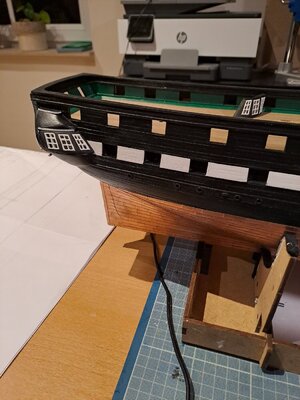
I installed the portlights. And I had to conclude that one item had been delivered short. So there was no other option than to make one myself: I took a 3/16" deadeye, sawed it in half and after some sanding: see transom. Problem solved
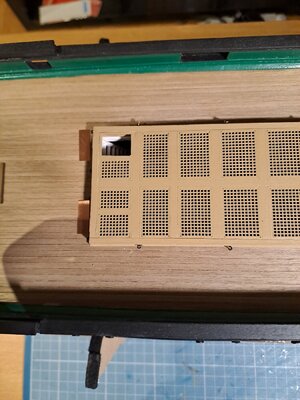
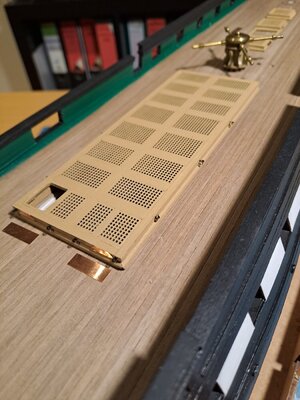
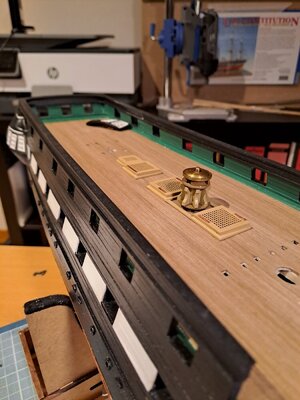
And then the Hatches. It seemed simple, but nothing could be further from the truth. Some I started over 3 times.
After all, I wanted no gaps between the gratings and the frames... a thousandth of an inch precision work....

a very difficult choice was the color: I tried no fewer than 6 different brown shades: heavy brown, brown, Occre etc... until I found the light brown color....
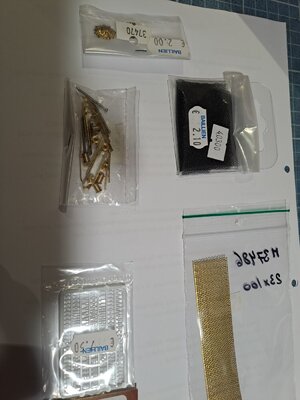
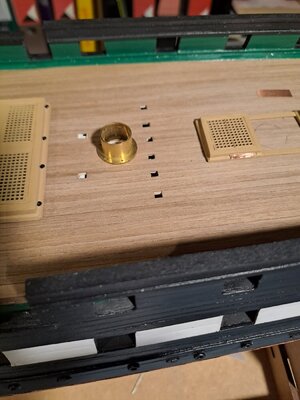
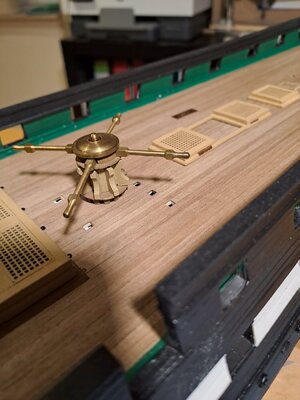
And I decided to upgrade: I bought some items in copper and brass in the hope of making the ship even more beautiful, such as the lion's head, the nets that I will stretch for the gunports and last but not least a beautiful capstan....
I also added the metal pieces (see photo) because I will make the canopy stanchions.....
SO hope you like it.
Marc
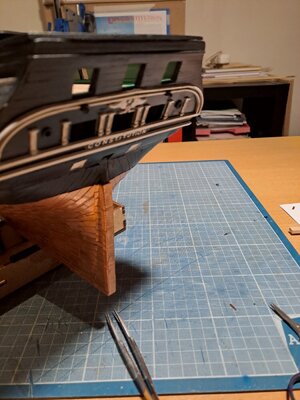
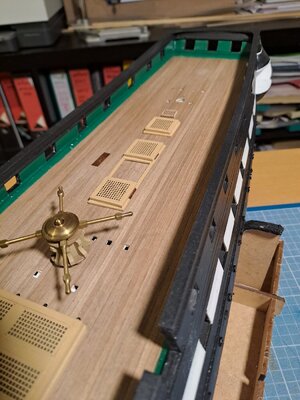
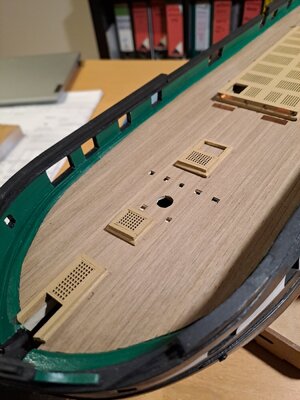
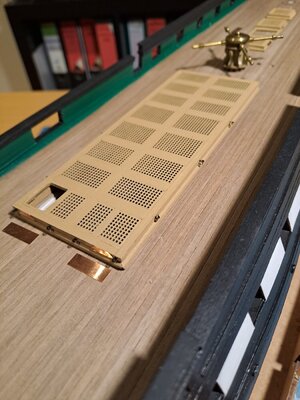
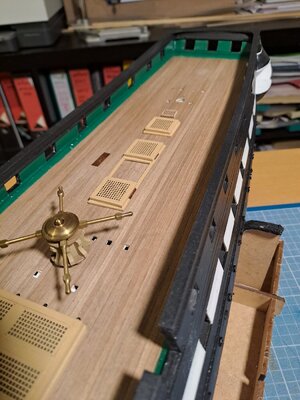
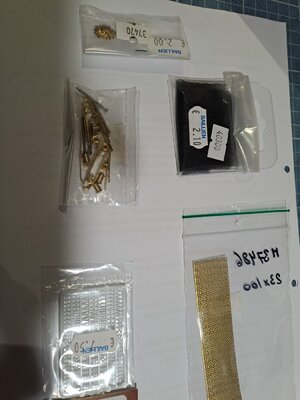
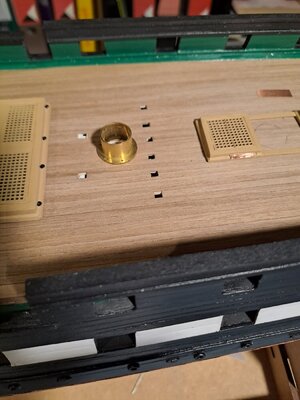
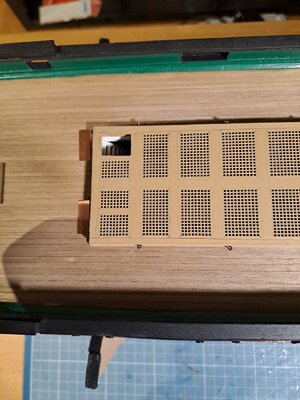
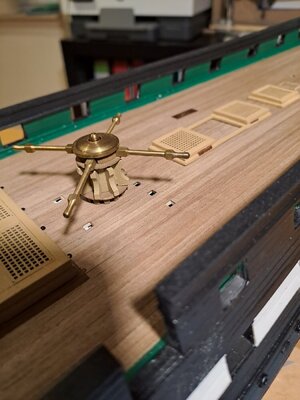
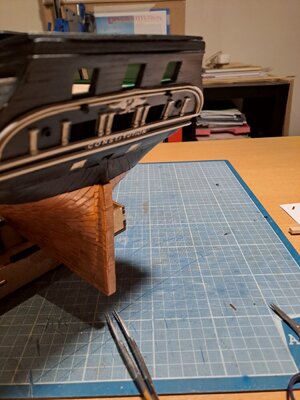
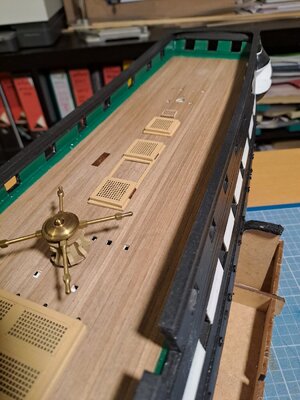
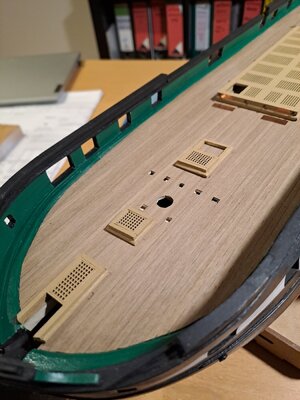
Hope you are fine! time for an upgrade...
Rain and more rain all week.
Ideal conditions for working on the ship......
I installed the portlights. And I had to conclude that one item had been delivered short. So there was no other option than to make one myself: I took a 3/16" deadeye, sawed it in half and after some sanding: see transom. Problem solved
And then the Hatches. It seemed simple, but nothing could be further from the truth. Some I started over 3 times.
After all, I wanted no gaps between the gratings and the frames... a thousandth of an inch precision work....
a very difficult choice was the color: I tried no fewer than 6 different brown shades: heavy brown, brown, Occre etc... until I found the light brown color....
And I decided to upgrade: I bought some items in copper and brass in the hope of making the ship even more beautiful, such as the lion's head, the nets that I will stretch for the gunports and last but not least a beautiful capstan....
I also added the metal pieces (see photo) because I will make the canopy stanchions.....
SO hope you like it.
Marc


Hello Gentlemen,
Again a quick update:
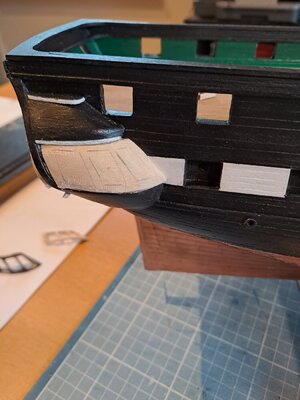
Today I started creating the quarter gallery.
Easier said than done.
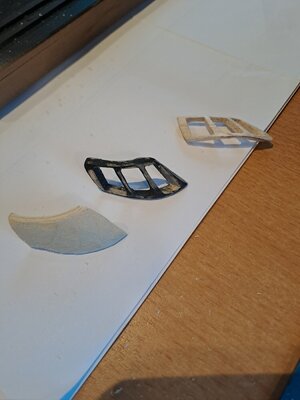
In the end, making a block in Balsa wood seemed to me to be the most efficient. And after four attempts to make a curved frame with room for the three windows.
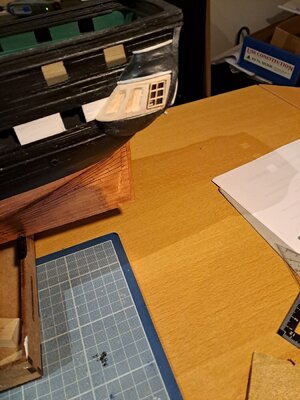
First I made a block of 50mm (1.96") by 17mm (0.66"). I sanded this block until it fitted between the opening. Then sand very carefully so that the block is sanded to size to fit. But then it only begins: after all, the three windows have to be fitted into the frame. First freezed away the wood and then filed out the rest. Always fitting the window. During the fitting of the laser cut windows, I broke two of them.... they are extremely thin and fragile.
Now even further fitting, painting and wood filler here and there (ps: the windows must become transparent....)
Do you like this or do you have a better solution? It's not to late.....
Again a quick update:
Today I started creating the quarter gallery.
Easier said than done.
In the end, making a block in Balsa wood seemed to me to be the most efficient. And after four attempts to make a curved frame with room for the three windows.
First I made a block of 50mm (1.96") by 17mm (0.66"). I sanded this block until it fitted between the opening. Then sand very carefully so that the block is sanded to size to fit. But then it only begins: after all, the three windows have to be fitted into the frame. First freezed away the wood and then filed out the rest. Always fitting the window. During the fitting of the laser cut windows, I broke two of them....
Now even further fitting, painting and wood filler here and there (ps: the windows must become transparent....)
Do you like this or do you have a better solution? It's not to late.....


- Joined
- Oct 9, 2020
- Messages
- 2,229
- Points
- 488

good idea!
Tony, I'm following along! I have the same kit waiting for bench time. Are by chance using the Hunt Practicum to assist your build
for all building the Constitution the Bob Hunt practicum is helpful but keep in mind it’s about 10 years old. Also if you’ve not started your build keep in mind that you can install a second deck below and install real cannons and not the fake ones. I’m six months into my build and I’m drilling hole in the inside bulwarks and installing very small pegs to simulate bolts. It will take about 4000 of these to complete the whole ship. I don’t have the photos of this on my iPad but will send them in another post.Perhaps we should move our kits to the bench so Tony has some company!
Very good solution - well done
Hi Grant sorry for the late reply I've been a bit sidetracked lately, I really appreciate the feedback.Good morning Tony. …..what everyone else says! Wow this is good. Cheers Grant
Tony
Great fittings, I especially like the lions head are they from Amati?. Did you try making up the kits capstan anyway the new one is better.Hello everybody!
Hope you are fine! time for an upgrade...
Rain and more rain all week.
Ideal conditions for working on the ship......
I installed the portlights. And I had to conclude that one item had been delivered short. So there was no other option than to make one myself: I took a 3/16" deadeye, sawed it in half and after some sanding: see transom. Problem solved
And then the Hatches. It seemed simple, but nothing could be further from the truth. Some I started over 3 times.
After all, I wanted no gaps between the gratings and the frames... a thousandth of an inch precision work....
a very difficult choice was the color: I tried no fewer than 6 different brown shades: heavy brown, brown, Occre etc... until I found the light brown color....
And I decided to upgrade: I bought some items in copper and brass in the hope of making the ship even more beautiful, such as the lion's head, the nets that I will stretch for the gunports and last but not least a beautiful capstan....
I also added the metal pieces (see photo) because I will make the canopy stanchions.....
SO hope you like it.
Marc
View attachment 406083
View attachment 406060
View attachment 406061
View attachment 406062
View attachment 406063
View attachment 406064
View attachment 406065
View attachment 406066
View attachment 406067
View attachment 406068
View attachment 406084
View attachment 406085
View attachment 406086
View attachment 406087
View attachment 406088
View attachment 406089
View attachment 406090
View attachment 406091
View attachment 406092
Tony
MarcHello Gentlemen,
Again a quick update:
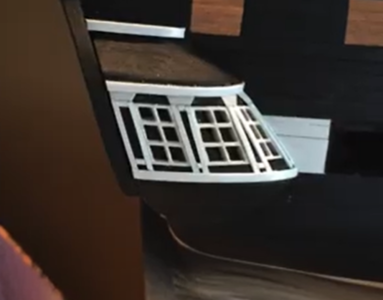
Today I started creating the quarter gallery.
Easier said than done.
In the end, making a block in Balsa wood seemed to me to be the most efficient. And after four attempts to make a curved frame with room for the three windows.
First I made a block of 50mm (1.96") by 17mm (0.66"). I sanded this block until it fitted between the opening. Then sand very carefully so that the block is sanded to size to fit. But then it only begins: after all, the three windows have to be fitted into the frame. First freezed away the wood and then filed out the rest. Always fitting the window. During the fitting of the laser cut windows, I broke two of them....they are extremely thin and fragile.
Now even further fitting, painting and wood filler here and there (ps: the windows must become transparent....)
Do you like this or do you have a better solution? It's not to late.....
View attachment 406781
View attachment 406782
View attachment 406783
This looks like a lot of work and very hard to do. Ten out of ten for your effort and results.
At the moment I have no idea how I will do mine when I'm faced with a problem like this I tend to make it up as I go along. Seeing how you are doing yours is a big help.
Tony
Hello Tony,
Quarter Gallery:
Below the first step: it is indeed very difficult to get the right shape....I'have broken twice the almost completed frames because the balsa is very weak and the frames in which the windows fit are very thin...I still have to add the necessary decorations, that is also a big challenge....
Be followed...
Marc


Well done reading other logs this part of the build has caused a lot of problems your solution works well.Hello Tony,
Quarter Gallery:
Below the first step: it is indeed very difficult to get the right shape....I'have broken twice the almost completed frames because the balsa is very weak and the frames in which the windows fit are very thin...I still have to add the necessary decorations, that is also a big challenge....
Be followed...
Marc
View attachment 407003
View attachment 407004
View attachment 407005
View attachment 407006
Tony
I'm checking to see if I can get some of these over here.Hello Tony,
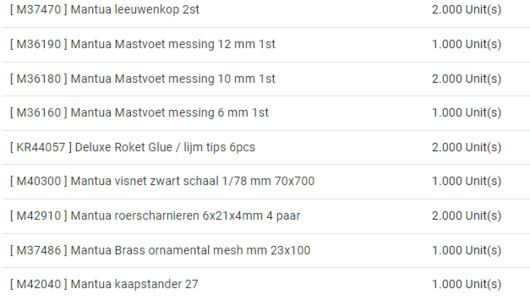
Below the references from MANTUA:
1ste line are the lions head
the last one is the capstan...very beautifull and only 4 euros....
View attachment 407002
Tony
Hi
Just a quick update not much done but getting there. I started fitting the masts into the hull to get ready for laying the deck. As I was studying the plans for the masts it got me thinking how am I going to do this, it's not an easy job. At this stage I decided to take a break from the hull and work on the masts.
I have a tool I made to do the masts and yards my only problem it was dismantled when I moved house and I only found half the pieces where I thought I left them.
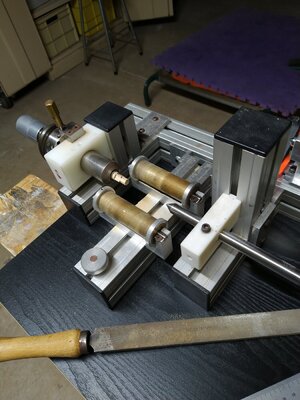
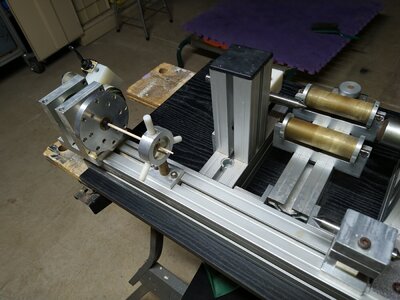
This is my tool for masts and yards, filing on one side and tapering on the other.
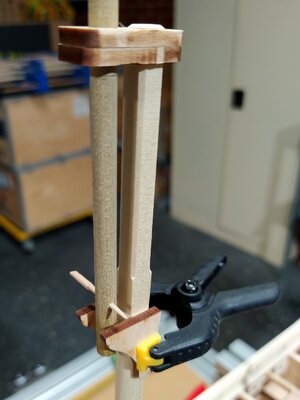
Easy part done.
Tony
Just a quick update not much done but getting there. I started fitting the masts into the hull to get ready for laying the deck. As I was studying the plans for the masts it got me thinking how am I going to do this, it's not an easy job. At this stage I decided to take a break from the hull and work on the masts.
I have a tool I made to do the masts and yards my only problem it was dismantled when I moved house and I only found half the pieces where I thought I left them.


This is my tool for masts and yards, filing on one side and tapering on the other.

Easy part done.
Tony
I could order them for you and send by mail (post).... Is this possible? I can inquire by post.... if you like....I'm checking to see if I can get some of these over here.
Tony
Wow.... I can only dream of this... I've no such tools at all.....Hi
Just a quick update not much done but getting there. I started fitting the masts into the hull to get ready for laying the deck. As I was studying the plans for the masts it got me thinking how am I going to do this, it's not an easy job. At this stage I decided to take a break from the hull and work on the masts.
I have a tool I made to do the masts and yards my only problem it was dismantled when I moved house and I only found half the pieces where I thought I left them.
View attachment 407083
View attachment 407087
This is my tool for masts and yards, filing on one side and tapering on the other.
View attachment 407088
Easy part done.
Tony
Hi MarcI could order them for you and send by mail (post).... Is this possible? I can inquire by post.... if you like....
Thank you so much for this offer, I should be able to order from the web if I'm unsuccessful I'll let you know.
Tony


