who may think, you don't have the millThanks
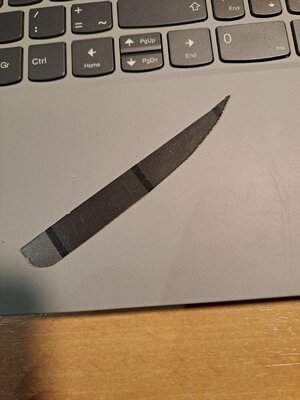
I wish i still had access to a mill and lathe it would make life so much easier. I was looking at ways to index the 25 steps on a drill press or small table saw. I was toying with getting a X Y table for my drill press but with 3/32*3/16 material on a 26 degree angle I don't think it will be successful.
-

Win a Free Custom Engraved Brass Coin!!!
As a way to introduce our brass coins to the community, we will raffle off a free coin during the month of August. Follow link ABOVE for instructions for entering.
-

PRE-ORDER SHIPS IN SCALE TODAY!
The beloved Ships in Scale Magazine is back and charting a new course for 2026!
Discover new skills, new techniques, and new inspirations in every issue.
NOTE THAT OUR FIRST ISSUE WILL BE JAN/FEB 2026
You are using an out of date browser. It may not display this or other websites correctly.
You should upgrade or use an alternative browser.
You should upgrade or use an alternative browser.
As a toolmaker by trade I had access to all the machines I needed. Now I'm retired I need to make do with what I have. I will experiment with a file but my eyes are not as good as they once were.who may think, you don't have the millWell...alternatively, use the triangle file, and set the top of your vise as the border.
That is /was your secret!As a toolmaker by trade I had access to all the machines I needed. Now I'm retired I need to make do with what I have. I will experiment with a file but my eyes are not as good as they once were.
Hello everybody,
Another week has flown by....
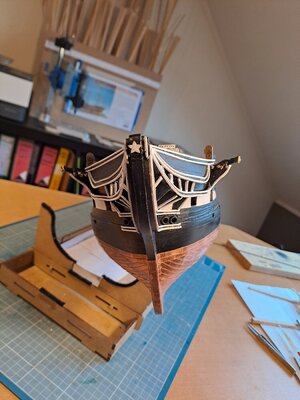
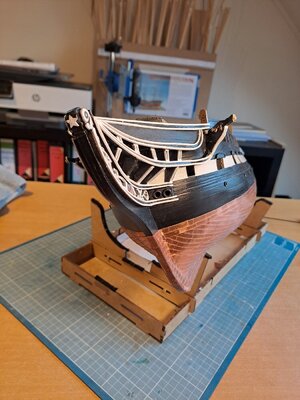
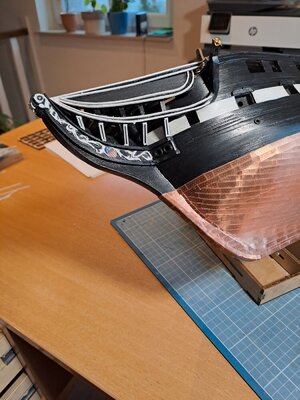
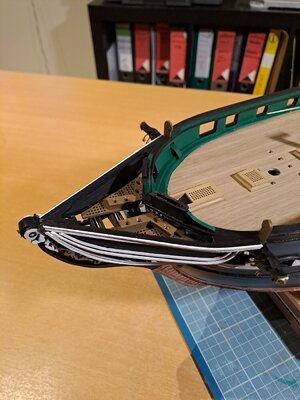
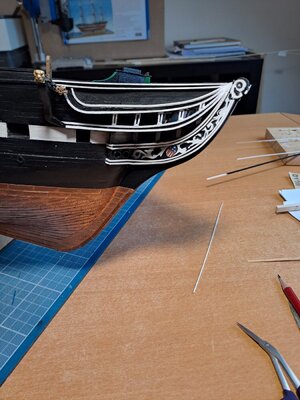
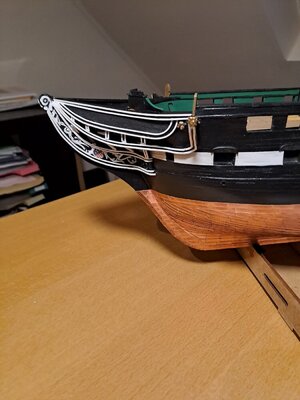
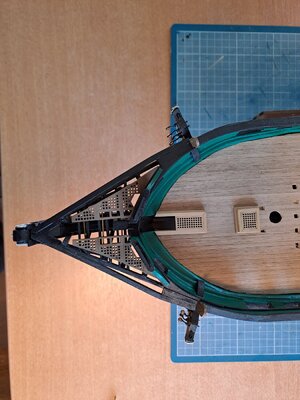
The moment for the weekly update...I continued my work on the bow...
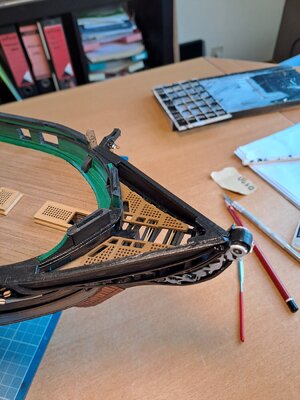
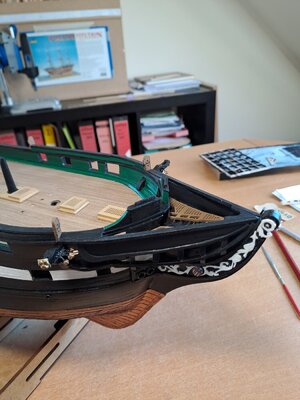
Making the rail supports took almost a full week... because the rails had to fit exactly between the cheek knee and the 2nd rail... so each rail had to be cut to size, adjusted, etc...the grating support beams and tie rods (in brass) were also placed and last but not least the grating panels at head...
To place the 1/16" thick panels between the main rail and the 2nd rail, I first cut out a cardboard template to size (adjusted several times until it fit exactly). Then I first glued the planks together and then installed it neatly between the 2 rails and glued....
Simple but very efficient...


Thx but what you do is impressive!It's a pleasure to watch your construction progress.
- Joined
- Jun 17, 2021
- Messages
- 3,199
- Points
- 588

Jim, a photo or two by way of illustration would be helpful for me (and maybe a few others) to put what you are saying into practice.who may think, you don't have the millWell...alternatively, use the triangle file, and set the top of your vise as the border.

Thanks, I can use all the help I can get!
Pete
Nicely done!You need a steady hand for this....pffffffff
View attachment 412141
View attachment 412142
View attachment 412143
View attachment 412144
View attachment 412145
- Joined
- Jun 17, 2021
- Messages
- 3,199
- Points
- 588

Wonderful!
- Joined
- Jun 17, 2021
- Messages
- 3,199
- Points
- 588

Beautiful! Well done! This is a terrific build and a treat to follow. 

Seems that you have such steady handsYou need a steady hand for this....pffffffff
Very good result

- Joined
- Oct 9, 2020
- Messages
- 2,229
- Points
- 488

That would be me, but I have started the kit using Hunt's practicum and definitely this build that you are working on.I wonder how many others have this kit waiting for a build session. Maybe a group build all together to help each other.
- Joined
- Jun 17, 2021
- Messages
- 3,199
- Points
- 588

Closets all up and down the eastern seaboard, and perhaps around the country must be full of MS Connie kits taken on as a first project and abandoned.
Kurt Konrath
Kurt Konrath
I also have Bob Hunt's practicum and plan to use it when time comes. I wish he did on for the Connie Cross Section kit as well.That would be me, but I have started the kit using Hunt's practicum and definitely this build that you are working on.
Kurt Konrath
Kurt Konrath
That is what feeds the many eBay sales of which I have bought several partially started kits. But it is buyers beware on if kit is complete when you get the box.Closets all up and down the eastern seaboard, and perhaps around the country must be full of MS Connie kits taken on as a first project and abandoned.
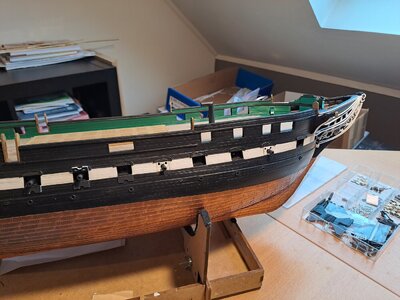
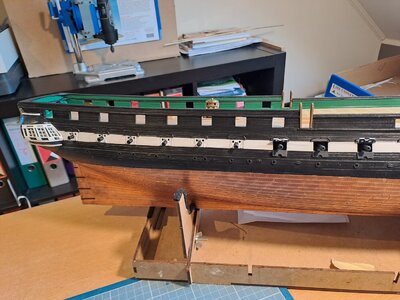
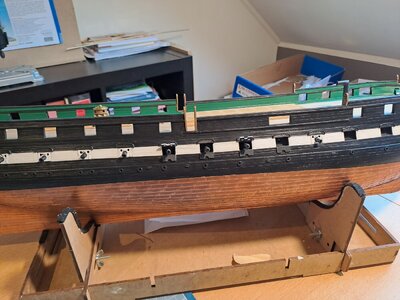
After completing the bow, I started with the gun ports: I closed the gun ports under the channel and chain plates. I leave the others open (see photo).
On the one hand, this offers some variety, but it also makes it easier to mount the chain plates... and an open gunport under the channel plates is not clearly visible in my opinion...
Fitting the gunport lids requires a lot of work: the laser cut Gunport lids do not fit at all in the provided gunport openings (I sometimes have to cut away more than 1/32" on each side, even though the openings are perfectly according to plan)...
I suspect they made the gun ports lids much larger to accommodate the different tolerances occurred during the construction by the many Hobbyists?
Cheers
Marc


- Joined
- Jun 17, 2021
- Messages
- 3,199
- Points
- 588

Gosh, this is such beautiful work!
Hi MarcAfter completing the bow, I started with the gun ports: I closed the gun ports under the channel and chain plates. I leave the others open (see photo).
On the one hand, this offers some variety, but it also makes it easier to mount the chain plates... and an open gunport under the channel plates is not clearly visible in my opinion...
Fitting the gunport lids requires a lot of work: the laser cut Gunport lids do not fit at all in the provided gunport openings (I sometimes have to cut away more than 1/32" on each side, even though the openings are perfectly according to plan)...
I suspect they made the gun ports lids much larger to accommodate the different tolerances occurred during the construction by the many Hobbyists?
Cheers
Marc
View attachment 412704
View attachment 412705
View attachment 412706
I hope I can equal your achievements the bow looks great and very challenging. When I see your Constitution I find it hard to believe I started mine first.
I'm surprised at the trouble you had fitting the gunport lids. l hope all laser cut lids are the same size, I cut out a pair to check the size while planking.
Tony
Last edited:


