-

Win a Free Custom Engraved Brass Coin!!!
As a way to introduce our brass coins to the community, we will raffle off a free coin during the month of August. Follow link ABOVE for instructions for entering.
-

PRE-ORDER SHIPS IN SCALE TODAY!
The beloved Ships in Scale Magazine is back and charting a new course for 2026!
Discover new skills, new techniques, and new inspirations in every issue.
NOTE THAT OUR FIRST ISSUE WILL BE JAN/FEB 2026
You are using an out of date browser. It may not display this or other websites correctly.
You should upgrade or use an alternative browser.
You should upgrade or use an alternative browser.
Hi
Time to forget the 3D Printer for a while and catch up with my progress.
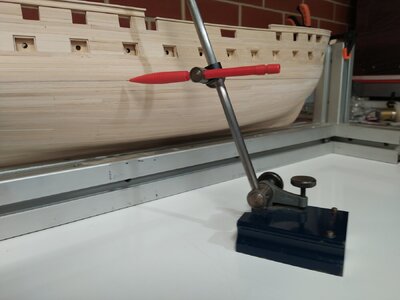
This is the first time I've painted a model, I experimented with some different paints and decided to use acrylic. This is how I marked the level of the copper plates.
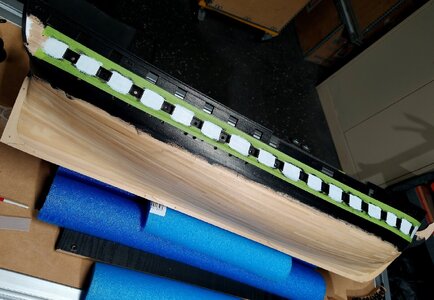
Three coats of each colour worked well.
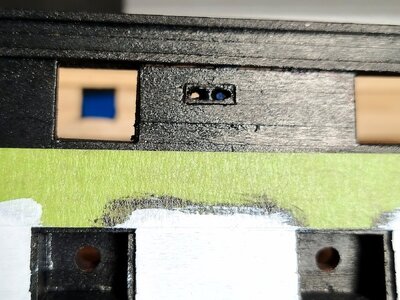
The 8 sheaths where quite time consuming but they came out OK.
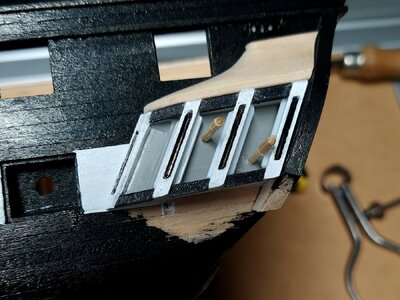
While painting I did some work on the gallery. This is a bit of a dilemma for me as I like the way they look but they're not correct to the ship. I've tried to alter the spacing so the bottom of the middle window is wider than the others, I couldn't make this work. This is due to the angle of the stern being to steep. A fix would be to shorten the width at the top of the windows but this makes the angle at the front of the gallery a lot sharper. I haven't decided yet but I leaning towards sticking with what I have.
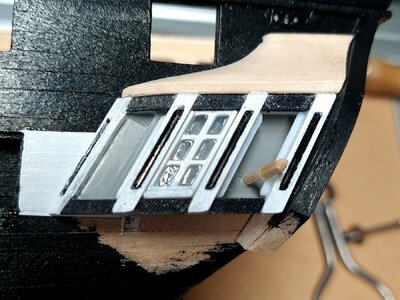
And one with a window fitted.
That my progress up to date time to look into copper plating.
Tony
Time to forget the 3D Printer for a while and catch up with my progress.

This is the first time I've painted a model, I experimented with some different paints and decided to use acrylic. This is how I marked the level of the copper plates.

Three coats of each colour worked well.

The 8 sheaths where quite time consuming but they came out OK.

While painting I did some work on the gallery. This is a bit of a dilemma for me as I like the way they look but they're not correct to the ship. I've tried to alter the spacing so the bottom of the middle window is wider than the others, I couldn't make this work. This is due to the angle of the stern being to steep. A fix would be to shorten the width at the top of the windows but this makes the angle at the front of the gallery a lot sharper. I haven't decided yet but I leaning towards sticking with what I have.

And one with a window fitted.
That my progress up to date time to look into copper plating.
Tony
Hi
Time to forget the 3D Printer for a while and catch up with my progress.
View attachment 420913
This is the first time I've painted a model, I experimented with some different paints and decided to use acrylic. This is how I marked the level of the copper plates.
View attachment 420914
Three coats of each colour worked well.
View attachment 420915
The 8 sheaths where quite time consuming but they came out OK.
View attachment 420916
While painting I did some work on the gallery. This is a bit of a dilemma for me as I like the way they look but they're not correct to the ship. I've tried to alter the spacing so the bottom of the middle window is wider than the others, I couldn't make this work. This is due to the angle of the stern being to steep. A fix would be to shorten the width at the top of the windows but this makes the angle at the front of the gallery a lot sharper. I haven't decided yet but I leaning towards sticking with what I have.
View attachment 420917
And one with a window fitted.
That my progress up to date time to look into copper plating.
Tony
Tony!Hi
Time to forget the 3D Printer for a while and catch up with my progress.
View attachment 420913
This is the first time I've painted a model, I experimented with some different paints and decided to use acrylic. This is how I marked the level of the copper plates.
View attachment 420914
Three coats of each colour worked well.
View attachment 420915
The 8 sheaths where quite time consuming but they came out OK.
View attachment 420916
While painting I did some work on the gallery. This is a bit of a dilemma for me as I like the way they look but they're not correct to the ship. I've tried to alter the spacing so the bottom of the middle window is wider than the others, I couldn't make this work. This is due to the angle of the stern being to steep. A fix would be to shorten the width at the top of the windows but this makes the angle at the front of the gallery a lot sharper. I haven't decided yet but I leaning towards sticking with what I have.
View attachment 420917
And one with a window fitted.
That my progress up to date time to look into copper plating.
Tony
You did it again!!!!!
How on earth did you get that Quarter gallery so perfect?
With your 3D printer?
I'm jealous
Dear Tony,
I have a question for you!
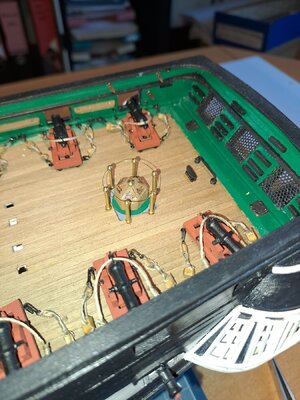
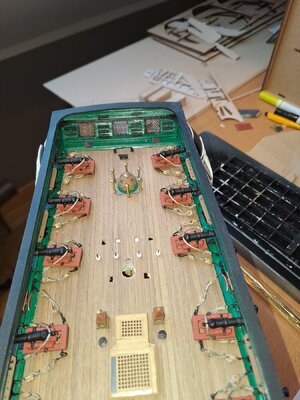
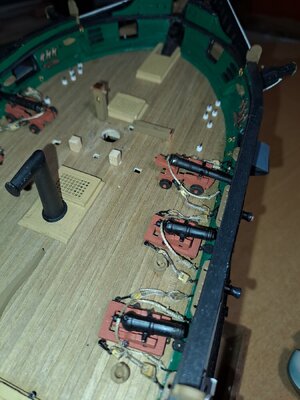
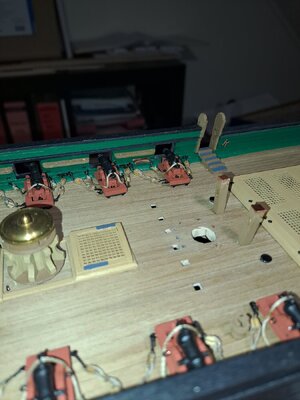
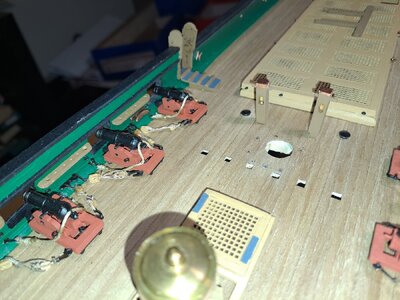
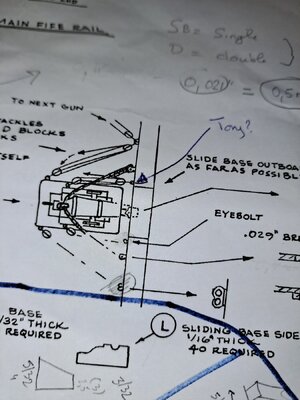
I'm still working on the rigging of the guns.
I installed the breech lines and one gun tackle (each gun has 2 of them).
As you can see in the photo I would actually add a 3rd and 4th to wire the open eyebolts. But, is this recommended as I fear I will have an abundance of wires per gun....
What would / are you going to do?
PS
very nicely painted... perfect... and also very clever that you have now installed the sheaves in the hull before finishing further details... I followed the plans and only plan 4 are the sheaves discussed... .better at your stage!


Hi
Time to forget the 3D Printer for a while and catch up with my progress.
View attachment 420913
This is the first time I've painted a model, I experimented with some different paints and decided to use acrylic. This is how I marked the level of the copper plates.
View attachment 420914
Three coats of each colour worked well.
View attachment 420915
The 8 sheaths where quite time consuming but they came out OK.
View attachment 420916
While painting I did some work on the gallery. This is a bit of a dilemma for me as I like the way they look but they're not correct to the ship. I've tried to alter the spacing so the bottom of the middle window is wider than the others, I couldn't make this work. This is due to the angle of the stern being to steep. A fix would be to shorten the width at the top of the windows but this makes the angle at the front of the gallery a lot sharper. I haven't decided yet but I leaning towards sticking with what I have.
View attachment 420917
And one with a window fitted.
That my progress up to date time to look into copper plating.
Tony
Time to forget the 3D Printer for a while and catch up with my progress.
View attachment 420913
This is the first time I've painted a model, I experimented with some different paints and decided to use acrylic. This is how I marked the level of the copper plates.
View attachment 420914
Three coats of each colour worked well.
View attachment 420915
The 8 sheaths where quite time consuming but they came out OK.
View attachment 420916
While painting I did some work on the gallery. This is a bit of a dilemma for me as I like the way they look but they're not correct to the ship. I've tried to alter the spacing so the bottom of the middle window is wider than the others, I couldn't make this work. This is due to the angle of the stern being to steep. A fix would be to shorten the width at the top of the windows but this makes the angle at the front of the gallery a lot sharper. I haven't decided yet but I leaning towards sticking with what I have.
View attachment 420917
And one with a window fitted.
That my progress up to date time to look into copper plating.
Tony
I don't know why my last post repeated, when I first tried sending it a message was displayed server error try again later. I tried again last night the same message was displayed and again this morning when it posted OK. Now there's multiple post, can an they be removed?
Hi MarcDear Tony,
I have a question for you!
I'm still working on the rigging of the guns.
I installed the breech lines and one gun tackle (each gun has 2 of them).
As you can see in the photo I would actually add a 3rd and 4th to wire the open eyebolts. But, is this recommended as I fear I will have an abundance of wires per gun....
What would / are you going to do?
PS
very nicely painted... perfect... and also very clever that you have now installed the sheaves in the hull before finishing further details... I followed the plans and only plan 4 are the sheaves discussed... .better at your stage!
View attachment 421053
View attachment 421054
View attachment 421056
Before I answer your question have a look at my last model and tell me what's wrong with the cannons?
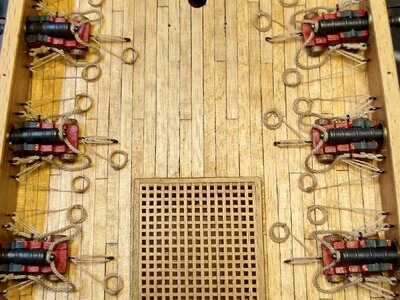
Tony
Tony, nothing wrong!Hi Marc
Before I answer your question have a look at my last model and tell me what's wrong with the cannons?
View attachment 421083
Tony
The only thing I see is that you did not use SB & D blocks..... Doing so you have a very clean solution but nevertheless rigged the guns...clever.
So if I understand your suggestion right, continue without the blocks: fine for me... Is this right?
- Joined
- Oct 9, 2020
- Messages
- 2,228
- Points
- 488

I personally like the look. Well done.Hi Marc
Before I answer your question have a look at my last model and tell me what's wrong with the cannons?
View attachment 421083
Tony
I like your solution to an otherwise crowded and cluttered deck space. Nice job.Hi Marc
Before I answer your question have a look at my last model and tell me what's wrong with the cannons?
View attachment 421083
Tony
Hi Marc your right. Try without the blocks or use smaller ones but use the method your happiest with.Tony, nothing wrong!
The only thing I see is that you did not use SB & D blocks..... Doing so you have a very clean solution but nevertheless rigged the guns...clever.
So if I understand your suggestion right, continue without the blocks: fine for me... Is this right?
There's photos of the cannons fully rigged and partly rigged so you could leave one set off for a cleaner look.
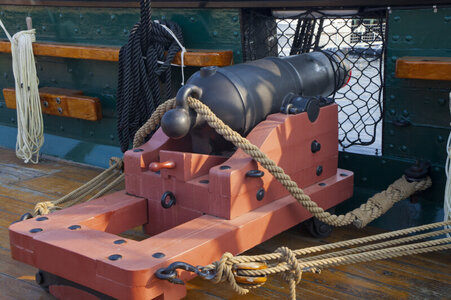
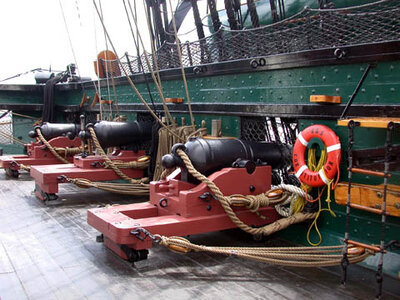
One of the biggest problems with rigging the cannons is the blocks and fittings need to be very small. Both hard to find and time consuming.
While making my Unicorn I had a lot of trouble getting the guns to look right. I used the smallest blocks I could find but with the eyebolts hooks and blocks there wasn't much rope showing. I saw this method on another log and until I read about it and went back to look at the photos hadn't noticed there were no blocks. On my Unicorn log only one person commented on the way I rigged the cannons.
With my Constitution I will try a few methods and see what looks best once the cannons are made up.
Tony
OK But I will follow your idea and finish the rigging without blocks....Hi Marc your right. Try without the blocks or use smaller ones but use the method your happiest with.
There's photos of the cannons fully rigged and partly rigged so you could leave one set off for a cleaner look.
View attachment 421237
View attachment 421238
One of the biggest problems with rigging the cannons is the blocks and fittings need to be very small. Both hard to find and time consuming.
While making my Unicorn I had a lot of trouble getting the guns to look right. I used the smallest blocks I could find but with the eyebolts hooks and blocks there wasn't much rope showing. I saw this method on another log and until I read about it and went back to look at the photos hadn't noticed there were no blocks. On my Unicorn log only one person commented on the way I rigged the cannons.
With my Constitution I will try a few methods and see what looks best once the cannons are made up.
Tony
PS
I used the blocks delivered with the kit; smaller doesn't exist....and very difficult to work with eg have a nice rigging....
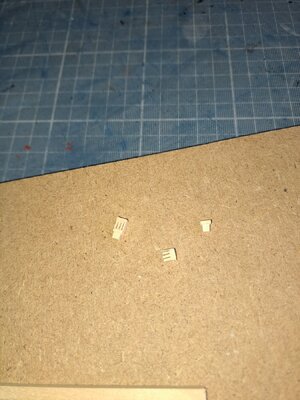
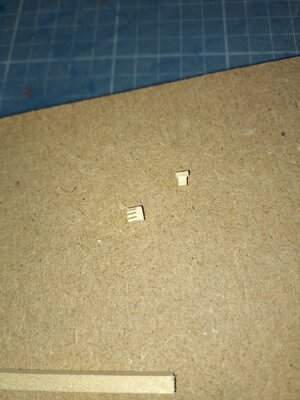
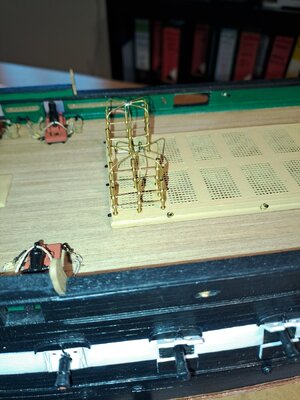
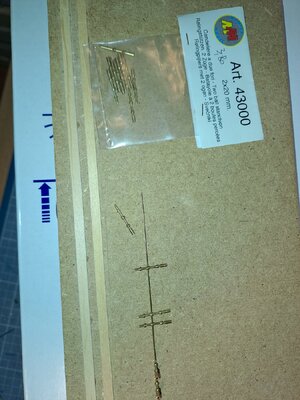
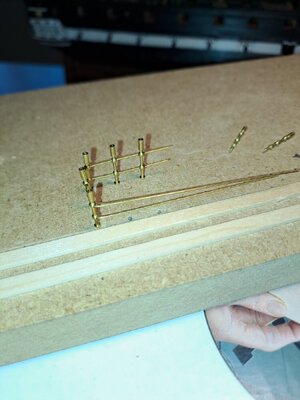
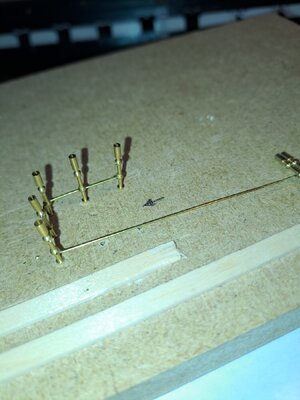
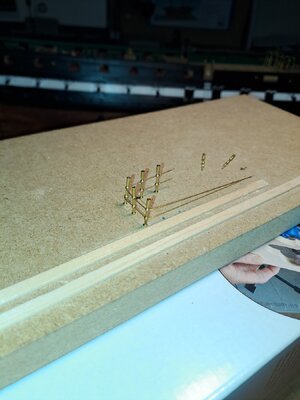
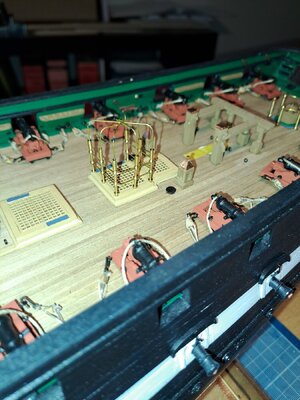
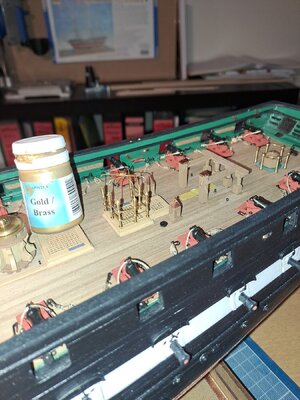
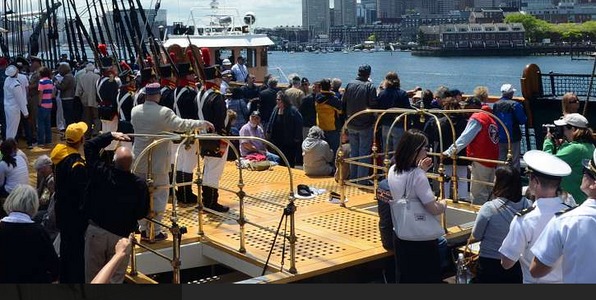
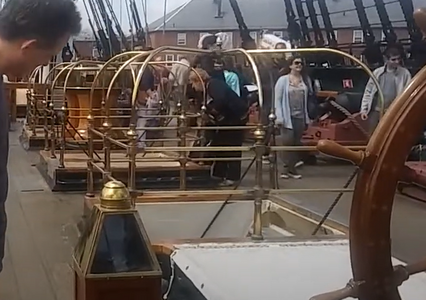
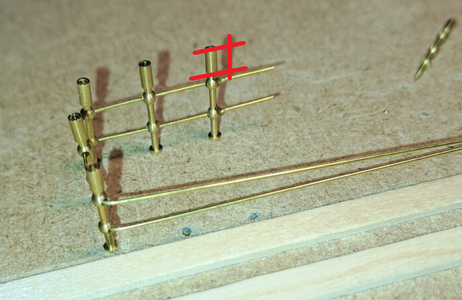
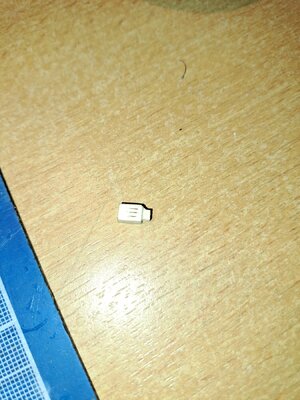
A very fun (annoying) one is making the fife rails. More specifically, the sheaves in the bottom blocks: in a 5/32" block, 3 sheaves should be provided. Give it a try. I tried everything: drilling and grinding holes, milling, etc. until I finally simply tried with my cutter to carve three parallel notches and some from deep... the front one alone took me two full days... starting over and over again...; Now I don't know if anyone has a better idea because I still have to make the middle and back making...
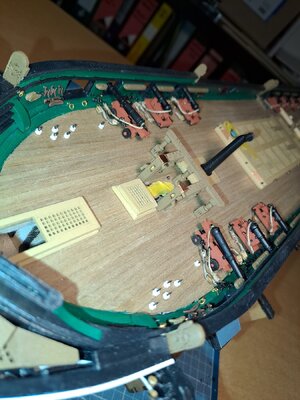
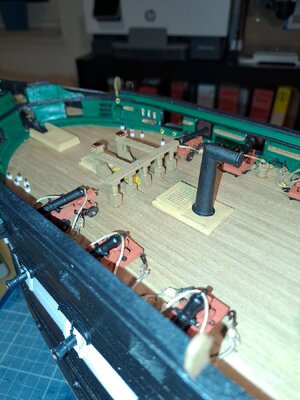
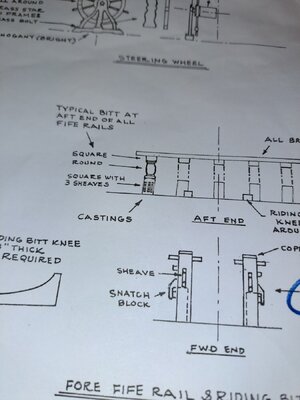


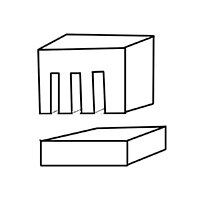
Possibly saw the slots. Cut a base plate the size of the bottom of the foot and glue in place. No drilling, only sawing. I attached a crude drawing of what I tried to explain.A very fun (annoying) one is making the fife rails. More specifically, the sheaves in the bottom blocks: in a 5/32" block, 3 sheaves should be provided. Give it a try. I tried everything: drilling and grinding holes, milling, etc. until I finally simply tried with my cutter to carve three parallel notches and some from deep... the front one alone took me two full days... starting over and over again...; Now I don't know if anyone has a better idea because I still have to make the middle and back making...
View attachment 421411
View attachment 421412
View attachment 421413
View attachment 421414
Dear Jeff,Possibly saw the slots. Cut a base plate the size of the bottom of the foot and glue in place. No drilling, only sawing. I attached a crude drawing of what I tried to explain.
View attachment 421437
Thank you very much for your advise.
I must admit that I had already considered that option. The reason I didn't do this until yesterday was because I need to fit the blocks into a hole in the deck (early in the project I provided square cutouts to fit the blocks exactly into place).
But you convinced me yesterday. So first make a block and then use a very fine saw to make the three slots. Then a block of 1/32" thick with a bulge. And this works much better than my previous tinkering
Thank you!
Photo's: first attempt......
