Your birthday wishes give me great pleasure.... 67 years young... I hope I can continue to pursue this hobby for many years to come... and share a lot of information with you.... 

-

Win a Free Custom Engraved Brass Coin!!!
As a way to introduce our brass coins to the community, we will raffle off a free coin during the month of August. Follow link ABOVE for instructions for entering.
-

PRE-ORDER SHIPS IN SCALE TODAY!
The beloved Ships in Scale Magazine is back and charting a new course for 2026!
Discover new skills, new techniques, and new inspirations in every issue.
NOTE THAT OUR FIRST ISSUE WILL BE JAN/FEB 2026
You are using an out of date browser. It may not display this or other websites correctly.
You should upgrade or use an alternative browser.
You should upgrade or use an alternative browser.
You are making great progress
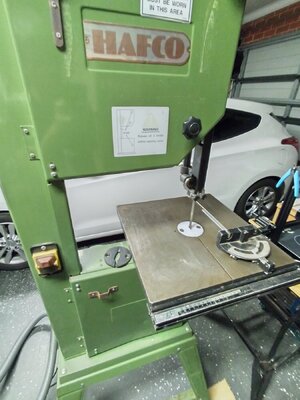
Hi time to post an update on my progress or lack of. I got myself a belated Christmas present an old bandsaw it needed a bit of TLC. With a few new parts it works quite well.
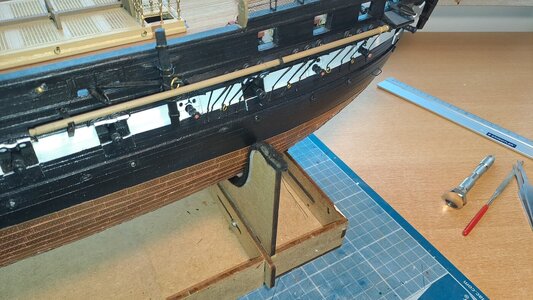
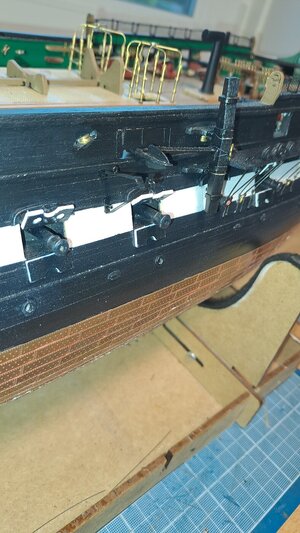
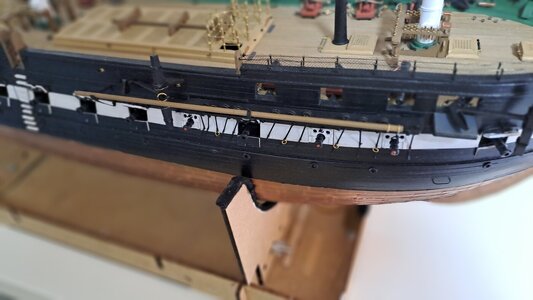
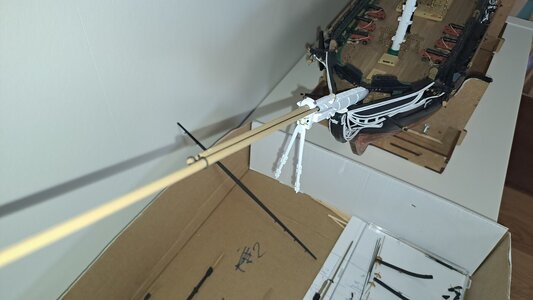
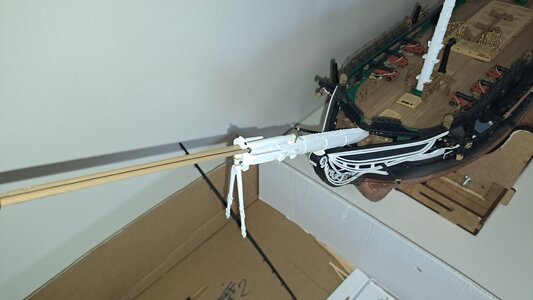
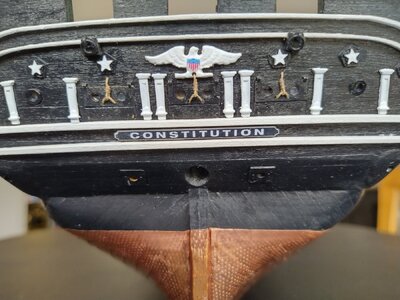
Here's some current photos of where I'm at.
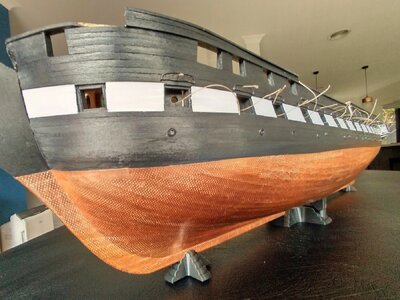
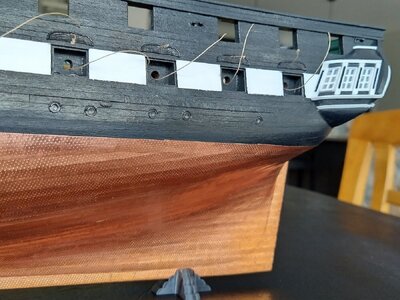
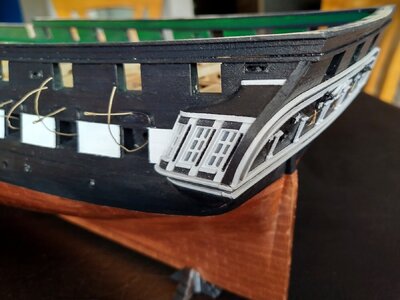
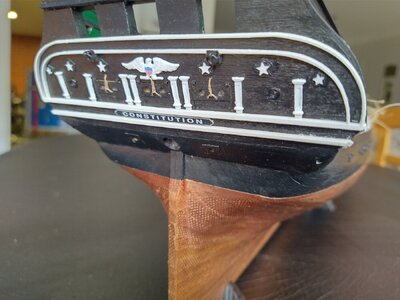
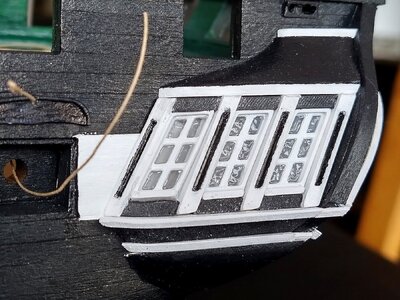
As you can see the rear gallery windows are in place, these are a combination of 3d printed and wood parts. They're not quite to the drawing but where the best fitting/looking ones I made.
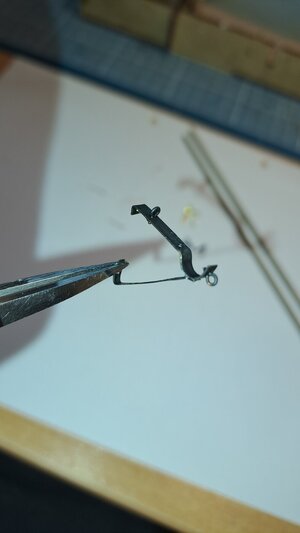
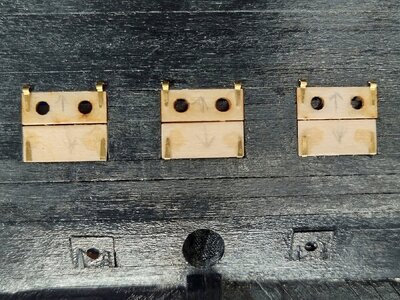
While attaching the gunport hinges I found with paint they tended to disappear so I bent the top to make a better looking hinge.
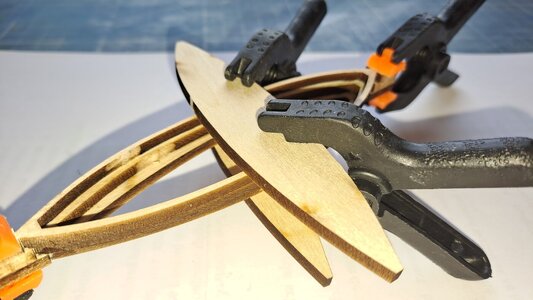
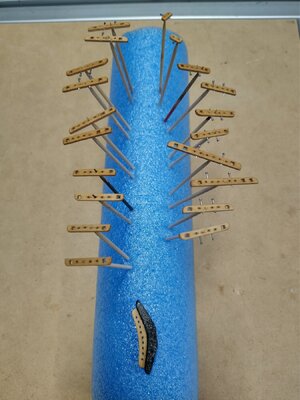
I'm currently working on the pinrails they don't look much but are time consuming. Cut 20 pieces pitch the holes then make the holes for the square pins on the end.
Thanks for reading.
Tony

Here's some current photos of where I'm at.


As you can see the rear gallery windows are in place, these are a combination of 3d printed and wood parts. They're not quite to the drawing but where the best fitting/looking ones I made.

While attaching the gunport hinges I found with paint they tended to disappear so I bent the top to make a better looking hinge.

I'm currently working on the pinrails they don't look much but are time consuming. Cut 20 pieces pitch the holes then make the holes for the square pins on the end.

Thanks for reading.
Tony
Last edited:
Nice job
- Joined
- Jun 17, 2021
- Messages
- 3,199
- Points
- 588

everything looks great! l Love the coppering. 

I'm so happy to hear news again....Hi time to post an update on my progress or lack of. I got myself a belated Christmas present an old bandsaw it needed a bit of TLC. With a few new parts it works quite well.
View attachment 435604
Here's some current photos of where I'm at.
View attachment 435599
View attachment 435600
View attachment 435601
View attachment 435602
View attachment 435603
As you can see the rear gallery windows are in place, these are a combination of 3d printed and wood parts. They're not quite to the drawing but where the best fitting/looking ones I made.
View attachment 435598
While attaching the gunport hinges I found with paint they tended to disappear so I bent the top to make a better looking hinge.
View attachment 435597
I'm currently working on the pinrails they don't look much but are time consuming. Cut 20 pieces pitch the holes then make the holes for the square pins on the end.
View attachment 435605
Thanks for reading.
Tony
Once again perfect within a 1000th of an inch....perfect!
I have a question for the audience: I would like to receive advice regarding a tool that I might eventually purchase. I like to refer to the masts where a section in the round part has to be made square. How do you do this?
I used a file but you never get a nice defined square...
I will definitely need something like that for my next project but.....
I used a file but you never get a nice defined square...
I will definitely need something like that for my next project but.....
Great work on your Constitution, HMSFly! Will definitely be referring back to this build log when I get to my Constitution!I have a question for the audience: I would like to receive advice regarding a tool that I might eventually purchase. I like to refer to the masts where a section in the round part has to be made square. How do you do this?
I used a file but you never get a nice defined square...
I will definitely need something like that for my next project but.....
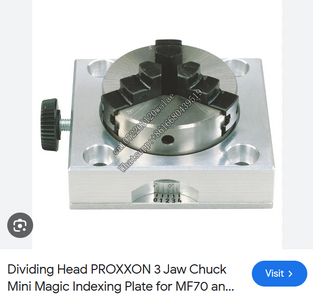
Regarding new tools to make a nice defined square, the first thing I thought of was my newest tool... my Proxxon MF70 mill machine. For some cuts I have used it for so far, it has been awesome!
- Joined
- Oct 9, 2020
- Messages
- 2,229
- Points
- 488

Thx for the input: I will have a deeper look into the MF70.....Great work on your Constitution, HMSFly! Will definitely be referring back to this build log when I get to my Constitution!
Regarding new tools to make a nice defined square, the first thing I thought of was my newest tool... my Proxxon MF70 mill machine. For some cuts I have used it for so far, it has been awesome!
Hi MarcI have a question for the audience: I would like to receive advice regarding a tool that I might eventually purchase. I like to refer to the masts where a section in the round part has to be made square. How do you do this?
I used a file but you never get a nice defined square...
I will definitely need something like that for my next project but.....
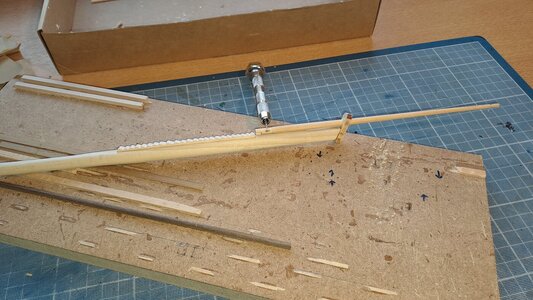
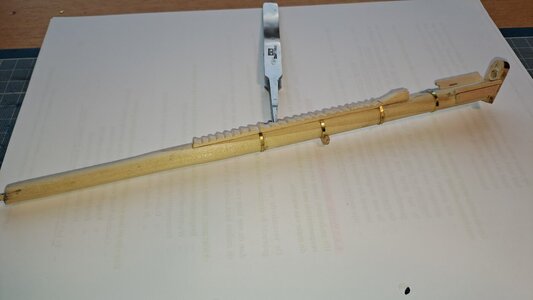
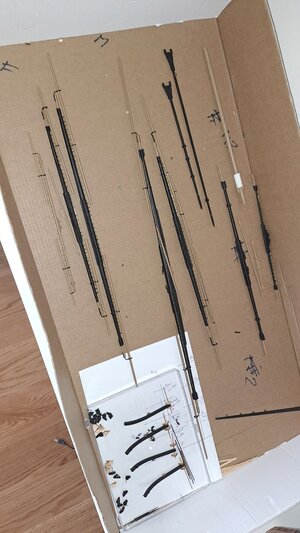
This is the tool I used to make the square and octagonal sections of my masts and yards. I'm afraid it's not much use to you as I made it myself back in the late 90s when model making milling and other machines where a lot harder to find.
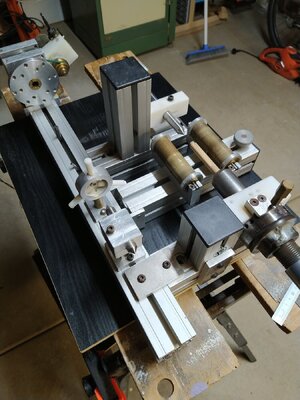
One side is used to tapper dowels and the other to file squares etc.
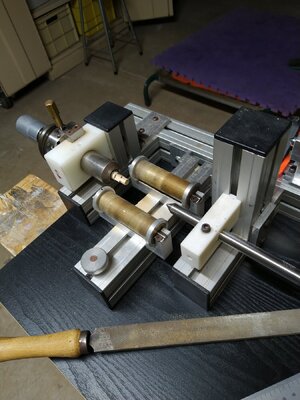
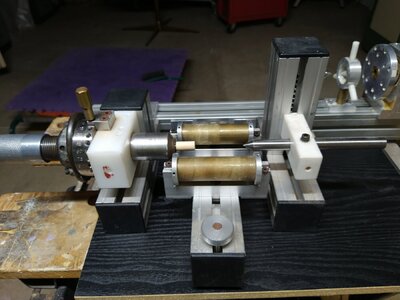
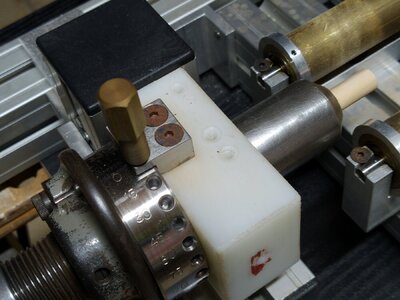
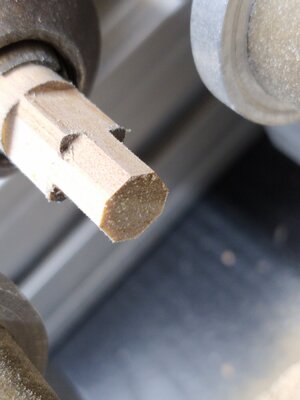
The head can be indexed in 15 degree increments, the rollers can adjusted up and down to change the size of the square.
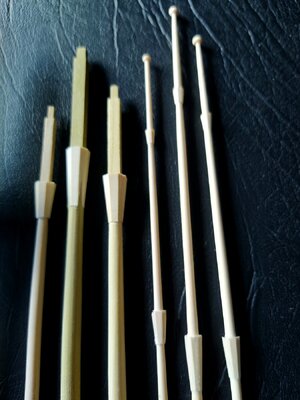
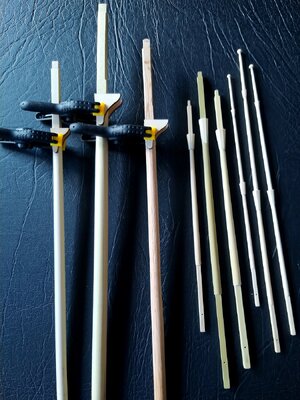
The headstock can be adjusted to make tapered parts which was very handy for these masts.
Tony
Hi Tony,Hi Marc
This is the tool I used to make the square and octagonal sections of my masts and yards. I'm afraid it's not much use to you as I made it myself back in the late 90s when model making milling and other machines where a lot harder to find.
View attachment 436358
One side is used to tapper dowels and the other to file squares etc.
View attachment 436359View attachment 436360
View attachment 436361
View attachment 436362
The head can be indexed in 15 degree increments, the rollers can adjusted up and down to change the size of the square.
View attachment 436374
View attachment 436375
The headstock can be adjusted to make tapered parts which was very handy for these masts.
Tony
definitely out of my reach....
 A great machine...a dream that will remain a dream.
I looked at the proxxon MF70 but the price here in Belgium is +-285 euros...
Quite expensive, but so far the only solution that I can buy ready-made...
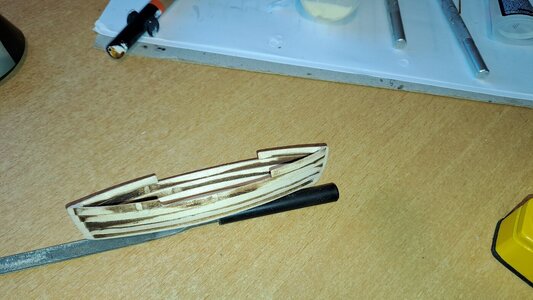
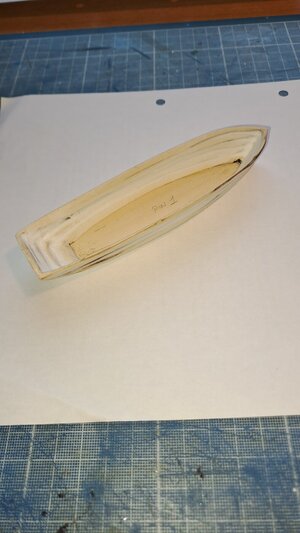
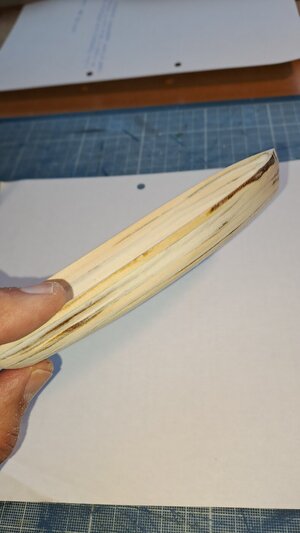
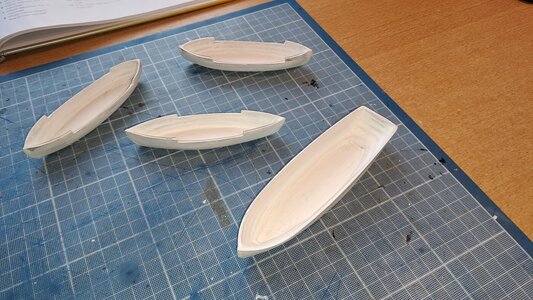
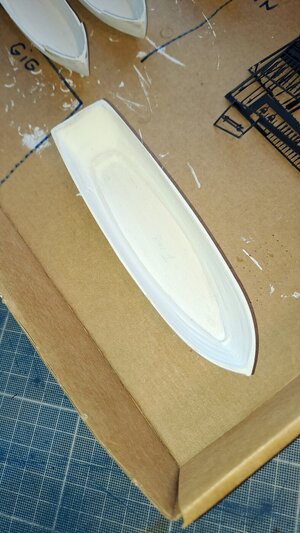
Below are some photos of the Ship Boats.
I carefully glued the parts together, except for the bottom. The absence of the bottom simplifies sanding the wood (better accessibility).
You really have to be very careful when sanding. The wood is very soft and very thin... To avoid sanding through the wood, I did not finish the inside and outside to the extreme... I finished and filled the imperfections with white putty. Then sand very finely until you obtain a smooth finish. And then I applied primer. By priming you emphasize the errors that still exist and therefore sand and finely sand again. I decided to equip the ship boats with a 1/64" thin wooden strip that I used for the Spar Deck covering....But this is for next week.
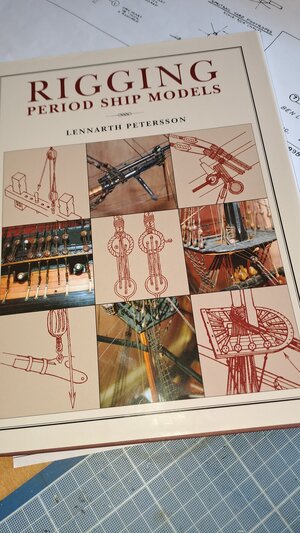
In the meantime I start studying the rigging. After all, I want to apply the Blocks first. But this is another story. After all, the included plan is completely insufficient to successfully complete the rigging. That's why I'm going to base myself largely on the book "Rigging period Ship Models" by Leenarth Peterson...


WOW !!!


