USS Constitution by Model Shipways 1:76 scale

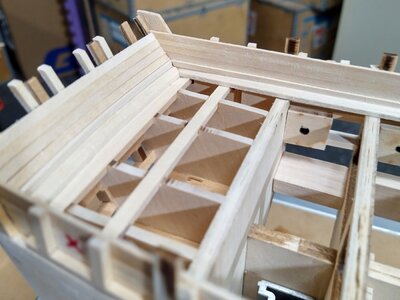
When I did the Brig Syren, the deck was also planked directly on the bulkheads. I put blocks in between the bulkheads as per the instructions. That may be a good idea for the Constitution as well, assuming you don't want a gun deck.
Oh btw, the instructions for the Brig Syren are available on the model expo site, in case you want to see what they did.
 
Hi Marc
There's certainly a lot room to be creative I really admire the builders who add the lower gundeck, it's' above my skill level.

The deck uses 1/8*1/16 timber I'm looking forward to seeing how you do your deck. This is my first ship that has a single planked hull and a deck mounted directly on the bulkheads, I'm interested to see how it works out.

I placed the first pair of planks today I'll post some photos when there's more to see.
Tony
I think from what I've seen of you you underestimate yourself.... I am convinced that you could make the gun deck perfect
 
When I did the Brig Syren, the deck was also planked directly on the bulkheads. I put blocks in between the bulkheads as per the instructions. That may be a good idea for the Constitution as well, assuming you don't want a gun deck.
Hi Jack thanks for the advice.
There' are some longitudinal beams for the hatches that also support the deck if done correctly looks sufficient. I'll look at it in more detail when I get to that stage.
Tony
 
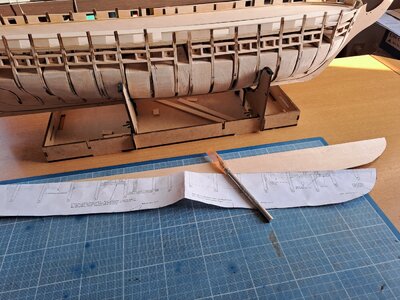
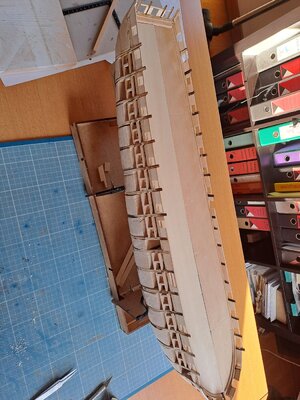
Result of the past weekend:
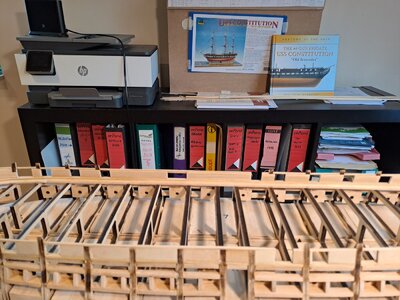
- I finished almost the spar deck gun ports, eg I have to add strips inboard and outboard to make the gangway.
I'm very happy with the fact I used the plywood to make the gunports: after sanding it will look even better...and no fiddling with individual strips which have to be placed between Bulkhead extensions etc...

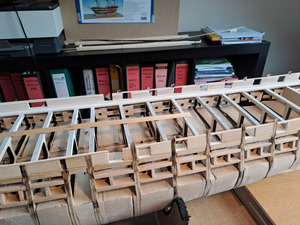
- I made also the spar deck out of plywood because I will use fine strips in special wood (stil to be defined but plenty of choice)
The only tool I needed was plywood (1/16"), my cutter and sanding paper....
I don't know what the audience thinks but the result is very good: I still have to make the openings for the bow, masts etc....
But as you can see I made the deck in 2 pieces...easier to make the openings for the hatches, masts etc...

Next step?
Transom extension wit fairing blocks seems to be the most logical step before beginning the planking?
Making the Transom wil not be easy....

Tony?

Tony20.jpg

Tony21.jpg

Tony22.jpg
 
Result of the past weekend:
- I finished almost the spar deck gun ports, eg I have to add strips inboard and outboard to make the gangway.
I'm very happy with the fact I used the plywood to make the gunports: after sanding it will look even better...and no fiddling with individual strips which have to be placed between Bulkhead extensions etc...

- I made also the spar deck out of plywood because I will use fine strips in special wood (stil to be defined but plenty of choice)
The only tool I needed was plywood (1/16"), my cutter and sanding paper....
I don't know what the audience thinks but the result is very good: I still have to make the openings for the bow, masts etc....
But as you can see I made the deck in 2 pieces...easier to make the openings for the hatches, masts etc...

Next step?
Transom extension wit fairing blocks seems to be the most logical step before beginning the planking?
Making the Transom wil not be easy....

Tony?

View attachment 389543

View attachment 389544

View attachment 389545
Hi Marc
The plywood around the gunports looks good, I haven't had much time to spend on my model I've nearly finished the first 4 rows of planks then I'll add the frames.
I like your way of doing the deck I'll do mine at a later stage.
Tony
 
Dear Tony,

I would like to need your expert advice again.
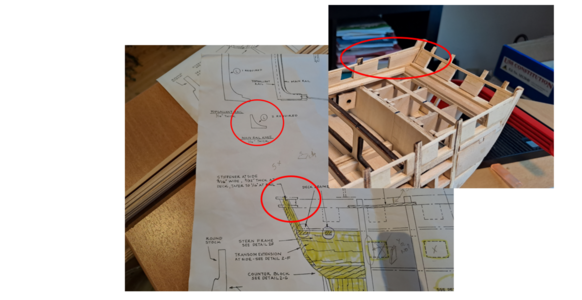
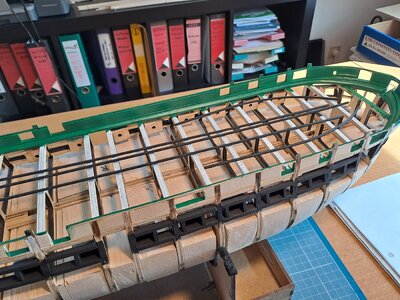
As you can see I have completed the inner planking: the goal is to place the inner inboard strip to form the main rail.

Now the kit includes a laser cut "main rail knee" and the togalant rail (also laser cut).
Do you have an idea how I should apply the main rail knee?

I would think that I would have to cut off a piece of the corner, but then I would have no support for placing the laser cut top galant rail?

Help!?


1692256605128.png

Tony22.jpg

Tony25.jpg
 
Dear Tony,

I would like to need your expert advice again.
As you can see I have completed the inner planking: the goal is to place the inner inboard strip to form the main rail.

Now the kit includes a laser cut "main rail knee" and the togalant rail (also laser cut).
Do you have an idea how I should apply the main rail knee?

I would think that I would have to cut off a piece of the corner, but then I would have no support for placing the laser cut top galant rail?

Help!?


View attachment 389898

View attachment 389899

View attachment 389900
I'll check my drawings and post some pictures tomorrow.
Tony
 
Hello Tony,

I found it! It's easy: you have to fix it inside the Hull..... Pfffff the plan is not clear but when I investigated the laser cut piece...found the solution.
Wil show you in a few days.

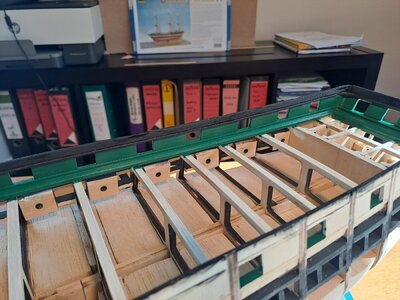
Meanwhile I add some primer on the inside planking because next steps:
- going to paint the inside waterway and strips in green because the inboard framing strip which forms the main rail should be painted in black.
- I painted the main rail strips already in black so wil fix them soon
This because if you glue the strips before painting, it seems to be difficult to have a nice result....

1692290439033.jpg
 
Hello Tony,

I found it! It's easy: you have to fix it inside the Hull..... Pfffff the plan is not clear but when I investigated the laser cut piece...found the solution.
Wil show you in a few days.

Meanwhile I add some primer on the inside planking because next steps:
- going to paint the inside waterway and strips in green because the inboard framing strip which forms the main rail should be painted in black.
- I painted the main rail strips already in black so wil fix them soon
This because if you glue the strips before painting, it seems to be difficult to have a nice result....

View attachment 389945
Hi Marc
Like this.
IMG_20230818_130856.jpg

What type/brand of paint are you using.

Tony
 
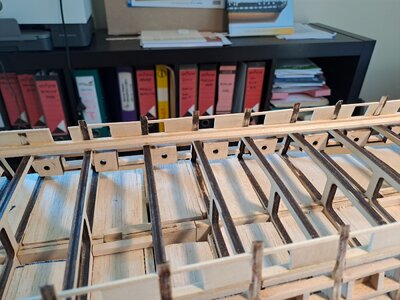
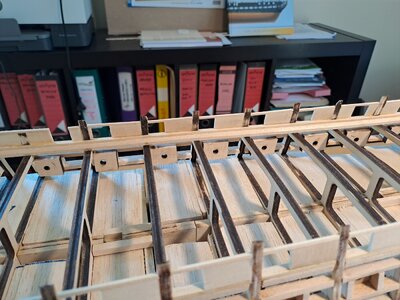
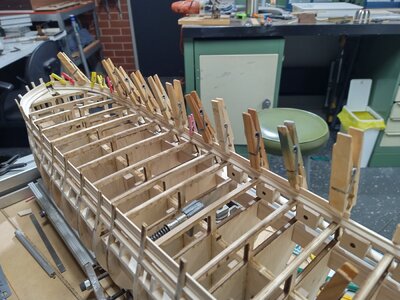
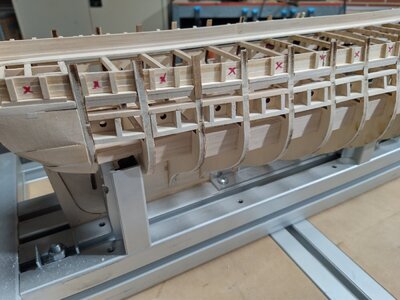
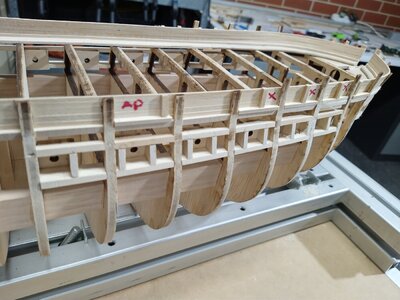
Time for a update. Firstly the bulkhead extensions need shimming so they are all the same size. The thinnest ones where very flexible and easily broken.
IMG_20230809_100844.jpg

With the extensions fixed I can start on planking up the insides.

IMG_20230815_183110.jpg
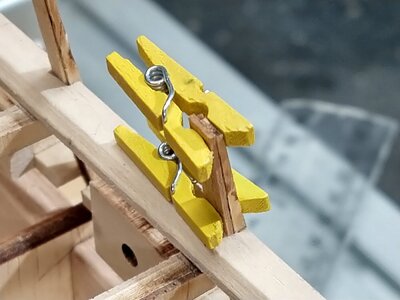
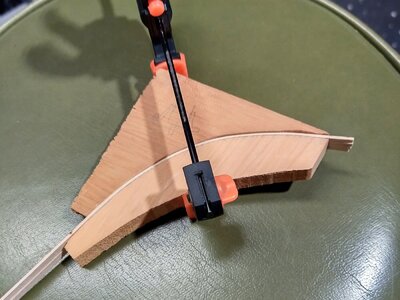
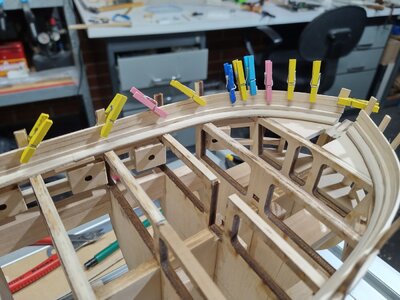
I made a bending jig for the planks, the strips are quite soft and mark easily a two piece jig overcame this. The planks where placed in hot water for a couple of hours before bending.


IMG_20230815_183314.jpg
IMG_20230813_085243.jpgIMG_20230813_165400.jpg

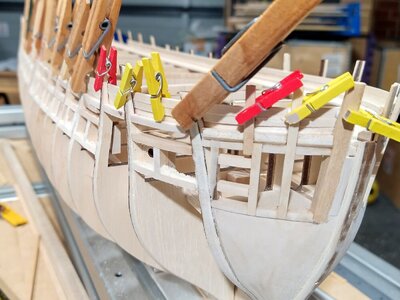
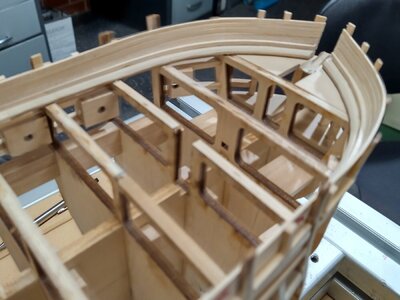
The bow is tricky to do while bending the planks I added a 1/4" (approximately) lateral bend as well. 4 planks (7/16" total) is to the top of the main rail.
IMG_20230818_192247.jpg
IMG_20230818_192339.jpg

With the planks in place I added the frames for the upper gunports.
IMG_20230818_141002.jpg
IMG_20230818_141021.jpg

I will cut out the gunports at a later stage right now I want to finish fairing the frames and continue with the planking.
 
Last edited:
Tony,

very smart! In the future I will wait for your ideas....

Now also an update from me.
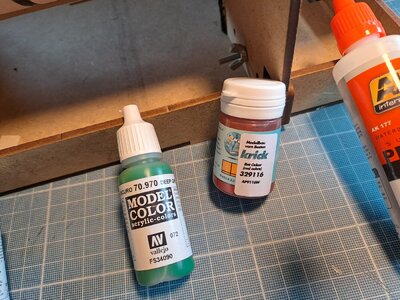
First the most important: answer to your question about paint choice:

For me it is important that the paint has good coverage, because I don't always apply a primer first. Given this, I would like to emphasize the wood structure as much as possible. So the more layers of paint (including primer) the fewer the accents.

I have had the best experience with the Vallejo brand: available almost everywhere and with a large color palette.

But, if you want a special color specifically for sailing ships, I can recommend "Admiralty paint" from Jo Tika. They have the beautiful red ocher color for the guns .... but are twice as expensive as the rest for the same quality.

But I think the most important thing is to paint certain parts in time and not wait until everything is put together.
That is why I already painted the interior planking (first layer still needs to be sanded) and when everything is dry I will apply the pre-painted inboard strip.

Tony30.jpg

Tony31.jpg

Tony32.jpg

Tony33.jpg
 
Update:
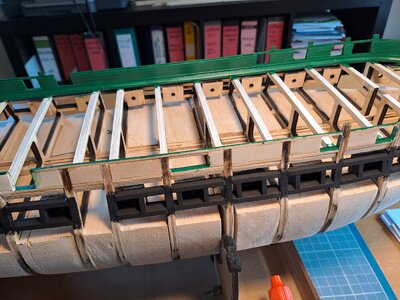
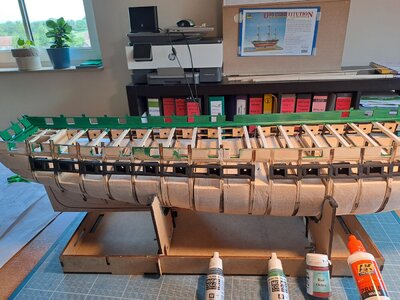
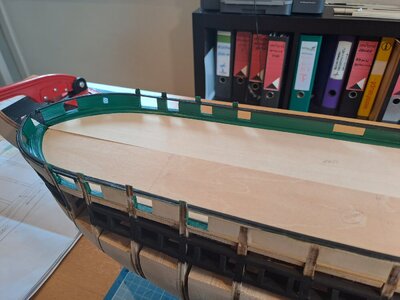
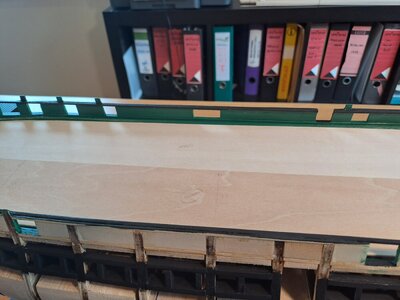
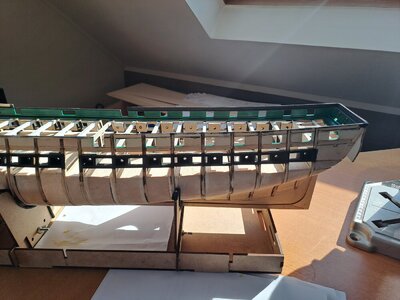
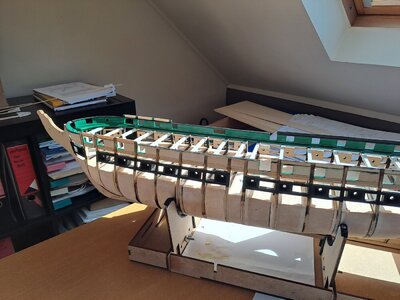
Installation of the inner main rail, and also planked and painted the part between main rail and topgalant.
I fixed also the Transom extension because I want to start with the outside part, and therefore Transom should be in place.
But before the planking, I have to figure aout how to make the extension between bulkhead F and E: Tony do you have a sugestion?

Tony36.jpg

Tony37.jpg

Tony38.jpg

Tony39.jpg

Tony40.jpg
 
Tony,

very smart! In the future I will wait for your ideas....

Now also an update from me.
First the most important: answer to your question about paint choice:

For me it is important that the paint has good coverage, because I don't always apply a primer first. Given this, I would like to emphasize the wood structure as much as possible. So the more layers of paint (including primer) the fewer the accents.

I have had the best experience with the Vallejo brand: available almost everywhere and with a large color palette.

But, if you want a special color specifically for sailing ships, I can recommend "Admiralty paint" from Jo Tika. They have the beautiful red ocher color for the guns .... but are twice as expensive as the rest for the same quality.

But I think the most important thing is to paint certain parts in time and not wait until everything is put together.
That is why I already painted the interior planking (first layer still needs to be sanded) and when everything is dry I will apply the pre-painted inboard strip.

View attachment 390125

View attachment 390126

View attachment 390127

View attachment 390128
Thanks for the paint advice I've never had to paint a wooden model before. Please don't wait for me you're going at twice my speed.
 
Update:
Installation of the inner main rail, and also planked and painted the part between main rail and topgalant.
I fixed also the Transom extension because I want to start with the outside part, and therefore Transom should be in place.
But before the planking, I have to figure aout how to make the extension between bulkhead F and E: Tony do you have a sugestion?

View attachment 390365

View attachment 390366

View attachment 390367

View attachment 390368


View attachment 390369
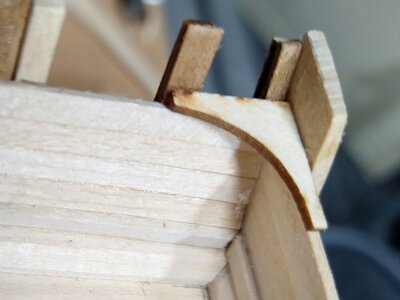
Are you referring to this part
IMG_20230820_100507.jpg
If so there is a single piece main rail from bulkheads E to K (note cutout for gangway) and another single piece topgalant rail from rail board (between F&E)and A. The three part continuation of the main rail starts from E to B.
Hope this helps if not please let me know.
Tony
 
Thanks for the paint advice I've never had to paint a wooden model before. Please don't wait for me you're going at twice my speed.
Dear Tony,

I don't think I work twice as fast as you, but maybe more hours in certain periods.....
Haste and haste is seldom good. Take last weekend: it is 8 am here on Monday morning. Couldn't do anything last weekend.
So I hope you keep posting your realization along with me. Your work is really refined and inspiring for everyone... Looking forward to it.

The next few days I'm going to plank the part above the waterway, so the outside to the top gallant rail. :)
 
Hallo Tony,

It's extremely hot outside today (+30°celcius) and decided to continue a little bit.
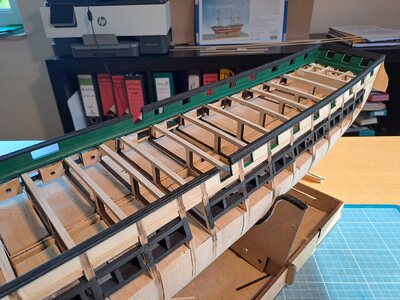
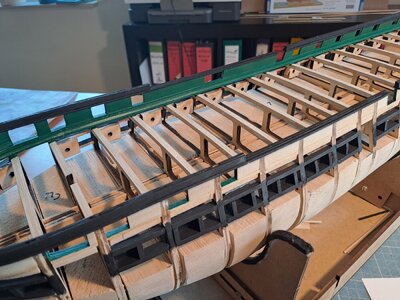
As said, I planked the outside of the Hull between the main rail and the topgalant.

Went verry smoothly:mad: :
Unfortunately during the gluing a strip of 3/64 x 3/32 was broken... but not a big deal.... had to make a small correction but still warned about the remaining planking.

And before everyone thinks I'm crazy...no...I only painted the part that is difficult to access later...the rest of the planks have to wait...

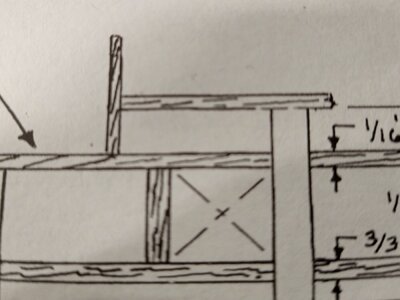
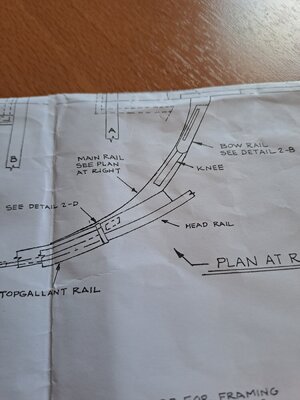
PS concerning the question: I mentioned the bow part...not very clear but wil wait with this part: see plan

I als wil start with the planking of the transom part...wil be a challenge.

Tony-question.jpg

Tony45.jpg

Tony46.jpg
 
Back
Top