Thanks, Heinrich. But scale is ‘relative‘. In 1:36 you can double the details on the details ….I cannot even imagine attempting that level of detail at 1:72 scale. 1:36, here we come!
Regards, Peter
 |
As a way to introduce our brass coins to the community, we will raffle off a free coin during the month of August. Follow link ABOVE for instructions for entering. |
 |
 |
The beloved Ships in Scale Magazine is back and charting a new course for 2026! Discover new skills, new techniques, and new inspirations in every issue. NOTE THAT OUR FIRST ISSUE WILL BE JAN/FEB 2026 |
 |
Thanks, Heinrich. But scale is ‘relative‘. In 1:36 you can double the details on the details ….I cannot even imagine attempting that level of detail at 1:72 scale. 1:36, here we come!

I know, but you weren't supposed to say that!Thanks, Heinrich. But scale is ‘relative‘. In 1:36 you can double the details on the details ….. Look to the 1:24 Drifter of Stephan @Stevedownunder: even more details. So, it’s a ‘sliding scale’.
Regards, Peter
 At 1:36 scale I might just have a chance of executing the details in 1:72 scale - not add more!

It's more like a slippery slope...So, it’s a ‘sliding scale’.

HAR! The older I get the more I "execute" details in any scale.I know, but you weren't supposed to say that!At 1:36 scale I might just have a chance of executing the details in 1:72 scale - not add more!


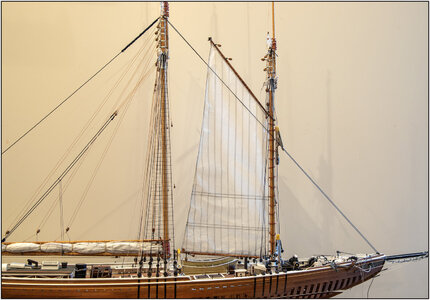

Thanks, Johan.Exemplary work again, Peter.
I especially enjoy the boom details. As to furling sails, personally I am off the opinion that a ship without or with furled sails is like a propellor aircraft without propellors, but... not my shipyard, not my decision. And also with sails furled this build is still appealing.
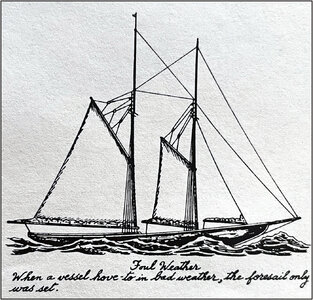

My two cents: that will definitely enhance your model!Thanks, Johan.
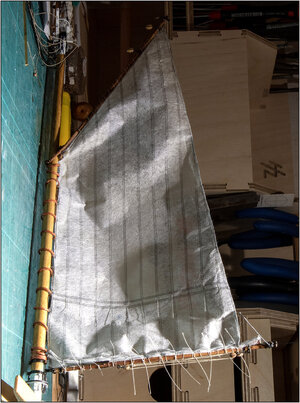
Now that I look at it some more time, I'm starting to think about rigging this sail so definitively. As a kind of storm sail ……
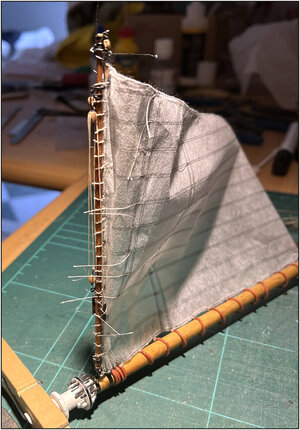
This sail doesn't obscure much view and this way I can show better what kind of material I used and how.
Then I still have to add some reef band.
Regards, Peter
Thanks, Heinrich. A new challenge and just adjust the plans. If it is within the possibilities, I am flexible and it gives the model more 'watching fun'.Very interesting permutations to consider, Peter. Whichever option you choose to go for, previous experience has shown that it will be spectacular.
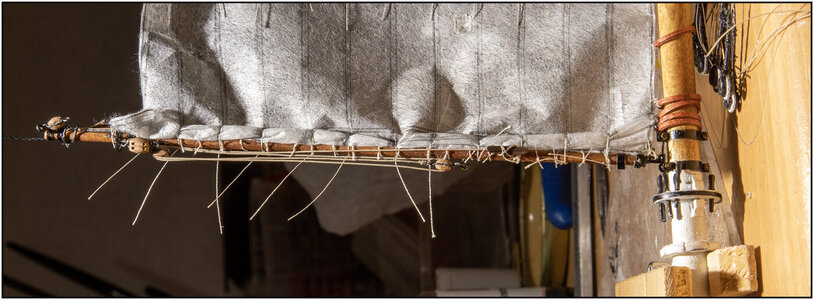

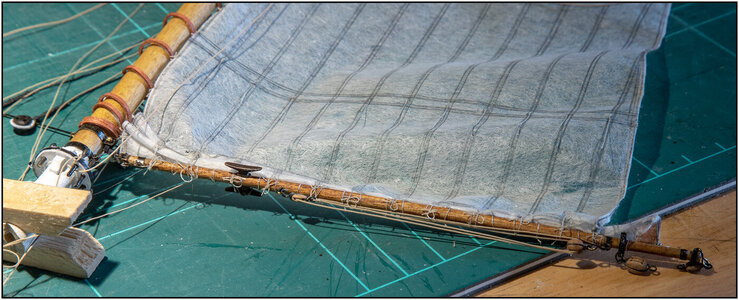

A very nice personal touch to the reef lines.While applying as many lines as possible to the still loose foremast, I noticed that the temporarily secured reefing lines became loose. That's why they are now permanently tied:
View attachment 356518
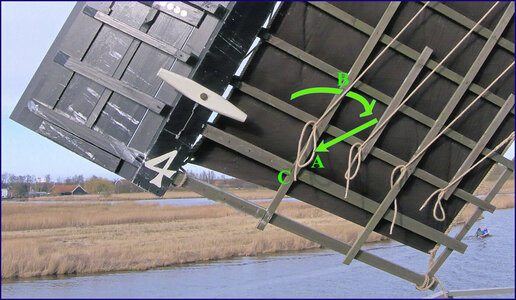
Then I thought, I can do that in the way I used on the windmill to 'tie' the 3 'reef lines' (zwichtlijnen) of the sail to the fencing (hekwerk) of the wings (wieken):
View attachment 356519
You pass the loop A at position B from left to right between the rope and the wood. Then pull the loop down by pulling A and C at the same time to the corner of the horizontal and vertical batten. The tension on the line holds the loop there.
If the line has to be loosened (quickly), you only have to pull at the end C and the 'knot'/loop will loosen automatically.
On my model, I threaded both ends between the sail and the loop around the sail and pulled down to the side of the boom. You tuck away loose longer ends so neatly.
PS: The knots of course fixed with a tip of diluted wood glue.
Regards, Peter


Such a
A very nice personal touch to the reef lines.
Thanks buddies. ‘Oude liefde roest niet!’ (Old love doesn’t rust.)Looks very nice Peter
Hats off as they say here

Outstanding Peter. Cheers JJ..While applying as many lines as possible to the still loose foremast, I noticed that the temporarily secured reefing lines became loose. That's why they are now permanently tied:
View attachment 356518
Then I thought, I can do that in the way I used on the windmill to 'tie' the 3 'reef lines' (zwichtlijnen) of the sail to the fencing (hekwerk) of the wings (wieken):
View attachment 356519
You pass the loop A at position B from left to right between the rope and the wood. Then pull the loop down by pulling A and C at the same time to the corner of the horizontal and vertical batten. The tension on the line holds the loop there.
If the line has to be loosened (quickly), you only have to pull at the end C and the 'knot'/loop will loosen automatically.
On my model, I threaded both ends between the sail and the loop around the sail and pulled down to the side of the boom. You tuck away loose longer ends so neatly.
PS: The knots of course fixed with a tip of diluted wood glue.
Regards, Peter

I had to look a couple of times,though, before understanding how that knot works...Such a
A very nice personal touch to the reef lines.

This leads you into treacherous waters, my friend. Before you know it, you'll be over your ears into customization of your build and there's no way out of it.I'm getting some good ideas not to mention instruction.

