Nice adding, Henk. Thanxs.The music is missing Peter
Craftsmanship is Mastery
(Without advertising )
Good Job
A while ago I heard that music on the radio again. Even then I thought: I should use the image.
Regards, Peter
 |
As a way to introduce our brass coins to the community, we will raffle off a free coin during the month of August. Follow link ABOVE for instructions for entering. |
 |
 |
The beloved Ships in Scale Magazine is back and charting a new course for 2026! Discover new skills, new techniques, and new inspirations in every issue. NOTE THAT OUR FIRST ISSUE WILL BE JAN/FEB 2026 |
 |
Nice adding, Henk. Thanxs.The music is missing Peter
Craftsmanship is Mastery
(Without advertising )
Good Job
Breathtakingly beautiful music...
Composed by Clous van Mechelen.
Nice there is multiple choise in music.not my taste of music, it makes me nervous. I'm more of Ramstein

Which shows again: "zoveel hoofden, zoveel zinnen". (Everyone his own).not my taste of music, it makes me nervous. I'm more of Ramstein
You are really getting into the spirits of this schooner. . . just don't tipple too deep!Then you slept a night on it .....
You have written that the space between the 2 floors is for storage .......
Then you should also be able to store. Getting started again:
View attachment 271812
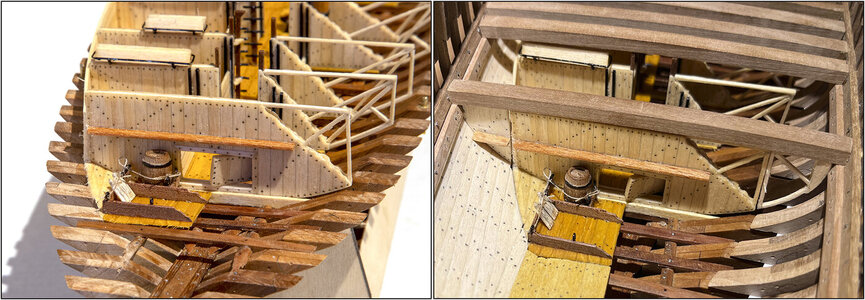
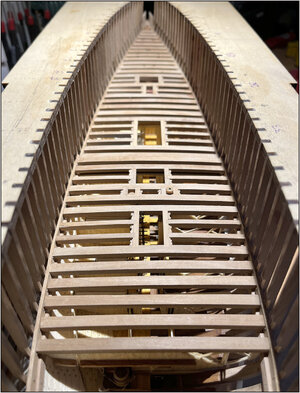
Some bulkheads against which goods can be stored. With lashing eyes so that everything does not slide back and forth.
The hatch on this side now also has nails.
Yes, that barrel can go through the hole on its side.
Most of the photos I took without a background. Then you don't have much reference to the size of the model you are building.
I'm almost done for the bottom part. I build the Cabin in the upper part.
To conclude this part:
View attachment 271813
Inspired by the old advertisements of a Dutch beer brand from the east of the country. At the end, it showed the craftsman with his tools.
Regards, Peter
 Rich
RichRegarding the music I am sailing on that tack but won't claim right of way passing rights. Follow your most favorable wind to arrive at the port of destination. RichYou are really getting into the spirits of this schooner. . . just don't tipple too deep!She is really looking great with your passion for small details which you do so well.
Rich
Thanxs Dean. The work is being moved. It's still winter here, so it's nice to still work inside the hull.Looks great! This chapter is done, and now for the upper half!
Thanks Rich. Much appreciated!You are really getting into the spirits of this schooner. . . just don't tipple too deep!She is really looking great with your passion for small details which you do so well.
Rich
Sure Rich. With the BN, every wind direction is fine.Regarding the music I am sailing on that tack but won't claim right of way passing rights. Follow your most favorable wind to arrive at the port of destination. Rich


Thanxs Stephan. I use the same picture for both: max 2000 pix wide with the less compression. No idea whether the Dutch forum resized them.The pictures here are always looking better then on the other forum. It looks great.

Just looking very, very crisp. My compliments.The theory and practice:
After cutting off the ears (ala Van Gogh) and finally placing the wall and ears in the hull, I additionally applied the boards to the outside of the FishHolds. They ended on the outside of the last wall. And so it became slightly wider and the ear no longer slides past it.
Then something has to be sanded off the ear.
It would also be nice if the storage shelves didn't get in the way when putting the two parts together.
That turned out to be just right:
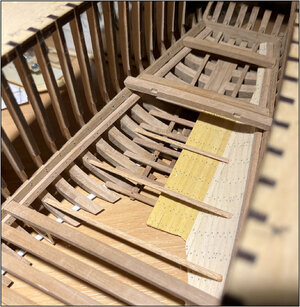
View attachment 271968
Both stages just shopped side by side.
The deck also closed again with beams 38 and 39.
View attachment 271969
Then bars 1 to 40 are also a continuous whole.
regards, Peter
Thanxs Johan. It is literally and figuratively working on the edges.Just looking very, very crisp. My compliments.


It is mind boggling to see how you have expotentially expanded the detail and build complexity of your BN so well in precision. Your example keeps the carrot before my nose to improve from the present. RichIndicative the first 3 floor beams for the cabin have been laid.
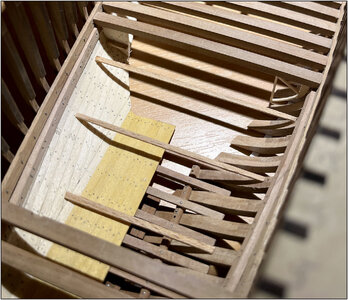
View attachment 272054
I am partly dependent on the design of YQ. Particularly at the rear of the opening in the upper deck beams. That is why beam 49 has been added. The 2 longitudinal beams will be placed in the 2 recesses. That seems to match up quite nicely.
From the back side:
View attachment 272055
I can now make the bearing beam on both sides under the deck beams to size. They must have a nice flow, because there is a lot running obliquely and round. And the other floor beams.
Regards, Peter
Great work PeterThe theory and practice:
After cutting off the ears (ala Van Gogh) and finally placing the wall and ears in the hull, I additionally applied the boards to the outside of the FishHolds. They ended on the outside of the last wall. And so it became slightly wider and the ear no longer slides past it.
Then something has to be sanded off the ear.
It would also be nice if the storage shelves didn't get in the way when putting the two parts together.
That turned out to be just right:
View attachment 271968
Both stages just shopped side by side.
The deck also closed again with beams 38 and 39.
View attachment 271969
Then bars 1 to 40 are also a continuous whole.
regards, Peter

Deck beams look great Peter! I know how much work it is to get all the joints to fit well and be flush! Excellent job!The theory and practice:
After cutting off the ears (ala Van Gogh) and finally placing the wall and ears in the hull, I additionally applied the boards to the outside of the FishHolds. They ended on the outside of the last wall. And so it became slightly wider and the ear no longer slides past it.
Then something has to be sanded off the ear.
It would also be nice if the storage shelves didn't get in the way when putting the two parts together.
That turned out to be just right:
View attachment 271968
Both stages just shopped side by side.
The deck also closed again with beams 38 and 39.
View attachment 271969
Then bars 1 to 40 are also a continuous whole.
regards, Peter


Hello Peter,Indicative the first 3 floor beams for the cabin have been laid.
View attachment 272054
I am partly dependent on the design of YQ. Particularly at the rear of the opening in the upper deck beams. That is why beam 49 has been added. The 2 longitudinal beams will be placed in the 2 recesses. That seems to match up quite nicely.
From the back side:
View attachment 272055
I can now make the bearing beam on both sides under the deck beams to size. They must have a nice flow, because there is a lot running obliquely and round. And the other floor beams.
Regards, Peter
