YUANQING BLUENOSE - Peter Voogt [COMPLETED BUILD]

It is mind boggling to see how you have expotentially expanded the detail and build complexity of your BN so well in precision. Your example keeps the carrot before my nose to improve from the present. Rich
Thank you, Rich, for your kind words. I really enjoy your Kyrenia and your interpretations. So, carrots everywhere. :)
Regards, Peter
 
Last edited:
Dear Peter. Each time you post updates I have to go back three posts or so to try and get a continuous line of progress - so rapid is your progress. How you worked all this out in your head before the time, I simply cannot fathom. For sure there are POF kits on the market that offer this kind of construction, but then the kit was designed like this from the word go - you are doing something with this build that was never intended by the manufacturers. And ... you are not just doing it, you are doing it brilliantly! Okay
Thank you very much for your nice words, Heinrich. YQ indeed did not mean this by releasing this kit. I also hope that other builders or newly interested people also notice this. And don't get disappointed if they don't find it in the manual. ;)
I still have a lot of appreciation for YQ's kit. :) I try to work in the direction of the original B with this and I don't find it a problem at all that I occasionally run into differences. That rather stimulates me to find a nice solution. Together with AL-FI and the input of you and others from the SoS I have come a long way.
Regards, Peter
 
Hello Peter,
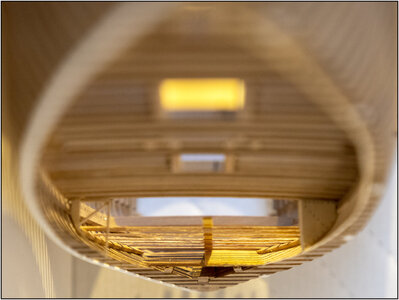
Apart from the jaw-dropping modeling, I have a question regarding the sloped lower deck floor, below the intended main cabin floor. The current configuration shows the sloped lower deck extending aft to a position where there appears to be little practical use of the lower deck. Would it be reasonable to assume that the intended cargo old does not extend further than the second cabin floorbeam? One could also argue the accessibility of that hold, the further aft one gets.
Kind regards,
Johan
Hi Johan. Nice that this step of my build triggers you to think with me. :)
If you look at sailing yachts in general, every possible corner is used to store things. There is a lot of space between the cabin floor and the lower floor. So that's why my interpretation is to do something with that.
I have now stopped at the cut of the lower floor. Maybe I'll pull it through under the cabin floor in the upper part. I've almost got it now and can see if it's still interesting.
Regards, Peter
I can see the need for storage and using every possible corner.
Hatches in the main cabin floor an option, instead of in the fishhold's aft bulkhead?
But, in the end of the day, you're the shipwright...
 
I can see the need for storage and using every possible corner.
Hatches in the main cabin floor an option, instead of in the fishhold's aft bulkhead?
But, in the end of the day, you're the shipwright...
I also thought about a hatch in the cabin. But then you have to lie on your stomach to lift things in and out. And should you keep that hatch free (again less space) or (temporarily) put things on it? And should there be stairs under that hatch? Which takes up space. So, a lot to consider.
I prefer to let the crew crawl partly on their knees through the hatch.
Regards, Peter
I'm afraid ergonomics were not a top priority in those days... I also know that in smaller aircraft the luggage loaders have to crawl around on their knees; no fun, especially not with our heavy holiday suitcases.
Where you plan the hatches depends on the intended use; storage for the captain, or fishhold necessities/crew essentials?
I really can't judge, but my guestimation was that the height of the hold below the main cabin is too shallow to allow the installation of a stair.
 
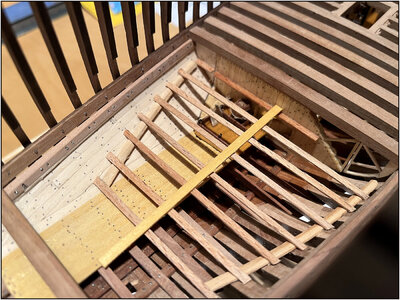
Made both bearing beam. The 'plankenbuiger' came in handy again, because these beam weighers have a double twist. To be able to follow the shape of the trunk, which runs in and up, horizontally:
478 CabinFloor.jpg
For now a dry-fit, together with a floor plank because........

The next step is to make the beam frame with the recess for the cabin. Then I can start designing the cabin.
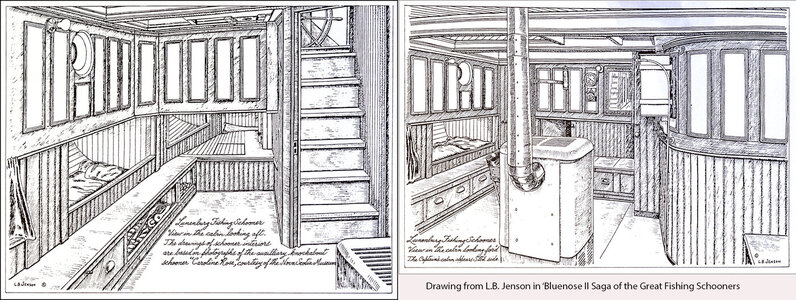
Also here are 2 drawings by J.B. Jenson from The Saga (pages 48 and 49) an inspiration:
479 Cabin.jpg
As mentioned, Jenson based these drawings on photographs of the 'Caroline Rose' that hang in the Nova Scotia Museum.

The left drawing with the view to the rear. You can see:
- the stairs up with the steering wheel in view;
- the upper part of the wall is the structure above the deck with a porthole in view;
- the structure has been extended under the deck towards the hull;
- in the lower right corner just a corner of the stove;
- it has also been extended openly to the rear with presumably just the side of the rudder passage.

The drawing on the right is the view to the front. You can see:
-ditto the upper structure with porthole;
-the stove is positioned fairly centrally;
-on the right, with the curved corner, the Captains Cabin with its own entrance door;
-on the back wall a mirror with slide in the stairs visible.
PS for Johan @RDN1954 : I also see a turning hatch there (behind the stove). That gives high access to the FishHold. I'll have to see if I can still get it registered.

Looking for paper and scissors again to make another model first.
Then I also have to get the parts for the cabin from the kit. In the drawings, the superstructure appears to fall within the deck beams. With a list at the bottom and then the further construction under the deck beams.
If that YQ parts are placed on the beams, I can also opt for continuous (double) inner planking.

I also want to make the structure parts on the deck 'open work'. I already have an idea, but that will be a bit more puzzling.

Anyway, a lot of details that I'm still buzy with.
Regards, Peter
 
PS for Johan @RDN1954 : I also see a turning hatch there (behind the stove). That gives high access to the FishHold. I'll have to see if I can still get it registered.
Yep, spotted that hinged hatch as well. That'll give some access to the fishhold and thus indirectly to the hold beneath the main cabin floor. Job for the "scheepsmaatje"?
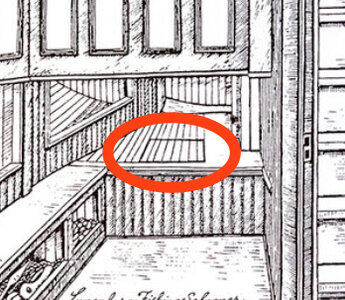
In the left hand picture I might have spotted a second hatch. The floor of the main cabin steps up and just left of the below decks wheel house there might be an access hatch as well.
BED2CEA3-58A1-47CC-954F-9325C41208F5.jpeg
 
Yep, spotted that hinged hatch as well. That'll give some access to the fishhold and thus indirectly to the hold beneath the main cabin floor. Job for the "scheepsmaatje"?
In the left hand picture I might have spotted a second hatch. The floor of the main cabin steps up and just left of the below decks wheel house there might be an access hatch as well.
View attachment 272475
Correct, but know, it are drawings of the Caroline Rose. Left from the circle, you see the planks of the hull in the bunk. So, I thing that square leads ....... to almost nothing. Or some little space under that step. I can imagine that those ships are full of those hatches. Use every hole.
For the BN, everything is (free) interpretation. And that is what I do.
Regards, Peter
The hatch could also simply be for storage. A common practice on boats. ;) They often had hinged lids on the benches that were storage boxes. These held food items, cooking items, etc. However I’m not sure if this practice was used in the BN and to what degree? AL could come into play here. :p
 
Last edited:
The hatch could also simply be for storage. A common practice on boats. ;) They often had hinges lids on the benches that were storage boxes. These held food items, cooking items, etc. However I’m not sure if this practice was used in the BN and to what degree? AL could come into play here. :p
Thanxs, Dean. I think you are right.
A friend of mine was a ship's carpenter. I often helped him when he had to assemble something again and needed extra hands. Very creative how they used and got rid of spaces.
AL-FI tells me that on the old BN every ‘nook and cranny’ was used to store things. But not too many hatches that can fly in all directions in heavy weather. Upright planks and lashing eyes are functional.
The BN-II is a luxury yacht where everything has to be neat.
Regards, Peter
I think we can all agree upon the possibility/fact that wherever space was available on the BN, it would have been used. Every cubic inch was valuable.
As we already have established, we just don't have unambiguous plans of the original BN, only documents like the Saga, so it's AL-FI all over the place, as far as the interior goes; our fantasy, experience, common sense and discussions with others leads us to possible layouts. Which type of hatches were used and where they are located is anyone's guess.
Peter's build shows us a reasonable possibility of how below decks might have looked. And, let's try and not forget, it's Peter's ship and he ís the shipwright...
 
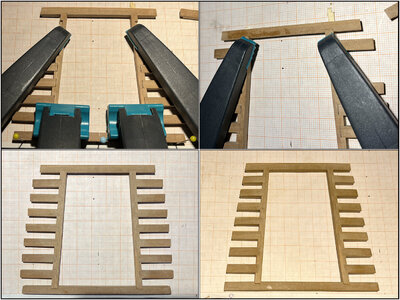
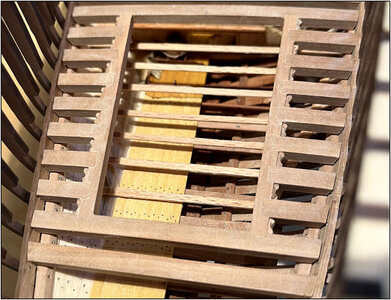
Before I can design the MainCabin, first assembled the frame with beams 41 to 49 and 2 longitudinal beams 60:
481 41-49.jpg
2 whole beams, 2 longitudinal beams and 2x8 small cross beams. That's 18 custom lip connections.
First the beams 41 and 49 custom made between the Clamps
This time I used mm paper for assembling and then gluing it together to get everything symmetrical and straight.
After gluing the small beams, let everything dry and then sand it to size. Fitting, sanding, fitting, sanding etc etc etc.

Also with this frame the double knees are applied equally.
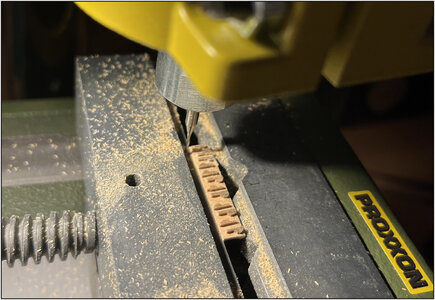
I was able to get my new drill / mill right away. To use column and cross table:
Not for Thanksgiving here in the Netherland, not for Black-Fryday-Week, not the pre-Christmas-sail. Just made a nice deal with a German seller.
The Proxxon drill BFW 40/E and the drill stand BFB 2000:
View attachment 271766
A big difference with the Dremel. And now I can install the crosstabel KT 150 in a stable way as it should be.
Regards, Peter
482 DoubleKnees.jpg
As mentioned before: 2x5 mm slats sawn from the waste planks of the deck beams. The upper knees are milled out at half thickness.
Then cut and continue editing by hand.

After 16x filing and sanding this came about:
483 DoubleKnees.jpg

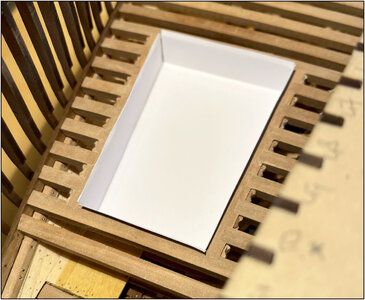
Now I could take the 1st step for the Cabin. Made a mold from 120gr paper:
484 Cabin.jpg
The walls protrude slightly above it. The white floor will be removed when I have finished customizing the walls.

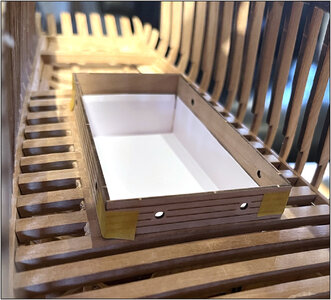
From the YQ kit the 4 walls of the Cabin secured with tape and placed around the raised edges:
485 Cabin.jpg

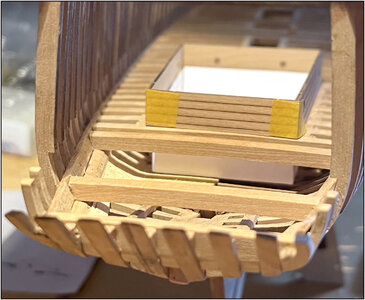
The walls must follow the deck curve at the bottom:
486 Cabin.jpg
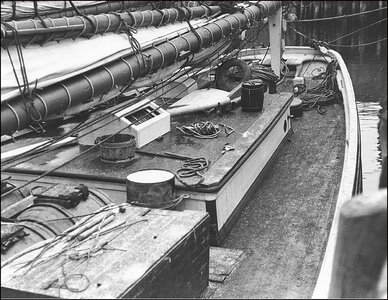
According to this old photo the roof is quite flat on it:
487 Cabin.jpg
But I think I'm going to give it a bit rounding..
A few 1/4 round corner profiles and some moldings. But that's for later.
First let's get started on connecting the top and bottom wall.
Then the further disign.
Regards, Peter
 
Last edited:
Back
Top