-

Win a Free Custom Engraved Brass Coin!!!
As a way to introduce our brass coins to the community, we will raffle off a free coin during the month of August. Follow link ABOVE for instructions for entering.
You are using an out of date browser. It may not display this or other websites correctly.
You should upgrade or use an alternative browser.
You should upgrade or use an alternative browser.
Bluenose II Build (Artesania Latina) 1:75 by Nomad [Completed Build]
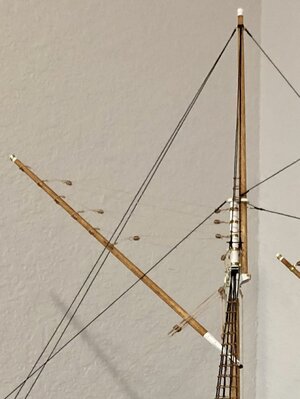
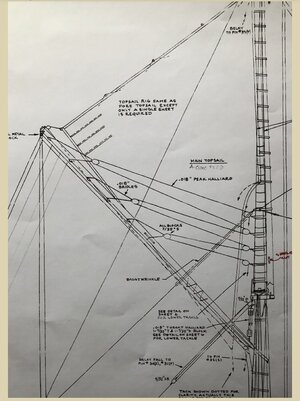
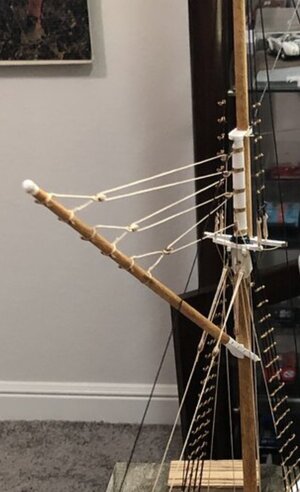
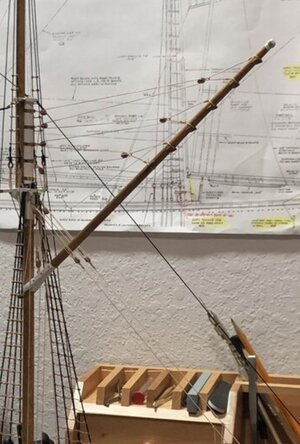
Nope, never a chance of me changing anything now Dean! The AL specs are slightly different to the photos above, which I've built to, but I think the concepts are quite similarThese pics may be clearer…
View attachment 295385View attachment 295383View attachment 295384
I don’t know that it would be worth changing it now, but there is a line to lift the gaff, and the lines shown that open the sail.
I understand completely, keep doing what you’re doing. It will look beautiful regardless of the number of pulleys, etc.Nope, never a chance of me changing anything now Dean! The AL specs are slightly different to the photos above, which I've built to, but I think the concepts are quite similar
Looking good MarkI have now installed the mainsail on my ship. This was a delicate and tricky bit of work that required steady hands and all sorts of patience. I attached the sail to the mainmast, boom and gaff with far more rings than were supplied in the kit, which in my mind made it look more to scale and also gave the mainsail, which was probably a bit bigger than it should have been, a better trim.
View attachment 295362
The rigging of the main gaff was probably the trickiest of all, and made more complicated by the position of some of the blocks which simply did not work. I was obliged to relocate some blocks higher up the mast, and in one instance change the order of the halyards completely.
View attachment 295363
I attached all the mainsail rigging quite loosely to start with, and once the sail was attached to the spars I slowly tightened all the ropes to achieve a uniform tension and to get as much surface area out of the sail as possible.
View attachment 295364
Belaying the ropes to their respective tie-offs took a bit of practice, and patience, and it is amazing how many things your hands will drop, displace or simply knock over when all you want to do is tie a simple knot on a belaying pin without losing tension in the rigging
View attachment 295365

What a job, Mark. Well done!I have now installed the mainsail on my ship. This was a delicate and tricky bit of work that required steady hands and all sorts of patience. I attached the sail to the mainmast, boom and gaff with far more rings than were supplied in the kit, which in my mind made it look more to scale and also gave the mainsail, which was probably a bit bigger than it should have been, a better trim.
View attachment 295362
The rigging of the main gaff was probably the trickiest of all, and made more complicated by the position of some of the blocks which simply did not work. I was obliged to relocate some blocks higher up the mast, and in one instance change the order of the halyards completely.
View attachment 295363
I attached all the mainsail rigging quite loosely to start with, and once the sail was attached to the spars I slowly tightened all the ropes to achieve a uniform tension and to get as much surface area out of the sail as possible.
View attachment 295364
Belaying the ropes to their respective tie-offs took a bit of practice, and patience, and it is amazing how many things your hands will drop, displace or simply knock over when all you want to do is tie a simple knot on a belaying pin without losing tension in the rigging
View attachment 295365
I can imagine that sometimes you needed a extra hand and otherwise your fingers were in the way again. A good exercise for tweezing skills.
Perhaps after setting up some more sails, you will have the courage to change the main sail like Dean shows.
Regards, Peter
- Joined
- Sep 3, 2021
- Messages
- 5,146
- Points
- 738

Are you sure? Winter is coming to Down Under and if it's going to be anything like the one we had over here, it's going to be a miserable one; cold wet and windy. So, if you don't have a follow-up project waiting for you....Nope, never a chance of me changing anything now Dean! The AL specs are slightly different to the photos above, which I've built to, but I think the concepts are quite similar
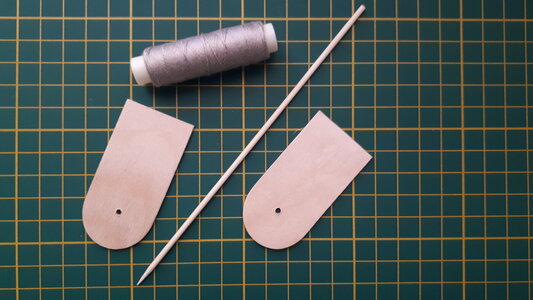
The kit instructions called for a couple of coils of rope to be attached to belaying pins on the fife rail. No problem, I thought, until I tried to create a coil of rope using .15mm raw thread by hand. So, another little jig required. This one was very rudimentary, just two flat boards punctured with holes to support a dowel, in this instance a thin bamboo skewer.
The process is very simple. Insert the dowel through the holes and knot the thread to the dowel at a point between the boards.
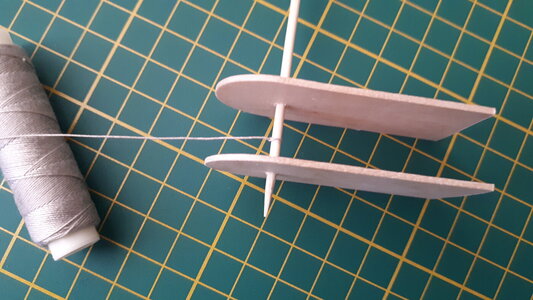
Push the boards towards each other and wind the thread continously around the dowel between the the two boards.
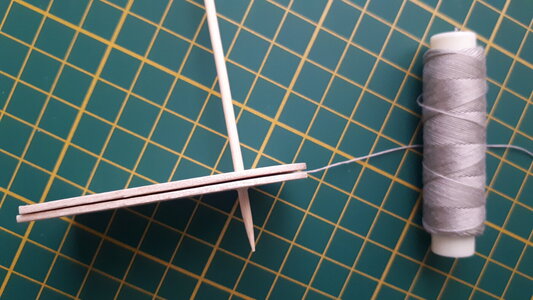
Pull the boards apart and carefully remove the coiled rope from the dowel.
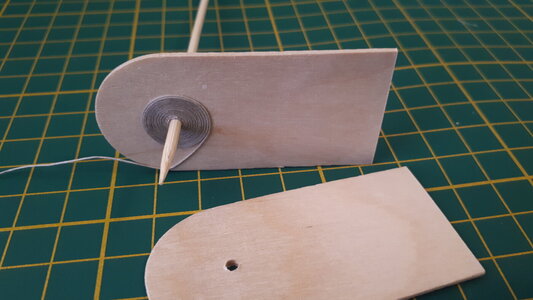
Et voilà !
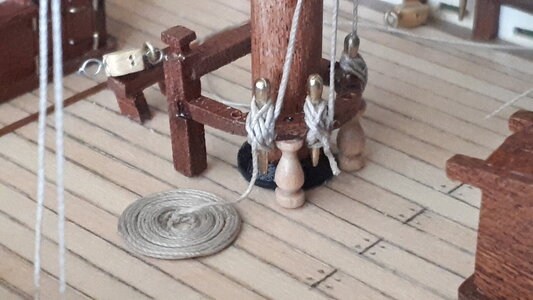

The process is very simple. Insert the dowel through the holes and knot the thread to the dowel at a point between the boards.

Push the boards towards each other and wind the thread continously around the dowel between the the two boards.

Pull the boards apart and carefully remove the coiled rope from the dowel.

Et voilà !

Last edited:
Hello Mark. That is ingenious and the coil is excellent. I will remember this.The kit instructions called for a couple of coils of rope to be attached to belaying pins on the fife rail. No problem, I thought, until I tried to create a coil of rope using .15mm raw thread by hand. So, another little jig required. This one was very rudimentary, just two flat boards punctured with holes to support a dowel, in this instance a thin bamboo skewer.
View attachment 295989
The process is very simple. Insert the dowel through the holes and knot the thread to the dowel at a point between the boards.
View attachment 295990
Push the boards towards each other and wind the thread continously around the dowel between the the two boards.
View attachment 295991
Pull the boards apart and carefully remove the coiled rope from the dowel.
View attachment 295992
Et voilà !
View attachment 295993

Model building life can be so simple and easy.The kit instructions called for a couple of coils of rope to be attached to belaying pins on the fife rail. No problem, I thought, until I tried to create a coil of rope using .15mm raw thread by hand. So, another little jig required. This one was very rudimentary, just two flat boards punctured with holes to support a dowel, in this instance a thin bamboo skewer.
View attachment 295989
The process is very simple. Insert the dowel through the holes and knot the thread to the dowel at a point between the boards.
View attachment 295990
Push the boards towards each other and wind the thread continously around the dowel between the the two boards.
View attachment 295991
Pull the boards apart and carefully remove the coiled rope from the dowel.
View attachment 295992
Et voilà !
View attachment 295993
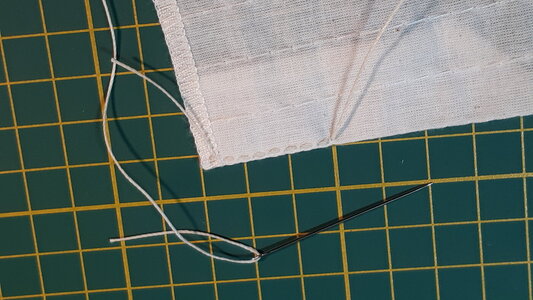
My ship has sails! I found this to be one of the more challenging tasks of this Bluenose II model, but I am glad that I saw it through to the end, however flawed, as it does give the ship something of a wow factor. It didn't help that at least three of the pre-cut sails were the wrong size, too big, and there was quite a bit of the ol' scissors, needle and thread to get things into some kind of order again.
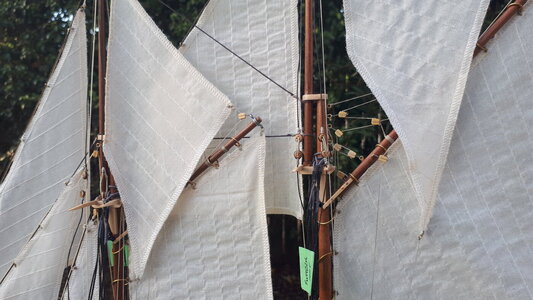
Yet even with the sails more or less the correct size, I was still required to move a few blocks and eyebolts about in order to bend the sails to the masts, booms and gaffs with some degree of accuracy. The discerning eye will quickly notice the irregularities in this close-up, but there were plenty of compromises to be made with this AL kit and, overall, I am quite satisfied with the outcome
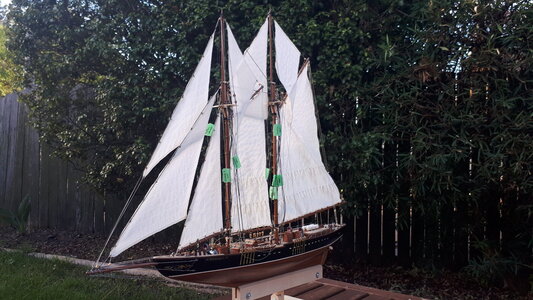
So that's the sails done and dusted. Just the lower, upper and futtock shrouds and a few other bits and bobs to go now. I'm starting to see light at the end of the bowsprit now

Yet even with the sails more or less the correct size, I was still required to move a few blocks and eyebolts about in order to bend the sails to the masts, booms and gaffs with some degree of accuracy. The discerning eye will quickly notice the irregularities in this close-up, but there were plenty of compromises to be made with this AL kit and, overall, I am quite satisfied with the outcome


So that's the sails done and dusted. Just the lower, upper and futtock shrouds and a few other bits and bobs to go now. I'm starting to see light at the end of the bowsprit now

- Joined
- Oct 17, 2020
- Messages
- 1,687
- Points
- 488

Good morning Nomade, one way to appreciate the models for their complexity of details is without the sails, which are never beautiful for the model itself, too difficult to perform, this is my opinionMy ship has sails! I found this to be one of the more challenging tasks of this Bluenose II model, but I am glad that I saw it through to the end, however flawed, as it does give the ship something of a wow factor. It didn't help that at least three of the pre-cut sails were the wrong size, too big, and there was quite a bit of the ol' scissors, needle and thread to get things into some kind of order again.
View attachment 297827
Yet even with the sails more or less the correct size, I was still required to move a few blocks and eyebolts about in order to bend the sails to the masts, booms and gaffs with some degree of accuracy. The discerning eye will quickly notice the irregularities in this close-up, but there were plenty of compromises to be made with this AL kit and, overall, I am quite satisfied with the outcome
View attachment 297828
So that's the sails done and dusted. Just the lower, upper and futtock shrouds and a few other bits and bobs to go now. I'm starting to see light at the end of the bowsprit now
View attachment 297829
- Joined
- Sep 3, 2021
- Messages
- 5,146
- Points
- 738

Hey Frank, although I appreciate where you're coming from with your reply, a sailing schooner without sails is to me like an aircraft without wings. Having said that, my Admiral is pushing towards a "no-sail" Bluenose for my current build...Good morning Nomade, one way to appreciate the models for their complexity of details is without the sails, which are never beautiful for the model itself, too difficult to perform, this is my opinion
- Joined
- Oct 17, 2020
- Messages
- 1,687
- Points
- 488

I allowed myself this to better appreciate all the maneuvers and details that are the heart of the model, Forgive meHey Frank, although I appreciate where you're coming from with your reply, a sailing schooner without sails is to me like an aircraft without wings. Having said that, my Admiral is pushing towards a "no-sail" Bluenose for my current build...
Hello Frank, there appears to be a lot of debate about whether to add sails or not. After weighing up many, many opinions the general consensus seems to be: yes for fore-and-aft ships, no for square-rigged ships. Seems reasonable. Either way, I'm really glad I did add them. For one I learnt a great from the experience, and two, the Bluenose really did look quite naked without them. My next build is square-rigged so I will probably forego the sailsGood morning Nomade, one way to appreciate the models for their complexity of details is without the sails, which are never beautiful for the model itself, too difficult to perform, this is my opinion
Two schools of thought neither definite- It is in the hands of the modeler for sure. My Victory will have no sails (probably because I am too fearful to make them). If I built the Bluenose I certainly would be inclined to go for sails. Personal preference is always king. CheersHey Frank, although I appreciate where you're coming from with your reply, a sailing schooner without sails is to me like an aircraft without wings. Having said that, my Admiral is pushing towards a "no-sail" Bluenose for my current build...
BTW Mark she looks beautiful. Awesome job.My ship has sails! I found this to be one of the more challenging tasks of this Bluenose II model, but I am glad that I saw it through to the end, however flawed, as it does give the ship something of a wow factor. It didn't help that at least three of the pre-cut sails were the wrong size, too big, and there was quite a bit of the ol' scissors, needle and thread to get things into some kind of order again.
View attachment 297827
Yet even with the sails more or less the correct size, I was still required to move a few blocks and eyebolts about in order to bend the sails to the masts, booms and gaffs with some degree of accuracy. The discerning eye will quickly notice the irregularities in this close-up, but there were plenty of compromises to be made with this AL kit and, overall, I am quite satisfied with the outcome
View attachment 297828
So that's the sails done and dusted. Just the lower, upper and futtock shrouds and a few other bits and bobs to go now. I'm starting to see light at the end of the bowsprit now
View attachment 297829
Cheers Grant
- Joined
- Oct 17, 2020
- Messages
- 1,687
- Points
- 488

Good afternoon Grant, my remark on the sails is just to highlightTwo schools of thought neither definite- It is in the hands of the modeler for sure. My Victory will have no sails (probably because I am too fearful to make them). If I built the Bluenose I certainly would be inclined to go for sails. Personal preference is always king. Cheers
and highlight all the work involved in bridging the equipment
- Joined
- Sep 3, 2021
- Messages
- 5,146
- Points
- 738

There's no right or wrong in either point of view, nor is my remark meant to be judgmental.Good afternoon Grant, my remark on the sails is just to highlight
and highlight all the work involved in bridging the equipment
Whether one put on sails, or no sails, or furled sails, it's all up to the shipwright (and, more likely, up to the Admiral). All three options have their own merits.

