Bluenose II Build (Artesania Latina) 1:75 by Nomad [Completed Build]

My ship has sails! I found this to be one of the more challenging tasks of this Bluenose II model, but I am glad that I saw it through to the end, however flawed, as it does give the ship something of a wow factor. It didn't help that at least three of the pre-cut sails were the wrong size, too big, and there was quite a bit of the ol' scissors, needle and thread to get things into some kind of order again.

View attachment 297827

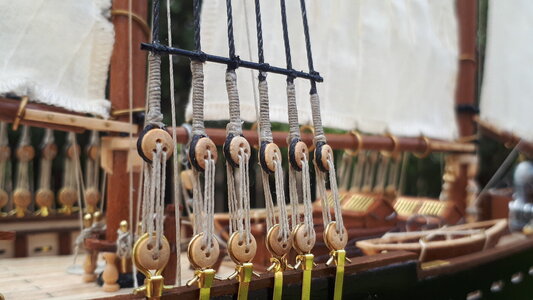
Yet even with the sails more or less the correct size, I was still required to move a few blocks and eyebolts about in order to bend the sails to the masts, booms and gaffs with some degree of accuracy. The discerning eye will quickly notice the irregularities in this close-up, but there were plenty of compromises to be made with this AL kit and, overall, I am quite satisfied with the outcome Thumbsup

View attachment 297828

So that's the sails done and dusted. Just the lower, upper and futtock shrouds and a few other bits and bobs to go now. I'm starting to see light at the end of the bowsprit now :cool:

View attachment 297829
It remains an impressive amount of sail. With a lot of running rope. I'm impressed, Mark.
Regards, Peter
 
Good evening, I just expressed my opinion on the sails but, I do not think I have underestimated the model, I apologize if anyone has resented
 
It remains an impressive amount of sail. With a lot of running rope. I'm impressed, Mark.
Regards, Peter
Thanks Peter! I notice that there aren't too many of the AL Bluenose II builds on this forum, mostly the YQ brand, and I see there are quite vast differences between the two, some of which were pointed out as I went along. It seems the YQ is probably closer in design to the real thing, maybe AL was just being a bit kinder to the novice modeller :p
 
Hey Frank, although I appreciate where you're coming from with your reply, a sailing schooner without sails is to me like an aircraft without wings. Having said that, my Admiral is pushing towards a "no-sail" Bluenose for my current build... :eek:
Ha ha, and we know we have to listen to the admiral, don't we Johan? Otherwise you could be keel-hauled or flogged around the fleet ROTF
 
Hey Frank, although I appreciate where you're coming from with your reply, a sailing schooner without sails is to me like an aircraft without wings. Having said that, my Admiral is pushing towards a "no-sail" Bluenose for my current build... :eek:
Johan, you have one BN with sails already. So maybe one without, will be a nice compliment, especially since it is POF with exposed frames. ;)
 
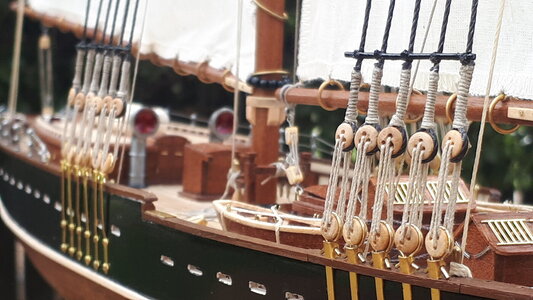
The lower shrouds of the main and foremast are installed by reeving the dead-eyes at the end of each shroud line with the dead-eyes attached to the chainplates. Maintaining an even tension in the ropes seems to be the name of the game here, while at the same time keeping the rows of dead-eyes in as straight a line as possible. There were twenty-two shroud lines in total and they weren't as difficult to install as I first supposed. I had seized the dead-eyes a long while ago when seizing was a new thing for me, and in my enthusiasm made the seized portion a bit longer than it probably needed to be, but I left it as is and was satisfied with the overall look all the same :)

0895_20220328_bluenose_II_build.jpg

The bar running across the top of the seizings is a brass rod painted black, and once lashed in place it provides the entire shroud assembly with a good deal of stability. I started to cement each knot with super glue to start with, but it tended to leave an ungainly residue after drying and I switched to white carpenter glue instead, which did the same job as the CA and also dried to a satisfyingly transparent clear colour.

0900_20220328_bluenose_II_build.jpg
 
The lower shrouds of the main and foremast are installed by reeving the dead-eyes at the end of each shroud line with the dead-eyes attached to the chainplates. Maintaining an even tension in the ropes seems to be the name of the game here, while at the same time keeping the rows of dead-eyes in as straight a line as possible. There were twenty-two shroud lines in total and they weren't as difficult to install as I first supposed. I had seized the dead-eyes a long while ago when seizing was a new thing for me, and in my enthusiasm made the seized portion a bit longer than it probably needed to be, but I left it as is and was satisfied with the overall look all the same :)

View attachment 299149

The bar running across the top of the seizings is a brass rod painted black, and once lashed in place it provides the entire shroud assembly with a good deal of stability. I started to cement each knot with super glue to start with, but it tended to leave an ungainly residue after drying and I switched to white carpenter glue instead, which did the same job as the CA and also dried to a satisfyingly transparent clear colour.

View attachment 299150
Good Morning. Ok..you owned that! Your chains strops, dead eyes and shrouds fit your Bluenose wonderfully. Yep that seizing is a tad long ( you must be the only guy I know who get enthusiastic about seizing ;)) however in my opinion it does not detract from your model at all.Thumbsup Great picture BTW. Cheers Grant
 
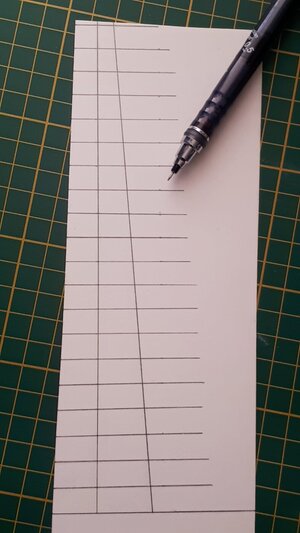
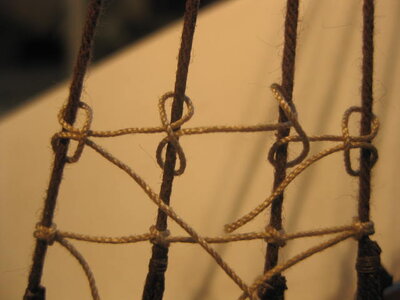
The ratlines are the last big push to get this Bluenose over the line. I left them to the very end as that seemed the logical thing to do, out of the way of all other assemblies such as booms, gaffs and sails. I started off by creating a template to map out the position of each ratline, which in this instance are about 10mm apart.

0905_20220328_bluenose_II_build.jpg

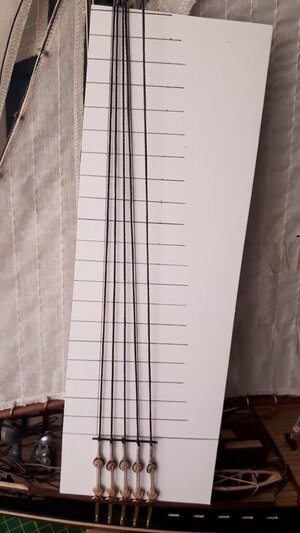
The template is made of light-coloured card, which does wonders for visibilty when used as a backdrop behind the shrouds.

0910_20220328_bluenose_II_build.jpg

Some research taught me that the two ends of a ratline can be connected to the shroud using a 'cow hitch' knot, and the ones in between with 'clove hitch' knots. Out of interest, there is a useful website called Animated Knots that graphically explains a whole variety of knots, and another useful YouTube Video where ratlines are being prepared using these two knot types. I found this picture (below) on the internet which clearly shows the cow and clove hitch knots that I propose to use for this exercise.

0915_20220328_bluenose_II_build.jpg
 
Good Morning. Ok..you owned that! Your chains strops, dead eyes and shrouds fit your Bluenose wonderfully. Yep that seizing is a tad long ( you must be the only guy I know who get enthusiastic about seizing ;)) however in my opinion it does not detract from your model at all.Thumbsup Great picture BTW. Cheers Grant
Ha ha, thanks Grant. No, the enthusiasm died down pretty quickly after seizing a few lines with my then new rope-walk toy, but by then it was too late ROTF
 
Last edited:
Good afternoon. The distance between the fades is 15-16 inches. Translated to 75 scale is 5 mm. You, when compared with the rug, are about 10 mm. It's a lot. Try lifting your leg 80 cm up. Conveniently?
Hmmm, I'm not sure I understand all the maths, but I'm assuming the suggestion is that the ratlines should be spaced closer together? The kit recommends 12mm, which looked a bit too wide, so I settled on 10mm which at least looks 'about right' ;)
 
Hmmm, I'm not sure I understand all the maths, but I'm assuming the suggestion is that the ratlines should be spaced closer together? The kit recommends 12mm, which looked a bit too wide, so I settled on 10mm which at least looks 'about right' ;)
Misspelled. 15-16 inches. 75 scale 5 mm. Yes, the fades should be closer to each other.
 
Back
Top