• Win a Free Custom Engraved Brass Coin!!!
    As a way to introduce our brass coins to the community, we will raffle off a free coin during the month of August. Follow link ABOVE for instructions for entering.

HMS Enterprise 1:160 scale Boxwood - Unicorn Models

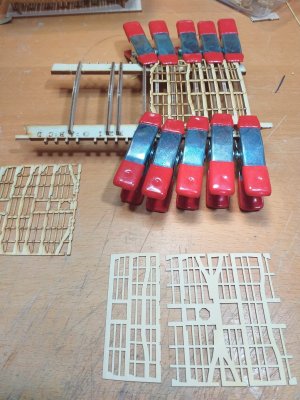
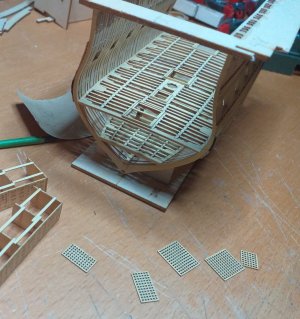
Orlop installed without difficulty. The jig works well. Usually I use PVA, but in this case I just went inside with drops of CA. I forgot to add the gratings, but easy to do next.

I made the 'rooms'. Not really keen on their appearance, but they look OK in the context of the model. I'll hold off of adding them while I ponder whether I could fabricate a better option. I never liked them on the 1:96 either and left them off......................


20251024_210547.jpg

.............................
 
Orlop installed without difficulty. The jig works well. Usually I use PVA, but in this case I just went inside with drops of CA. I forgot to add the gratings, but easy to do next.

I made the 'rooms'. Not really keen on their appearance, but they look OK in the context of the model. I'll hold off of adding them while I ponder whether I could fabricate a better option. I never liked them on the 1:96 either and left them off......................


View attachment 552548

.............................
A nice progress and a steady pace, Richard. But a beautiful finish without any trace of a hurry.
Regards, Peter
 
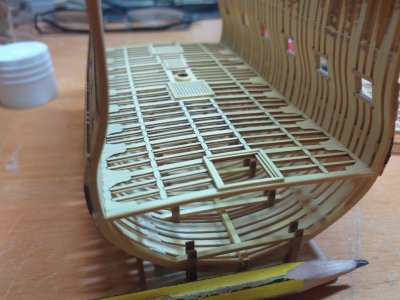
Orlop installed and completed, and now onto the gundeck. I'm assembling it in stages to try to prevent the creaping problem during the orlop assembly. It is much more fragile due to the gaps left at the edges where the additional knees will be installed. I'm also using the jig Tom of all Trades devised for the assembly. Works very well. Thanks Tom.................................
20251025_104645.jpg
 
Orlop completed.

I'm still not convinced the 'sandwiched' deck method is best. I see the benefit, but alignment is very difficult and always leaves a dark line between the two layers. I've tried to disguise it in places, but sometimes it just gets worse. I would have preferred a solid deck moistened with water and clamped in a press/former.

I left some gratings off because the hatches look nice. Gundeck beams are in the process of glueing and I plan to install tomorrow. Following that be able to ascertain the gunport height and begin thinking about remaking the gun carriages to look heavier and a little more authentic...............................


20251025_194115.jpg
 
I'm still not convinced the 'sandwiched' deck method is best. I see the benefit, but alignment is very difficult and always leaves a dark line between the two layers. I've tried to disguise it in places, but sometimes it just gets worse. I would have preferred a solid deck moistened with water and clamped in a press/former.
I see your point, however, since the deck beams are not milled from solid into a curved profile, it is the glue line that helps to maintain the curve of the deck.
 
Hey Richard,

It's amazing how fast you are. Unfortunately, it takes me a bit longer as I'm not quite as fast as you. This looks really great. I was wondering if you could perhaps incorporate the gratings so that it looks as if they are being held open by a stick ... great work ... Thumbsup
 
Hey Richard,

It's amazing how fast you are. Unfortunately, it takes me a bit longer as I'm not quite as fast as you. This looks really great. I was wondering if you could perhaps incorporate the gratings so that it looks as if they are being held open by a stick ... great work ... Thumbsup
Hi Günther,
Thanks. I have the benefit of semi-retirement at present which accelerates my progress. I like the idea of propping up a grating. I'll see how it look later on. If the deck look a bit 'bare' it will add character.

Cheers
 
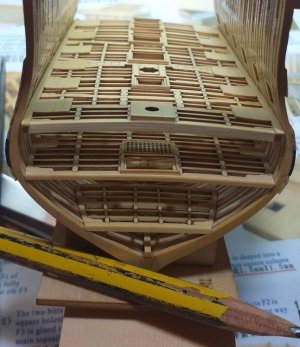
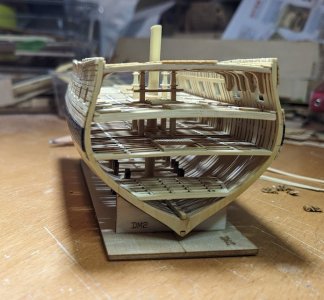
Gundeck pretty much completed.

The included jig works reasonably well for placement. I'm using PVA almost exclusively, which does cause thinner pieces to curl up and require clamping.
At least I am now able to ascertain the gunport height above the deck and start to think about creating the correct pattern carriages.
Gratings yet to be added. If any areas looks a bit empty after the deck fittings are installed, I'll prop up some of the gratings to fill the spaces, as suggested by Gunther.
The keen-eyed among you will notice that I have excluded the room structures (again). I just can't get on with their aesthetic, and will seek an alternative.............


20251027_092206.jpg
 
Hey Richard,

really very nice! I like your way of building this kit. I have to admit, I really like your pear look ... :) Thumbsup
 
That's really looking nice did you put any finish on the wood?
I'm just cutting the gun ports out on mine and built one of the ships boats.

Neil
 
Gundeck pretty much completed.

The included jig works reasonably well for placement. I'm using PVA almost exclusively, which does cause thinner pieces to curl up and require clamping.
At least I am now able to ascertain the gunport height above the deck and start to think about creating the correct pattern carriages.
Gratings yet to be added. If any areas looks a bit empty after the deck fittings are installed, I'll prop up some of the gratings to fill the spaces, as suggested by Gunther.
The keen-eyed among you will notice that I have excluded the room structures (again). I just can't get on with their aesthetic, and will seek an alternative.............


View attachment 553027
Good morning Richard. Yep, you are owning this. Cheers Grant
 
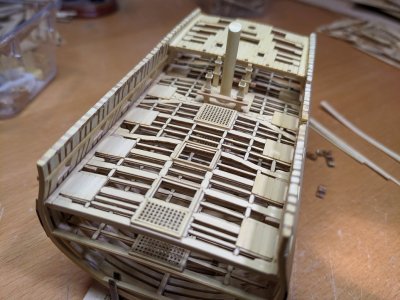
Quarterdeck, or half of it ;), installed, and the berth is cut free. Some of the frames tops, and a sill, fell during that process and had to be cleaned up and reconnected. I hope that they survive the final cutting and filing to height.

The quarterdeck camber varies slightly, Seems a lot to me as it is noticably flatter towards midships. However, it was a challenge getting it this far as all of the 'beams' required a lot of sanding to fit and most are unsupported due to gaps that allow for the insertion of hanging knees.

Drift rail volutes are assembled. I'll leave them to dry at least 24 hrs before shaping as they are quite small, but they will be an attractiveg feature if done correctly.

Bitts were not as bad to shape as I had expected, despite the compound angles, and the included jig worked really well.

The mast is shaped from a square section. I don't have a proper lathe, but had seen others on SOS shaping by hand and gave it a try. It took time but was worth it.....................


1000053095.jpg

1000053099.jpg
 
Back
Top