Donnie's HMS Blandford Cross Section Build: 1/32 Scale [COMPLETED BUILD]

Hi Matus,
Only two had to be made. Each one did in like 3 evenings. Not bad as far as time goes - it's all relative. Most all the time spent is setting up for a cut rather than the cutting.
 
Thanks to all who are tuning in to this build. Well, the rest remains to be seen when I start the frames. I had to order the Micro-Mark Drum Sander which will arrive soon in a few days. So, we will see how I handle the frames. Until then, more work on the Cannons to make the Trunnions, then I am finished with that and can put them away.
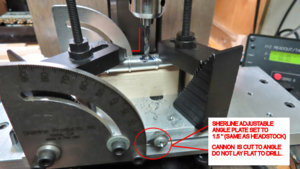
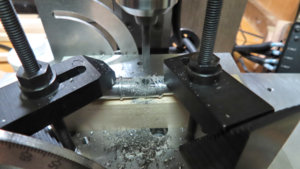
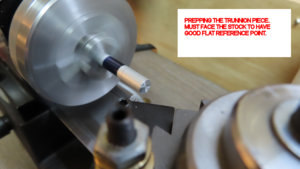
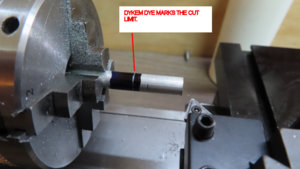
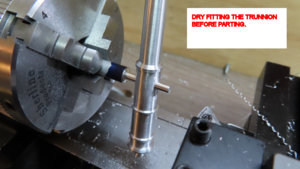
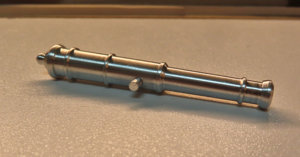
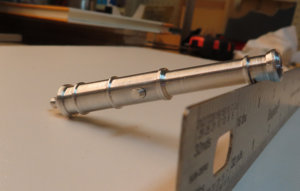
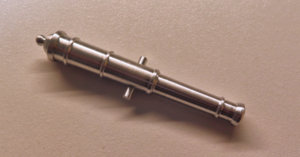
So, since the Cannons were cut to about 1.5 ° (Cannons do have a taper) then it is obvious to drill a hole that is 90 ° to the bore, then I had to use my Adjustable Angle plate and likewise adjust it to 1.5 ° to offset the angle. I used a few triangle squares to eye-ball it as close as I could (once I had the main 1.5 degrees set up). I used a "center drill" that basically "spots" the initial drill and sets up the drilled hole to be completed using the main drill bit. It just so happens that I have a bit that is "to scale", so that worked out nicely. Drill nice and slow as you do not want the torque of the machine to grab the cannon off-center. The black parts are hold-downs and not set too tight as not to mar the finish of the barrels. The Trunnions were made last. Calipers are fine, but making incremental cuts and dry fitting is the best way this time.
As a general rule, it takes more time to "set up" to make a cut than it is to actually make the cut or drill. The drill bit I am using is a "short stub bit" which they are much shorter and hence much truer bit. My "spotting bit" is not shown.

cannon30.jpg

cannon31.jpg

cannon32.jpg

cannon33.jpg

cannon34.jpg

cannon35.jpg

cannon36.jpg

cannon37.jpg
EDIT: The Trunnions were removed as they are not long enough. They will be redone.

 
Last edited:
Hi Donnie,

Excellent work on the cannon! I usually drill the hole for the trunnions before I taper the barrel and take measurements from the center of the hole. I use wood, it is faster with little set-up time, but your guns are a lot more consistent. I need to get a metal lathe.
 
First, the wood is Birch. Supplied by the Lumberyard.
Thank you guys for the compliments. I had a lot of folks to thank here for helping me get started and taking lessons. So, now I finally get down to business. I ordered a Drum Sander from Micro-Mark due to cost and its immediate availability. The review can be seen here. Since I have no previous experience with such machines, I don't know if this is a good one or not. The dust port is in the way as the wood exits out the back. Poor design. Make sure you pass wood many times to get the sander drum kind of broken in. The new drum had a tendency to "dig" into the wood, therefore, making waves in the plank as it passes through. After about 10 or so passes, things started to settle down. Do not expect perfection on this machine. It is what it is.
So, I decided to use a dry glue stick to paste the bottom part of the frames onto the stock. This is as far as I could get in one evening. Not sure why I decided to put all the lower frames onto one board, but this is what came to mind. Maybe it was a sub-conscience decision based on someone else's log I saw.

 
Last edited:
Hallo Donnie,
the start is made .....
Two hints and my 2cents for now:
1) Use rubber cement for gluing the paper on the wood - this can be removed later on much easier than the normal dry glue stick!
I am using Fixo-Gum from Marabi and have very good experience with it, but there are also other products which are similar
rubber-cement-5_p1.jpg

2) Is your final decision already made to use birch for the frames? In order to get an impression, how the frames using birch is looking like, I would make the floor timber ("bottom part"), futtocks and top timber of one frame and would glue one frame. Getting the experience with one frame, you know already something more about, what you have maybe to change with cutting the elements of the next frame.
If you are cutting out all floor timbers out you can not adjust this working step based on experience - maybe you realized, that you can already cut closer to the outside line and leave less "meat" - less meat means also less sanding later on
And you see how the appearance of a frame in birch is
 
I think that I am trying to understand what Uwe is saying. I intend to build one frame at a time. I think my reasoning for the layout that I have for cutting layout is to control the amount of waste. Also, I can focus on how each lower timber sets in the keel. Then move on from there.
I am not used to managing raw wood stock and then the drum sander. Therefore as I am careful to manage each piece of raw stock planks. I have already made my request to the Lumberyard about my decision to use Birch (from some samples that I requested). My cuts using the scroll saw, I will manage to cut outside the blue or red lines making sure I have enough meat as you say. To me it is evident the most critical are the butting joints. Then upon being glued up, then the frame will be taken to the spindle sander. I am not sure if I am explaining it correctly. I hope that I do not make too many of my freinds here "cringe" at my efforts.
 
Hi Donnie,

The butt joints are not load bearing and just need to look decent, the frame gets its strength from overlapping the fore with the aft frame. The butt joints are offset so you have a large surface area making a strong frame. That is why double frames are fast and easy to build. Single frames are a different animal, each joint is a stress point, if the joints are not well made the frame is weak and could fail.

I haven’t seen any of your friends cringe yet lol.
 
the frame gets its strength from overlapping the fore with the aft frame
-- Yes, and thank you for reminding me of this.

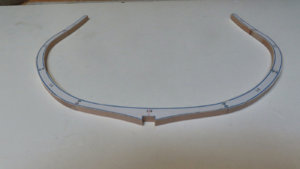
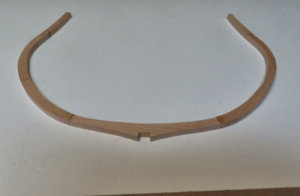
THIS IS JUST A TEST FOR FIRST FUTTOCK. IT WILL NOT BE USED.
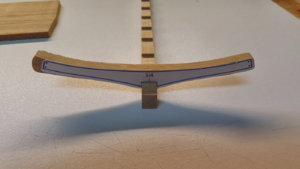
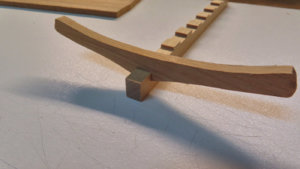
So, - what I have done is cut out one part and left some meat on it. My main trial was the notch that I was concerned about. So, here is the first fitment of the notch and the meat (that is there now), I shall leave alone until this particular frame is glued up. One image just shows the template and all I did was turn the floor piece around to demonstrate the notch fitment. It looks like the waste is really scarce from this view (the top blue line), but I still have about 1mm or so to sand down. Yes, I know --- almost got too close for comfort, but I am not worried about it now.

frames02.jpgframes03.jpg
 
Last edited:
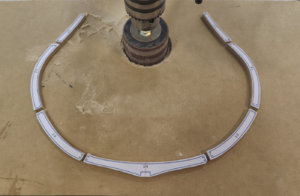
Thank you all for your compliments and encouragement. I now laid out patterns for Frame 1 (one sheet). The preceding set up that I had with all the floor timbers WILL NOT be cut out this way. Therefore, I edited the post with that image and deleted it.

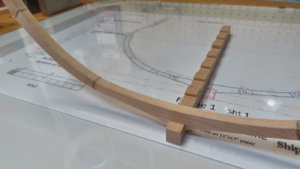
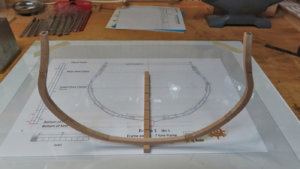
So - what you see here is a little sanding prep. The Keel / Floor notch will be created with the MIll using down-cut End Mill, and then glue-up will be next. I chose some of my Birch stock that has a very tight grain to it. This is slightly over 1 hour to get this done with just taking my time. It is not quite as bad as I thought it was going to be (at least for now). The trick I guess is to get the fore and aft frame keel / Floor Timber notches to line up. I will figure that out later.

Since I now have the Blandford AoTS book, it is helping me with the correct terms.

frames04.jpg
 
Hi Donnie,
If you glue the fore and aft floor timbers together before cutting the notch it saves you some work. The book has great illustrations that will give you a lot of helpful information.
 
Hi Donnie,looking good.Lighter pressure and moving the timber side to side on the table reduces the burning.That is,of course,unless you are after this look.

Kind Regards

Nigel
 
Back
Top