H.M.S. Victory by Caldercraft - Build Log

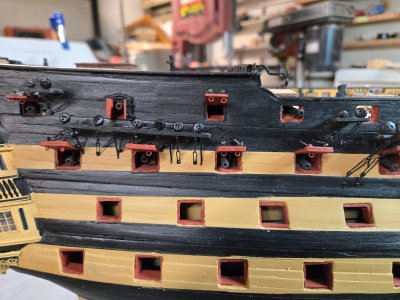
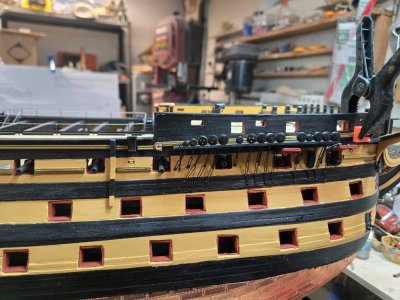
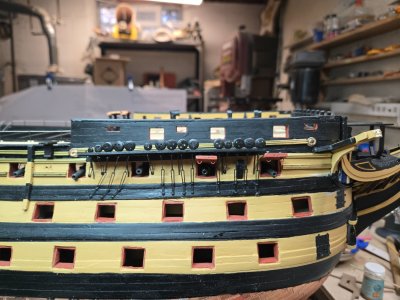
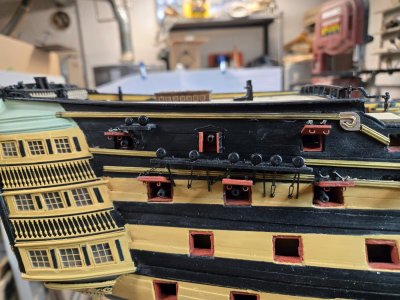
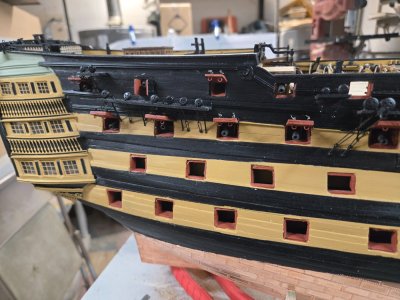
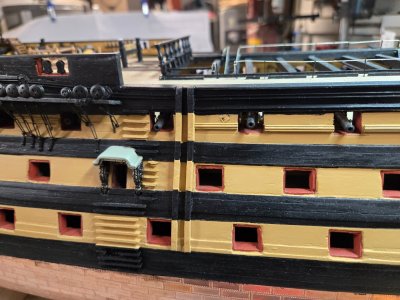
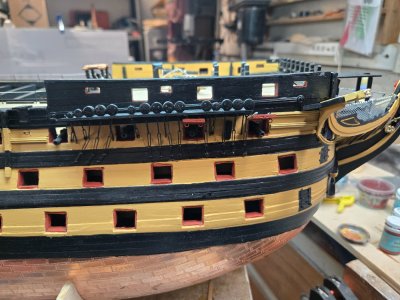
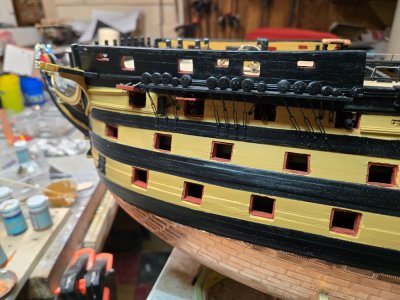
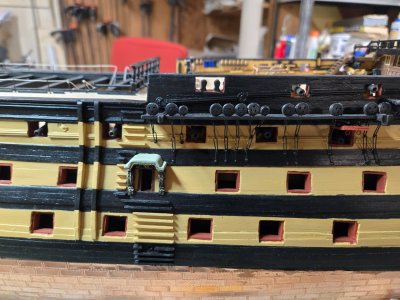
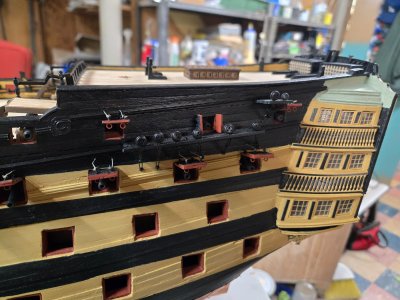
Took a few hours this morning to see if I could try and get one side done. Was determined.

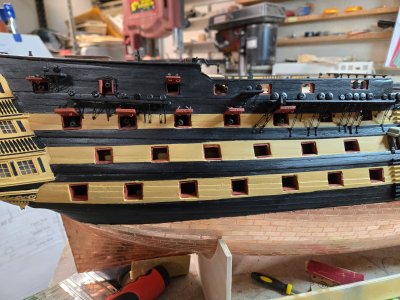
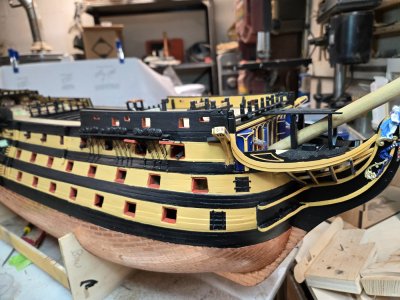
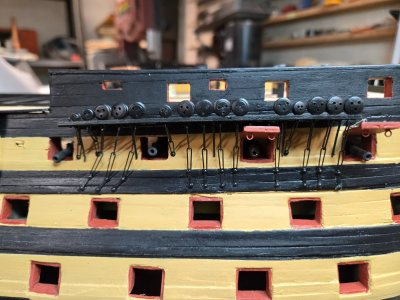
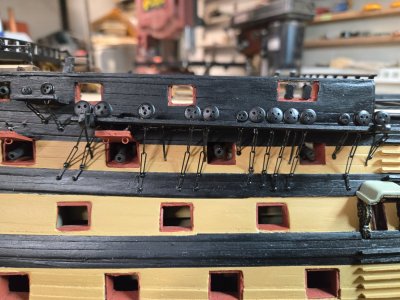
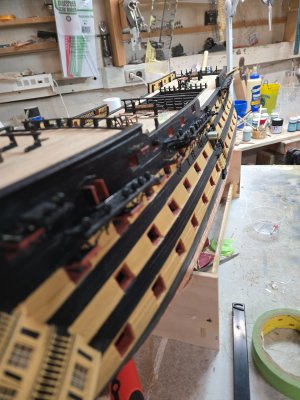
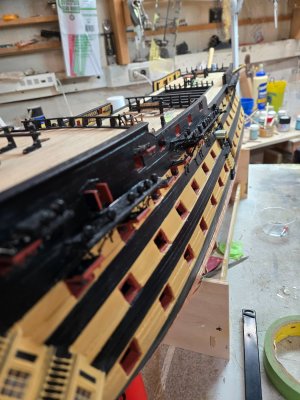
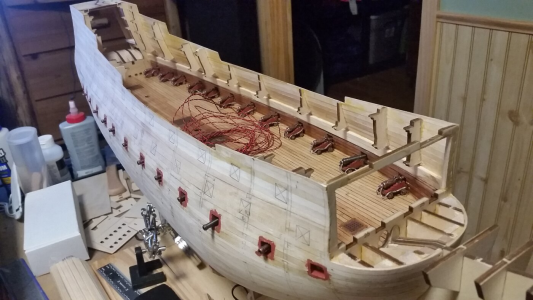
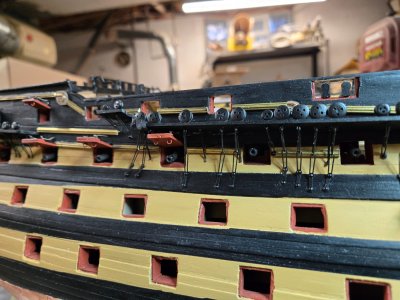
It's actually a pretty steady process. My only issue was that my channels may not have been placed in exactly the right position and this caused some issues with chainplate positioning.

May not have been....they weren't!

In retrospect, it may have been a better idea to attach the front and back chainplates to the channels before laying them out and then trying to lay them out per the blue prints. I think you could do that before adding pins to the back of the channels, perhaps tape them up and seeing if the chainplates fall where they should...if the two outside ones fit properly, they the inside one should fall into place.

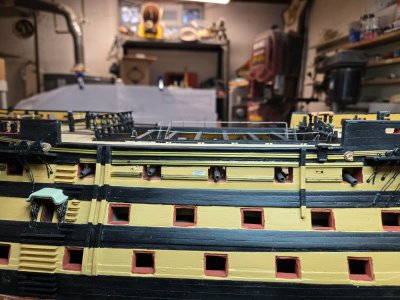
I didn't do that and had some issues with the stern channels, but overall, I think they look great.

Especially when the pic is from far away! Just beautiful...lol

I also took a pic through the entrance...yep, I can still see the other entrance!

20241128_115912.jpg

20241128_115920.jpg

20241128_115927.jpg

20241128_115931.jpg

20241128_115937.jpg

20241128_115942.jpg

20241128_115953.jpg

20241128_115956.jpg

20241128_120032.jpg
 
Worked on getting everything for the port side ready. Painting lids, making sure bottoms of channels are clear for chainplates, etc.

I also added all of the copper eyelets on deck and the small cleats to the stern.

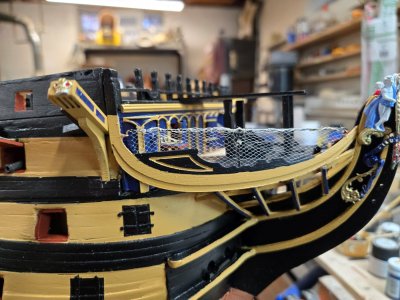
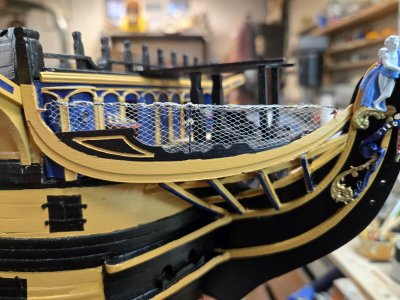
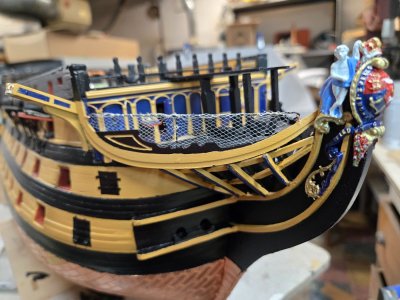
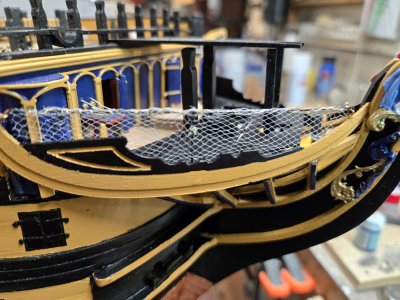
While doing this, I created the 2 railings for the bow gratings. I was able to add copper eyelets and then bend the .7mm wire to fit. After, I decided to see how difficult it's going to be to add the netting here and ultimately for the mattress hammocks.

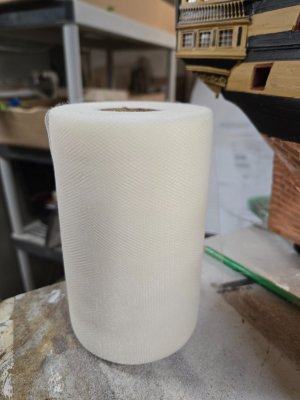
I had bought some peachy colored tulle online, but decided it was a bit too orange. This stuff is synthetic, so it won't color and I could not for the life of me find anything that was cotton. Except one place sold it in $60 batches of mosquito netting. Nope.

I found the same tulle in ivory for $9USD and bought that. So if you have kids and need some, I'll have extra!!!!

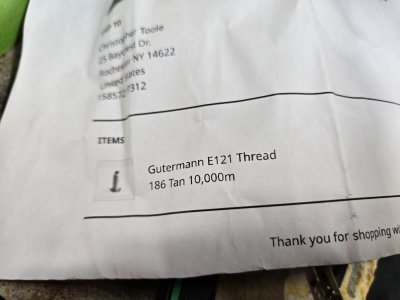
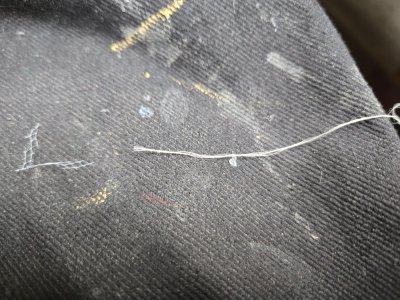
Now this was just a test and I am going to redo. I had a huge spool of thread from Guterman, but it frays on the end VERY QUICKLY. I think it's too thin and I'll redo with the .1mm in the kit.

I also didn't secure the railing as I did it and I'll make a better, more stable rig for that. I wanted to practice or see what kind of knot would work best and I have a better idea now.

After it was done, I trimmed it and gave it a coat of very watered down white glue...had to wipe it off to be sure it didn't clog holes.

I think if I do it right and take my time, it will look pretty good.

20241129_130103.jpg

20241129_130319.jpg

20241129_130354.jpg

20241129_130400.jpg

20241129_130421.jpg

20241129_130443.jpg

20241129_130505.jpg
 
Worked on getting everything for the port side ready. Painting lids, making sure bottoms of channels are clear for chainplates, etc.

I also added all of the copper eyelets on deck and the small cleats to the stern.

While doing this, I created the 2 railings for the bow gratings. I was able to add copper eyelets and then bend the .7mm wire to fit. After, I decided to see how difficult it's going to be to add the netting here and ultimately for the mattress hammocks.

I had bought some peachy colored tulle online, but decided it was a bit too orange. This stuff is synthetic, so it won't color and I could not for the life of me find anything that was cotton. Except one place sold it in $60 batches of mosquito netting. Nope.

I found the same tulle in ivory for $9USD and bought that. So if you have kids and need some, I'll have extra!!!!

Now this was just a test and I am going to redo. I had a huge spool of thread from Guterman, but it frays on the end VERY QUICKLY. I think it's too thin and I'll redo with the .1mm in the kit.

I also didn't secure the railing as I did it and I'll make a better, more stable rig for that. I wanted to practice or see what kind of knot would work best and I have a better idea now.

After it was done, I trimmed it and gave it a coat of very watered down white glue...had to wipe it off to be sure it didn't clog holes.

I think if I do it right and take my time, it will look pretty good.

View attachment 487130

View attachment 487131

View attachment 487132

View attachment 487133

View attachment 487134

View attachment 487135

View attachment 487136
Good morning Chris. Very impressive work. I remember doing those nets on my Victory- probably the most frustrating part of my journey. Fiddly little “#%£$”…..Cheers Grant
 
Hi Chris

Coming along very nicely!

For the next model, if there is a coppered bottom, the plates went on from the top down, not from the keel up and overlapped slightly. It gives a completely different look. I realize the plates in most kits are much too thick so overlapping looks awful, but some do offer plates with the nail dents on two adjacent sides so it looks like they are overlapped when butted together.

A very noticeable thing are the gun port stops or linings, so you may find it interesting that the stops were only on the sides and bottom of the port, not on the top as some kits are incorrectly designed.

Love all your photos, please keep them coming.

Allan
 
Good morning Chris. Very impressive work. I remember doing those nets on my Victory- probably the most frustrating part of my journey. Fiddly little “#%£$”…..Cheers Grant
As always Grant, I appreciate your comments and stopping by. It gives me confidence!!!

You know what has been driving me CRAZY!!!!??????

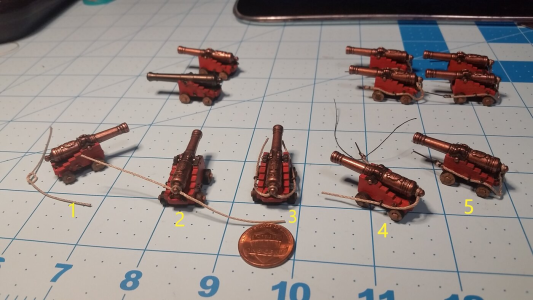
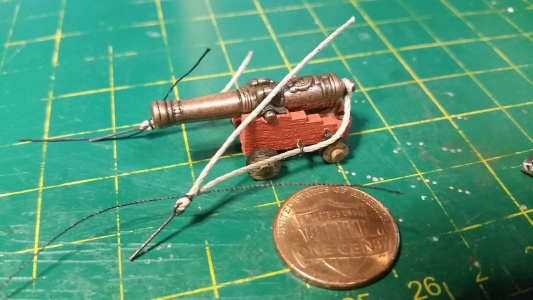
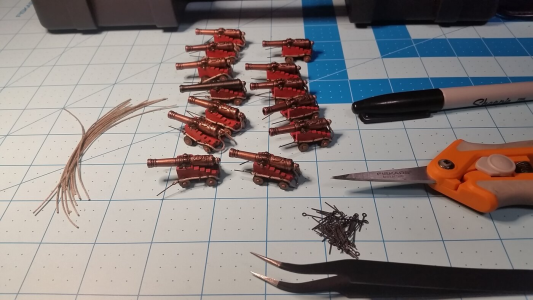
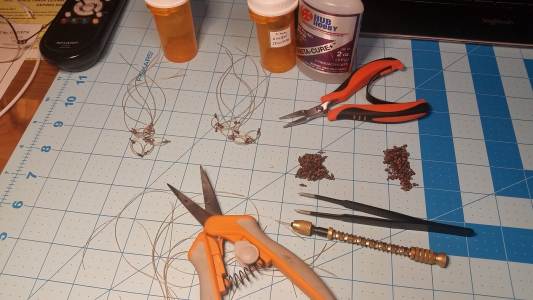
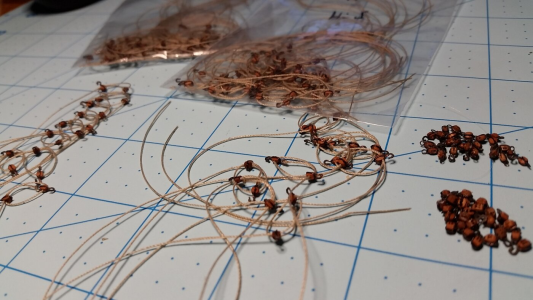
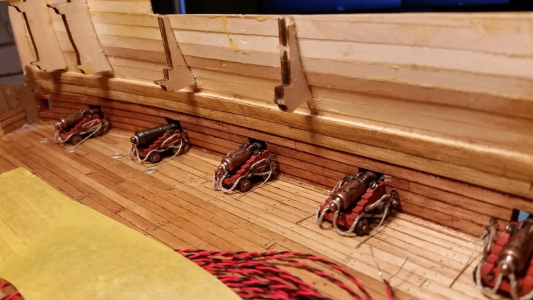
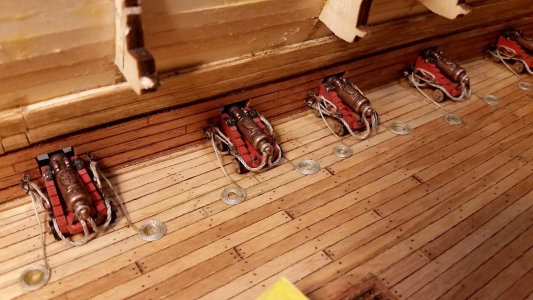
Creating the darn rigging for the cannons. Trying to tie the breeching lines, the cannons flipping all over, my FAT fingers getting in the way, trying to use 2 sets of tweezers to get everything close, only to lightly hit something and the whole things flies half way across my bench.

I've watched Olha Batchvarov's various videos on how to rig cannons a dozen times. She makes it look effortless...I hate her!!!! (not really, her work is beyond speechless if you've never see it, search her on YouTube)
 
Last edited:
Hi Chris

Coming along very nicely!

For the next model, if there is a coppered bottom, the plates went on from the top down, not from the keel up and overlapped slightly. It gives a completely different look. I realize the plates in most kits are much too thick so overlapping looks awful, but some do offer plates with the nail dents on two adjacent sides so it looks like they are overlapped when butted together.

A very noticeable thing are the gun port stops or linings, so you may find it interesting that the stops were only on the sides and bottom of the port, not on the top as some kits are incorrectly designed.

Love all your photos, please keep them coming.

Allan
Hi Al;

I've seen a lot of posts about the overlapping copper plating. I did try that to see, but as you state, they are way too think for that. Perhaps if I had gone with copper tape? That might have been thin enough to at least overlap on the horizontal sides. But then I'd be forced to create all of the little nail divots! No way.

As for the gun ports, I have seen your posts along with support pictures and diagrams of the gun ports and the use of 'sills' to secure the lids when they are shut. It makes sense that there wouldn't be a stop on the upper inside. However, I didn't see your posts till well after I had finished the side hulls (and reworked them at least 3 times!)

Your expertise is far beyond anything I can hope for.
Chris
 
Chris, I have been learning, after the fact, since I began building wooden ship models going on 50 years ago. As long as there is a next build I look forward to correct errors and learning new things for the next round of fun.

Hope you did not get too hard with the snow the past few days. The Bills/49ers game was fun to watch in the weather they had.

Allan
Well then, I'll have a LOT of errors to correct on my next build. Provided I don't shoot myself rigging these F-ing cannons!

We're about 70 miles east of Buffalo so our snow has to come from the NW or NE to hurt us, Buffalo is directly in line with Erie so they will get snow anytime the wind blows until Erie freezes...which may not happen as the Lakes are pretty warm still.

We'll get ours, but not as bad as my younger days! The game was fun, I've been to a few of those games, they're better at home!
 
As always Grant, I appreciate your comments and stopping by. It gives me confidence!!!

You know what has been driving me CRAZY!!!!??????

Creating the darn rigging for the cannons. Trying to tie the breeching lines, the cannons flipping all over, my FAT fingers getting in the way, trying to use 2 sets of tweezers to get everything close, only to lightly hit something and the whole things flies half way across my bench.

I've watched Olha Batchvarov's various videos on how to rig cannons a dozen times. She makes it look effortless...I hate her!!!! (not really, her work is beyond speechless if you've never see it, search her on YouTube)
Good morning Chris. Olha is legendary. I like the way she presents her videos which have help me for sure.

You are not alone rigging cannons. When I start this process I have my swear jars ready. ;)
Cheers Grant
 
First off, welcome to SOS. Your attempt at one of the most challenging ships is inspiring! I work with youngsters who do not know a 2 x 4 is not actually 2 x 4 inches! They do not know streets run east and west and avenues run north and south. This is your model, and I believe you will achieve your goal. Many of the masters of scale modeling (I am sure) started the same way and have overcome. At some point you have to ask yourself if the time and effort is worth it. It is worth it to me, of course.

Journey on young man! And by the way, none of our model's float....... we don't have the ballast!
 
As always Grant, I appreciate your comments and stopping by. It gives me confidence!!!

You know what has been driving me CRAZY!!!!??????

Creating the darn rigging for the cannons. Trying to tie the breeching lines, the cannons flipping all over, my FAT fingers getting in the way, trying to use 2 sets of tweezers to get everything close, only to lightly hit something and the whole things flies half way across my bench.

I've watched Olha Batchvarov's various videos on how to rig cannons a dozen times. She makes it look effortless...I hate her!!!! (not really, her work is beyond speechless if you've never see it, search her on YouTube)
team118, here is cannon rigging 101:

For other novices in modeling, the steps used are detailed as follows. Of course, a magnifying headset and tweezers are required unless you happen to be a human microscope. :D Follow ths steps below, and it should go much easier for you. Keep in mind that the carriages shown below are from 1635, not 1778.

1) A 9cm length of 0.8mm diameter is used for the breech rope. for these size carriages, this will place the eyes of the eyebolts just forward of the muzzle of the gun barrel when the breech rope is stretched taut. The breeching rope lengths are figured out by making one carriage as a test piece. You pre-cut the ropes after you figure out how long they have to be. People often make the breeching ropes too short.

2) The breeching rope shown tied and glued around the cascable with a very small amount of CA glue. In general, CA glue is used in very small quantity and applied to places not easily visible when the gun in complete, so darkening stains will not be visible. The ends of the breech rope are shown leaving the casable at the bottom of it, but more often the line was wrapped such that the ends leave the cascable nearest the top of the cascable. On HMS Victory, the breechope simply passes through an eyelet which is above the cascable:
1733198699324.png

The steps are numbered in the photo below.
1733198114841.png

For speed and simplicity, the line is tied in an overhand knot at the center on the cascabel at the rear of the gun barrel. Typically, the line would be wound with one turn around the cascabel, and seized with small cord to hold it there, but since that cord is practically invisible at this scale, the line was tied and glued instead.

3) Each end of the breech rope is passed through the rings on the side of the carriage and led forward.

4) The etched eyelets are 2mm at the eye. I usually get the smallest ones which willl still allow the rope to pass through in order to keep the hardware as close to scale with the model as possible. This also goes with the gun tackle blocks which we will get to later. At the ends of the breach line, the tip of the rope is passed through the ring of a 2mm diameter eyebolt. Only 3mm of the rope from the end is folded over the eye, then tacked in place with a bit of CA glue, drying by pinching it between your fingers. For additional detail, a black thread is tied around the loop with an overhand knot, secured with a bit of CA glue, then trimmed. This makes the seizing appear very small, thus very close to scale, yet visible because of the contrasting color.
1733200795059.png

5) Most people stop before step, but the breeching rope on a model does not drape properly over the wheels and hang like real rope, the tan rope being rather stiff. To make the entire gun look realistic, this has to be addressed. The breeching rope ends are pulled rearward until the eyes of the eyebolts are positioned just in front of the front edge of the carriage cheeks. To make the rope droop properly, a bit of CA glue (not enough to soak through the line) is placed on the top of the rear wheels and the line is glued there. Then to make the line loops hang down far enough at the rear of the carriage below the casabel, apply some CA glue to the bottom surface of the lines just below the cascabel and hold the line downward until the line stiffens and stays in place. Again, do not use too much CA glue or it will soak through the line and create dark spots. Apply the glue with the tip of a toothpick. When ready to install the guns on the deck, the the breech rope eyebolts will be glued into holes predrilled in the bulwark, and then tweezers are used to hook the gun tackles to the other eyebolts on the bulwark and to the carriage, then are adjusted to the proper tension. Note that the position of the eyelets is at the front edge of the carriage. Also, the length of the shanks of the eyelets should be trimmed such that it is not longer than the width of the hull.
1733197672152.png

1733200836669.png

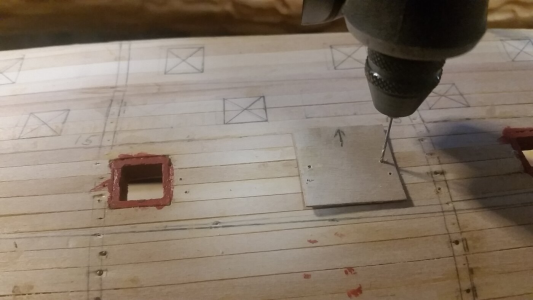
6) if you have not yet made holes in the bulwarks to accept the eyelets for breech lines and gun tackles, now is the time. A jig is used to make these holes, and they are dilled from the outside of the hull before final planking has been installed. The center square of wood for the jig is inserted into the gun port from the outside, ensuring consistent location of the drilled holes. The arrow on the jig points upward.
1733199820950.png

The holes in the jig line the drill up perfectly and consistently. The two lower holes are for the breeching rope eyelets, and the upper two are for the gun tackle eyelets.
1733199838281.png

7) Attach the gun carriages to the deck. Using tweezers, hold each eyelet by the loop of breeching rope connected to it, apply CA glue to the shank, and insert it into the proper hole, the lower hole. If the end of the shank protrudes through the hull, file it flush with a needle file. You don't want it to interfere with applying the final planking.
1733199560070.png

8) Now for the gun tackles. These take lost of time to prepare, but a cannon looks incomplete without them. I make right hand and left hand gun tackles using the smallest etched hooks and strops and blocks as possible, because in all cases, gun tackles on models are oversized. The difference between right and left hand tackles is how the line is rove through the double block at the front end of the tackle. The bitter end of the line as it leaves the double block should be on the outboard side relative to the carriage.

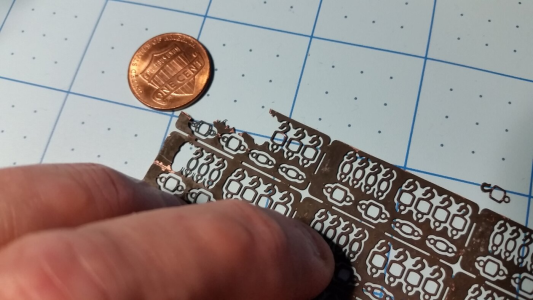
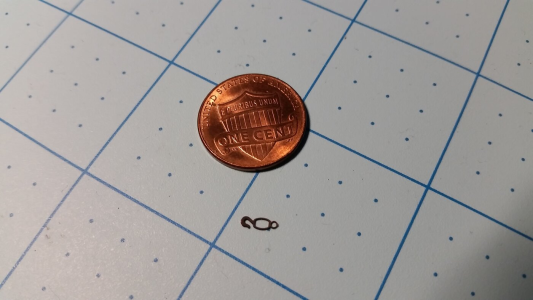
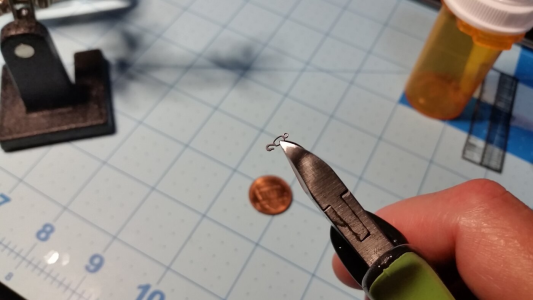
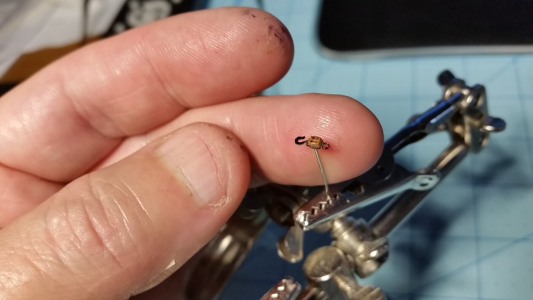
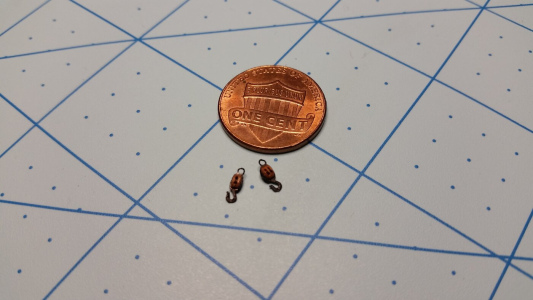
Photo etched 3mm copper strops purchased from HiS Models in the Czech Republic. Because 2mm Falkonet blocks are too large to squeeze into the strop, the strop is cut and reformed around the block. All the blocks had their holes drilled with an Archimedes drill to enlarge them slightly and allow the glue stiffened thread to pass through easily. Here is the process I used to make these strops work.
1733201292027.png

9) First, cut the strop from the nippers or the tips of the Fiskars scissors, which are very precise in cutting.
1733201322791.png

10) The cut is made on the bottom, which is the side that the hook points toward, so when the gun tackle is on the carriage, it won't be seen.
1733201345112.png

11) Open the strop a bit so it can accept the block. You should have a couple of narrow needle nosed pliers for this work.
1733201376585.png

12) This example uses a single, 2mm block from Falkonet. The block is suspended on the tip of a large coat needle in the jaws of a helping-hands tool. Using tweezers, place the strop around the block, then carefully squeeze the loose ends of the strop where it was cut against the block to hold the strop in place. Then squeeze the strop as shown below to make the strop fit tightly around the block. You need steady hands and a magnifying headset for this. The strop will settle snugly in the recesses of the block and stay in place.
1733201401867.png

13) Apply some CA glue to both sides of the block to anchor the strop to the block.
1733201425381.png

14) Since working with the strop wears some of the blackening off, use a Sharpie marker to color the copper black.
1733201450789.png

Here is an example of a 2mm double block. The strops provided by HiS Model for the double blocks were too large, so the strop meant for the single block was also used on the double block. It seems to work.
1733201475539.png

Both blocks stropped.
1733201506702.png

15) With a tweezers, the hooks on the blocks were twisted 90 degrees. Remember, the eye loops on the double block should be cut off, since they are not needed for a gun tackle. Shown below are the two types of gun tackle I have been assembling.

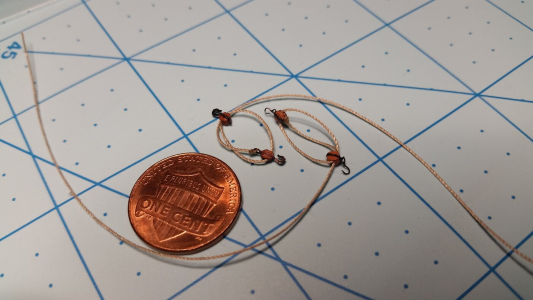
The one on the left uses photo etched strops, and the one on the right uses very thin 3mm hooks with the tackle made using blocks tied with thread. Which do you think looks better?
1733201576044.png

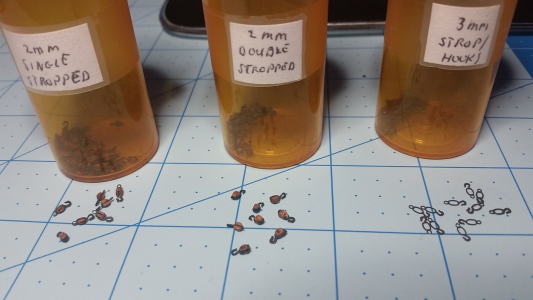
Many hours are spent mass producing stropped 2mm single blocks with hooks and eyes and stropped 2mm double blocks with hooks for gun tackles. Some of the single blocks are small enough to slip strops around them without cutting and opening them. After a while, I could identify when this was possible. Cut the eye rings off the double blocks, leaving only the hooks. Leave the eye rings on the single blocks.
1733201642099.png

16) Take a 9" length of 0.25mm tan rope and tie the end to the eye loop on the single block, and rove the other end through the double block and single block to make a gun tackle. The bitter end of the lanyard should extend away from the double block in the same direction as the hook if you rigged it correctly. Which hole in the double block your choose to pas the lanyard through first will determine if the tackle is right or left hand. Now spend a few days as manufacture one right hand and one left hand gun tackle for each gun carriage.
1733201730106.png

Six days work making gun tackles for 102 guns on HMS Sovereign of the Seas.
1733203266082.png

17) Adjust the length of each gun tackle such that it is loose enough for the hooks to to be place on the eyes on the bulwark and carriage. The next part required patience and steady hands. Using tweezers, hook the tackle to the carriage first, then to the bulwark. Using tweezers, carefully tug the loops of line of the tackle to take the slackout until it is taut between the eyes. Apply a small amount of CA glue to the hooks to secure them to the eyes and prevent them from popping off should the tackle go slack. Take the bitter end of the lanyard and glue it to the deck with PVA glue and trim the end to length by chopping it with the edge of a chisel shaped razor knife.
1733203766343.png

18) PVA glue on coils of line stuck to double faced tape. Once dry, remove the coil from the tape by prying it off with the tip of a razor knife, cut off the dangling line close to the coil. Make equal amounts of left hand and right hand wrapped coils.
1733203570234.png

19) Glue the coil to the deck, matching the end of the line on the coil with the end of the line on the gun tackle. Note the difference between right and left hand coils matched to the appropriate left and right side of the carriage.
1733204646657.png

DONE!
In summary, the tedious part is making all the gun tackles. The trick part is hooking them into place, and drawing the lanyards taut. Just listen to music or podcasts and spend the time. It will go faster as you get some practice. In the end, the model will look striking with properly rigged guns!
 
Last edited:
team118, here is cannon rigging 101:

For other novices in modeling, the steps used are detailed as follows. Of course, a magnifying headset and tweezers are required unless you happen to be a human microscope. :D Follow ths steps below, and it should go much easier for you. Keep in mind that the carriages shown below are from 1635, not 1778.

1) A 9cm length of 0.8mm diameter is used for the breech rope. for these size carriages, this will place the eyes of the eyebolts just forward of the muzzle of the gun barrel when the breech rope is stretched taut. The breeching rope lengths are figured out by making one carriage as a test piece. You pre-cut the ropes after you figure out how long they have to be. People often make the breeching ropes too short.

2) The breeching rope shown tied and glued around the cascable with a very small amount of CA glue. In general, CA glue is used in very small quantity and applied to places not easily visible when the gun in complete, so darkening stains will not be visible. The ends of the breech rope are shown leaving the casable at the bottom of it, but more often the line was wrapped such that the ends leave the cascable nearest the top of the cascable. On HMS Victory, the breechope simply passes through an eyelet which is above the cascable:
View attachment 487826

The steps are numbered in the photo below.
View attachment 487825

For speed and simplicity, the line is tied in an overhand knot at the center on the cascabel at the rear of the gun barrel. Typically, the line would be wound with one turn around the cascabel, and seized with small cord to hold it there, but since that cord is practically invisible at this scale, the line was tied and glued instead.

3) Each end of the breech rope is passed through the rings on the side of the carriage and led forward.

4) The etched eyelets are 2mm at the eye. I usually get the smallest ones which willl still allow the rope to pass through in order to keep the hardware as close to scale with the model as possible. This also goes with the gun tackle blocks which we will get to later. At the ends of the breach line, the tip of the rope is passed through the ring of a 2mm diameter eyebolt. Only 3mm of the rope from the end is folded over the eye, then tacked in place with a bit of CA glue, drying by pinching it between your fingers. For additional detail, a black thread is tied around the loop with an overhand knot, secured with a bit of CA glue, then trimmed. This makes the seizing appear very small, thus very close to scale, yet visible because of the contrasting color.
View attachment 487830

5) Most people stop before step, but the breeching rope on a model does not drape properly over the wheels and hang like real rope, the tan rope being rather stiff. To make the entire gun look realistic, this has to be addressed. The breeching rope ends are pulled rearward until the eyes of the eyebolts are positioned just in front of the front edge of the carriage cheeks. To make the rope droop properly, a bit of CA glue (not enough to soak through the line) is placed on the top of the rear wheels and the line is glued there. Then to make the line loops hang down far enough at the rear of the carriage below the casabel, apply some CA glue to the bottom surface of the lines just below the cascabel and hold the line downward until the line stiffens and stays in place. Again, do not use too much CA glue or it will soak through the line and create dark spots. Apply the glue with the tip of a toothpick. When ready to install the guns on the deck, the the breech rope eyebolts will be glued into holes predrilled in the bulwark, and then tweezers are used to hook the gun tackles to the other eyebolts on the bulwark and to the carriage, then are adjusted to the proper tension. Note that the position of the eyelets is at the front edge of the carriage. Also, the length of the shanks of the eyelets should be trimmed such that it is not longer than the width of the hull.
View attachment 487824

View attachment 487831

6) if you have not yet made holes in the bulwarks to accept the eyelets for breech lines and gun tackles, now is the time. A jig is used to make these holes, and they are dilled from the outside of the hull before final planking has been installed. The center square of wood for the jig is inserted into the gun port from the outside, ensuring consistent location of the drilled holes. The arrow on the jig points upward.
View attachment 487828

The holes in the jig line the drill up perfectly and consistently. The two lower holes are for the breeching rope eyelets, and the upper two are for the gun tackle eyelets.
View attachment 487829

7) Attach the gun carriages to the deck. Using tweezers, hold each eyelet by the loop of breeching rope connected to it, apply CA glue to the shank, and insert it into the proper hole, the lower hole. If the end of the shank protrudes through the hull, file it flush with a needle file. You don't want it to interfere with applying the final planking.
View attachment 487827

8) Now for the gun tackles. These take lost of time to prepare, but a cannon looks incomplete without them. I make right hand and left hand gun tackles using the smallest etched hooks and strops and blocks as possible, because in all cases, gun tackles on models are oversized. The difference between right and left hand tackles is how the line is rove through the double block at the front end of the tackle. The bitter end of the line as it leaves the double block should be on the outboard side relative to the carriage.

Photo etched 3mm copper strops purchased from HiS Models in the Czech Republic. Because 2mm Falkonet blocks are too large to squeeze into the strop, the strop is cut and reformed around the block. All the blocks had their holes drilled with an Archimedes drill to enlarge them slightly and allow the glue stiffened thread to pass through easily. Here is the process I used to make these strops work.
View attachment 487834

9) First, cut the strop from the nippers or the tips of the Fiskars scissors, which are very precise in cutting.
View attachment 487835

10) The cut is made on the bottom, which is the side that the hook points toward, so when the gun tackle is on the carriage, it won't be seen.
View attachment 487836

11) Open the strop a bit so it can accept the block. You should have a couple of narrow needle nosed pliers for this work.
View attachment 487837

12) This example uses a single, 2mm block from Falkonet. The block is suspended on the tip of a large coat needle in the jaws of a helping-hands tool. Using tweezers, place the strop around the block, then carefully squeeze the loose ends of the strop where it was cut against the block to hold the strop in place. Then squeeze the strop as shown below to make the strop fit tightly around the block. You need steady hands and a magnifying headset for this. The strop will settle snugly in the recesses of the block and stay in place.
View attachment 487838

13) Apply some CA glue to both sides of the block to anchor the strop to the block.
View attachment 487839

14) Since working with the strop wears some of the blackening off, use a Sharpie marker to color the copper black.
View attachment 487840

Here is an example of a 2mm double block. The strops provided by HiS Model for the double blocks were too large, so the strop meant for the single block was also used on the double block. It seems to work.
View attachment 487841

Both blocks stropped.
View attachment 487842

15) With a tweezers, the hooks on the blocks were twisted 90 degrees. Remember, the eye loops on the double block should be cut off, since they are not needed for a gun tackle. Shown below are the two types of gun tackle I have been assembling.

The one on the left uses photo etched strops, and the one on the right uses very thin 3mm hooks with the tackle made using blocks tied with thread. Which do you think looks better?
View attachment 487843

Many hours are spent mass producing stropped 2mm single blocks with hooks and eyes and stropped 2mm double blocks with hooks for gun tackles. Some of the single blocks are small enough to slip strops around them without cutting and opening them. After a while, I could identify when this was possible. Cut the eye rings off the double blocks, leaving only the hooks. Leave the eye rings on the single blocks.
View attachment 487844

16) Take a 9" length of 0.25mm tan rope and tie the end to the eye loop on the single block, and rove the other end through the double block and single block to make a gun tackle. The bitter end of the lanyard should extend away from the double block in the same direction as the hook if you rigged it correctly. Which hole in the double block your choose to pas the lanyard through first will determine if the tackle is right or left hand. Now spend a few days as manufacture one right hand and one left hand gun tackle for each gun carriage.
View attachment 487845

Six days work making gun tackles for 102 guns on HMS Sovereign of the Seas.
View attachment 487846

17) Adjust the length of each gun tackle such that it is loose enough for the hooks to to be place on the eyes on the bulwark and carriage. The next part required patience and steady hands. Using tweezers, hook the tackle to the carriage first, then to the bulwark. Using tweezers, carefully tug the loops of line of the tackle to take the slackout until it is taut between the eyes. Apply a small amount of CA glue to the hooks to secure them to the eyes and prevent them from popping off should the tackle go slack. Take the bitter end of the lanyard and glue it to the deck with PVA glue and trim the end to length by chopping it with the edge of a chisel shaped razor knife.
View attachment 487848

18) PVA glue on coils of line stuck to double faced tape. Once dry, remove the coil from the tape by prying it off with the tip of a razor knife, cut off the dangling line close to the coil. Make equal amounts of left hand and right hand wrapped coils.
View attachment 487847

19) Glue the coil to the deck, matching the end of the line on the coil with the end of the line on the gun tackle. Note the difference between right and left hand coils matched to the appropriate left and right side of the carriage.
View attachment 487850

DONE!
In summary, the tedious part is making all the gun tackles. The trick part is hooking them into place, and drawing the lanyards taut. Just listen to music or podcasts and spend the time. It will go faster as you get some practice. In the end, the model will look striking with properly rigged guns!
Good morning, I hope to do some help with these images.Frank

4111461641_c1efbe307c_b.jpg

16123648306_6f65f23c1e_o.jpg

9461323000_7ea891b3dc_o.jpg

15526941234_cbab0102de_b.jpg
 
team118, here is cannon rigging 101:

For other novices in modeling, the steps used are detailed as follows. Of course, a magnifying headset and tweezers are required unless you happen to be a human microscope. :D Follow ths steps below, and it should go much easier for you. Keep in mind that the carriages shown below are from 1635, not 1778.

1) A 9cm length of 0.8mm diameter is used for the breech rope. for these size carriages, this will place the eyes of the eyebolts just forward of the muzzle of the gun barrel when the breech rope is stretched taut. The breeching rope lengths are figured out by making one carriage as a test piece. You pre-cut the ropes after you figure out how long they have to be. People often make the breeching ropes too short.

2) The breeching rope shown tied and glued around the cascable with a very small amount of CA glue. In general, CA glue is used in very small quantity and applied to places not easily visible when the gun in complete, so darkening stains will not be visible. The ends of the breech rope are shown leaving the casable at the bottom of it, but more often the line was wrapped such that the ends leave the cascable nearest the top of the cascable. On HMS Victory, the breechope simply passes through an eyelet which is above the cascable:
View attachment 487826

The steps are numbered in the photo below.
View attachment 487825

For speed and simplicity, the line is tied in an overhand knot at the center on the cascabel at the rear of the gun barrel. Typically, the line would be wound with one turn around the cascabel, and seized with small cord to hold it there, but since that cord is practically invisible at this scale, the line was tied and glued instead.

3) Each end of the breech rope is passed through the rings on the side of the carriage and led forward.

4) The etched eyelets are 2mm at the eye. I usually get the smallest ones which willl still allow the rope to pass through in order to keep the hardware as close to scale with the model as possible. This also goes with the gun tackle blocks which we will get to later. At the ends of the breach line, the tip of the rope is passed through the ring of a 2mm diameter eyebolt. Only 3mm of the rope from the end is folded over the eye, then tacked in place with a bit of CA glue, drying by pinching it between your fingers. For additional detail, a black thread is tied around the loop with an overhand knot, secured with a bit of CA glue, then trimmed. This makes the seizing appear very small, thus very close to scale, yet visible because of the contrasting color.
View attachment 487830

5) Most people stop before step, but the breeching rope on a model does not drape properly over the wheels and hang like real rope, the tan rope being rather stiff. To make the entire gun look realistic, this has to be addressed. The breeching rope ends are pulled rearward until the eyes of the eyebolts are positioned just in front of the front edge of the carriage cheeks. To make the rope droop properly, a bit of CA glue (not enough to soak through the line) is placed on the top of the rear wheels and the line is glued there. Then to make the line loops hang down far enough at the rear of the carriage below the casabel, apply some CA glue to the bottom surface of the lines just below the cascabel and hold the line downward until the line stiffens and stays in place. Again, do not use too much CA glue or it will soak through the line and create dark spots. Apply the glue with the tip of a toothpick. When ready to install the guns on the deck, the the breech rope eyebolts will be glued into holes predrilled in the bulwark, and then tweezers are used to hook the gun tackles to the other eyebolts on the bulwark and to the carriage, then are adjusted to the proper tension. Note that the position of the eyelets is at the front edge of the carriage. Also, the length of the shanks of the eyelets should be trimmed such that it is not longer than the width of the hull.
View attachment 487824

View attachment 487831

6) if you have not yet made holes in the bulwarks to accept the eyelets for breech lines and gun tackles, now is the time. A jig is used to make these holes, and they are dilled from the outside of the hull before final planking has been installed. The center square of wood for the jig is inserted into the gun port from the outside, ensuring consistent location of the drilled holes. The arrow on the jig points upward.
View attachment 487828

The holes in the jig line the drill up perfectly and consistently. The two lower holes are for the breeching rope eyelets, and the upper two are for the gun tackle eyelets.
View attachment 487829

7) Attach the gun carriages to the deck. Using tweezers, hold each eyelet by the loop of breeching rope connected to it, apply CA glue to the shank, and insert it into the proper hole, the lower hole. If the end of the shank protrudes through the hull, file it flush with a needle file. You don't want it to interfere with applying the final planking.
View attachment 487827

8) Now for the gun tackles. These take lost of time to prepare, but a cannon looks incomplete without them. I make right hand and left hand gun tackles using the smallest etched hooks and strops and blocks as possible, because in all cases, gun tackles on models are oversized. The difference between right and left hand tackles is how the line is rove through the double block at the front end of the tackle. The bitter end of the line as it leaves the double block should be on the outboard side relative to the carriage.

Photo etched 3mm copper strops purchased from HiS Models in the Czech Republic. Because 2mm Falkonet blocks are too large to squeeze into the strop, the strop is cut and reformed around the block. All the blocks had their holes drilled with an Archimedes drill to enlarge them slightly and allow the glue stiffened thread to pass through easily. Here is the process I used to make these strops work.
View attachment 487834

9) First, cut the strop from the nippers or the tips of the Fiskars scissors, which are very precise in cutting.
View attachment 487835

10) The cut is made on the bottom, which is the side that the hook points toward, so when the gun tackle is on the carriage, it won't be seen.
View attachment 487836

11) Open the strop a bit so it can accept the block. You should have a couple of narrow needle nosed pliers for this work.
View attachment 487837

12) This example uses a single, 2mm block from Falkonet. The block is suspended on the tip of a large coat needle in the jaws of a helping-hands tool. Using tweezers, place the strop around the block, then carefully squeeze the loose ends of the strop where it was cut against the block to hold the strop in place. Then squeeze the strop as shown below to make the strop fit tightly around the block. You need steady hands and a magnifying headset for this. The strop will settle snugly in the recesses of the block and stay in place.
View attachment 487838

13) Apply some CA glue to both sides of the block to anchor the strop to the block.
View attachment 487839

14) Since working with the strop wears some of the blackening off, use a Sharpie marker to color the copper black.
View attachment 487840

Here is an example of a 2mm double block. The strops provided by HiS Model for the double blocks were too large, so the strop meant for the single block was also used on the double block. It seems to work.
View attachment 487841

Both blocks stropped.
View attachment 487842

15) With a tweezers, the hooks on the blocks were twisted 90 degrees. Remember, the eye loops on the double block should be cut off, since they are not needed for a gun tackle. Shown below are the two types of gun tackle I have been assembling.

The one on the left uses photo etched strops, and the one on the right uses very thin 3mm hooks with the tackle made using blocks tied with thread. Which do you think looks better?
View attachment 487843

Many hours are spent mass producing stropped 2mm single blocks with hooks and eyes and stropped 2mm double blocks with hooks for gun tackles. Some of the single blocks are small enough to slip strops around them without cutting and opening them. After a while, I could identify when this was possible. Cut the eye rings off the double blocks, leaving only the hooks. Leave the eye rings on the single blocks.
View attachment 487844

16) Take a 9" length of 0.25mm tan rope and tie the end to the eye loop on the single block, and rove the other end through the double block and single block to make a gun tackle. The bitter end of the lanyard should extend away from the double block in the same direction as the hook if you rigged it correctly. Which hole in the double block your choose to pas the lanyard through first will determine if the tackle is right or left hand. Now spend a few days as manufacture one right hand and one left hand gun tackle for each gun carriage.
View attachment 487845

Six days work making gun tackles for 102 guns on HMS Sovereign of the Seas.
View attachment 487846

17) Adjust the length of each gun tackle such that it is loose enough for the hooks to to be place on the eyes on the bulwark and carriage. The next part required patience and steady hands. Using tweezers, hook the tackle to the carriage first, then to the bulwark. Using tweezers, carefully tug the loops of line of the tackle to take the slackout until it is taut between the eyes. Apply a small amount of CA glue to the hooks to secure them to the eyes and prevent them from popping off should the tackle go slack. Take the bitter end of the lanyard and glue it to the deck with PVA glue and trim the end to length by chopping it with the edge of a chisel shaped razor knife.
View attachment 487848

18) PVA glue on coils of line stuck to double faced tape. Once dry, remove the coil from the tape by prying it off with the tip of a razor knife, cut off the dangling line close to the coil. Make equal amounts of left hand and right hand wrapped coils.
View attachment 487847

19) Glue the coil to the deck, matching the end of the line on the coil with the end of the line on the gun tackle. Note the difference between right and left hand coils matched to the appropriate left and right side of the carriage.
View attachment 487850

DONE!
In summary, the tedious part is making all the gun tackles. The trick part is hooking them into place, and drawing the lanyards taut. Just listen to music or podcasts and spend the time. It will go faster as you get some practice. In the end, the model will look striking with properly rigged guns!
Hi Kurt
This is excellent
THanks for sharing
 
Provided I don't shoot myself rigging these F-ing cannons!

Hi Chris,
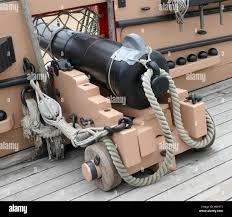
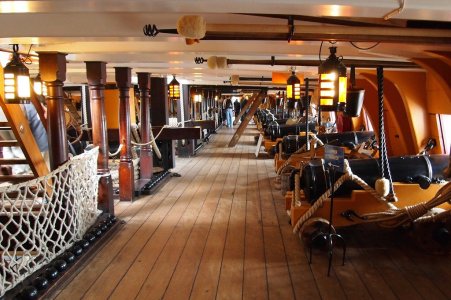
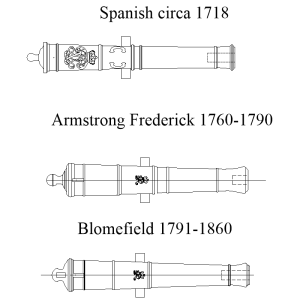
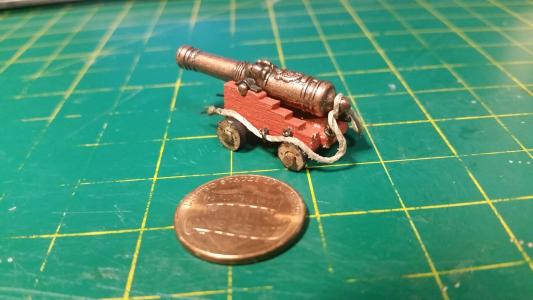
Sorry but I have to ask. Are the cannon in your photo from the kit? They appear to be Spanish guns circa 1718.

I hope you find the following little bit of her gun history interesting......Victory originally carried Armstrong Fredericks when first put in service then stripped when the Admiralty ordered her to be converted to a hospital ship in 1798. She was re-armed with Blomefields and Carronades when put back in sea service in 1803. The differences in appearance can be seen below.

Allan

1733274230855.png
 
Last edited:
team118, here is cannon rigging 101:

For other novices in modeling, the steps used are detailed as follows. Of course, a magnifying headset and tweezers are required unless you happen to be a human microscope. :D Follow ths steps below, and it should go much easier for you. Keep in mind that the carriages shown below are from 1635, not 1778.

1) A 9cm length of 0.8mm diameter is used for the breech rope. for these size carriages, this will place the eyes of the eyebolts just forward of the muzzle of the gun barrel when the breech rope is stretched taut. The breeching rope lengths are figured out by making one carriage as a test piece. You pre-cut the ropes after you figure out how long they have to be. People often make the breeching ropes too short.

2) The breeching rope shown tied and glued around the cascable with a very small amount of CA glue. In general, CA glue is used in very small quantity and applied to places not easily visible when the gun in complete, so darkening stains will not be visible. The ends of the breech rope are shown leaving the casable at the bottom of it, but more often the line was wrapped such that the ends leave the cascable nearest the top of the cascable. On HMS Victory, the breechope simply passes through an eyelet which is above the cascable:
View attachment 487826

The steps are numbered in the photo below.


For speed and simplicity, the line is tied in an overhand knot at the center on the cascabel at the rear of the gun barrel. Typically, the line would be wound with one turn around the cascabel, and seized with small cord to hold it there, but since that cord is practically invisible at this scale, the line was tied and glued instead.

3) Each end of the breech rope is passed through the rings on the side of the carriage and led forward.

4) The etched eyelets are 2mm at the eye. I usually get the smallest ones which willl still allow the rope to pass through in order to keep the hardware as close to scale with the model as possible. This also goes with the gun tackle blocks which we will get to later. At the ends of the breach line, the tip of the rope is passed through the ring of a 2mm diameter eyebolt. Only 3mm of the rope from the end is folded over the eye, then tacked in place with a bit of CA glue, drying by pinching it between your fingers. For additional detail, a black thread is tied around the loop with an overhand knot, secured with a bit of CA glue, then trimmed. This makes the seizing appear very small, thus very close to scale, yet visible because of the contrasting color.


5) Most people stop before step, but the breeching rope on a model does not drape properly over the wheels and hang like real rope, the tan rope being rather stiff. To make the entire gun look realistic, this has to be addressed. The breeching rope ends are pulled rearward until the eyes of the eyebolts are positioned just in front of the front edge of the carriage cheeks. To make the rope droop properly, a bit of CA glue (not enough to soak through the line) is placed on the top of the rear wheels and the line is glued there. Then to make the line loops hang down far enough at the rear of the carriage below the casabel, apply some CA glue to the bottom surface of the lines just below the cascabel and hold the line downward until the line stiffens and stays in place. Again, do not use too much CA glue or it will soak through the line and create dark spots. Apply the glue with the tip of a toothpick. When ready to install the guns on the deck, the the breech rope eyebolts will be glued into holes predrilled in the bulwark, and then tweezers are used to hook the gun tackles to the other eyebolts on the bulwark and to the carriage, then are adjusted to the proper tension. Note that the position of the eyelets is at the front edge of the carriage. Also, the length of the shanks of the eyelets should be trimmed such that it is not longer than the width of the hull.


6) if you have not yet made holes in the bulwarks to accept the eyelets for breech lines and gun tackles, now is the time. A jig is used to make these holes, and they are dilled from the outside of the hull before final planking has been installed. The center square of wood for the jig is inserted into the gun port from the outside, ensuring consistent location of the drilled holes. The arrow on the jig points upward.


The holes in the jig line the drill up perfectly and consistently. The two lower holes are for the breeching rope eyelets, and the upper two are for the gun tackle eyelets.


7) Attach the gun carriages to the deck. Using tweezers, hold each eyelet by the loop of breeching rope connected to it, apply CA glue to the shank, and insert it into the proper hole, the lower hole. If the end of the shank protrudes through the hull, file it flush with a needle file. You don't want it to interfere with applying the final planking.


8) Now for the gun tackles. These take lost of time to prepare, but a cannon looks incomplete without them. I make right hand and left hand gun tackles using the smallest etched hooks and strops and blocks as possible, because in all cases, gun tackles on models are oversized. The difference between right and left hand tackles is how the line is rove through the double block at the front end of the tackle. The bitter end of the line as it leaves the double block should be on the outboard side relative to the carriage.

Photo etched 3mm copper strops purchased from HiS Models in the Czech Republic. Because 2mm Falkonet blocks are too large to squeeze into the strop, the strop is cut and reformed around the block. All the blocks had their holes drilled with an Archimedes drill to enlarge them slightly and allow the glue stiffened thread to pass through easily. Here is the process I used to make these strops work.


9) First, cut the strop from the nippers or the tips of the Fiskars scissors, which are very precise in cutting.


10) The cut is made on the bottom, which is the side that the hook points toward, so when the gun tackle is on the carriage, it won't be seen.


11) Open the strop a bit so it can accept the block. You should have a couple of narrow needle nosed pliers for this work.


12) This example uses a single, 2mm block from Falkonet. The block is suspended on the tip of a large coat needle in the jaws of a helping-hands tool. Using tweezers, place the strop around the block, then carefully squeeze the loose ends of the strop where it was cut against the block to hold the strop in place. Then squeeze the strop as shown below to make the strop fit tightly around the block. You need steady hands and a magnifying headset for this. The strop will settle snugly in the recesses of the block and stay in place.


13) Apply some CA glue to both sides of the block to anchor the strop to the block.


14) Since working with the strop wears some of the blackening off, use a Sharpie marker to color the copper black.


Here is an example of a 2mm double block. The strops provided by HiS Model for the double blocks were too large, so the strop meant for the single block was also used on the double block. It seems to work.


Both blocks stropped.


15) With a tweezers, the hooks on the blocks were twisted 90 degrees. Remember, the eye loops on the double block should be cut off, since they are not needed for a gun tackle. Shown below are the two types of gun tackle I have been assembling.

The one on the left uses photo etched strops, and the one on the right uses very thin 3mm hooks with the tackle made using blocks tied with thread. Which do you think looks better?


Many hours are spent mass producing stropped 2mm single blocks with hooks and eyes and stropped 2mm double blocks with hooks for gun tackles. Some of the single blocks are small enough to slip strops around them without cutting and opening them. After a while, I could identify when this was possible. Cut the eye rings off the double blocks, leaving only the hooks. Leave the eye rings on the single blocks.


16) Take a 9" length of 0.25mm tan rope and tie the end to the eye loop on the single block, and rove the other end through the double block and single block to make a gun tackle. The bitter end of the lanyard should extend away from the double block in the same direction as the hook if you rigged it correctly. Which hole in the double block your choose to pas the lanyard through first will determine if the tackle is right or left hand. Now spend a few days as manufacture one right hand and one left hand gun tackle for each gun carriage.


Six days work making gun tackles for 102 guns on HMS Sovereign of the Seas.


17) Adjust the length of each gun tackle such that it is loose enough for the hooks to to be place on the eyes on the bulwark and carriage. The next part required patience and steady hands. Using tweezers, hook the tackle to the carriage first, then to the bulwark. Using tweezers, carefully tug the loops of line of the tackle to take the slackout until it is taut between the eyes. Apply a small amount of CA glue to the hooks to secure them to the eyes and prevent them from popping off should the tackle go slack. Take the bitter end of the lanyard and glue it to the deck with PVA glue and trim the end to length by chopping it with the edge of a chisel shaped razor knife.


18) PVA glue on coils of line stuck to double faced tape. Once dry, remove the coil from the tape by prying it off with the tip of a razor knife, cut off the dangling line close to the coil. Make equal amounts of left hand and right hand wrapped coils.


19) Glue the coil to the deck, matching the end of the line on the coil with the end of the line on the gun tackle. Note the difference between right and left hand coils matched to the appropriate left and right side of the carriage.


DONE!
In summary, the tedious part is making all the gun tackles. The trick part is hooking them into place, and drawing the lanyards taut. Just listen to music or podcasts and spend the time. It will go faster as you get some practice. In the end, the model will look striking with properly rigged guns!

Kurt;

That is a fantastic primer on cannon rigging. VERY MUCH appreciated. I added rings to the tops of the cascabels and was able to thread the breeching line through them.

I think doing those lines has been the easiest part of the task and ended up doing what your steps lay out...BEFORE reading this.

As for the tackles, that is been just terrible ordeal so far. I didn't want add the Flemish flake that you show. I really didn't see that in any pictures of the real Victory. Most of the tackles have the bitter end wound around the tackle and then secured. Unfortunately, trying to simulate that has been a pain. Whatever I try just isn't looking right.

After looking at your primer, perhaps I could do a hybrid of what you did. Rather than the Flemish flake, I could create a tied loop of line and affix that to the tackle to make it look like a seamless structure. Hard to write, but I'll try it and post a pic of what I'm talking about.

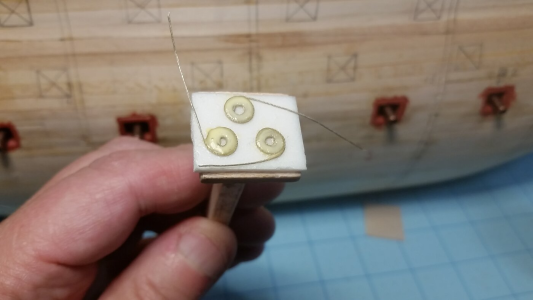
I like your kit's solution of creating PE strops for the blocks. Certainly better than what Caldercraft requires...tying off the one block with a hook and the other with a ring eyelet to secure to bulkwark.

Again, MANY THANKS and I am sure others will love and bookmark this!
Chris
 
Hi Chris,
Sorry but I have to ask. Are the cannon in your photo from the kit? They appear to be Spanish guns circa 1718.

I hope you find the following little bit of her gun history interesting......Victory originally carried Armstrong Fredericks when first put in service then stripped when the Admiralty ordered her to be converted to a hospital ship in 1798. She was re-armed with Blomefields and Carronades when put back in sea service in 1803. The differences in appearance can be seen below.

Allan
Hi Allan;

Yes, they are kit pieces, very generic spun brass pieces. I assume due to the scale, there wasn't a big push to get closer to the real thing.

I am sure there are many after market options out there that would provide better, more detailed versions of all of the cannons.

I went down that path when I did my Trumpeter Titanic. I purchased quite a few of the after market mods, detail up kits, etc. It added a GREAT DEAL of cost to the final model. I wanted to keep the costs for the Victory close to the already steep $1000-$1100USD cost.

Chris
 
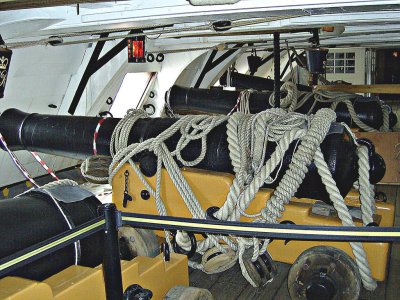
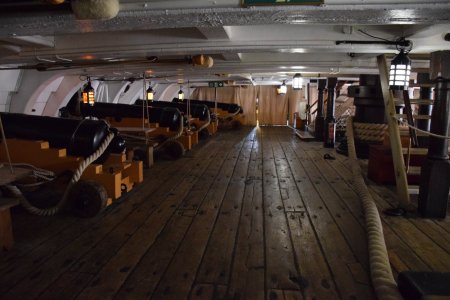
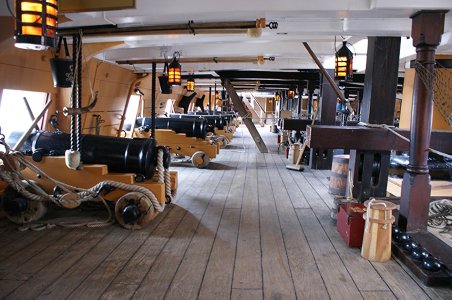
Good morning, I hope to do some help with these images.Frank

View attachment 487852

Thank you Frank;
I had a lot of those pics in my files for reference. You can see in the one above the tying off or looping of the bitter end of the cannon tackles being wound around the whole tackle structure.

I like this pic as it's a mish mash of lines all over the place....kind of what my cannons look like!!!!!
Chris
 
Back to work!

While I've been struggling with them cannons, I have also been struggling with adding the profiles.

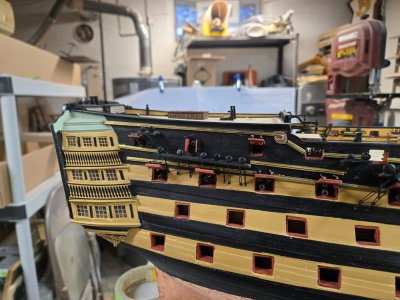
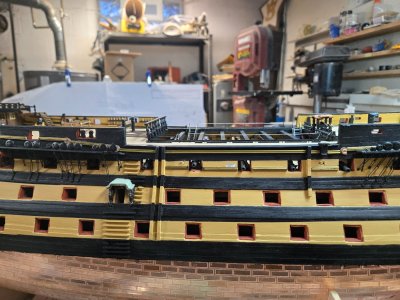
First, I should have added the profiles first. I had taken a lot of time working on the channels and deadeyes and trying to get them located correctly. And then to make sure one side matched the other side. When I was done, it was apparent that I didn't get them 100% right and is evident when attaching the chainplates per the blue print plans.

The directions call for the installation of the profiles almost as the very last detail before moving on the mast/rigging work.

That is just wrong.

If you lay the profiles first, it will provide a better layout of where the channels MUST be. In addition, it just seems easier to cut and glue the profiles in their proper locations as opposed to the channels.

Well, let the next rookie viewer beware! DO THE PROFILES FIRST!

I did the best I could with what I have after the channels were already placed. In some places, I had to alter the course of a profile and in some areas I had to decide not to place a piece.

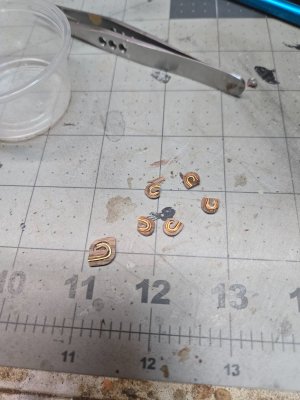
I also enhanced the moulding swirls provided. I added differing diameters of wire to the recesses of the swirls. After they were painted, it was hard to see anything, but it was fairly easy to create them. Sadly, I knocked over the little dish I stored them in and lost 3 or 4 under my bench. Despite repeated sweepings, they are gone, gone, gone.

I made new ones and again, once painted, they are barely visible.

After doing both side, I painted the profiles and then circled back with a 3-0 brush to touch up what I could and redo the chainplates.
Once painted they kind of disappear into the hull, but create a new nuanced bit of detail.

I believe there is one additional thinner piece of trim that I can add, perhaps using brass tubing. I'll do some more looking.

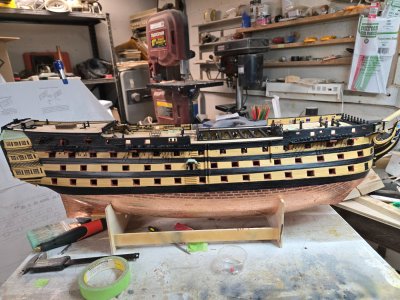
After adding the anchor palm blocks, I think I'm close to the hull being finished....

20241201_130642.jpg

20241201_130649.jpg

20241201_130653.jpg

20241201_133354.jpg

20241201_133359.jpg

20241201_133403.jpg

20241201_133407.jpg

20241204_173048.jpg

20241204_173053.jpg

20241204_173059.jpg

20241204_173123.jpg

20241204_173128.jpg

20241204_173131.jpg

20241201_125524.jpg

127134-Hms-Victory hhhh.jpg
 
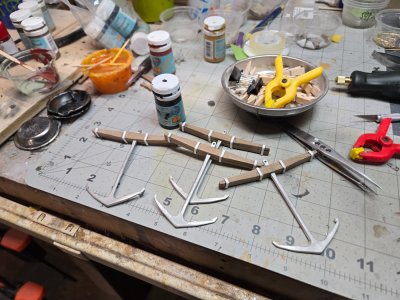
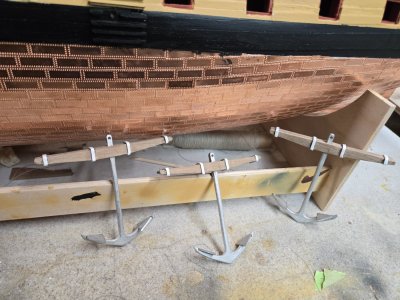
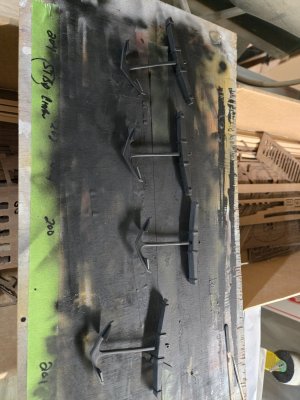
Worked on the anchors.

Which I have built incorrectly. I will need to go down and see (HOPE) if I can pull the cast anchor off the stock and turn them 90 degrees.

I have no idea what I was thinking...

I used 2mm styrene for the metal strapping on the stocks. I have seen one builder use wire shrink wrap. That would be a great idea. I have tons of different sizes, but they are all on my boat, laid up for the winter. I could have gone to Harbor Freight and buy a cheap set...but I had the styrene around.

The only problem is styrene breaks very easily around 90 degree bends. It required careful setting and some sanding and filling before painting.

You also have to sand and/or file the castings to smooth them out.

I used iron black to paint them. I like the subtle difference in the color compared to the dull black of the hull.

I will keep you posted on my adjustments!

20241130_124614.jpg

20241130_125551.jpg

20241204_173149.jpg
 
Back
Top