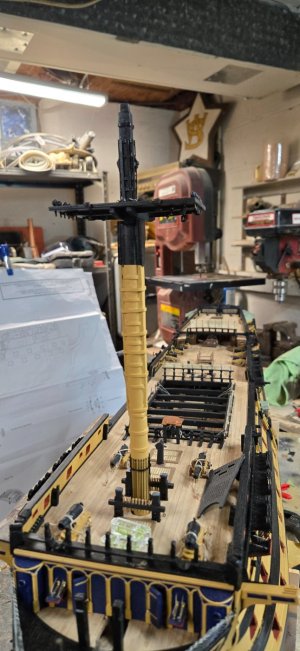
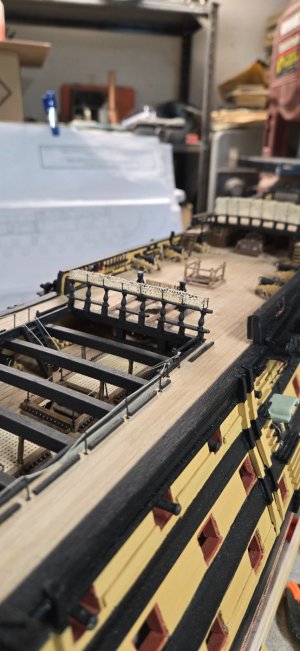
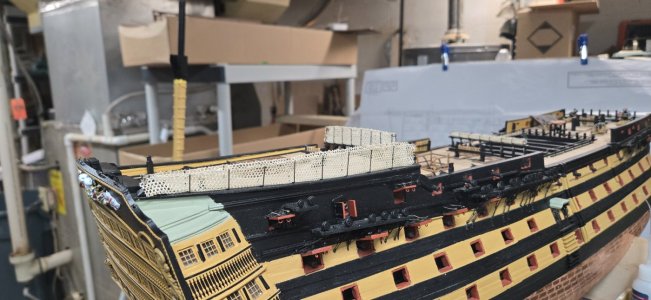
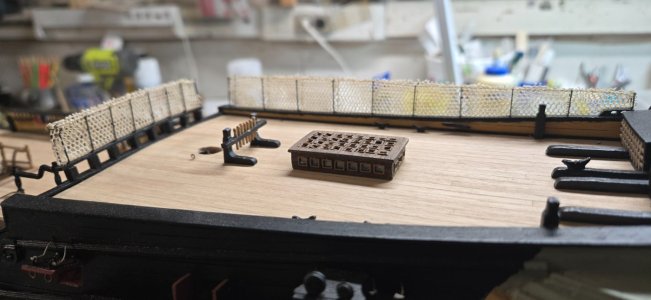
H.M.S. Victory by Caldercraft - Build Log

Setting the bowsprit aside for now, here is what I tried to do with my first attempt at masts with the foremast.

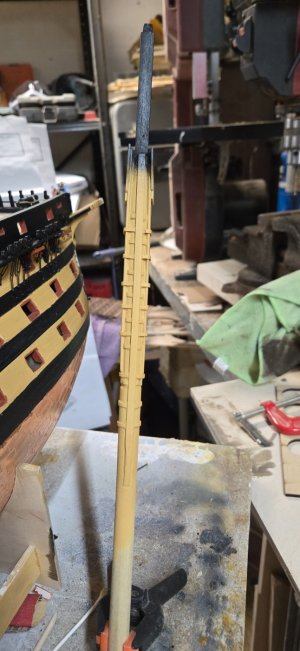
I was able to square off the top of the lower foremast and then add the smaller square on top of that for the forecap. Squaring off things is MUCH easier than trying to add 6 or 8 sided shapes.

I shaved off the sides for the cheeks but may have gone too far or too deep in my first run at it.

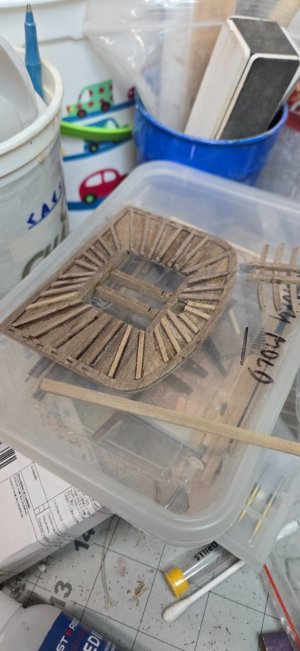
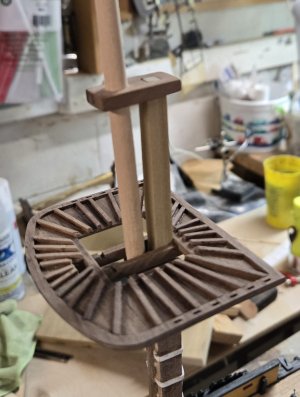
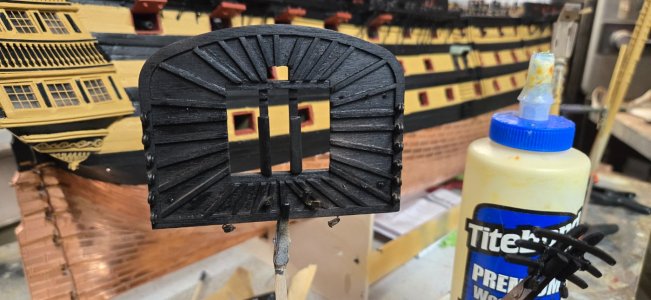
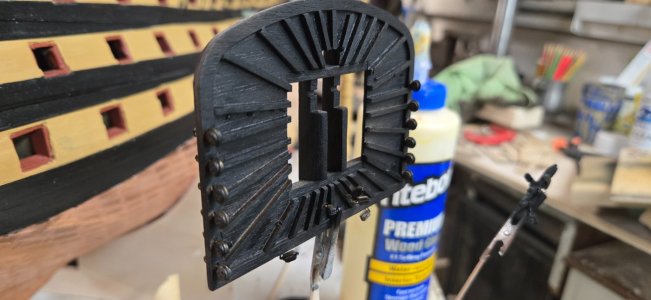
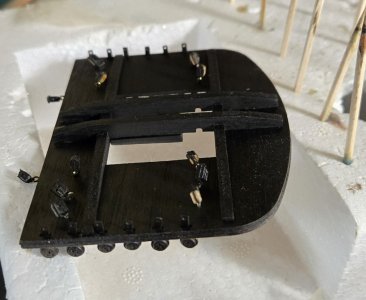
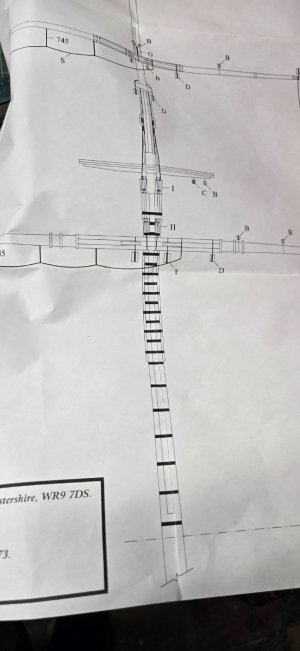
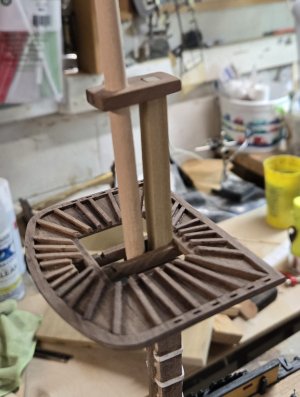
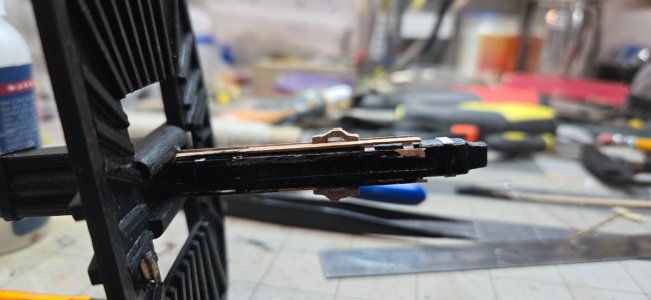
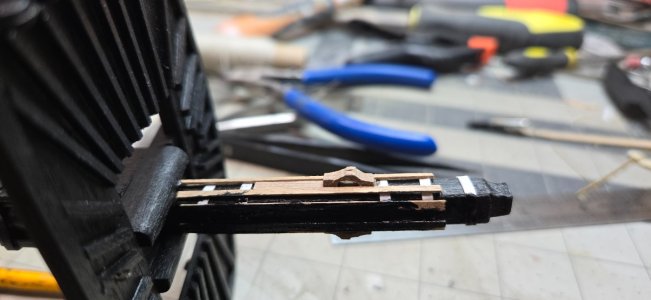
I also started with the first platform. You need to add 1.5x1.5mm strips to the top of the platform. Some have traced the pattern on the blueprints and then using carbon paper and tracing paper, drew these patterns over the platform. That would work, but I didn't have either close my. So I kind of laid the platform over the blueprint and marked the battens locations.
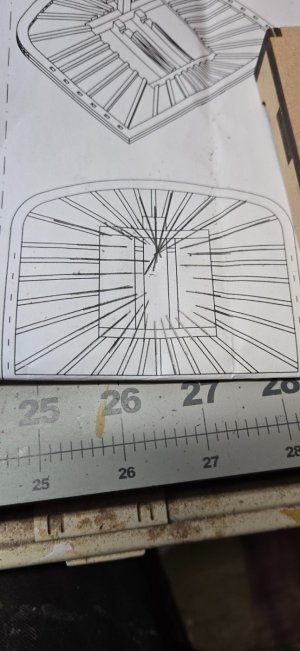
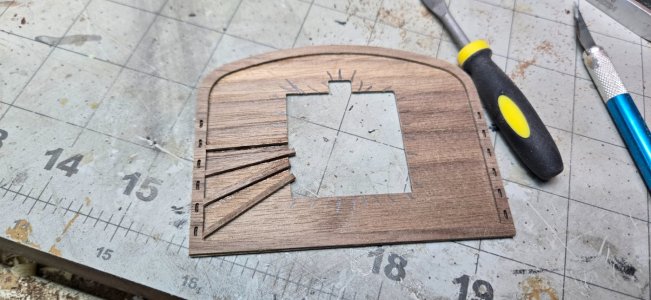
20241220_153442.jpg20241220_153453.jpg

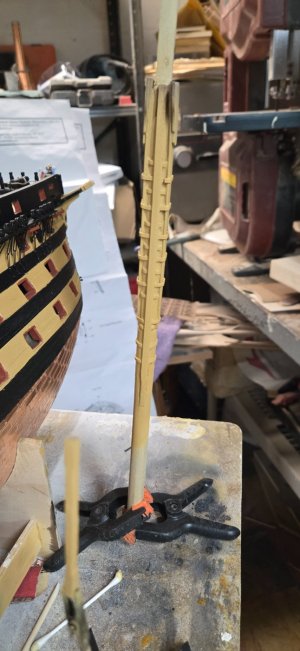
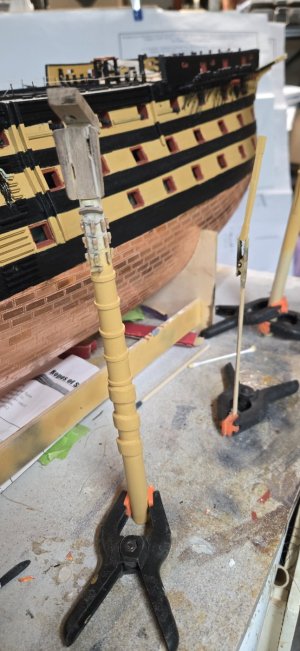
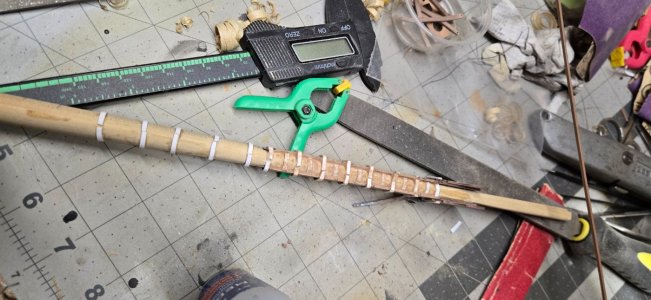
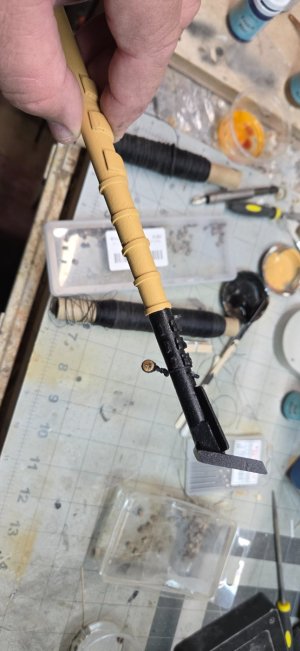
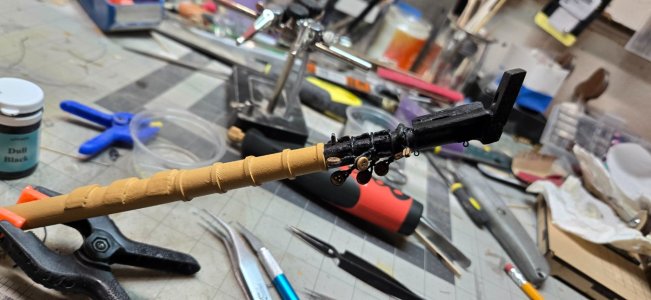
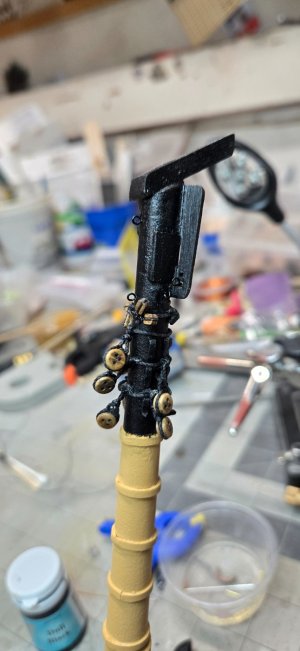
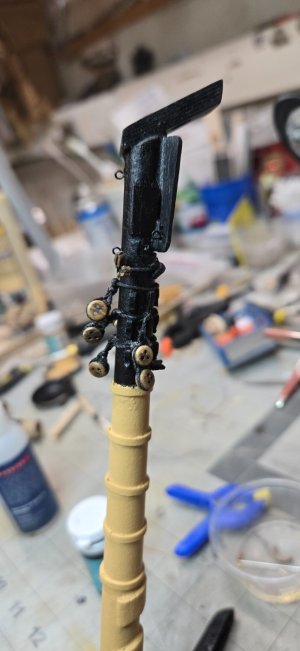
One of the issues that arose was the completion or finish of the lower masts and how they will look. The cheeks require banding under and over them and then there is a paunch that goes over all the banding of the front of the mast. All of this creates spaces between the various wood pieces as they sit on the bandings.

In my case, I used 2mm wide strips of styrene, which have a thickness to them. The directions call for the use of cartridge paper, which I assume is what we call construction paper. Hardly thicker than regular paper. I have ordered some thin brass, but it comes in sheets, not strips, but I'll see if when I get it I can cut it with a paper cutter...to insure consistency in the width.

Meanwhile, I used the styrene with CA glue and it just sucks. The styrene breaks at hard angles and the glue gets all over everything....it was the second planking all over!

I also wasn't as diligent in making sure the bandings are even/level as they circle the mast. I will have to to a better job on the rest.

Once completed, I looked for pics of other builds and live shots. It appears in the few good live shots that the cheeks and paunches were grooved so that the bandings fit under and were tight. It appears in builder blogs that people used putty to fill the voids.

That is what I did. It's sloppy and requires a lot of sanding and cleaning after the fact. Hopefully a few heavy coats of paint will blend it all in.

Working on the top mast and t'gallant mast required some detailed work creating 8 sided shapes. On the top mast, you have to add a small octagon and is offset from the main one. Also, these mast sections are much thinner and 8 sided shapes tend to get lost due to their small size. Once done as best as I could, I created the crosstrees and the foremast cap.

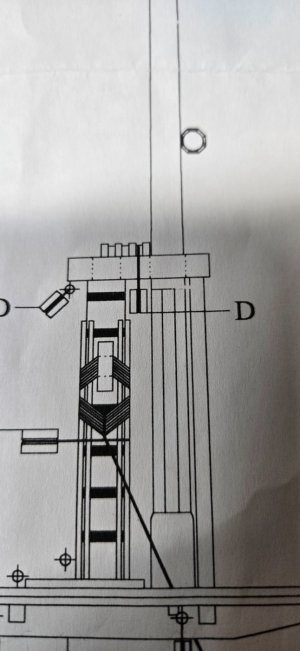
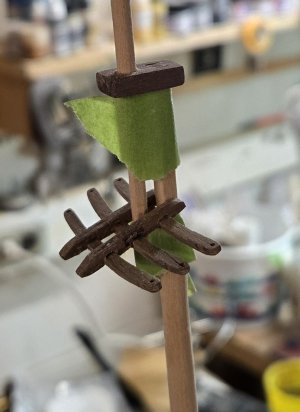
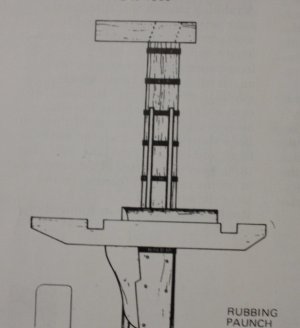
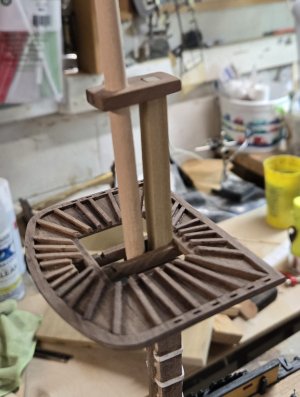
The foremast cap (#66) require the adding of foremast saddles (#340, 348), however, there is little to convey what that means. I finally found a side view on one of the blueprints and those 5 pieces fit together to create a groove for future lashings...
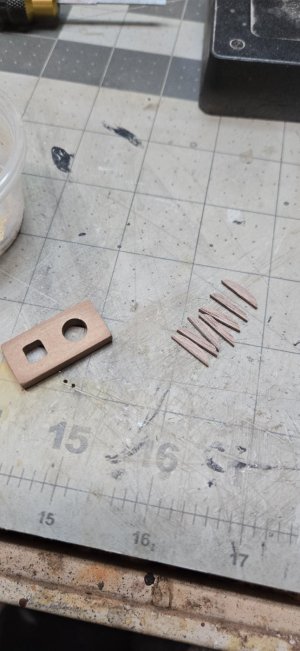
20241221_231959.jpg20241221_232538.jpg

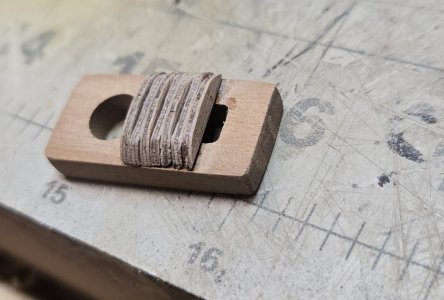
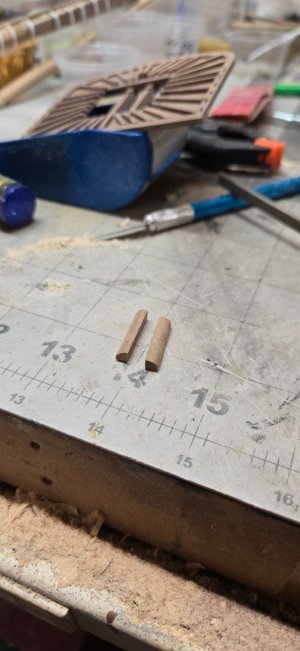
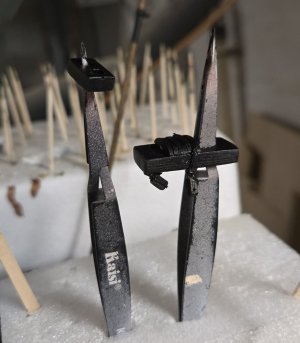
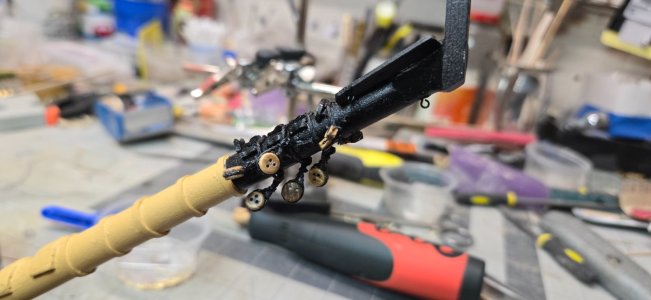
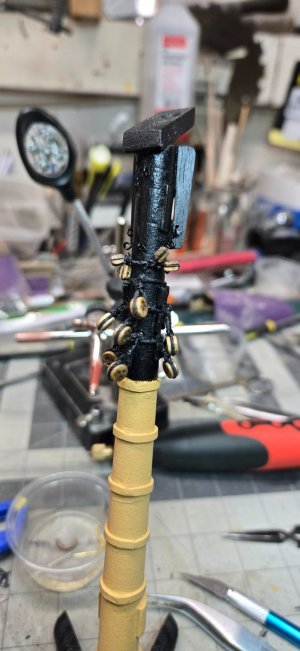
You also have to add bolster to the platform and crosstrees to help keep the various upper mast sections in place. These are bigger 3x3 or 4x4 pieces, that are fairly small in length (5-10mm). I used tweezers or clamps to hold them as I filed them into quarter rounds.
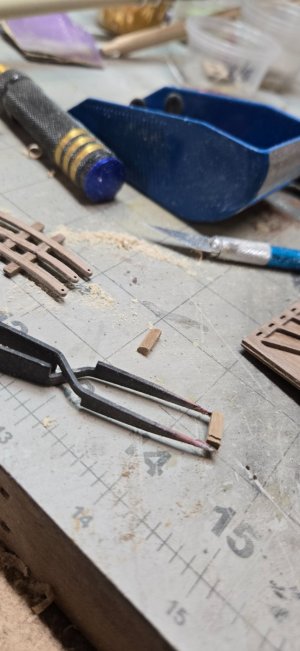
20241221_111830.jpg20241221_112351.jpg

It may be better to apply these after the masts are set up, but my way didn't interfere in the end.

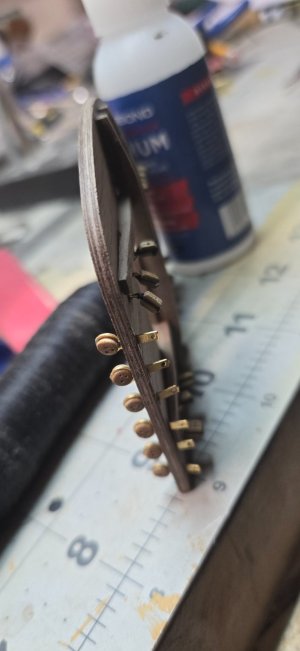
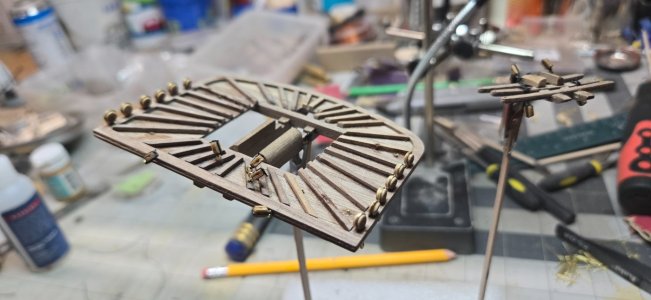
I also added most of the various blocks to the forecap, crosstree and platform before assembly. The directions don't call for this at their point, but it seems to me to be far easier to do all of this while the various bases are free and easy to move.
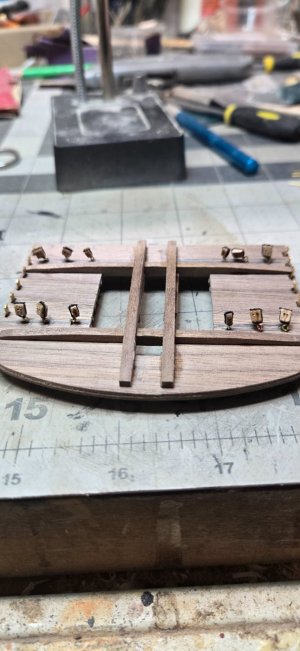
20241221_172643.jpg20241221_183843.jpg

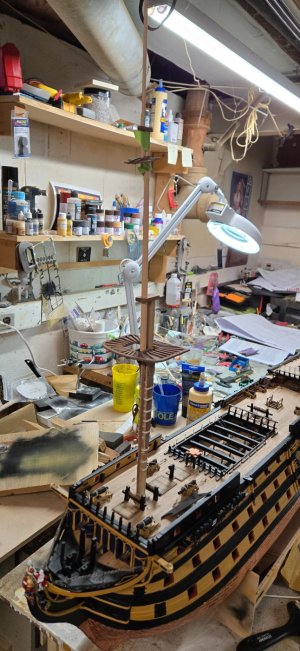
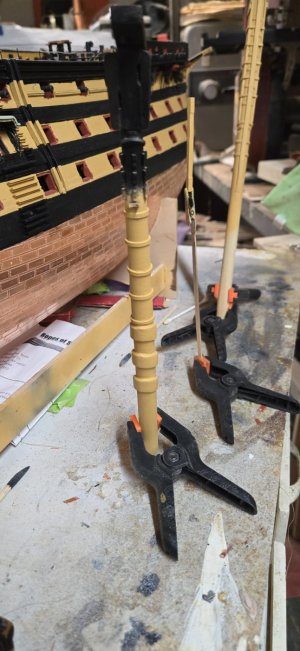
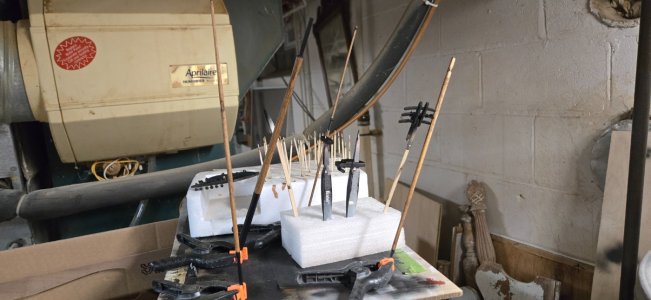
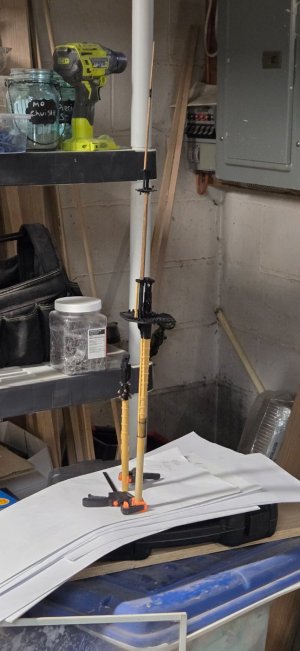
I also added some pics of what the 3 mast sections will look like assembled. They aren't 100%, just an idea of what I was going to have to deal with at the end.
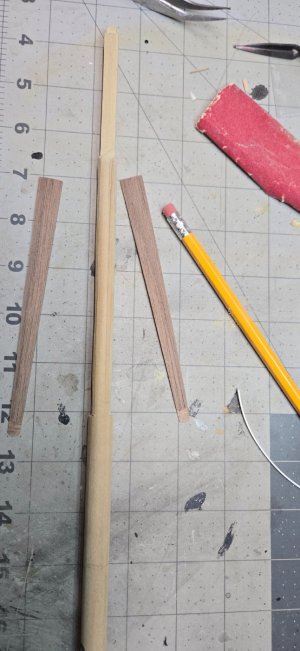
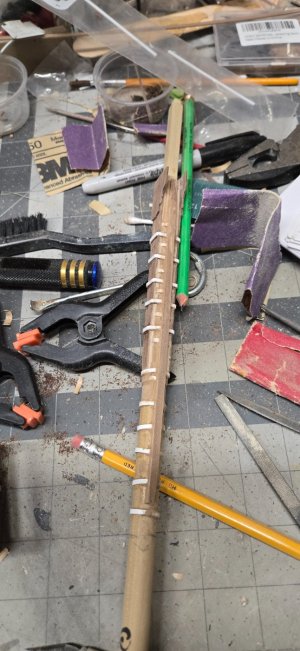
20241216_162621.jpg

20241220_190406.jpg

20241220_190419.jpg

20241220_190428.jpg

20241221_110618.jpg

20241221_110625.jpg

20241221_110630.jpg

20241221_110637.jpg

20241221_110655.jpg

20241221_112905.jpg

20241221_172717.jpg

20241221_183825.jpg

20241221_231953.jpg
 
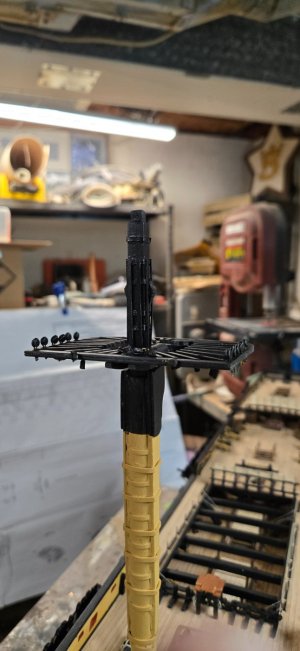
Painting everything took 3-4 coats using an airbrush. As more layers were added, I became a bit more happy with the results....a bit.20241222_000521.jpg

Painting the platforms, crosstrees and forecaps were fine and most of the blocks and deadeyes remained clear.

Assembly of the 3 mast sections is vague for a newby, but is straight foward after the fact...

A few things, the lower foremast requires a pike rack. This is a 3 piece photo etch assembly, but the bands that are required all the way to the bottom of the mast will get in the way of this and there is no mention not to install them until after the pike rack is installed. I had to remove mine and didn't bother re-installing them.
Step one:
Add the platform to the lower foremast. In my case, the bibs weren't as even as they should have been and it forced me to adjust the platform so it's level all the way around but doesn't sit squarely on the bibs now. Glue in place once you are happy.

After, you have to install banding on the squared top end and then strips of .5mm wood to the edges. This was hard because you have to use 3mm wood strips and cut them down the middle, still working out a way to do this neatly.

After that, you add the jeer strop cleats, the blueprints misnumber these parts.
20241226_134703.jpg

Step Two:
No pictures yet....
20241221_110625kk.jpg
You add the foremast cap to top of lower foremast.
The fore topmast will fit through the front round hole of the cap and slide down so that it hits the platform.
When ready, you'll fit this per the blueprints and drill a hole through the topmast so that you can add a 'fid' or stop so that the topmast will sit on top of the platform.
There is a handmast (#149) that will be glued in front of this. In real life, this mini mast stops the top and top gallant masts from raking too far foward due to the strains on the standing rigging that holds the mast in place.

Step Three:
No pictures yet
20241221_110630kk.jpg
Add the crosstree to the bottom of the squared off section of the topmast
You add the topmast cap (#88) to the square of the fore topmast.
The top gallant mast (t'gallant) will slide through the round hole and slides down so that it rests on the crosstree.
You will drill a hole into t'gallant so that a 'fid' will be inserted so that the t'gallant mast sits on top of the crosstree.

If you don't glue the fids in place, you can remove the 3 sections, or at the very least permanently glue the base mast in place and leave the top 2 sections off until ready for mast work.....

20241222_000529.jpg

20241222_000552.jpg

20241222_000558.jpg

20241222_180009.jpg

20241222_180013.jpg

20241222_180039.jpg

20241222_180043.jpg

20241222_180053.jpg

20241226_134708.jpg

20241226_134717.jpg
 
While doing this, I also began work on the main mast.

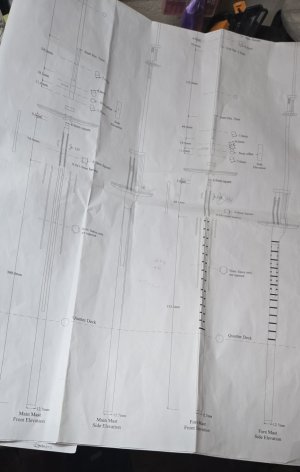
One of the blueprints provides scale drawings of all 3 masts. After using this plan at length for the creation of the foremast, I naturally turned to it for the mainmast.

To my delight, there was no banding required!!!! How exciting, this was going to go so easily!
I squared off the ends like a champ. Used by drill to taper that sucker down as required.

Shaved off the sides for the cheeks and glued them in place. Then I add the paunch and bibs. Man, she was going to look smart!!!!

There is a separate blueprint for the mainmast, so I pulled it out to begin getting the rest of the various parts ready.

WHAT!!!!! There is banding? WTF.

Why would the main plan show banding for the foremast and then just leave it off for the other 2 masts? Ink that expensive?
You can't look at the directions because all they say is that the main and mizzen are built just like the foremast....

It's my fault, I didn't review the mast specific plan and didn't thoroughly go over everything before continuing. But it would have been a simple thing to just add the banding to blueprint #6.

Oh well. The paunch came off in pieces due to the glue. I didn't dare risk removing the cheeks out of fear of breaking them. So I had some thin styrene strips (thinner than the regular stuff I was using) and added this to the front and back of the mast to create the illusion of the bands being under the cheeks.

Doing the best I could, I finished the banding, added putty to voids and added the paunch back on.

I had set aside more work on the main mast as I finish the foremast, begin more work on the bowsprit and start on the hammock cranes....

20241222_161739.jpg

20241222_161747.jpg

20241222_180028.jpg
 
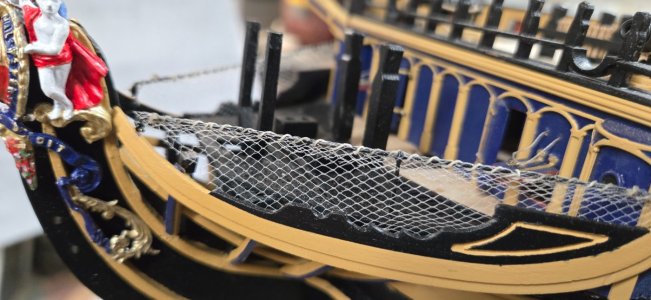
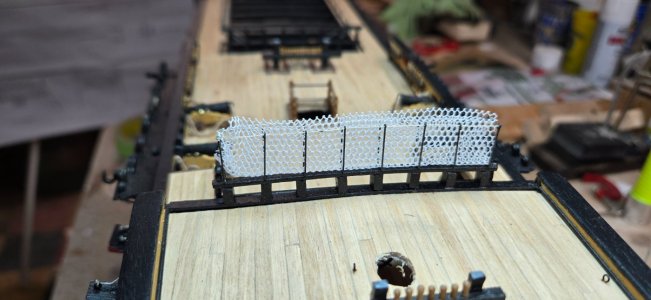
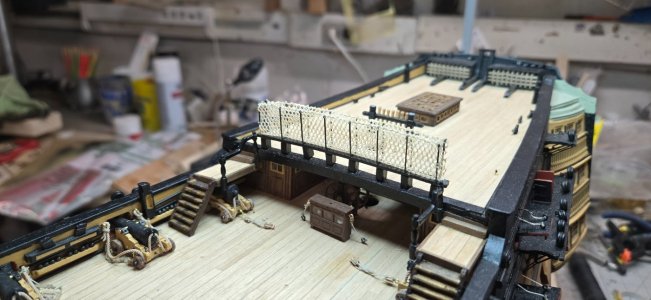
I had purchased 2 different colors of nylon tulle for the hammock netting.
I used the ivory version and finished the netting on the bow:
20241225_130427.jpg

It looked good, but the nylon is so grabby and I worried about working with this material as I tackled the larger areas in the back.

I tried the tulle on the poop deck hammocks. The result was ok, and I suppose would be adequate....
The problem was that the tulle is so delicate and grabby that in my test, i just cut enough for one side of the hammock. I figured I'd add the other side after.
20241218_142444.jpg20241218_142527.jpg

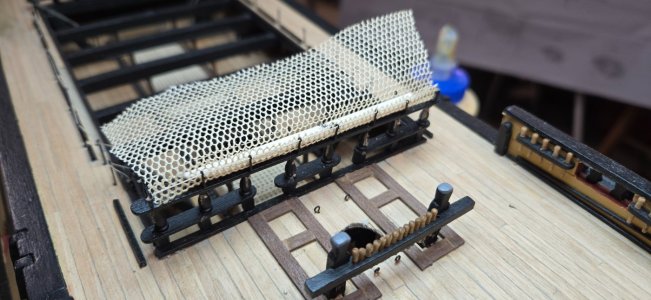
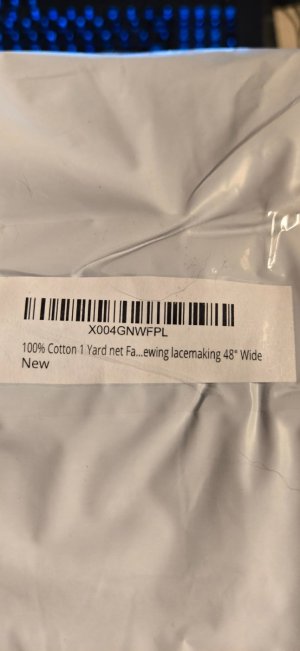
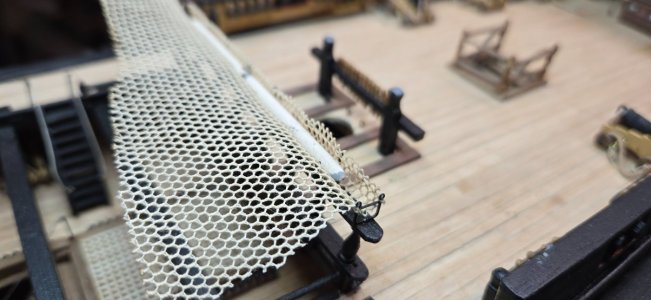
I finally found a material that was cotton that didn't cost $60USD or more for the very little I was going to use. It was $9USD through Amazon and while the shape isn't going to be quite the same, it's cotton and is easier to manipulate.

I was able to stain this using coffee. I tried tea, but it wasn't dark enough.
Here is the material before staining, you can see the pattern is larger than the tulle.
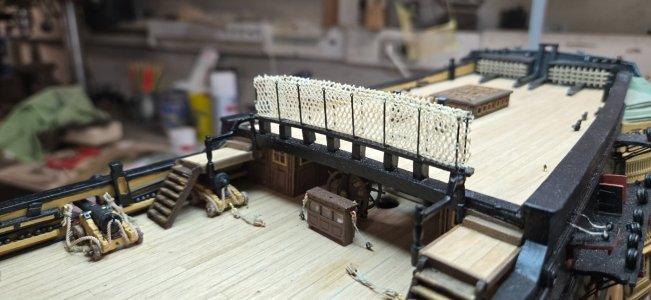
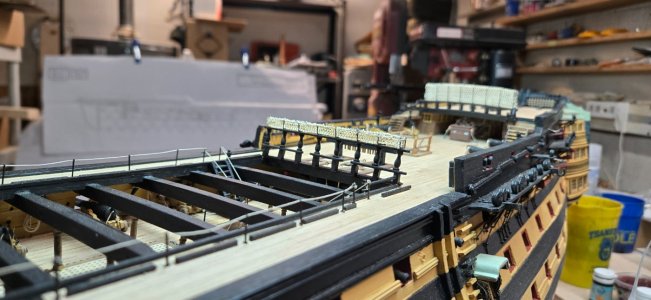
In this pic, it almost looks plastic, but you can also see I was able to add the complete netting for both sides.

20241224_143547.jpg


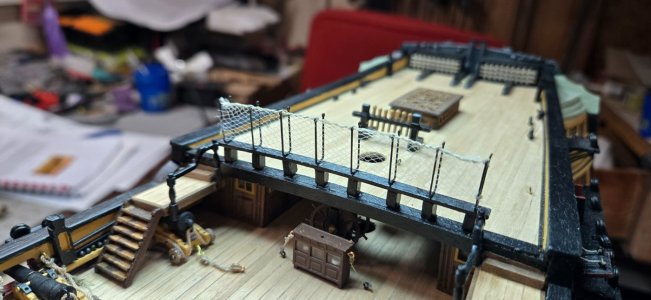
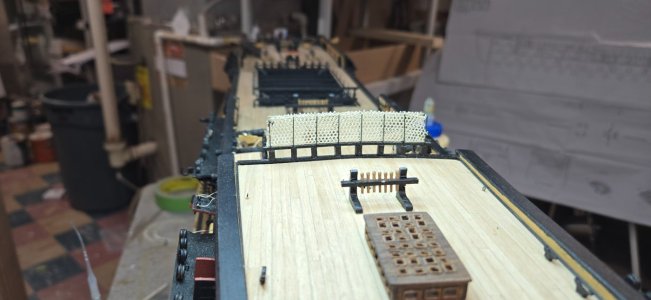
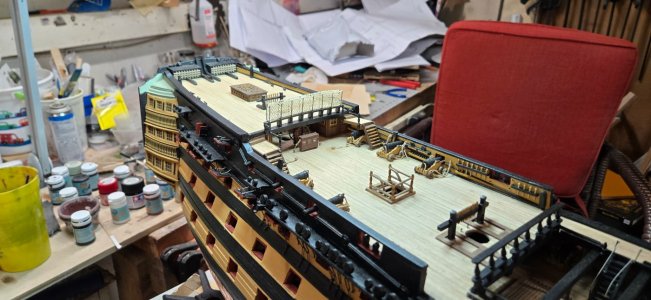
I did the poop deck. I was very careful to cut the piece along the edge so that I wouldn't open up a seam...so to speak.
I fit the netting into the hammock and sewed the tops along the hammock lining.
It went easier for the back side as I sat at the stern of the boat and faced the rear of the sling....sewing towards myself. You can see that the the rear line of the netting is cleaner than the forward. It also appears that adding some CA glue to the edges helped.
20241225_130422.jpg

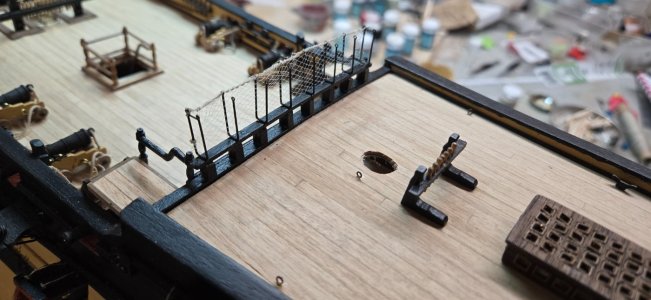
For the quarterdeck hammock, it is much smaller in height. I over cut the piece and let it hang. I used the dowel from a sanding stick to help keep the netting in place as I sewed it. Once a side was done, I carefully cut the other side to the proper height and sewed this onto the slings.

It's a bit sloppy looking and I think some glue will help to smooth out the cotton ends.
20241226_121614.jpg
20241225_132253.jpg

20241222_205427[1].jpg

20241222_205458.jpg

20241225_130349.jpg

20241225_130414.jpg

20241225_130445.jpg

20241225_132300.jpg
 
I had purchased 2 different colors of nylon tulle for the hammock netting.
I used the ivory version and finished the netting on the bow:
View attachment 491995

It looked good, but the nylon is so grabby and I worried about working with this material as I tackled the larger areas in the back.

I tried the tulle on the poop deck hammocks. The result was ok, and I suppose would be adequate....
The problem was that the tulle is so delicate and grabby that in my test, i just cut enough for one side of the hammock. I figured I'd add the other side after.
View attachment 491996View attachment 491997

I finally found a material that was cotton that didn't cost $60USD or more for the very little I was going to use. It was $9USD through Amazon and while the shape isn't going to be quite the same, it's cotton and is easier to manipulate.

I was able to stain this using coffee. I tried tea, but it wasn't dark enough.
Here is the material before staining, you can see the pattern is larger than the tulle.
In this pic, it almost looks plastic, but you can also see I was able to add the complete netting for both sides.

View attachment 491998


I did the poop deck. I was very careful to cut the piece along the edge so that I wouldn't open up a seam...so to speak.
I fit the netting into the hammock and sewed the tops along the hammock lining.
It went easier for the back side as I sat at the stern of the boat and faced the rear of the sling....sewing towards myself. You can see that the the rear line of the netting is cleaner than the forward. It also appears that adding some CA glue to the edges helped.
View attachment 491989

For the quarterdeck hammock, it is much smaller in height. I over cut the piece and let it hang. I used the dowel from a sanding stick to help keep the netting in place as I sewed it. Once a side was done, I carefully cut the other side to the proper height and sewed this onto the slings.

It's a bit sloppy looking and I think some glue will help to smooth out the cotton ends.
View attachment 491993
View attachment 491991

View attachment 491984

View attachment 491985

View attachment 491987

View attachment 491988

View attachment 491990

View attachment 491992
Looks really good
YOu are making excellent progress
 
So I made an installation error that I cannot undo without major deconstruction or possible damage to parts.

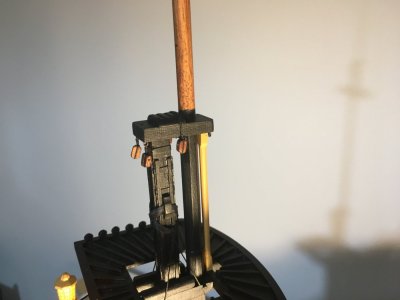
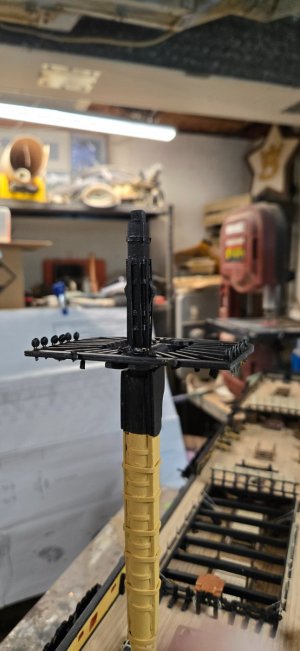
I honestly thought I had installed the platform for the lower foremast correctly. I had lined the mast up on the scale plans and judged where the platform needed to sit. As you can see, I have the rear of the platform sitting flush against the foremast squared off post.

I should have known this wasn't correct because one of the final tasks is the installation of the hand mast. This is supposed to sit directly under the foremast cap and ON TOP of the platform.

I see that there are notches to hold the 'fid' that will help support the top foremast. I didn't do that, the top foremast and the fids sit on top of the bolsters and I had to add a piece of wood strip so that when I install the hand mast, it will have a place to sit. I just thought that was what those notches were for.
20241221_110625kk.jpg

But I then found this pic I had saved and can easily see that my platform is too far aft...
IMG_4412.thumb.jpeg.76fb777a9459141b8cf318a6c6785e78.jpeg

I have put the foremast together and I can't take it apart. It isn't installed on the boat, but it is a solid piece now.

It isn't going to affect the angle or placement of the shrouds as they are started on the mast. But I think it's going to alter the topmast shrouds a bit.

I have or plan on making sure the other 2 masts will be done right.

Just want to make sure others see this before foolishly following anything I do without first double checking with someone who actually knows what they are doing!!!!

20241226_134703.jpg
 
Chris,
Below is a drawing from James Lees' Masting and Rigging English Ships of War. I think most would agree it's usually a good idea to confirm modern plans with information based on contemporary sources. Lees' book is a Godsend for both kit builders & scratchers.
Allan
1735512972891.jpeg
 
1735551210908.jpeg

Chris I think you could separate the top from the mast and correct the error.
To not adjust it will leave many aspects of the topmast and rigging out of alignment.
If any damage occurs to the parts of the mast during removal I am certain you have the skill to make good the damage, and paint will cover much. I encourage you to give it a go.
 
Chris,
Below is a drawing from James Lees' Masting and Rigging English Ships of War. I think most would agree it's usually a good idea to confirm modern plans with information based on contemporary sources. Lees' book is a Godsend for both kit builders & scratchers.
Allan
Hi Allan, Happy New Year!!!

Thanks for the quick pic. I agree, I have a few books and have been using Longridge a lot now that I am at the beginnings of the rigging stage of the build.
I found a good used edition of Lee's book and just ordered it. Thanks for the tip!

I'll keep plugging along and hope this mistake isn't too catastrophic!
Chris
 
View attachment 492410

Chris I think you could separate the top from the mast and correct the error.
To not adjust it will leave many aspects of the topmast and rigging out of alignment.
If any damage occurs to the parts of the mast during removal I am certain you have the skill to make good the damage, and paint will cover much. I encourage you to give it a go.
I don't think I've posted here before, Chris, so maybe I shouldn't now either...

But allow me to join with Michael (@Chestcutter) on this issue. I believe you can get this apart without damaging anything. Use a solvent that pairs with the glue you used and give it a shot. The geometry will be slightly off - but once you see this next to the correct construction on the remaining masts you will never 'unsee' it and it will drive you utterly bonkers every time you walk past your model.

Give it a day to all soak in and the decision becomes easier...at least that's been my experience.
 
Last edited:
I don't think I've posted here before, Chris, so maybe I shouldn't now either...

But allow me to join with Michael (@Chestcutter) on this issue. I believe you can get this apart without damaging anything. Use a solvent that pairs with the glue you used and give it a shot. The geometry will be slightly off - but once you see this next to the correct construction on the remaining masts you will never 'unsee' it and it will drive you utterly bonkers every time you walk past you model.

Give it a day to all soak in and the decision becomes easier...at least that's been my experience.
Hi Chris
I agree with the previous posts and believe it's definitely worth correcting this situation
I'm sure you have the skills to do that and unglue the parts
Good luck
 
You guys were right, just no way I could think about it being off....

I appreciate the kind kick in the butt!

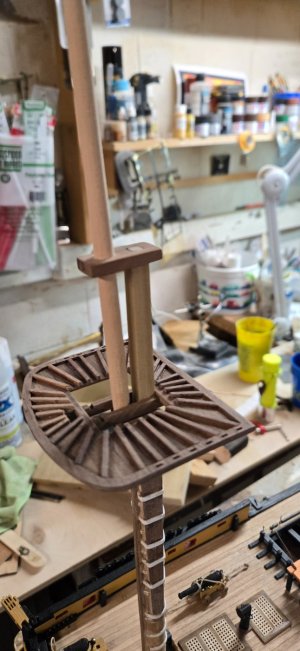
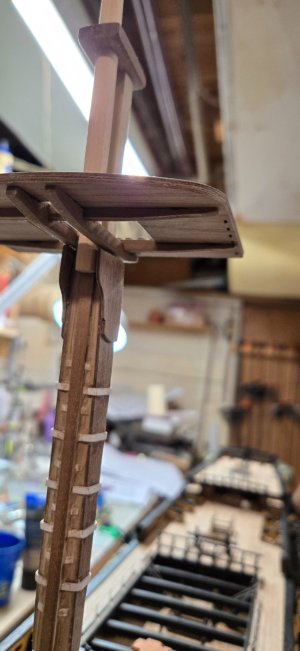
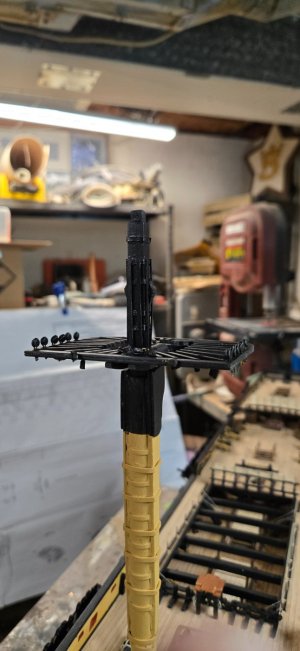
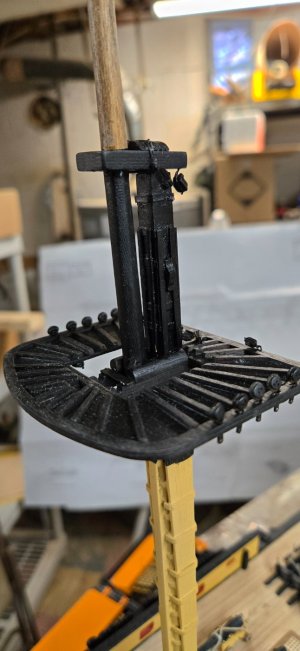
I soaked the platform and foremast cap with acetone to soften the CA glue. After a quick tug, the top foremast/t'gallant mast came off....no damage.
With a little rocking, the platform came loose. No damage.

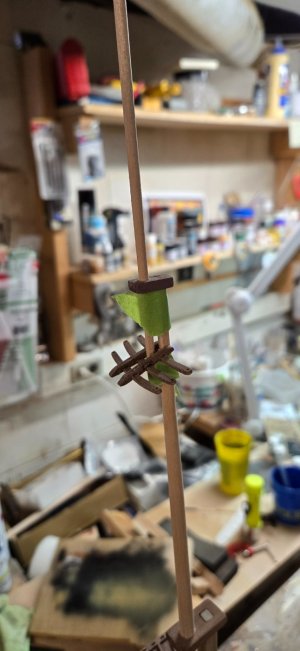
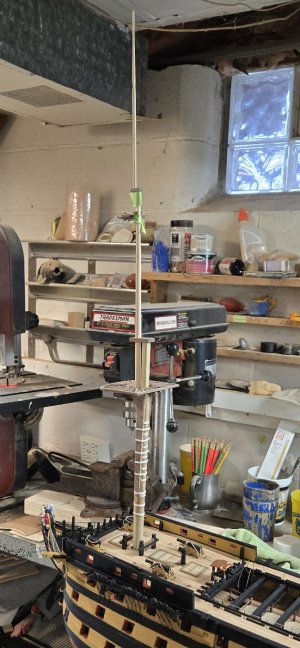
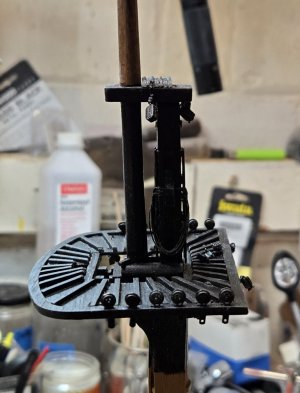
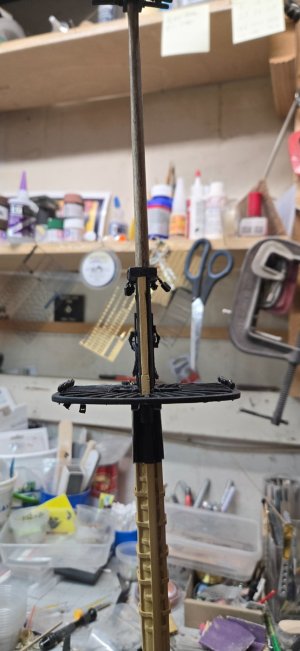
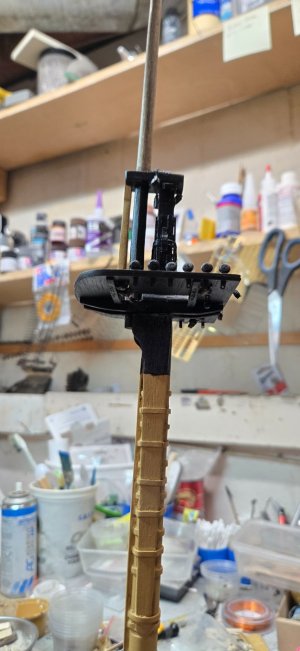
I realigned and redrilled where the fid needed to be and reset the platform based leveling and plumbing.

After, I was able to place the hand mast (which I had to make because the original fell off the sprue much earlier in the build and while I put all wood from the kit back into the back (including used sprue), I just couldn't find it. Easy enough to make a close copy....to a point.

After that, it all seemed to fit back together and it all appears straight and was plumb when inserted into the deck.

THANK YOU!!!!!

20241226_134703.jpg

20241227_124047.jpg

20241230_095234kk.jpg

20241230_101717.jpg

20241230_101736.jpg

20241230_112643.jpg
 
While screwing up my masts, I tried to tackle some of the block work on the bowsprit.

Using Longridge's book and a few pics of other builds and of course the blue prints, I think I got it right.

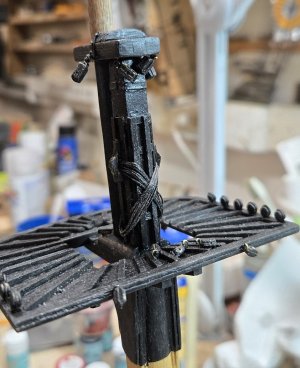
I also added the rigging through the jeer block strops. As I thought, the strops fit onto the mast and are/were obstructed by the banding on the sides.
I added some small blocking under the strops to get them higher.

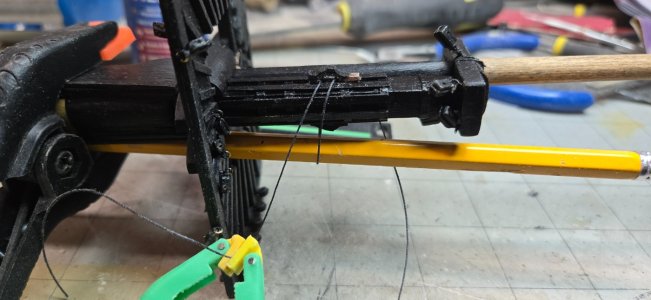
I clamped a pencil under the mast as I looped the line through the strop and down. I thought this would give me the right distance/shape. Once it was done, I added some watered down white glue to try and get the right shape as I've seen in other pictures, live or model.

While continuing on with the main mast, I added a piece of 3mm walnut in between the bandings. This brought up the strops so they are clear.

20241228_131159.jpg

20241228_180845kk.jpg

20241229_002445.jpg

20241229_132945.jpg

20241229_133007.jpg

20241229_133033.jpg

20241229_133042.jpg

20241229_133045.jpg

20241230_111652.jpg

20241230_111654.jpg
 
Finally, I installed one of the poop hammock slings.

I like the new cotton lace, but it is a bit too large.
Also, it does leave little irish pennants. I want to cut them, but they are way too close to the hammock lines and any attempt to trim them is going to cut into the hammock nettings or the lines holding them.

I wish there were little right angle scissors! Yes, I know there are...for you surgeons out there.

The netting seems to pinch in a bit, perhaps some really diluted white glue would help. I will do some experiments and see.

Onward I go!

20241229_233926.jpg

20241229_233936.jpg
 
You guys were right, just no way I could think about it being off....

I appreciate the kind kick in the butt!

I soaked the platform and foremast cap with acetone to soften the CA glue. After a quick tug, the top foremast/t'gallant mast came off....no damage.
With a little rocking, the platform came loose. No damage.

I realigned and redrilled where the fid needed to be and reset the platform based leveling and plumbing.

After, I was able to place the hand mast (which I had to make because the original fell off the sprue much earlier in the build and while I put all wood from the kit back into the back (including used sprue), I just couldn't find it. Easy enough to make a close copy....to a point.

After that, it all seemed to fit back together and it all appears straight and was plumb when inserted into the deck.

THANK YOU!!!!!

View attachment 492446

View attachment 492447

View attachment 492448

View attachment 492449

View attachment 492450

View attachment 492451
Excellent
Glad you succeeded
 
Back
Top