Way to go ChrisYou guys were right, just no way I could think about it being off....
I appreciate the kind kick in the butt!
I soaked the platform and foremast cap with acetone to soften the CA glue. After a quick tug, the top foremast/t'gallant mast came off....no damage.
With a little rocking, the platform came loose. No damage.
I realigned and redrilled where the fid needed to be and reset the platform based leveling and plumbing.
After, I was able to place the hand mast (which I had to make because the original fell off the sprue much earlier in the build and while I put all wood from the kit back into the back (including used sprue), I just couldn't find it. Easy enough to make a close copy....to a point.
After that, it all seemed to fit back together and it all appears straight and was plumb when inserted into the deck.
THANK YOU!!!!!
View attachment 492446
View attachment 492447
View attachment 492448
View attachment 492449
View attachment 492450
View attachment 492451
-

Win a Free Custom Engraved Brass Coin!!!
As a way to introduce our brass coins to the community, we will raffle off a free coin during the month of August. Follow link ABOVE for instructions for entering.
-

PRE-ORDER SHIPS IN SCALE TODAY!
The beloved Ships in Scale Magazine is back and charting a new course for 2026!
Discover new skills, new techniques, and new inspirations in every issue.
NOTE THAT OUR FIRST ISSUE WILL BE JAN/FEB 2026
You are using an out of date browser. It may not display this or other websites correctly.
You should upgrade or use an alternative browser.
You should upgrade or use an alternative browser.
H.M.S. Victory by Caldercraft - Build Log
- Thread starter team118
- Start date
- Watchers 41
-
- Tags
- caldercraft victory
It may be the photos, but I looks like some of your blocks are upside down. If they are, you can just drill the second hole, which should be there anyway, in the right place.
Allan
These blocks are the cheap single hole blocks, and yes they are upside down. Frankly, considering the high quality level of the Caldercraft Victory, these are a disappointment.
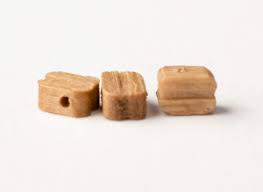
When the blocks only have a single hole to simulate where the rope passes through, it's easy to strop them upside down. Ask me how I know... That's why purchasing well made replacement blocks is a good idea. Carefully drilling new holes above the existing ones with a high speed Dremel is one way to go.
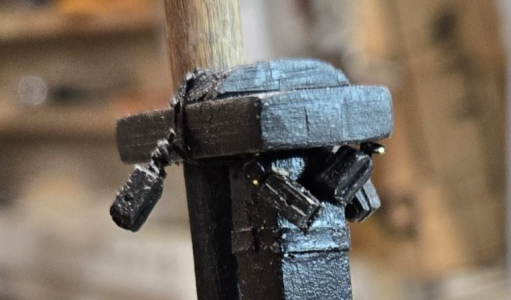
This is what we are trying to simulate.
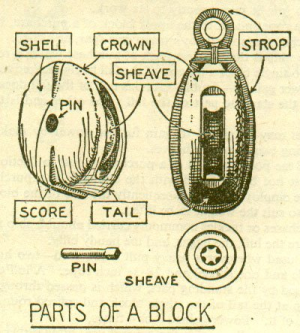
Dry-Dock Model Parts, Model Expo, and various other model parts suppliers make excellent blocks. They have the correct shape and you don't have to fight to push line through ragged, badly drilled holes!
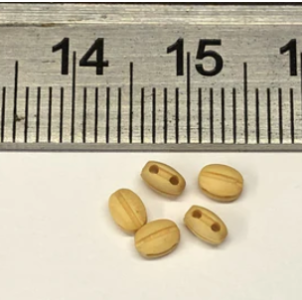
Often they were covered in pine tar like the rigging to seal the wood and prevent rot. Varnished or painted blocks can also be found. It all depends on the ship and what's available. Of course you would apply any coating in such a way as to not get it on the sheave pin.Looking at the photos again, they bring up a question. Were the blocks ever really painted? I can see this helping preserve the wood but I can also see this being a problem if it gets on the sheave or sheave pin. TIA
Allan
- Joined
- Mar 22, 2024
- Messages
- 396
- Points
- 168

BTW- blocks go back a long way- probably the oldest known dates to the 100AD period.
One huge wooden block reinforced with iron bands (Fig. 2), of the first century
after Christ, has been found in one of the large vessels possibly constructedby Caligula
on Lake Nemi.'0 The huge block is 1.08 m. long, 0.60 m. wide, and 0.28 m. thick.
The diameter of the sheave (quite possibly metal, although this is not specified in
the publication) is approximately 0.50 m. According to Ucelli, the rope passing
through the block was used either as a tow line or for maneuvering the mooring
hawser. One or more ropes passing through the attachments visible in the head of
the block would have secured it to some solid support. In this case, the block would
probably have been used not to reduce the amount of purchase necessary to lift a heavy
object, but simply to change the direction of force in order for the crew to tighten
the hawser.1
A very interesting wooden block (Fig. 3), resembling in some ways the one from
Kenchreai, was found in the " County Hall Ship " in London.'2 It dates slightly later
than A.D. 293.
- Joined
- Jun 17, 2021
- Messages
- 3,200
- Points
- 588

I am continually amazed by your dedication, evolving skills and speed with which this model is coming together. It is, in fact, humbling. Your determination to create a truly impressive model of such immense proportions is nothing short of voracious. Your results are becoming progressively beautiful and a pleasure to follow. I admire your determination to continually perfect and hone your skills as you climb this Himalayan learning curve.I had purchased 2 different colors of nylon tulle for the hammock netting.
I used the ivory version and finished the netting on the bow:
View attachment 491995
It looked good, but the nylon is so grabby and I worried about working with this material as I tackled the larger areas in the back.
I tried the tulle on the poop deck hammocks. The result was ok, and I suppose would be adequate....
The problem was that the tulle is so delicate and grabby that in my test, i just cut enough for one side of the hammock. I figured I'd add the other side after.
View attachment 491996View attachment 491997
I finally found a material that was cotton that didn't cost $60USD or more for the very little I was going to use. It was $9USD through Amazon and while the shape isn't going to be quite the same, it's cotton and is easier to manipulate.
I was able to stain this using coffee. I tried tea, but it wasn't dark enough.
Here is the material before staining, you can see the pattern is larger than the tulle.
In this pic, it almost looks plastic, but you can also see I was able to add the complete netting for both sides.
View attachment 491998
I did the poop deck. I was very careful to cut the piece along the edge so that I wouldn't open up a seam...so to speak.
I fit the netting into the hammock and sewed the tops along the hammock lining.
It went easier for the back side as I sat at the stern of the boat and faced the rear of the sling....sewing towards myself. You can see that the the rear line of the netting is cleaner than the forward. It also appears that adding some CA glue to the edges helped.
View attachment 491989
For the quarterdeck hammock, it is much smaller in height. I over cut the piece and let it hang. I used the dowel from a sanding stick to help keep the netting in place as I sewed it. Once a side was done, I carefully cut the other side to the proper height and sewed this onto the slings.
It's a bit sloppy looking and I think some glue will help to smooth out the cotton ends.
View attachment 491993
View attachment 491991
View attachment 491984
View attachment 491985
View attachment 491987
View attachment 491988
View attachment 491990
View attachment 491992
Respectfully, Pete Gutterman
VERY interesting. Thanks for pointing this out, the history of these kinds of things is fascinating.BTW- blocks go back a long way- probably the oldest known dates to the 100AD period.
Allan
- Joined
- Oct 21, 2022
- Messages
- 301
- Points
- 278

Hey, some great comments and that have been of great help for me and hopefully others like me in the future!
You've mentioned that my single blocks (and more than likely, the doubles too) are upside down.
For the little 3mm, single blocks, the holes are very inconsistent. Some are high up and some are in the middle, some are at an angle and one side is high, the other low.
I would bet that outsourcing blocks from a 3rd party would be the best choice. The problem was that I promised myself NOT to go down the rabbit hole of adding better after market pieces. As I've said, when I did the Trumpeter Titanic, I had purchased HUNDREDS of dollars in 3rd party photo etch parts and 3d printed parts, they looked great and added some great depth, but it was SO MUCH money. I wanted to see what doing a model using 'what God gave me' would turn out right.
Perhaps my next model (lol), I might look into using high quality parts!
I only painted the blocks on the foremast, because I had installed them prior to painting the structure. I wanted to see what was entailed in putting together all of the rigging blocks and wanted a 'picture' of what everything would look like going forward. After painting everything, I realized that wasn't going to work going forward. Also, as I moved onto the main mast, I liked the look of the natural or close to natural look of the blocks.
Finally, taking and posting pictures IS scary. From far away as I look at my model, I just love the way it looks. Then I take some pics and look at them and every terrible flaw is visible. Pictures of small scale work when done by a professional or someone are worth their weight in gold.
Mine? Well, let the viewer beware!!! lol
Agreed. Sometimes I scare others; sometimes I scare myselfFinally, taking and posting pictures IS scary.
 . But as a rule, the vast majority of forum members fully appreciate the 'it looks better in real life' thing and the harsher critic ends up being me rather than others. I say: carry on the way you are going. I'm enjoying the journey just fine.
If you are interested, there is a thing called a block tumbler than helps the kit blocks look a bit better. Here is a link to one you can purchase:
But I'm confident you could make one from scratch for less than the cost of a cup of coffee.
After looking at the low quality of certain kit parts used generically across various models, you eventually come to the conclusion that you can make a much better model with replacement with some quality parts. You set the bar as to how much you are willing to change on the model and spend to add accuracy and quality, and go from there. You will see that as you learn more about wooden ship design, you will want to add more improvements to your models. It's a predictable trend for most builders. Most modelers ad a few extra modifications after a model or two. My first model was enhanced with replacement parts to a small extent but modified with extensive scratch built rigging and sails, and the next, current model is over 90% scratch built. However, scratch building is slower because having kit parts shortcuts a lot of parts manufacturing. That's the appeal of kits. The work moves along much faster, with far less planning since you already have plans and instructions.Hey, some great comments and that have been of great help for me and hopefully others like me in the future!
You've mentioned that my single blocks (and more than likely, the doubles too) are upside down.
For the little 3mm, single blocks, the holes are very inconsistent. Some are high up and some are in the middle, some are at an angle and one side is high, the other low.
I would bet that outsourcing blocks from a 3rd party would be the best choice. The problem was that I promised myself NOT to go down the rabbit hole of adding better after market pieces. As I've said, when I did the Trumpeter Titanic, I had purchased HUNDREDS of dollars in 3rd party photo etch parts and 3d printed parts, they looked great and added some great depth, but it was SO MUCH money. I wanted to see what doing a model using 'what God gave me' would turn out right.
Perhaps my next model (lol), I might look into using high quality parts!
I only painted the blocks on the foremast, because I had installed them prior to painting the structure. I wanted to see what was entailed in putting together all of the rigging blocks and wanted a 'picture' of what everything would look like going forward. After painting everything, I realized that wasn't going to work going forward. Also, as I moved onto the main mast, I liked the look of the natural or close to natural look of the blocks.
Finally, taking and posting pictures IS scary. From far away as I look at my model, I just love the way it looks. Then I take some pics and look at them and every terrible flaw is visible. Pictures of small scale work when done by a professional or someone are worth their weight in gold.
Mine? Well, let the viewer beware!!! lol
There are ways to take the crude kit blocks and put some work into them to make them better, but they still won't be as good as the properly formed blocks from parts suppliers. You can invest in a drill operated sanding drum that rounds the sharp edges down, bringing them about halfway to proper shape. But tossing out out blocks where the single hole is centered, and salvaging the rest but drilling out a second hole is quite tedious. It all depends on where you want to expend your effort, fixing up crude blocks or paying to replace them.
Learning all this takes building experience. Reading the build logs of other builders can shorten this process by changing your building habits sooner.
- Joined
- Oct 21, 2022
- Messages
- 301
- Points
- 278

These might be out of order...
I'll post them with comments to get us back in sync....
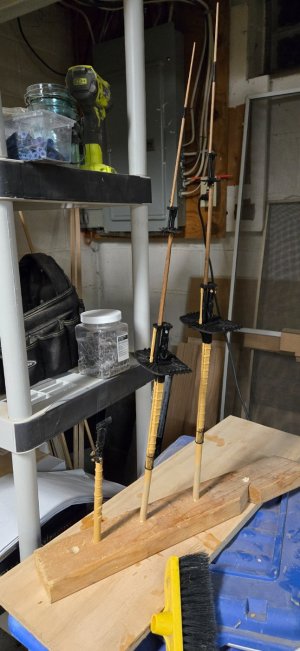
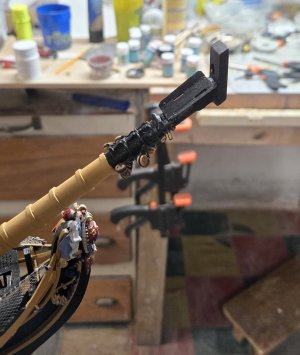
This is the corrected and completed foremast and bowsprit with the blocking for both.
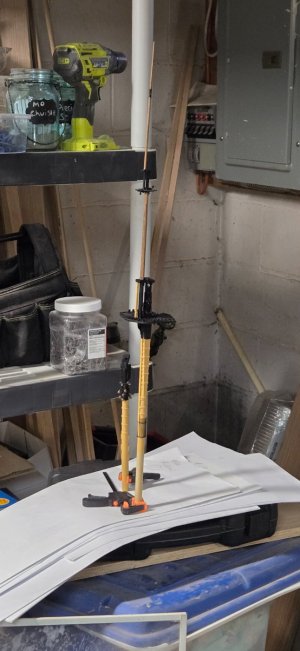
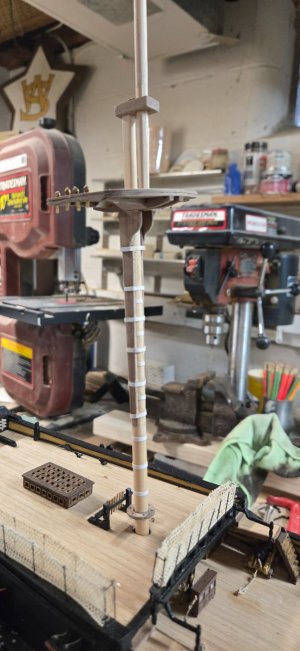
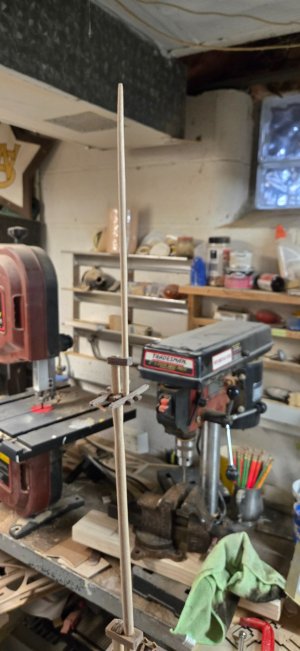
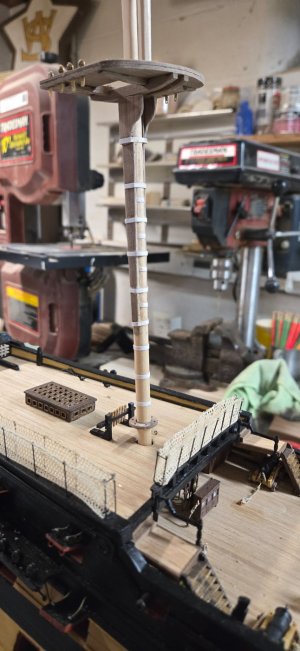
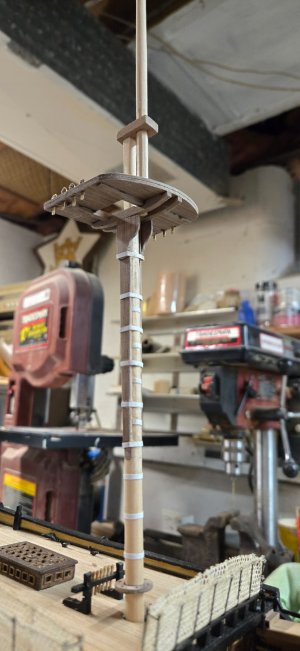
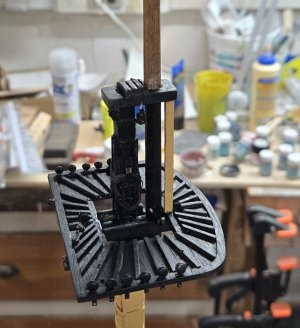
You can see in this pic the hand mast that sits on the platform to help stabilize the top and t'gallant foremast. This is the piece I lost and created.
The plans required that the hand mast be beveled on the top and bottom and rounded in the middle. I didn't see that and this hand mast isn't rounded. It also appears thicker than the others, perhaps it's supposed to be...
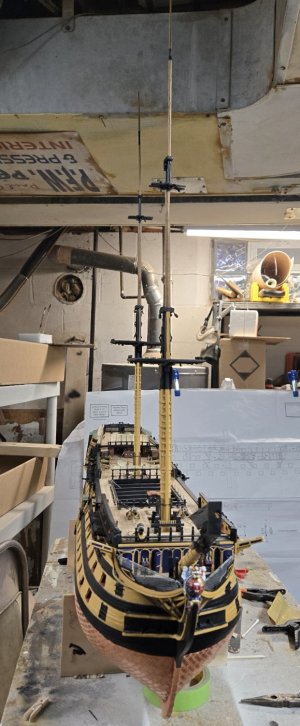
A couple of shots of both the main and foremasts completed. I had not painted the hand mast on the main yet.
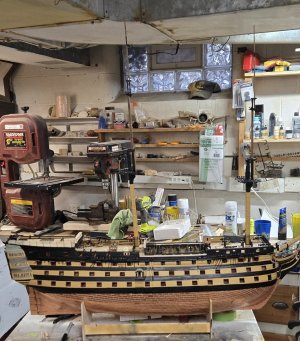
A side beauty shot....
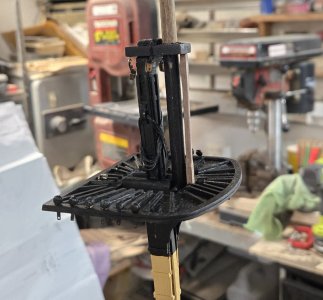
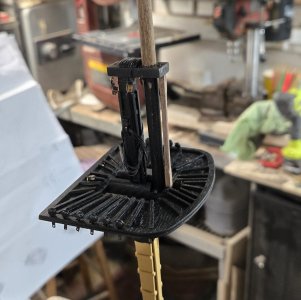
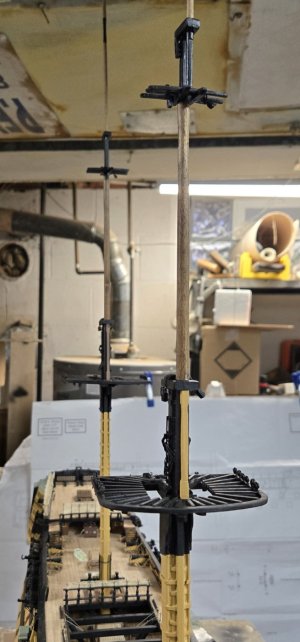
These are shots of the top to t'gallant foremast (left) and the same for main (right).
You can see that I didn't paint the blocks for the main. I also have not added the sheaves to the main yet.
I do not believe that either were glued yet, just fitted.
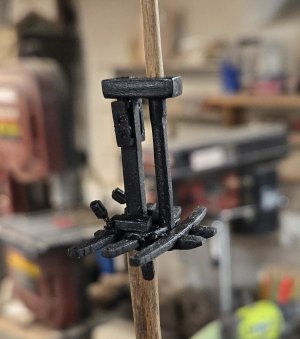
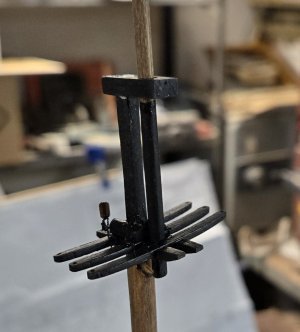
Working on the mizzen, I am at the stage where I have added the banding and cheek strips and added putty filler.
Again, there is the need to add a fife rail to the mizzen mast and if you follow the steps, the banding will get in the way of the rail.
I opted not to install the lower banding and added the rail now. I will have to be careful when painting as the tolerances for the belaying pins is minimal and there is no way to get a drill into those holes because of the angles. Just a forewarning.
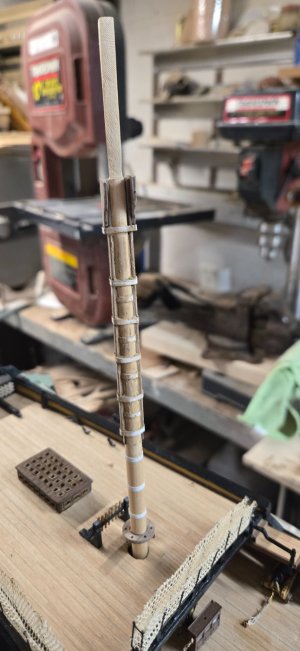
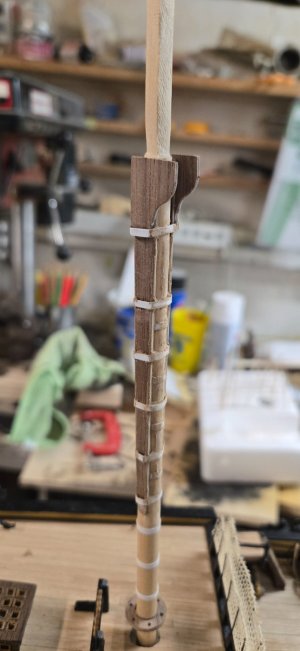
Just some dry fitting of mizzen mast assembly.
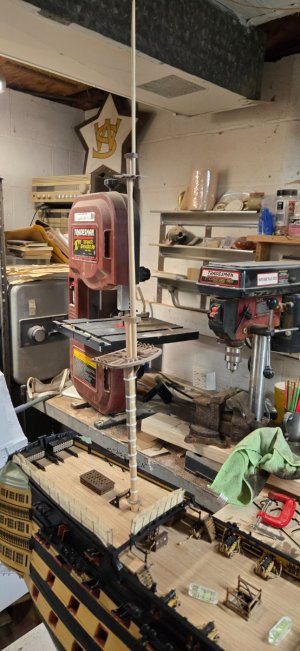
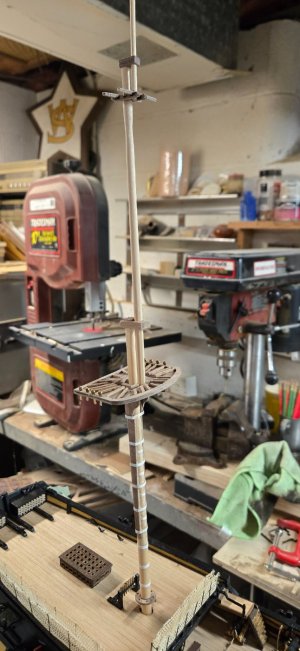
3 done, 1 more on the way!!!!
I'll post them with comments to get us back in sync....
This is the corrected and completed foremast and bowsprit with the blocking for both.
You can see in this pic the hand mast that sits on the platform to help stabilize the top and t'gallant foremast. This is the piece I lost and created.
The plans required that the hand mast be beveled on the top and bottom and rounded in the middle. I didn't see that and this hand mast isn't rounded. It also appears thicker than the others, perhaps it's supposed to be...

A couple of shots of both the main and foremasts completed. I had not painted the hand mast on the main yet.


A side beauty shot....


These are shots of the top to t'gallant foremast (left) and the same for main (right).
You can see that I didn't paint the blocks for the main. I also have not added the sheaves to the main yet.
I do not believe that either were glued yet, just fitted.


Working on the mizzen, I am at the stage where I have added the banding and cheek strips and added putty filler.
Again, there is the need to add a fife rail to the mizzen mast and if you follow the steps, the banding will get in the way of the rail.
I opted not to install the lower banding and added the rail now. I will have to be careful when painting as the tolerances for the belaying pins is minimal and there is no way to get a drill into those holes because of the angles. Just a forewarning.


Just some dry fitting of mizzen mast assembly.


3 done, 1 more on the way!!!!


- Joined
- Oct 21, 2022
- Messages
- 301
- Points
- 278

Hi Kurt;After looking at the low quality of certain kit parts used generically across various models, you eventually come to the conclusion that you can make a much better model with replacement with some quality parts. You set the bar as to how much you are willing to change on the model and spend to add accuracy and quality, and go from there. You will see that as you learn more about wooden ship design, you will want to add more improvements to your models. It's a predictable trend for most builders. Most modelers ad a few extra modifications after a model or two. My first model was enhanced with replacement parts to a small extent but modified with extensive scratch built rigging and sails, and the next, current model is over 90% scratch built. However, scratch building is slower because having kit parts shortcuts a lot of parts manufacturing. That's the appeal of kits. The work moves along much faster, with far less planning since you already have plans and instructions.
There are ways to take the crude kit blocks and put some work into them to make them better, but they still won't be as good as the properly formed blocks from parts suppliers. You can invest in a drill operated sanding drum that rounds the sharp edges down, bringing them about halfway to proper shape. But tossing out out blocks where the single hole is centered, and salvaging the rest but drilling out a second hole is quite tedious. It all depends on where you want to expend your effort, fixing up crude blocks or paying to replace them.
Learning all this takes building experience. Reading the build logs of other builders can shorten this process by changing your building habits sooner.
I think that is exactly what would have happened had I had a few lesser wooden ship models under my belt! I would have seen my finished results on those and decided on this one to shoot the moon.
Certainly correctly shaped blocks (those oval singles you posted are just lovely!) would add a level of perfection that assembly line blocks can't portray.
That is the mark of a truly crafted model.
Viewing other builder blogs, I feel that Caldercraft's kit is very good. Could some of the instructions be better? For a new builder, yes. For someone experienced with a few other builds under their belt and an understanding of how wooden models go together, I am sure they are fine....the fact there hasn't been many changes to the instructions probably bears that truth out.
Trying to drill out a second hole to create the reality of a block with an actual 'sheave' in it was beyond my reach or the ability of the thin bits required. It would seem to me that trying that would result in dozens of broken bits before getting through 20 or 30 blocks.
There are some builders (you at the top of that list) that excel at either using a kit as a base and then spending the time and resources to make the tiny areas from scratch so that they look real. That isn't me...yet. I shall continue to plod along. I do see that as I work, my muscle memory of things improves and things do look better. Case in point, the cannons on the quarterdeck look far better than those on the lower and the mizzen mast is far better than the fore.
Thanks for all of your comments and encouragement! They are VERY much appreciated!
Chris
- Joined
- Oct 21, 2022
- Messages
- 301
- Points
- 278

These blocks are the cheap single hole blocks, and yes they are upside down. Frankly, considering the high quality level of the Caldercraft Victory, these are a disappointment.
View attachment 492627
When the blocks only have a single hole to simulate where the rope passes through, it's easy to strop them upside down. Ask me how I know... That's why purchasing well made replacement blocks is a good idea. Carefully drilling new holes above the existing ones with a high speed Dremel is one way to go.
This is what we are trying to simulate.
Dry-Dock Model Parts, Model Expo, and various other model parts suppliers make excellent blocks. They have the correct shape and you don't have to fight to push line through ragged, badly drilled holes!
View attachment 492628
These blocks are the cheap single hole blocks, and yes they are upside down. Frankly, considering the high quality level of the Caldercraft Victory, these are a disappointment.
When the blocks only have a single hole to simulate where the rope passes through, it's easy to strop them upside down. Ask me how I know... That's why purchasing well made replacement blocks is a good idea. Carefully drilling new holes above the existing ones with a high speed Dremel is one way to go.
This is what we are trying to simulate.
Dry-Dock Model Parts, Model Expo, and various other model parts suppliers make excellent blocks. They have the correct shape and you don't have to fight to push line through ragged, badly drilled holes!
Lol....peer pressure! After re-reading your post and thinking....
I went over to the first site you mentioned that I have reviewed and shopped at before...Dry Dock Models.
I went through the instructions and counted how many single, double, open, closed, jeers, etc I would need for the rigging.
The bill was only $135USD, so I bit the bullet and decided this was a nice Christmas present for myself!
I think that since the rigging will be front and center, that's not a bad decision and a fairly low cost choice!
My thanks!
Chris
Every modeler who wants to add a few details has to set that price or labor mark at a comfortable level. For everyone, this level is different. Those of us who have replaced a lot of parts can point you to some of the best replacement parts out there if you want to add more to your model. I have poured not hundreds but thousands of dollars into the two models I've worked on, but that level is way above the typical kit basher. And always there are things I wish I did better. What truly matters is that you enjoy the build and are reasonably satisfied with the results, keeping in mind that the next build is always much better than the last. Everyone who is not a model ship builder will not see any of the mistakes or shortcomings that you see as the builder, even the occasional ugly bit. The Caldercraft Victory is not a kit for beginners, so talking on that model with drawings and instructions which assume you know a how to plank and rig is a huge learning challenge. If you can tackle that kit, without losing patience, you'll have a truly supreme accomplishment.Hi Kurt;
I think that is exactly what would have happened had I had a few lesser wooden ship models under my belt! I would have seen my finished results on those and decided on this one to shoot the moon.
Certainly correctly shaped blocks (those oval singles you posted are just lovely!) would add a level of perfection that assembly line blocks can't portray.
That is the mark of a truly crafted model.
Viewing other builder blogs, I feel that Caldercraft's kit is very good. Could some of the instructions be better? For a new builder, yes. For someone experienced with a few other builds under their belt and an understanding of how wooden models go together, I am sure they are fine....the fact there hasn't been many changes to the instructions probably bears that truth out.
Trying to drill out a second hole to create the reality of a block with an actual 'sheave' in it was beyond my reach or the ability of the thin bits required. It would seem to me that trying that would result in dozens of broken bits before getting through 20 or 30 blocks.
There are some builders (you at the top of that list) that excel at either using a kit as a base and then spending the time and resources to make the tiny areas from scratch so that they look real. That isn't me...yet. I shall continue to plod along. I do see that as I work, my muscle memory of things improves and things do look better. Case in point, the cannons on the quarterdeck look far better than those on the lower and the mizzen mast is far better than the fore.
Thanks for all of your comments and encouragement! They are VERY much appreciated!
Chris
Last edited:
That is the truth for every one of us. Well said.And always there are things I wish I did better.
Allan
- Joined
- Oct 21, 2022
- Messages
- 301
- Points
- 278

I'm kind of working on multiple areas. Mostly because I paint the various structures for the mizzen mast, I have time to tackle something else.
Now I suppose I should just jump in and do all of the hammocks now, but they get tedious, so I do one or two and do something else.
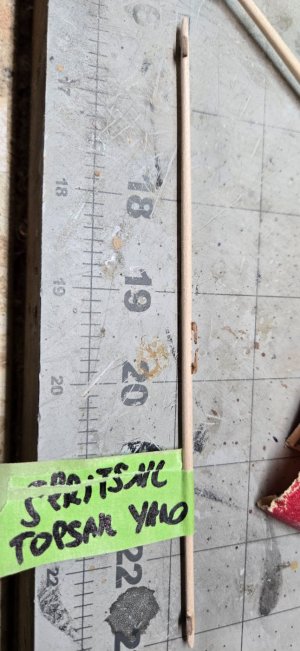
I also began work on the yards. The main yard blueprint starts with the bowsprit and her yards and goes from there, so I'm just going left to right.
I have the bowsprit, jibboom and flying jibboom done (including the dolphin striker and flagstaff) so I moved on to the two bow yards.
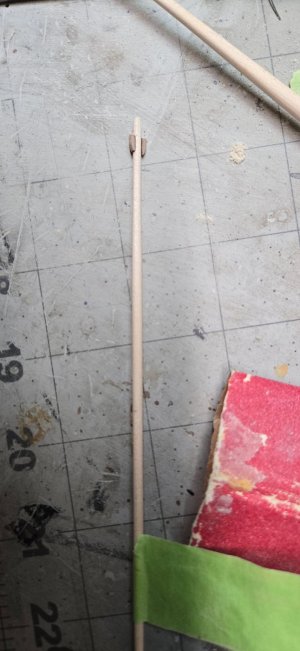
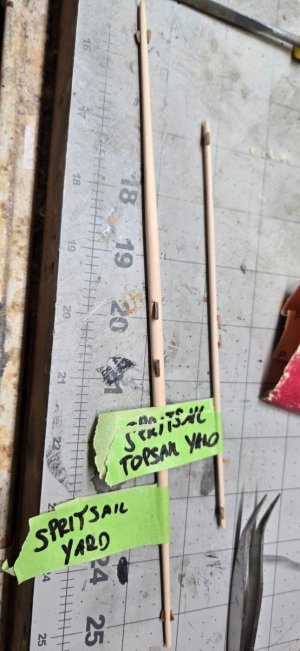
The spritsail and spritsail topsail yards are next. There isn't a lot to these as all they require is some tapering on both sides.
In addition, the plans call for sling cleats for the spritsail and there are stop cleats on both yards that are supposed to be made from 1.5x1.5mm walnut. There is also a set of sling cleats on the smaller topsail, but again, no part is referenced. For those, I just used the 1.5x1.5 and shaped them to look like the other sling cleats.
I went to Longridge to make sure that was all that was needed for those 2 yards and I just recieved a used copy of James Lee's The Masting & Rigging of English Ships of War. This was a great recommendation and I got a great deal....about $65USD from AbeBooks and one of their sellers Frey Fine Books. Frey did an amazing job, the book was almost brand new, it was covered in a clear book cover and still had the original dust cover.
I wanted to make sure that I had the right cleats and stops on these yards and it was very satisfying to take actual dimensions in the books and reduce them from feet/inches to millimeters and have it all work out!!!
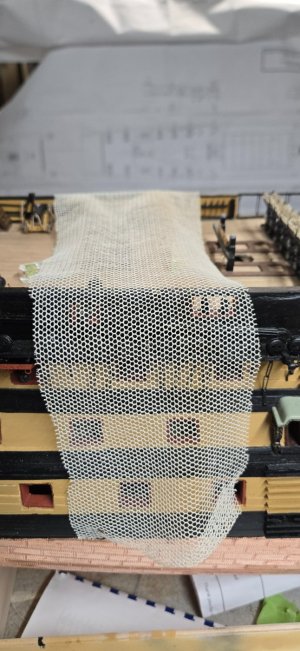
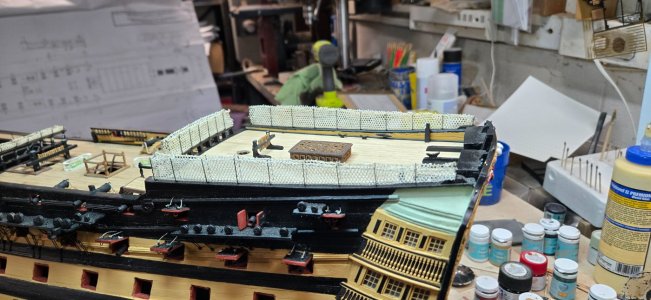
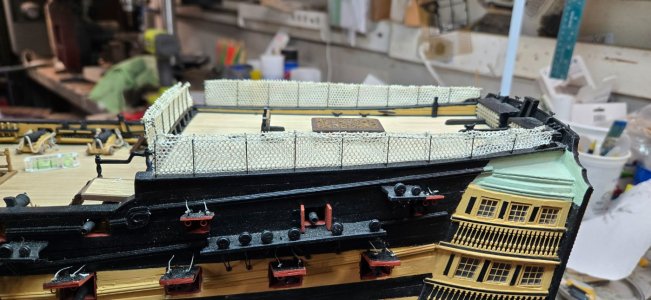
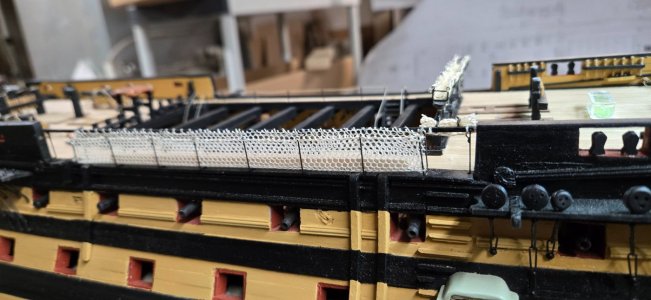
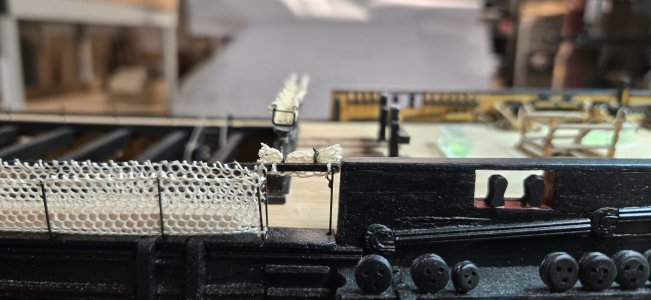
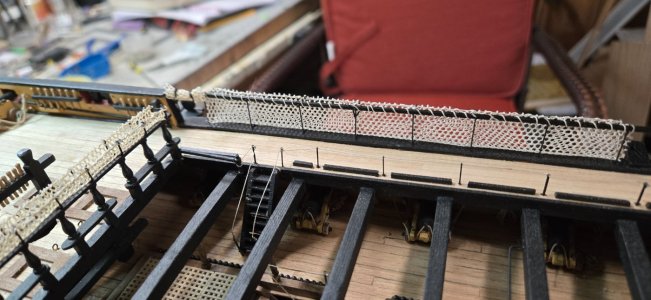
Ok....I put the final coats on the mizzen masts parts (no pics) and worked on 2 more hammocks. I did the other poop deck hammock and took a stan at one of the waist hammocks. The poop hammock was a bit of a disaster. I cut some of the netting too close and cut through the loops to the next layer so they wouldn't catch on the hammock lines. They became a mess. There's no easy, safe way to cut away the fringe, even if I glue it. I started thinking, man, wouldn't it be nice if I laid some heavy CA glue on the ends and then used my Dremmel to smooth it all away!!!! I won't do that....but that's what I need!
The waist went pretty easy. The thicker banister on the inside helps immensely and I took a lot of time carefully cutting the fringe away which made things go smooth. I too opted NOT to place netting on either side of the waist hammocks. It is clear when you start that the netting would interfere with the stairs on the side of the hull and the shipping of the anchors. I was getting bored and I thought, for safety reasons, why not build a set of netting that rolls up and out of the way? I did one and it seems ok, so I'll do that for all 4.
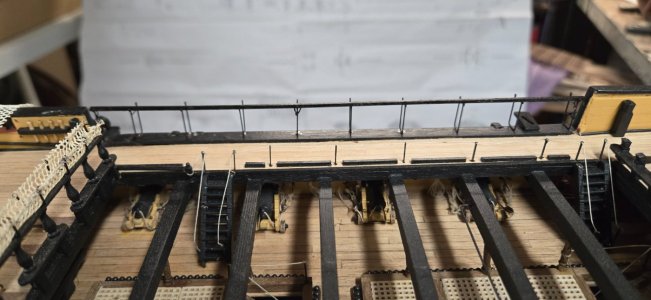


Looks pretty darn good to me. I use cuticle scissors to trim the edges reinforcement panels on sails because you can get very close to the attachment area without snipping off too much, since they are curved. They are very precise when paired with an eye magnification headset. Perhaps you can perform the trimming surgery on your netting with them?
