H.M.S. Victory by Caldercraft - Build Log

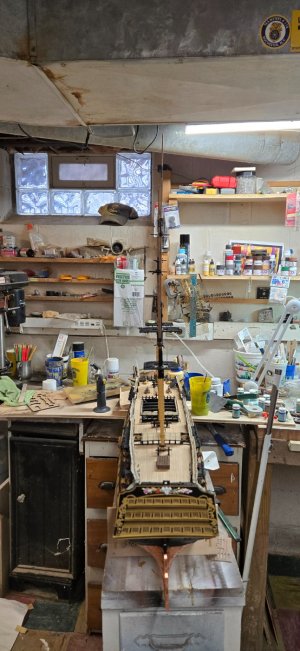
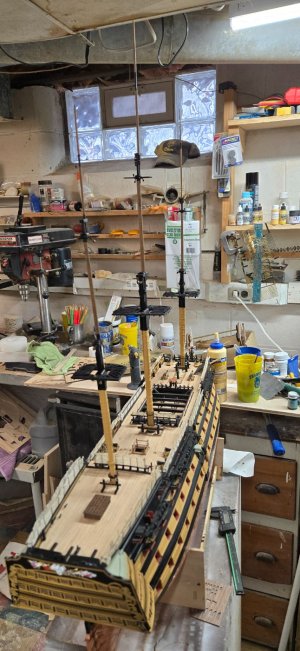
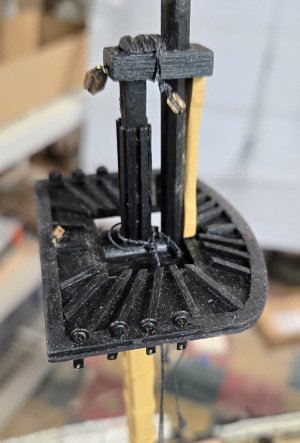
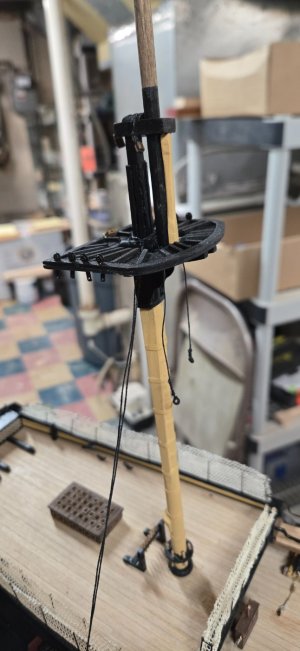
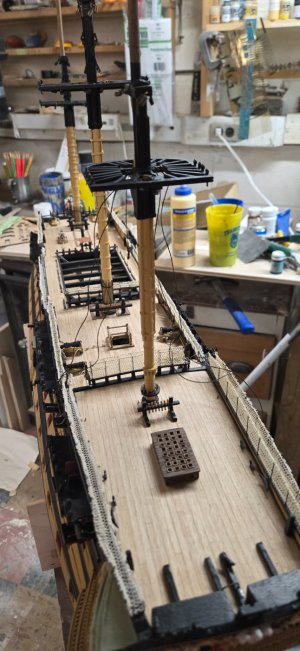
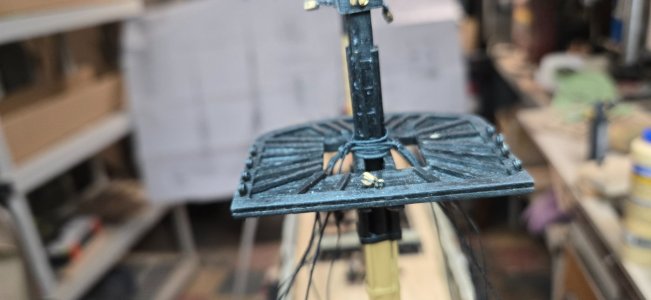
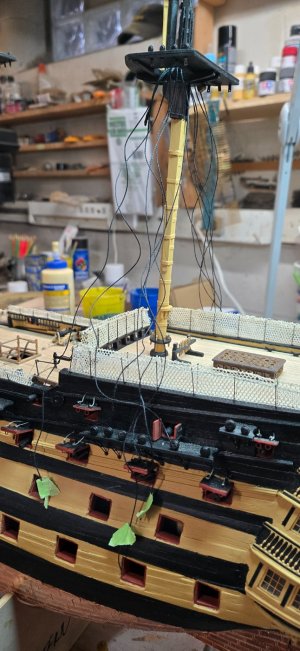
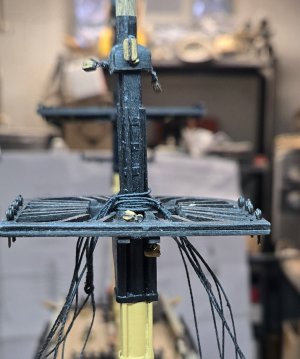
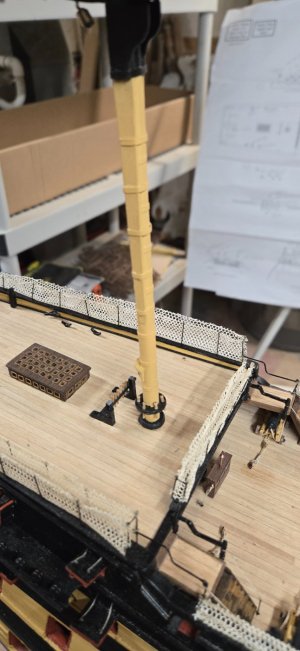
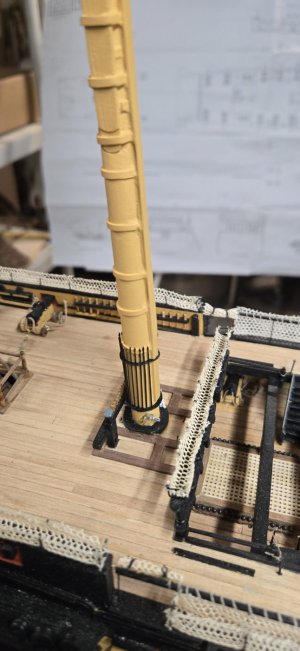
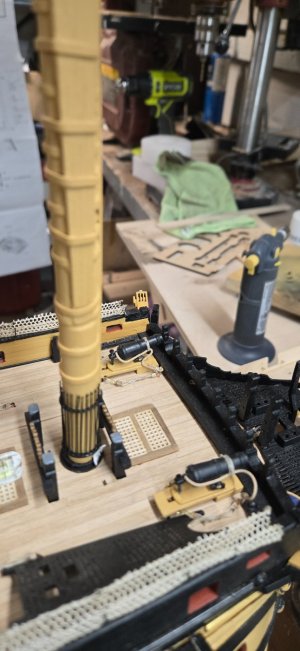
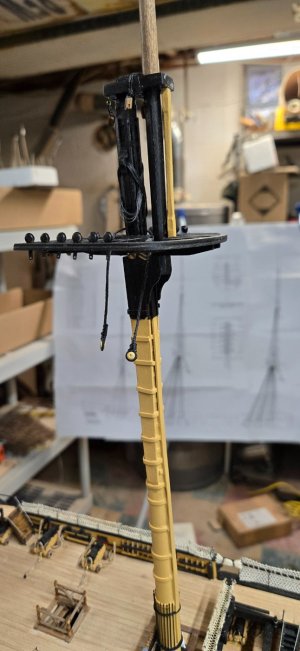
I also installed the 3 masts. After leveling the boat as best as I could, I hung a plumb near the boat and worked on installing the masts.

I have put them completely together, so I couldn't just install the main mast section and leave the top and top gallants for later.
It'll either be a bad decision or just something I'll have to work around!

I added the 4 cleats to the fore and main masts and made sure the sleeves fit.
To install, I poured a bunch of white glue down the holes and then added a dollop of E6000 glue to the base of each mast.

The sleeves were coated with white glue and some bits of CA glue. I tweaked the masts and hope they are as plumb as they need to be!!!
20250116_131623.jpg

20250116_131626.jpg

20250116_131629.jpg

20250116_131636.jpg

20250116_131649.jpg
 
I do have a question.

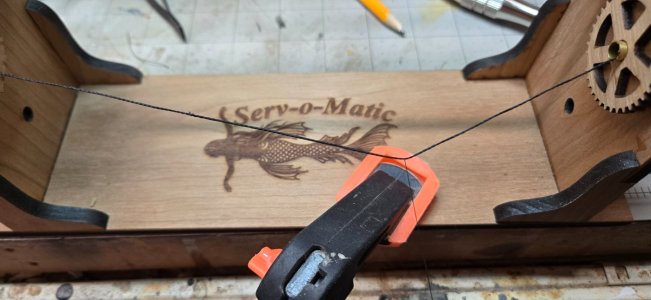
I have one of the Syren Serving machines. I bought it when I bought the kit last year. I put it together and set it aside.

I want to begin creating all of the necessary served shrouds and stays. Honestly, after viewing dozens of videos and reading up I thought that serving would be a simple process.

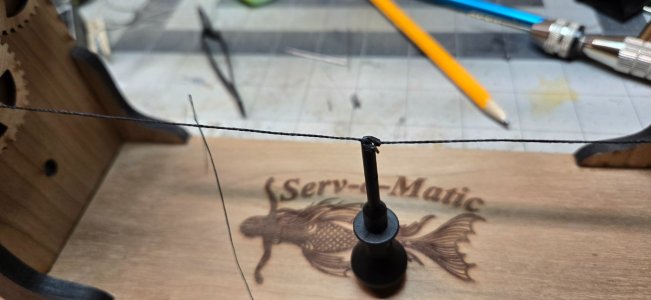
While the Syren machine is ok, the holes for gears were off and required that I drill them bigger so they wouldn't bind. Once that was done, I ran a piece of test .75mm line in. I wanted to serve it with .25mm line. (which is what the kit requires)

Now I didn't use a needle to push the serving line through the larger rope I wanted served, but I tied the thin line to it and added some CA glue.
This was just a test....

After it dried, I started turning the wheel. I thought that as soon as I started that, it would begin serving.
Instead, it line I am using to serve acted as a brake and all I did was twist the line to be served.

If I let off on the tension, it would kind of spring forward and create a very sloppy spiral around the rope to be served.
If I stopped, I could slide this spiral tight and create the serving. It wasn't perfect, but was getting there.

Eventually, if I held just the right tension, it did begin to serve. It just seems like I'm either doing it VERY wrong or there is a need to begin the turning of the line to be served to get it under tension before the serving line will begin to line up....

Any help would be greatly appreciated.
Chris
Make sure the bobbin of serving thread is very loose on it's axle. it should not have any binding whatsoever and should spin freely. Also, make sure you are using your left hand to feed and tension the serving thread, this will ensure you are making nice, compact servings.
 
Chris, your ship looks incredible. I'm enjoying watching your pace in working the build. I'm hoping to copy many of your's and Traumado's procedures as I move along. I'm in process of lining all the gun ports which is another 3 handed challenge.
 
Chris, your ship looks incredible. I'm enjoying watching your pace in working the build. I'm hoping to copy many of your's and Traumado's procedures as I move along. I'm in process of lining all the gun ports which is another 3 handed challenge.
Lining the ports was tough!
There is so little meat to attach them and get them right.

When I did the upper gun ports, I added some small pieces of wood as backing before lining them.
That helped immensely, instead of relying on that thin sliver of the gun port template to rest them on.
 
Make sure the bobbin of serving thread is very loose on it's axle. it should not have any binding whatsoever and should spin freely. Also, make sure you are using your left hand to feed and tension the serving thread, this will ensure you are making nice, compact servings.
Thank you! I was actually holding the serving thread in my fingers, varying the tension as I tested the process.

On another thread it was suggested I contact Syren directly and see what they would have to say. I did that on a lark and the owner actually responded within an hour!!!!

Here is what he suggested:
Boy that is a tough one to diagnose. I wish you were right here with the machine and I could test it personally. Try lubricating the gears and all moving parts. I will spray with wd40. See if that helps. The line you are using to serve should be very small. Like sewing thread. Even smaller…fly tie fishing line if you are serving smaller ropes. It sounds like you are teying to serve a smaller rope with too large serving line.

Serving rope should not be larger than .017mm for really large ropes and much less for the smaller rope you are trying to serve. .012mm or smaller. Really thin stuff.

~ Chuck Passaro

I was using .25mm serving thread because that is the thinnest black thread I had in the kit.

I also did not 'sew' the serving thread through the line that needed to be served. I just CA glued it, that might not have been the right thing either.
I do have a spool of Gutterman thread - E121, it's listed as 000 and I think that equates to about .02mm in diamter.

I don't really like this thread compared to all the other lines in the kit and the lines I purchased from Ropes of Scale that look so realistic.
But someone suggested the Gutterman thread as a way to start the process of making my own ropes. Which I'm not going to do.
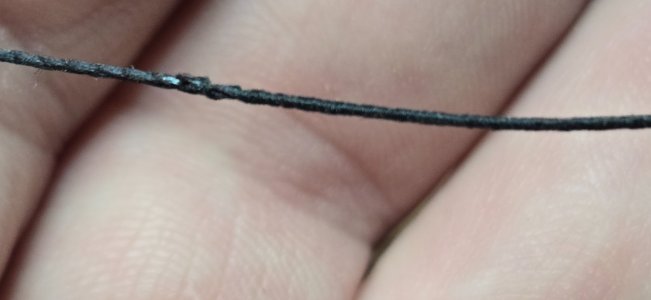
The thread is polyester, it is very thin and the ends fray almost immediately.

I will give it a proper try today and report back!
 
I tweaked the masts and hope they are as plumb as they need to be!!!
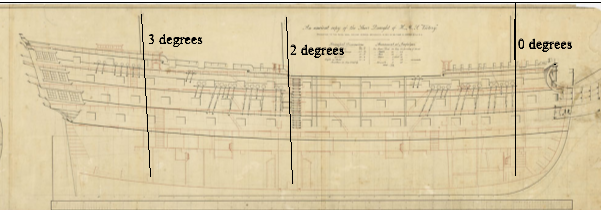
Not all of the masts were plumb. The below is a drawing of Victory done in 1788 long before her major refit in 1803, but the angles should be close. The masts were wedged at the partners so the rake could be adjusted for optimum performance.
Allan
1737126748961.png
 
Last edited:
Not all of the masts were plumb. The below is a drawing of Victory done in 1788 long before her major refit in 1803, but the angles should be close. The masts were wedged at the partners so the rake could be adjusted for optimum performance.
Allan
View attachment 495618
Well....plumb port to starboard. The rake is built in on the kit.
I think my mizzen is leaning a bit to the port, but it could be the table, my old back, or my bad eyes!
 
Lining the ports was tough!
There is so little meat to attach them and get them right.

When I did the upper gun ports, I added some small pieces of wood as backing before lining them.
That helped immensely, instead of relying on that thin sliver of the gun port template to rest them on.
That's a great idea. Thanks Chris. Can't wait to see your final product.
 
I took Chuck Passaro's advice and tried using the Gutermann thread.

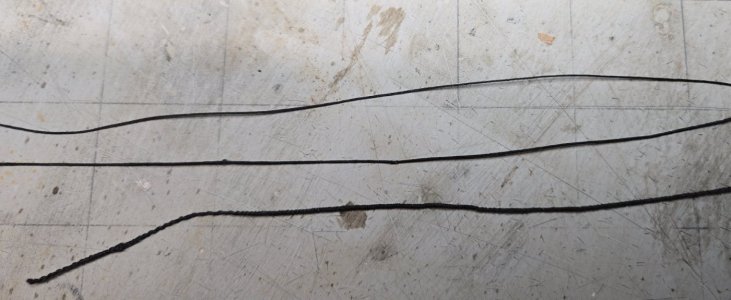
If I held light tension, it did seem to serve the line fairly quickly. My only issue is this thread is SO THIN and the line I was serving was only .75mm.
There is barely a difference when looking at the thread live.

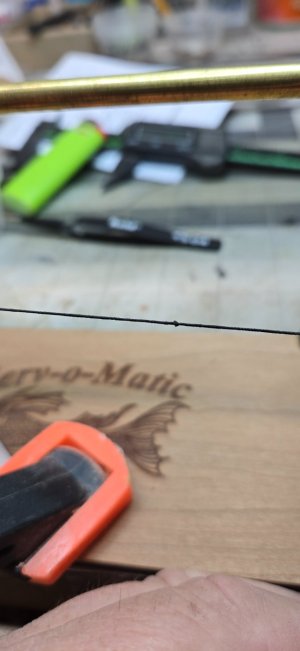
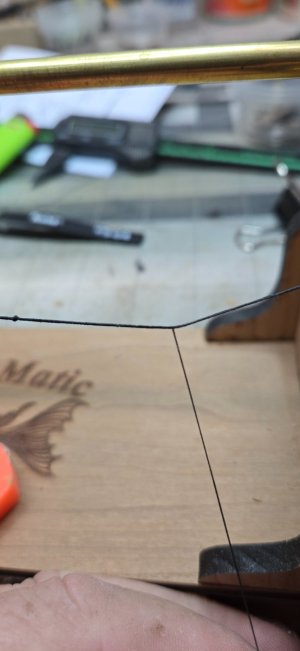
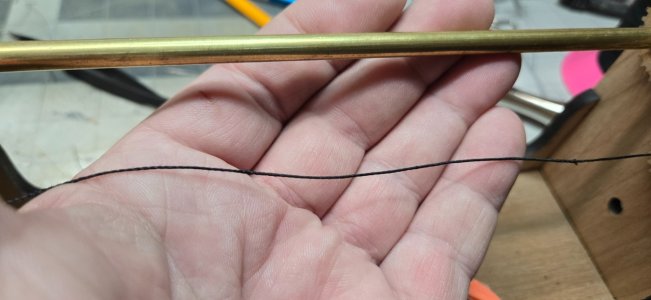
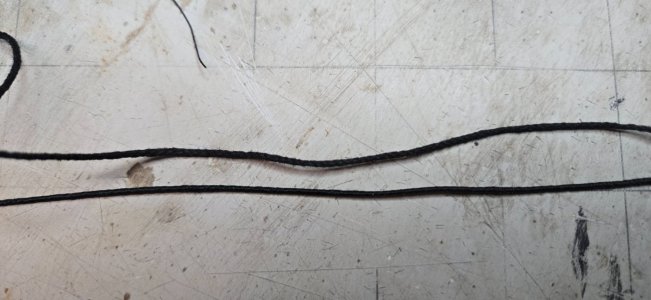
You can see right below; the top thread is the .75 with nothing, the middle is the the line served with the Gutermann and bottom was last night's attempt with .25 serving.

As I did more and more line with the Gutermann, I have become better at it and the gears seem to have loosened up a lot and it does go kind of quickly....
20250117_111812.jpg

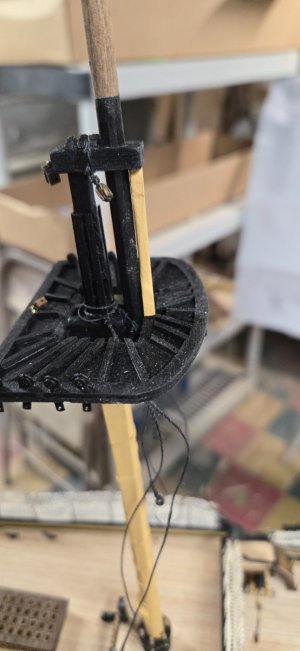
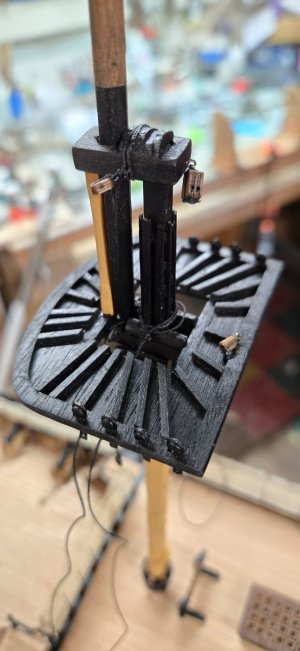
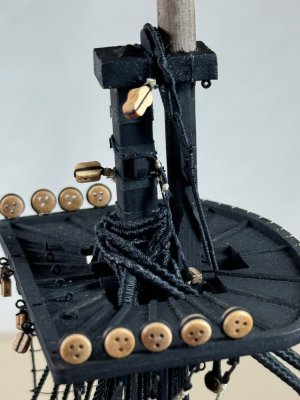
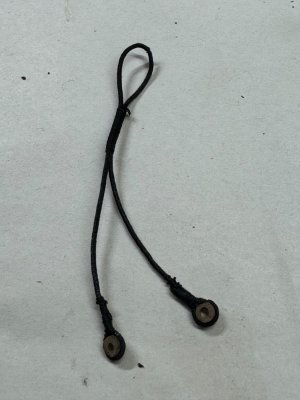
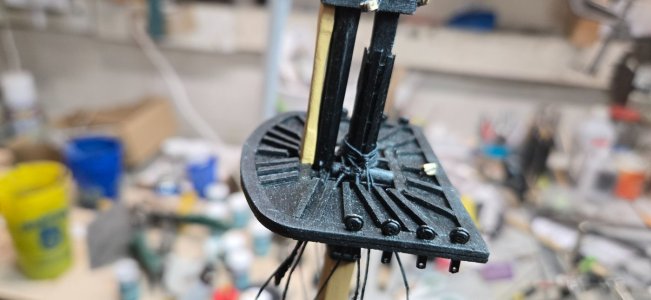
I took at stab at creating the mizzen pendants. The directions call for a weird setup with a loop around the mast with a pendant going out each side. I didn't see that or do that and I am not happy with how it looks, but this group of lines is at the very bottom so perhaps I'll trim the excess that can be seen...tighten that up and work on a method for the other 2 masts.

I tried serving the #1 shroud, but didn't go far enough and the shroud isn't served around the mast head.
When I did the port side, I made sure to serve the entire length of the #1 shroud and up to and around the mast.

It was hard to seize the shrouds as they don't slide up so I had to keep them loose.

The scale is so small, I'm not sure if serving is making a difference here.

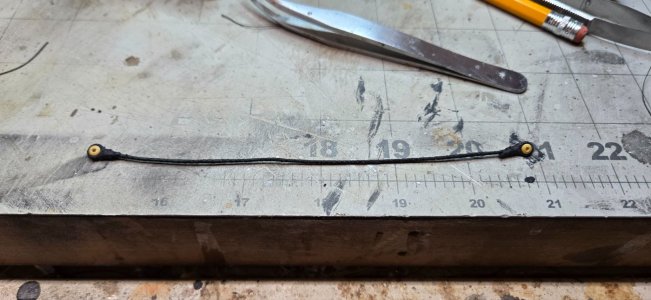
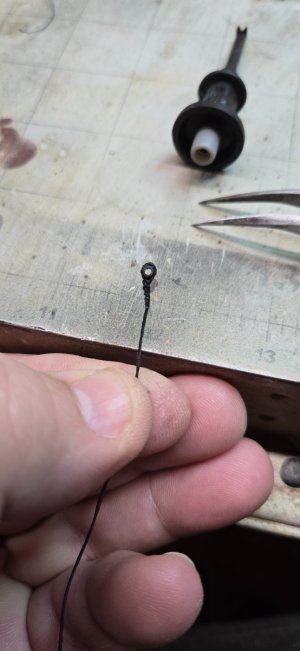
I made thimbles out of brass tubing. I don't have anything small enough to flair them, so hold them in tweezers and lightly tap them with hammer on my vice. They're a bit sloppy, but I think when I paint them up, they'll be fine.

I'll keep fine tuning my skills with each shroud.

Please, if someone has used a better thread for serving, let me know. I am going to research the forums for other suggestions!

20250117_110523.jpg

20250117_110525.jpg

20250117_123853.jpg

20250117_123906.jpg

20250117_131334.jpg

20250117_131440.jpg

20250117_131515.jpg
 
Hi Chris
Serving is a challenging and time consuming process in my experience, which is my first time.
In my build which is a1:72 scale third rate ship with many similarities to your Victory, the shrouds are 1.3mm and 1.0mm for the mizzen. To serve them I used Gutterman thread and found the polyester 000 to be the best. I always start by passing the serving line through the served line and then tie one knot and lay the free end along the served line to be held by the serving.
If I add glue it is thinned PVA, CA makes the line too stiff.
I have found serving lines less than 0.75mm too difficult, but they shouldn’t need serving, as only the heavier standing rigging needs serving.
The Burton pendants should be made of thicker line usually the same as the shrouds. The thimbles were wood usually and i have found making the from drilled 4mm dowel is a reproducible method. The pendant shouldn’t hang too far below the bibs of the mast tops.
The unserved lines of thinner thread with blocks at the end are the jeers for the yards.

IMG_5448.jpegIMG_5451.jpegIMG_5257.jpeg

IMG_5665.jpeg
 
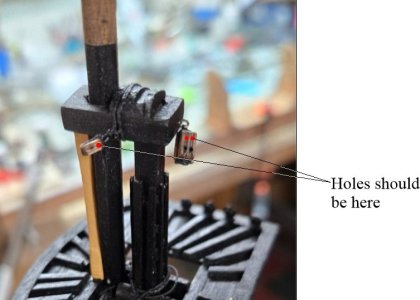
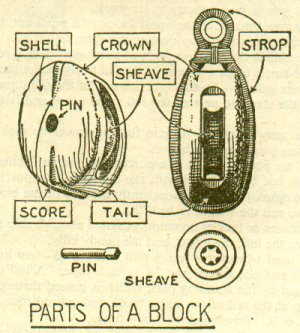
The blocks in this photo in your post #410 are upside down. It may be easier to drill the second hole as shown in red rather than cuttung them loose and rerigging. As they are now the line would run against the tail piece instead of over the would-be sheave and under the crown of the block.
1737199298591.jpeg1737199376340.jpeg
 
Hi Chris
Serving is a challenging and time consuming process in my experience, which is my first time.
In my build which is a1:72 scale third rate ship with many similarities to your Victory, the shrouds are 1.3mm and 1.0mm for the mizzen. To serve them I used Gutterman thread and found the polyester 000 to be the best. I always start by passing the serving line through the served line and then tie one knot and lay the free end along the served line to be held by the serving.
If I add glue it is thinned PVA, CA makes the line too stiff.
I have found serving lines less than 0.75mm too difficult, but they shouldn’t need serving, as only the heavier standing rigging needs serving.
The Burton pendants should be made of thicker line usually the same as the shrouds. The thimbles were wood usually and i have found making the from drilled 4mm dowel is a reproducible method. The pendant shouldn’t hang too far below the bibs of the mast tops.
The unserved lines of thinner thread with blocks at the end are the jeers for the yards.
I appreciate the response!
I don't disagree with your assessment that .75mm line seems to be too small to bother with serving. My plans ask for that size line on the mizzen only, the rest are 1.3mm.

I like your suggestion on the wood thimbles. I'll try that, I have a band saw with a thin 1/4" blade and might be able to make a bunch, maybe a bit thicker but then sand them down after cutting...hmmmm.

I am going to redo the Burton pendants, make them a bit higher and see if I can make those thimbles. I did get a delivery of wood thimbles, some 3.5 and 2mm. I think I have about 40 or so of each.

I don't know (without any of the manuals near me) if the mizzen mast has jeers, I think it just has a sling set up.

Thank you for the pics and help, I will keep you advised after more work today!
Chris
 
The blocks in this photo in your post #410 are upside down. It may be easier to drill the second hole as shown in red rather than cuttung them loose and rerigging. As they are now the line would run against the tail piece instead of over the would-be sheave and under the crown of the block.
Allan....I need to set up a cot for you to come to Rochester and make sure I'm doing it right!!!!
I knew they were upside down after viewing one of your responses on another builder's blog. I looked at mine and thought "I hope he doesn't see mine!!!"

Too late. As a sailor, I should have thought that through, but for some reason I purposely installed them with the holes down, I didn't stop to think that once rigged, they would need to go through the one hole on the top as once it lays over the block, it'll look like the real thing.

I will try to drill those holes, but the tiny bits are so fragile.

Also, I just got my delivery of new wooden blocks and they actually come with both holes and look great. Those will be added to all the yards and various running rigging as it comes up!

I appreciate you keeping an eye on my build and hopefully it will help other rookie builders out there. There is so much to consider on a build of this scale and complexity and I don't think you can do the build justice by just following the manuals and blue prints. I think you really need to avail yourself of the various references, books, etc to get you through it. Perhaps not so much if you have prior experience with square rigged models, but for someone like me that hasn't done anything close to this, these websites, the books and the help offered by many, MANY of you has been indispensable!

My thanks!
Chris
 
I do have a question.

I have one of the Syren Serving machines. I bought it when I bought the kit last year. I put it together and set it aside.

I want to begin creating all of the necessary served shrouds and stays. Honestly, after viewing dozens of videos and reading up I thought that serving would be a simple process.

While the Syren machine is ok, the holes for gears were off and required that I drill them bigger so they wouldn't bind. Once that was done, I ran a piece of test .75mm line in. I wanted to serve it with .25mm line. (which is what the kit requires)

Now I didn't use a needle to push the serving line through the larger rope I wanted served, but I tied the thin line to it and added some CA glue.
This was just a test....

After it dried, I started turning the wheel. I thought that as soon as I started that, it would begin serving.
Instead, it line I am using to serve acted as a brake and all I did was twist the line to be served.

If I let off on the tension, it would kind of spring forward and create a very sloppy spiral around the rope to be served.
If I stopped, I could slide this spiral tight and create the serving. It wasn't perfect, but was getting there.

Eventually, if I held just the right tension, it did begin to serve. It just seems like I'm either doing it VERY wrong or there is a need to begin the turning of the line to be served to get it under tension before the serving line will begin to line up....

Any help would be greatly appreciated.
Chris
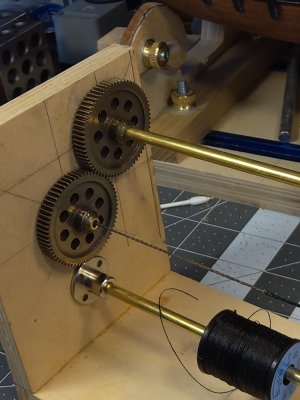
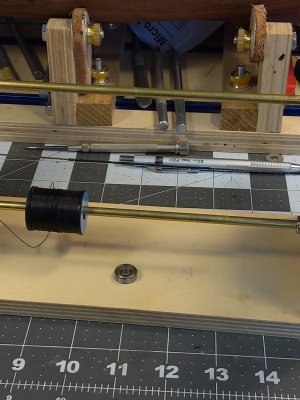
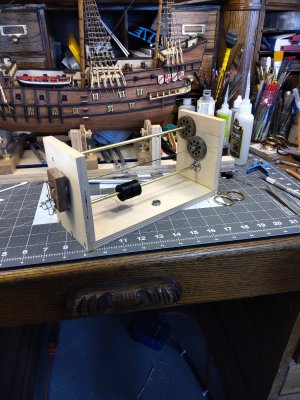
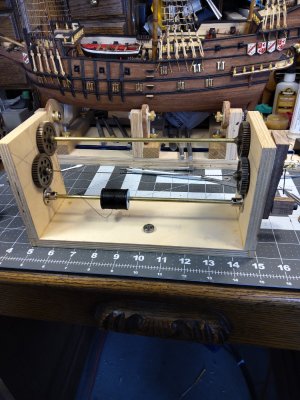
I bought the Syren serving machine too but found the gears and shafts didn't turn all that smoothly. So, using their basic layout and design, I built my own but used metal gears, added bearings and sturdy baltic birch plywood to construct my system. All the parts, gears, bushings, bearings and tubing were purchased from Amazon. It works great!20210830_150422.jpg20210830_150357.jpg20210830_150328.jpg20210830_150313.jpg
 
Thanks for the tip. I currently have one of those bench magnifying lights with huge lens. It was ok when I was working on stuff on the bench, but becomes limited while trying to stretch it out over the boat....without breaking something!

I went online and found some cuticle scissors and a headset that had good reviews....get them Wednesday and I'll see. Was planning on the headset, the scissors were cheap, so why not! Will use them forever....or till I lose them or they get dull...

Thank you sir!!!
Another source for decent scissors is fly tying shops. Many sizes available ( since I tie flies, I have a good selection - they work very well)
 
Last edited:
Another source for decent scissors is fly tying shops. Many sizes available ( since I tie fkies, I have a good selection - they work very well)
I'll tell you Phil, that seems to be a new theme at this stage in the build. There seems to be a lot of folks that have prior experience make flies for fishing and a lot of the tools or materials that are needed for the rigging stage are related to fly fishing!
Many thanks on the tip, I'm going to check that out right now!
 
I need to set up a cot for you to come to Rochester and make sure I'm doing it right!!!!
Thank you Chris!!
We moved away from the northeast because of the white stuff that falls from the sky in winter but come springtime ask me again, please. :)
 
I bought the Syren serving machine too but found the gears and shafts didn't turn all that smoothly. So, using their basic layout and design, I built my own but used metal gears, added bearings and sturdy baltic birch plywood to construct my system. All the parts, gears, bushings, bearings and tubing were purchased from Amazon. It works great!View attachment 495859
I can't believe you could find those gears on Amazon! The system looks great!
Mine has seemed to loosen up a bit, it bound once this afternoon, but otherwise it seems to be working.

Love the boat in the background....excellent work!
 
Just an update from this afternoon.
First, I think things began to go much smoother as I became more comfortable with the process.

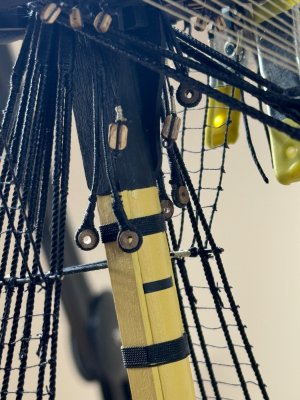
I removed the mizzen mast Burton pendants and redid them so they were shorter. I still used my homemade brass tubing thimbles. I did make a mistake though, I used the .75mm for these pendants and the plans called for .5mm for the pendants and .75mm for the shrouds.

I like redo's a lot better.
Since I had already served and installed the first 2 sets of shrouds, I was able to get the pendants underneath them and then move on the remaining shrouds.

I believe all of the shrouds need to be served around the mast where they sit, so I laid out how much string I'd need for a side and kept an eye on the middle. I set up the shrouds in the serv pro and used that little clip to judge the middle and then served a few inches out on either side.

The serving seemed to go ok and looks ok, I guess.

Seizing the line is a bit difficult. The serving does make it difficult to slide the seizing's up when snugging the shrouds around the mast. In addition, I am having trouble creating the seizing line. I've seen folks create a loop and then wind the string around their finger 4-8 times and running it through the loop, then pulling the bottom line to bunch it together.

No matter what I do, I seem to have difficutities with this and it ends up bunching up forcing me to tweak and pull the various loops to get it right. I've tried wrapping clockwise, counter clockwise...sticking the bitter end through the top of the loop, under the loop, etc. I know there must a right way.

The servings do look good compared to the unserved line and they do feel different.
20250118_133843.jpg20250118_133914.jpg

I was able to complete the shroud work for the mizzen. I haven't secured them and I'm not sure if I should or the tension of the shrouds once affixed to the channels will keep it all straight.

I added some green tape to the forward shroud of each pair to keep track of them, I don't want to try and fish through lines to make sure which was which.

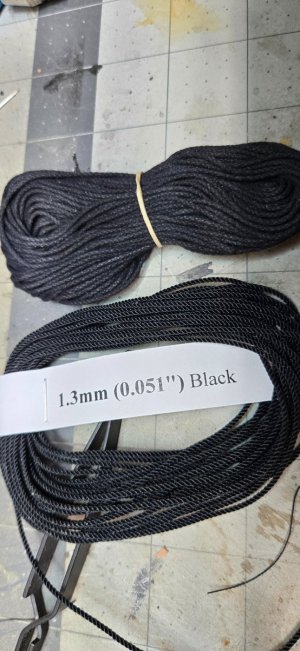
After this, I moved on to the main mast. I had bought 1.3mm line from Rope of Scale and it looks great compared to the kit rope.
20250118_144153.jpg20250118_145424.jpg
A big difference for sure!

For the pendants, I opted to use the kit line. They are short lines that are just under the platforms and I want to be sure I have enough of the Rope of Scale line for the rest of the shrouds and rigging...

20250118_151051.jpg

I used the nice new 3mm thimbles for the pendants and I am pretty happy with them...almost as if someone else did them!!!!

Break time!
20250118_151213.jpg

20250118_121838.jpg

20250118_133246.jpg

20250118_133605.jpg

20250118_143728.jpg

20250118_143733.jpg

20250118_143741.jpg

20250118_143752.jpg
 
Back
Top