-

Win a Free Custom Engraved Brass Coin!!!
As a way to introduce our brass coins to the community, we will raffle off a free coin during the month of August. Follow link ABOVE for instructions for entering.
-

PRE-ORDER SHIPS IN SCALE TODAY!
The beloved Ships in Scale Magazine is back and charting a new course for 2026!
Discover new skills, new techniques, and new inspirations in every issue.
NOTE THAT OUR FIRST ISSUE WILL BE JAN/FEB 2026
You are using an out of date browser. It may not display this or other websites correctly.
You should upgrade or use an alternative browser.
You should upgrade or use an alternative browser.
H.M.S. Victory by Caldercraft - Build Log
- Thread starter team118
- Start date
- Watchers 41
-
- Tags
- caldercraft victory
- Joined
- Oct 21, 2022
- Messages
- 301
- Points
- 278

Thanks for the tip. I currently have one of those bench magnifying lights with huge lens. It was ok when I was working on stuff on the bench, but becomes limited while trying to stretch it out over the boat....without breaking something!Looks pretty darn good to me. I use cuticle scissors to trim the edges reinforcement panels on sails because you can get very close to the attachment area without snipping off too much, since they are curved. They are very precise when paired with an eye magnification headset. Perhaps you can perform the trimming surgery on your netting with them?
View attachment 493669
I went online and found some cuticle scissors and a headset that had good reviews....get them Wednesday and I'll see. Was planning on the headset, the scissors were cheap, so why not! Will use them forever....or till I lose them or they get dull...
Thank you sir!!!
Big magnifying lenses get in the way! You start smashing things. Get a magnifying headset. They are GREAT. I use this one off Amazon. Only $16.00. Just take the little fold-out round lens off, because it snags on rigging! Ask me how I know.Thanks for the tip. I currently have one of those bench magnifying lights with huge lens. It was ok when I was working on stuff on the bench, but becomes limited while trying to stretch it out over the boat....without breaking something!
I went online and found some cuticle scissors and a headset that had good reviews....get them Wednesday and I'll see. Was planning on the headset, the scissors were cheap, so why not! Will use them forever....or till I lose them or they get dull...
Thank you sir!!!
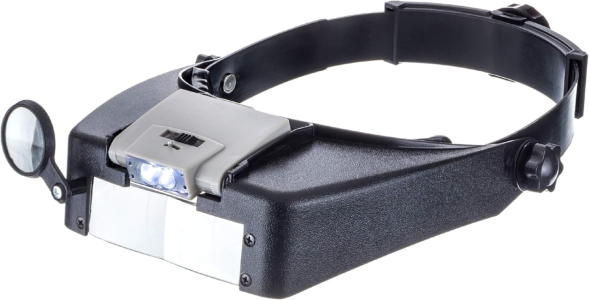
... you mislead folks, it is cheaper, it is $15.99Only $16.00. Just
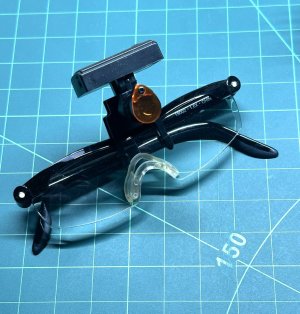
But you are correct on the usability, those are great! I have to use one (a different brand), but overhead band tension gives me a headache, but if loose, they fall. I bought the glasses instead and in combination with a dentist wireless light (bought on Amazon), this is exactly what I am comfortable with. Here are the glasses and the light.
Here is mine combination.
The $.01 is my referral fee.... you mislead folks, it is cheaper, it is $15.99
But you are correct on the usability, those are great! I have to use one (a different brand), but overhead band tension gives me a headache, but if loose, they fall. I bought the glasses instead and in combination with a dentist wireless light (bought on Amazon), this is exactly what I am comfortable with. Here are the glasses and the light.
Here is mine combination.
View attachment 493817
- Joined
- Oct 21, 2022
- Messages
- 301
- Points
- 278

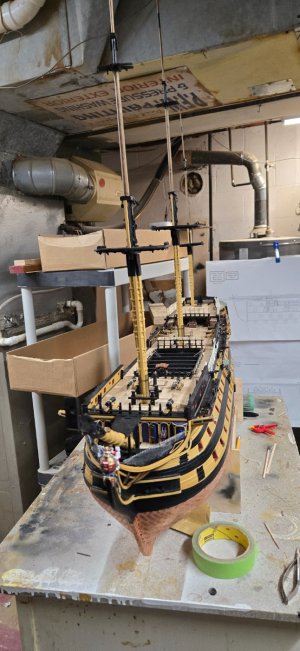
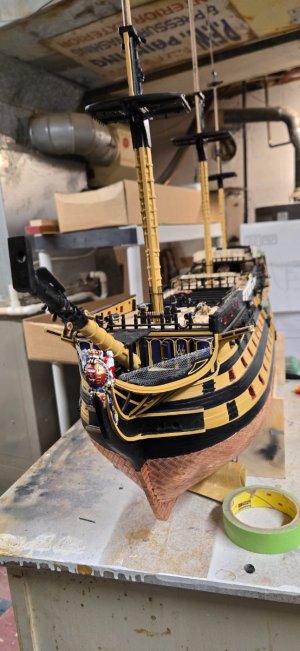
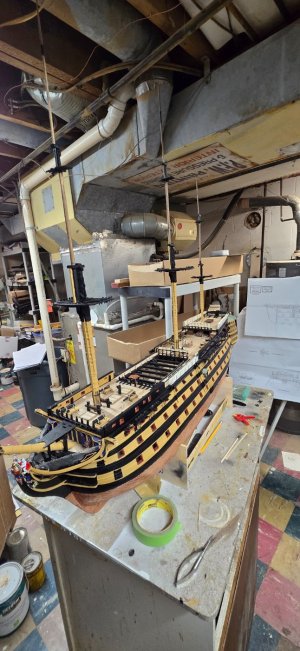
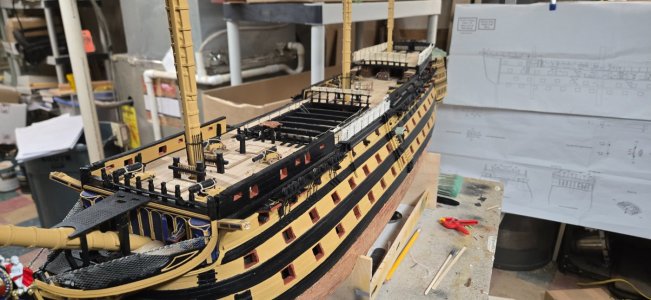
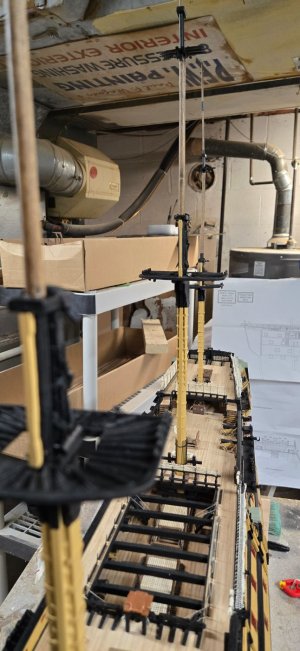
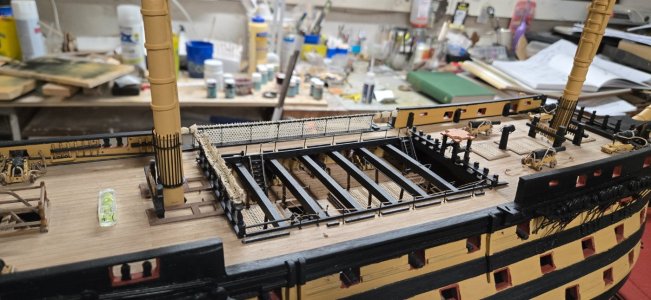
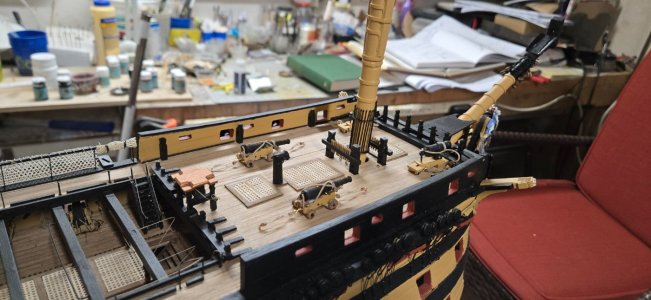
I have the 3 masts and lower bowsprit close to done. I still have to do the mast sleeves. I remember back in the old days, that I had a hard time cutting out the sleeves for the lower decks, most of the broke. I was much more careful doing these.
I also have to add the rails and lanterns to the platforms. I think I've seen some builds where they install netting on the rails....I might or might not do that.
I notice on these pics that some of the netting is whiter than the others. That's my fault, I should have stained it all together. I have done that for the remaining hammocks to be built.
The masts are just loose footed in place, I wanted to see what she looks like.
Honestly, now I'm not even sure where I'm going to put her when she's done!!!! She's HUGE!!!!
....notice I said 'when' and not 'if'....lol


- Joined
- Oct 21, 2022
- Messages
- 301
- Points
- 278

I also began work on the yards. I got really hung up on the stunsail booms/yards.
There is not one reference in the rigging manual about stunsails and while booms are mentioned there is very little to tie them into the stunsails.
The parts manual does reference the boom iron straps that go on the ends of the yards where the stunsail yards go....but that was it.
I have seen other pics of builder logs with these booms in place, but nothing about dimensions, etc.
Looking at the books I have, Longridge and McCay both reference and show the stunsail booms, but ironically no details about dimensions. That is strange for Longridge as he lays out almost EVERY length and width of every part.
In the end, my guess was that the stunsail booms look to be half the length of the yard they are attached to. Width....a bit smaller.
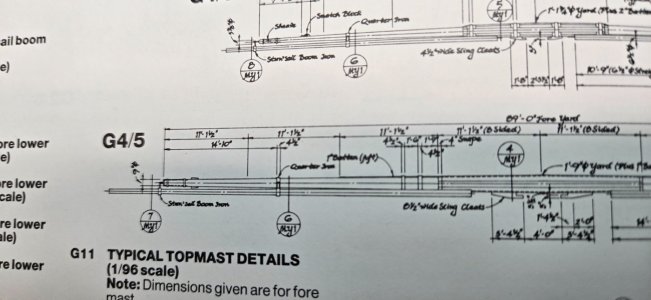
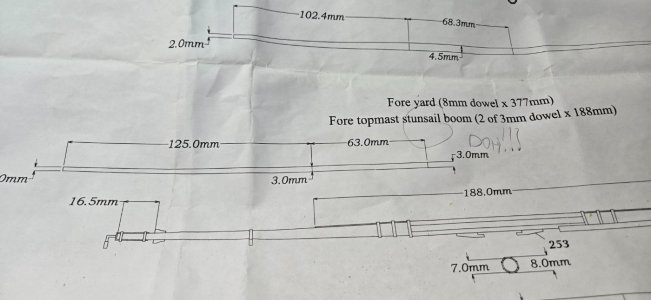
So I was going to start on the project, pulled the main blueprints out and viola! There are the stunsail booms! Right where they are supposed to be!
Read ahead, read ahead, read ahead!!!!!
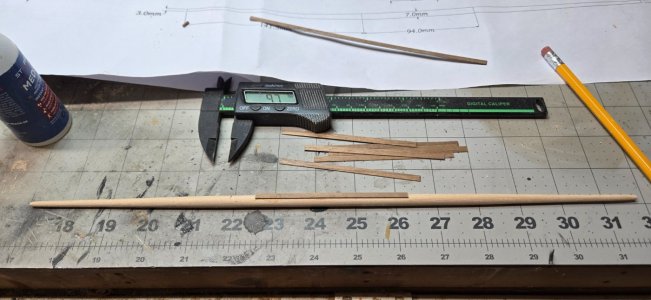
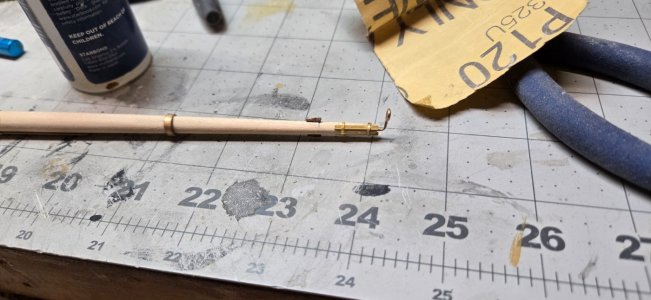
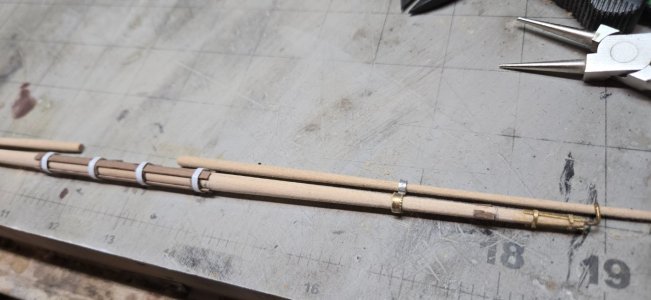
The first one I did seemed pretty straight forward. The fore main yard requires pieces of .5x4m strips in the middle, one longer than the others, which is nice because it creates a nice top reference for the rest.
I created the end hoops with annealed brass and bent and shaped to fit the booms. For me, the cast pieces that hold the 2 yard/booms together worked fine....although I am missing some and all of the larger ones for the main yard...so I'll have to create some for that.
I used photoetch sprue for the banding around those end pieces and styrene for the banding in the middle. I've added a few coats of paint and so far it seems to be blending in nicely.
I would drill the holes into the PE iron banding while they are flat BEFORE putting on the ends of the yards.
I had to snip the ends off to drill the hole into the ends of the yards for the wire hoops.
I would also drill those holes in the ends BEFORE tapering anything. Especially the smaller yards.
Right now, I cannot get the bit into the smaller fore topmast yard, in addition, I'm going to have to use small wire for this hoop... there's barely enough there for the wire I'm using on the fore main yard.
When doing the the smaller fore topmast yard, I assume the middle banding was .5x4mm, it's the 3mm strips. I didn't see that and could only get 3 strips on the yard, including the little spacers. I was going to remove and redo, but it was late and I think that once it's painted and all of the blocking is added, you won't notice it.
Again....read ahead, read ahead, read ahead.

![20250107_152453[1].jpg 20250107_152453[1].jpg](https://shipsofscale.com/sosforums/data/attachments/477/477939-c4f9906e7a5ac2051d7539d956043f25.jpg?hash=GwkYo0bWy2)
There is not one reference in the rigging manual about stunsails and while booms are mentioned there is very little to tie them into the stunsails.
The parts manual does reference the boom iron straps that go on the ends of the yards where the stunsail yards go....but that was it.
I have seen other pics of builder logs with these booms in place, but nothing about dimensions, etc.
Looking at the books I have, Longridge and McCay both reference and show the stunsail booms, but ironically no details about dimensions. That is strange for Longridge as he lays out almost EVERY length and width of every part.
In the end, my guess was that the stunsail booms look to be half the length of the yard they are attached to. Width....a bit smaller.
So I was going to start on the project, pulled the main blueprints out and viola! There are the stunsail booms! Right where they are supposed to be!
Read ahead, read ahead, read ahead!!!!!
The first one I did seemed pretty straight forward. The fore main yard requires pieces of .5x4m strips in the middle, one longer than the others, which is nice because it creates a nice top reference for the rest.
I created the end hoops with annealed brass and bent and shaped to fit the booms. For me, the cast pieces that hold the 2 yard/booms together worked fine....although I am missing some and all of the larger ones for the main yard...so I'll have to create some for that.
I used photoetch sprue for the banding around those end pieces and styrene for the banding in the middle. I've added a few coats of paint and so far it seems to be blending in nicely.
I would drill the holes into the PE iron banding while they are flat BEFORE putting on the ends of the yards.
I had to snip the ends off to drill the hole into the ends of the yards for the wire hoops.
I would also drill those holes in the ends BEFORE tapering anything. Especially the smaller yards.
Right now, I cannot get the bit into the smaller fore topmast yard, in addition, I'm going to have to use small wire for this hoop... there's barely enough there for the wire I'm using on the fore main yard.
When doing the the smaller fore topmast yard, I assume the middle banding was .5x4mm, it's the 3mm strips. I didn't see that and could only get 3 strips on the yard, including the little spacers. I was going to remove and redo, but it was late and I think that once it's painted and all of the blocking is added, you won't notice it.
Again....read ahead, read ahead, read ahead.


![20250107_152453[1].jpg 20250107_152453[1].jpg](https://shipsofscale.com/sosforums/data/attachments/477/477939-c4f9906e7a5ac2051d7539d956043f25.jpg?hash=GwkYo0bWy2)
- Joined
- Oct 17, 2020
- Messages
- 1,691
- Points
- 488

Hi see post pm.FrankI also began work on the yards. I got really hung up on the stunsail booms/yards.
There is not one reference in the rigging manual about stunsails and while booms are mentioned there is very little to tie them into the stunsails.
The parts manual does reference the boom iron straps that go on the ends of the yards where the stunsail yards go....but that was it.
I have seen other pics of builder logs with these booms in place, but nothing about dimensions, etc.
Looking at the books I have, Longridge and McCay both reference and show the stunsail booms, but ironically no details about dimensions. That is strange for Longridge as he lays out almost EVERY length and width of every part.
In the end, my guess was that the stunsail booms look to be half the length of the yard they are attached to. Width....a bit smaller.
So I was going to start on the project, pulled the main blueprints out and viola! There are the stunsail booms! Right where they are supposed to be!
Read ahead, read ahead, read ahead!!!!!
The first one I did seemed pretty straight forward. The fore main yard requires pieces of .5x4m strips in the middle, one longer than the others, which is nice because it creates a nice top reference for the rest.
I created the end hoops with annealed brass and bent and shaped to fit the booms. For me, the cast pieces that hold the 2 yard/booms together worked fine....although I am missing some and all of the larger ones for the main yard...so I'll have to create some for that.
I used photoetch sprue for the banding around those end pieces and styrene for the banding in the middle. I've added a few coats of paint and so far it seems to be blending in nicely.
I would drill the holes into the PE iron banding while they are flat BEFORE putting on the ends of the yards.
I had to snip the ends off to drill the hole into the ends of the yards for the wire hoops.
I would also drill those holes in the ends BEFORE tapering anything. Especially the smaller yards.
Right now, I cannot get the bit into the smaller fore topmast yard, in addition, I'm going to have to use small wire for this hoop... there's barely enough there for the wire I'm using on the fore main yard.
When doing the the smaller fore topmast yard, I assume the middle banding was .5x4mm, it's the 3mm strips. I didn't see that and could only get 3 strips on the yard, including the little spacers. I was going to remove and redo, but it was late and I think that once it's painted and all of the blocking is added, you won't notice it.
Again....read ahead, read ahead, read ahead.
View attachment 494156
View attachment 494157
View attachment 494158
View attachment 494159
View attachment 494160
Hi Chris
Your Victory is certainly taking shape nicely.
I am not sure if you have already glued or fixed the topmasts and topgallants. Because to do the rigging which I assume you will want to do having decided to install masts to full height, to install the shrouds and many of the other rigging lines it is much easier if you can loop lines around the top of the masts. If I am not being clear the rigging runs between the top of the lower mast (main, fore and mizzen) and the bottom of the topmast (main fore and mizzen), as well as around the mast and down through the trestle and cross trees of the tops.
Look at pictures of the rigging lines from other builds like @Alexander74 and consider the best sequence for installation of the topmast and topgallants to making the rigging process easier. It will certainly not be easy if the full mast height is constructed and fixed before rigging commences.


All of these kinds of details can be found in Lees' Masting and Rigging as well as Steel's Elements and Practice of Rigging and Seamanship which is available free on the internet. If you download the Steel book look at page 49 for the dimensions of mast, spars, etc for a first rate. https://maritime.org/doc/steel/In the end, my guess was that the stunsail booms look to be half the length of the yard they are attached to. Width....a bit smaller.
You need to know the correct length of the yard. To get this, from Lees you need to know the year the ship was launched or overhauled. For Victory after her rebuild in 1803---
(Length of the lower deck + extreme beam)/2 = "A" which is length of the main mast
The length of the main yard is 8/9 X A = B
Main topsail yard is 0.714X the main yard
Fore topsail yard is 7/8 the main topsail yard
Lower Stunsail boom 5/9 X B
Topsail stunsail booms 0.5X length of yard they are carried on
Stunsail yards is 4/7 the length of their booms
Diameters of the stunsail booms and stunsail yards is 1 inch per 5 feet of length.
Steel gives figures for various rates, including first rates. A comparison of Lees ratios and Steel's spread sheets follow. I am curious to know how accurate the yard lengths in your kit are.
Round numbers......
Stunsail boom
Main mast (196 + 51)/2= 120 Steel gives a length of 117 feet and diameter of 39 inches
Main Yard 120X(8/9) = 106 Steel gives a length of 102' 4" and a diameter of 24"
Stunsail boom
106X (5/9) = 59 feet Diameter 11.8 inches Steel gives a length of 56' 9" and a diameter of 11.75"
Stunsail yard
59X(4/7) =34 feet Diameter 6.8 inches Steel gives a length of 29-6" and diameter of 6"
I am pretty sure on my math but anyone with a copy of Lees' book may want to double check.....
Allan
Last edited:
- Joined
- Oct 21, 2022
- Messages
- 301
- Points
- 278

Hello Allan;All of these kinds of details can be found in Lees' Masting and Rigging as well as Steel's Elements and Practice of Rigging and Seamanship which is available free on the internet. If you download the Steel book look at page 49 for the dimensions of mast, spars, etc for a first rate. https://maritime.org/doc/steel/
You need to know the correct length of the yard. To get this, from Lees you need to know the year the ship was launched or overhauled. For Victory after her rebuild in 1803---
(Length of the lower deck + extreme beam)/2 = "A" which is length of the main mast
The length of the main yard is 8/9 X A = B
Main topsail yard is 0.714X the main yard
Fore topsail yard is 7/8 the main topsail yard
Lower Stunsail boom 5/9 X B
Topsail stunsail booms 0.5X length of yard they are carried on
Stunsail yards is 4/7 the length of their booms
Diameters of the stunsail booms and stunsail yards is 1 inch per 5 feet of length.
Steel gives figures for various rates, including first rates. A comparison of Lees ratios and Steel's spread sheets follow. I am curious to know how accurate the yard lengths in your kit are.
Round numbers......
Stunsail boom
Main mast (196 + 51)/2= 120 Steel gives a length of 117 feet and diameter of 39 inches
Main Yard 120X(8/9) = 106 Steel gives a length of 102' 4" and a diameter of 24"
Stunsail boom
106X (5/9) = 59 feet Diameter 11.8 inches Steel gives a length of 56' 9" and a diameter of 11.75"
Stunsail yard
59X(4/7) =34 feet Diameter 6.8 inches Steel gives a length of 29-6" and diameter of 6"
I am pretty sure on my math but anyone with a copy of Lees' book may want to double check.....
Allan
I have Lee's book and I love it. I thought I searched it pretty thoroughly, but the index is a bit disjointed. It has separate indices for each of the various areas of the ship, so I must have missed that.
With that, I could have easily figured it out. Many thanks. However, I was able to find the actual locations of the various stunsail booms and yards on one of the plans.
However, once again, you have given me a great link. I have seen Steel mentioned many times and just figured it was some old obscure book. Your link is great. I also see Abebooks has used paperback versions for about $30....but....lol....you've spent enough of my money this month. Just received my new magnifying headset and cuticle scissors as well as my nice edition of Lee's book!!!! At least Steel in online.
Many thanks!
Chris
- Joined
- Oct 21, 2022
- Messages
- 301
- Points
- 278

Hi Chris
Your Victory is certainly taking shape nicely.
I am not sure if you have already glued or fixed the topmasts and topgallants. Because to do the rigging which I assume you will want to do having decided to install masts to full height, to install the shrouds and many of the other rigging lines it is much easier if you can loop lines around the top of the masts. If I am not being clear the rigging runs between the top of the lower mast (main, fore and mizzen) and the bottom of the topmast (main fore and mizzen), as well as around the mast and down through the trestle and cross trees of the tops.
Look at pictures of the rigging lines from other builds like @Alexander74 and consider the best sequence for installation of the topmast and topgallants to making the rigging process easier. It will certainly not be easy if the full mast height is constructed and fixed before rigging commences.
Those are some great pictures, as good as some of the diagram pictures in the various books I have.
Sadly, I did put the three masts together completely. I understand what you're saying though. You're right that looping each set of shrouds together and tying them off at the mast head would have been easier (just slide the loops over, slide the seizing up and move on!!!).
I hope that I should be able to thread the various pendants, shrouds and stays at each junction and seize them together properly based on what I did.
I made my bed....I'll have to sleep in it!
- Joined
- Oct 21, 2022
- Messages
- 301
- Points
- 278

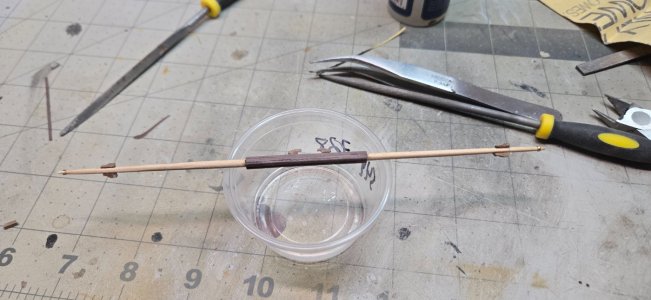
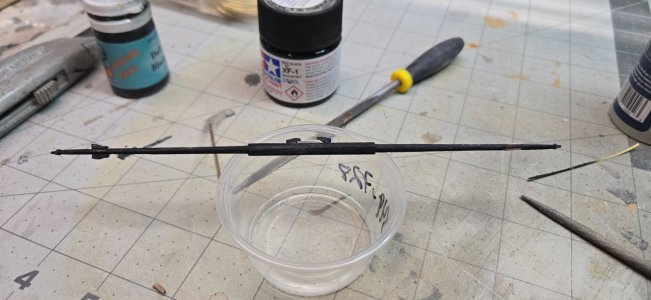
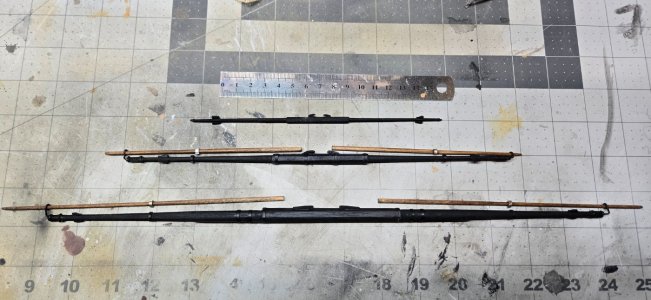
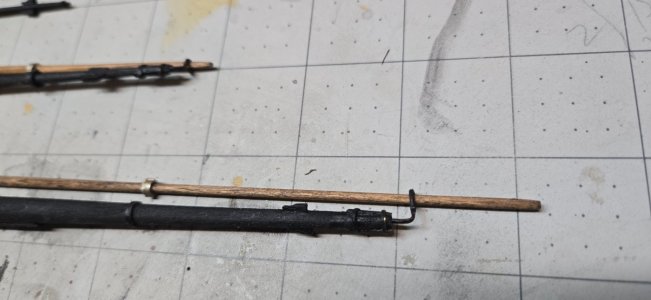
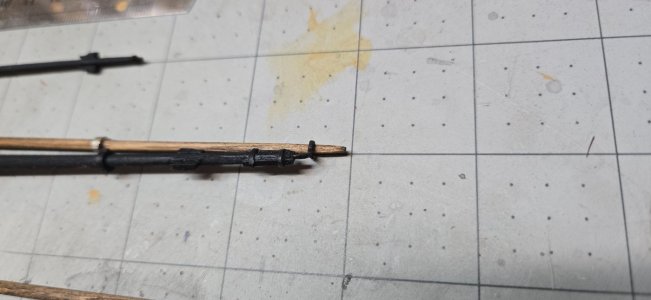
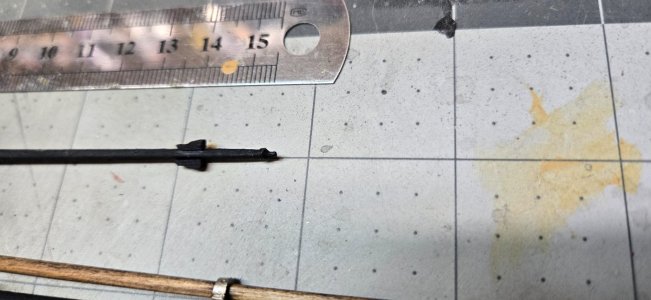
Plugging away on the first set of yards. For the foremast.
I had done the fore mast yard and the fore topmast. I had issues trying to get a hole into the ends of the topmast yard, but after a good night's sleep, I was able to get a small .5mm drill into the ends and then follow up with a bigger one to hold the brass wire.
Once done, I moved on the to the top gallant. There wasn't anything to discuss what the size of the strips in the center were. They appear to be about 1mm wide compared to 3 and 4 for the other two. That's what I went with, I think one of the strips was wider, but after getting them in, I was able to sand a bit and smooth it all out.
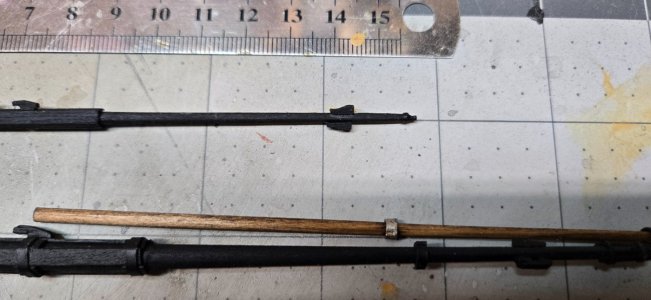
Everything was fine, you can see though that when I add the stops at the end and I filed them to shape them, I got one side backwards! Oops!
I didn't catch it until I started painting them. I've fixed it.
It also looks like the plans call for a point at the end of the top gallant yard, I assume to hold various riggings or blocks. I added a piece of PE sprue to the end and then sanded around the end to create the nipple. I thought about adding a piece of brass wire, but I think that would have to happen before starting the taper.
I may do that for the other two.
After, I continued to paint. I am down to about 1/3 of a bottle of the dull black that I ordered from JoTika's Ship Wright shop as a replacement to the dull I had already used. Earlier, I had made a mistake and used the iron black to paint the hull. When I re-ordered more yellow and black and also ordered more iron black (for the rest of the cannons). I wish I hadn't.
I decided to try Tamiya's dull black. I figured that would at least lay a base of black and I could cover with the kit paint if it didn't look good. But it actually matches pretty good! I have 2 good jars of this, so I will move forward with all the yards and Tamiya....plus it paints SO MUCH BETTER using the airbrush!
So one mast down! Two more to go....
Then on to the blocks....which I ordered some after market blocks. Can't wait to see how they will look!


- Joined
- Oct 21, 2022
- Messages
- 301
- Points
- 278

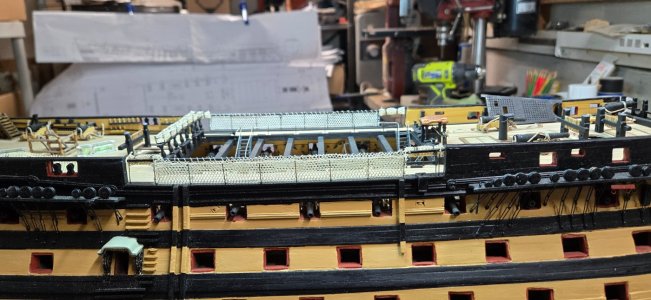
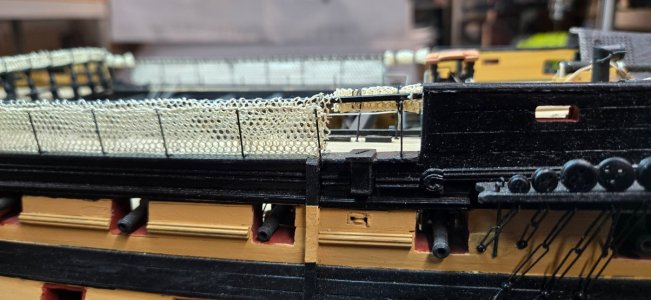
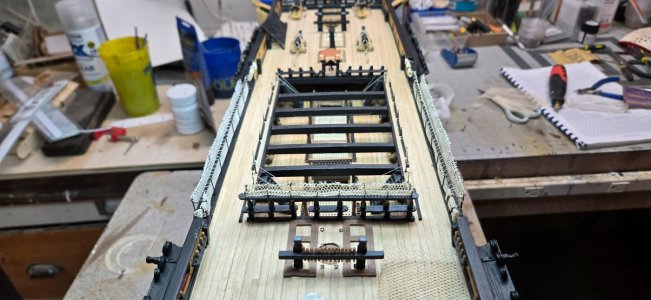
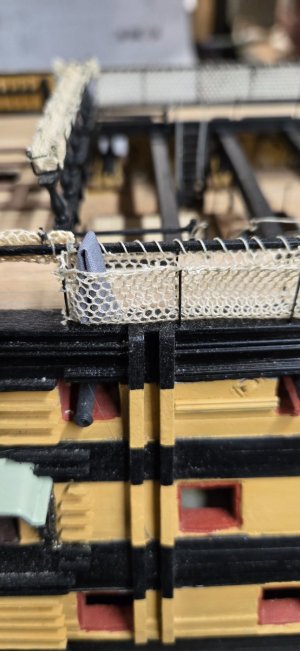
Meanwhile, I had some guys work on another hammock.
I got sidetracked with this one...the opposite waist hammock.
I really got used to sewing towards myself, for some reason, while attaching the netting to the wood banister, I was sewing away from me. It was awkward and my muscle memory wasn't there.
In the end, it's fine. I added my little roll down nets too.
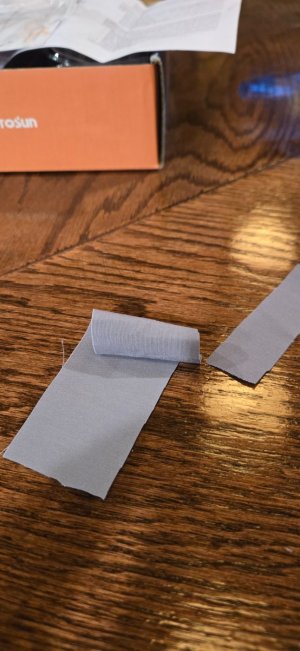
After, I found some gray/grey fabric upstairs and am thinking about creating actual hammocks. I searched online to see just what the process of rolling and folding up hammocks would be, Mostly, the pics I found show that the hammocks would be about the same length as the cannons.
Think about all those men sleeping side by side and most pics are hammocks swinging from the bulkheads to just past the ends of the cannons.
I think the hammocks would then be rolled long wise with the ropes secured tight with a hoop folded in. It's almost like the outer side of the hammock was kind of like a carry case. I think blankets, pillows or whatever would be rolled inside. Then once rolled up, it would be folded in half and taken up on deck.
There's a whole process of port side, starboard side sleeping schedules and partners taking care of each other's bedding, etc.
The fabric is a bit thin and when I folded it, it seemed to crease too much. But, perhaps I can add some material or tweak them. I like the contrast, it's a bit too dark. I picture the hammocks being a dirty white or very light gray. So I'm close!


Last edited:
- Joined
- Jun 17, 2021
- Messages
- 3,200
- Points
- 588

I feel ya!Hey, some great comments and that have been of great help for me and hopefully others like me in the future!
You've mentioned that my single blocks (and more than likely, the doubles too) are upside down.
For the little 3mm, single blocks, the holes are very inconsistent. Some are high up and some are in the middle, some are at an angle and one side is high, the other low.
I would bet that outsourcing blocks from a 3rd party would be the best choice. The problem was that I promised myself NOT to go down the rabbit hole of adding better after market pieces. As I've said, when I did the Trumpeter Titanic, I had purchased HUNDREDS of dollars in 3rd party photo etch parts and 3d printed parts, they looked great and added some great depth, but it was SO MUCH money. I wanted to see what doing a model using 'what God gave me' would turn out right.
Perhaps my next model (lol), I might look into using high quality parts!
I only painted the blocks on the foremast, because I had installed them prior to painting the structure. I wanted to see what was entailed in putting together all of the rigging blocks and wanted a 'picture' of what everything would look like going forward. After painting everything, I realized that wasn't going to work going forward. Also, as I moved onto the main mast, I liked the look of the natural or close to natural look of the blocks.
Finally, taking and posting pictures IS scary. From far away as I look at my model, I just love the way it looks. Then I take some pics and look at them and every terrible flaw is visible. Pictures of small scale work when done by a professional or someone are worth their weight in gold.
Mine? Well, let the viewer beware!!! lol
Pete
Kudos, Bravo…I have the 3 masts and lower bowsprit close to done. I still have to do the mast sleeves. I remember back in the old days, that I had a hard time cutting out the sleeves for the lower decks, most of the broke. I was much more careful doing these.
I also have to add the rails and lanterns to the platforms. I think I've seen some builds where they install netting on the rails....I might or might not do that.
I notice on these pics that some of the netting is whiter than the others. That's my fault, I should have stained it all together. I have done that for the remaining hammocks to be built.
The masts are just loose footed in place, I wanted to see what she looks like.
Honestly, now I'm not even sure where I'm going to put her when she's done!!!! She's HUGE!!!!
....notice I said 'when' and not 'if'....lol
View attachment 494146
View attachment 494147
View attachment 494148
View attachment 494149
View attachment 494150
View attachment 494151
View attachment 494152
View attachment 494153
View attachment 494154
View attachment 494155
- Joined
- Oct 21, 2022
- Messages
- 301
- Points
- 278

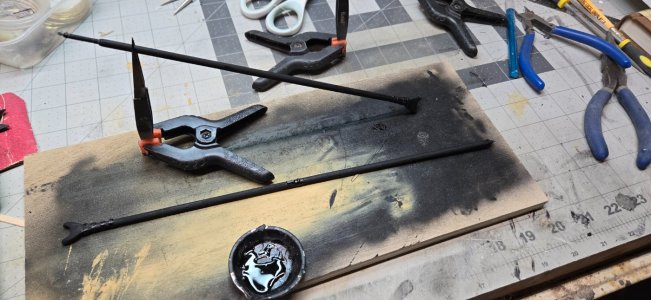
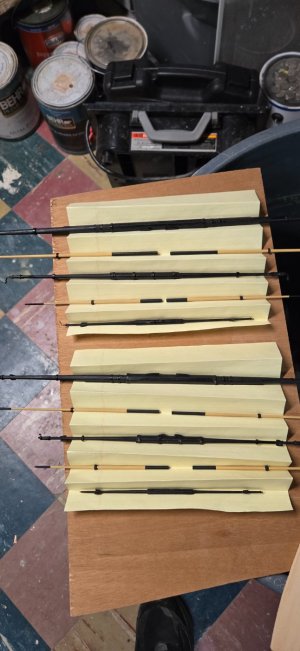
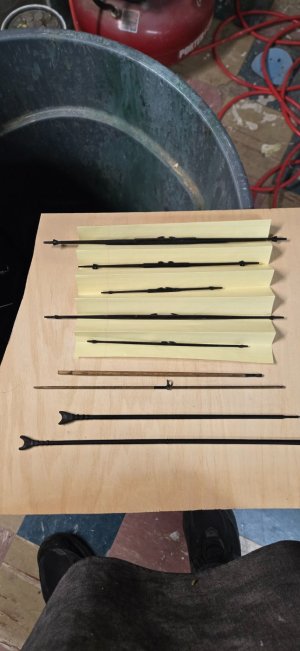
Finished all of the yards and their stunsail booms where applicable.
For the most part, I used the kit's cast iron rings on the yards that have stunsail booms. Except I lost the main yard rings. I do have a sheet of thick brass and was able to use tin shears to cut some strips about 1/8" wide. After annealing the cut pieces (which twist horribly after being cut), I was able to straighten them out, shape them around the yard and then file the sharp ends off.
I have seen others use this to make all the yard rings and the double rings needed to slide the booms in and out.
I had to go online to look at other builds to get the color scheme for the booms as there is nothing in the directions about them. Just the masts.
I have added a few coats of clear matt finish to everything and I may have to add just one more coat of black to the driver boom and gaff.


- Joined
- Oct 21, 2022
- Messages
- 301
- Points
- 278

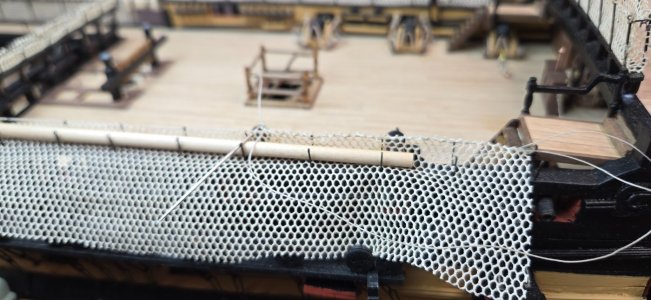
I continued to plug away on the hammocks.
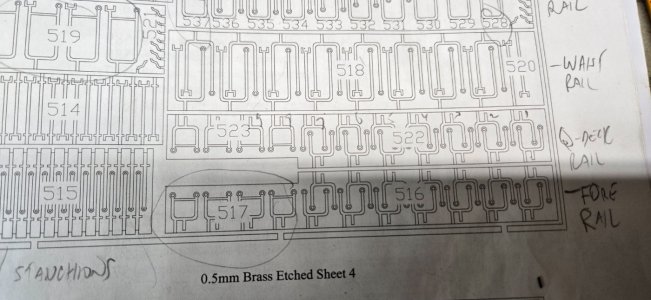
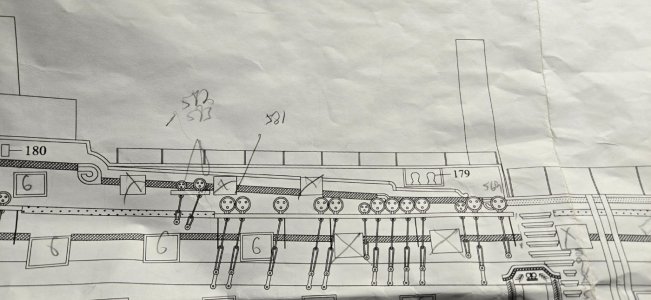
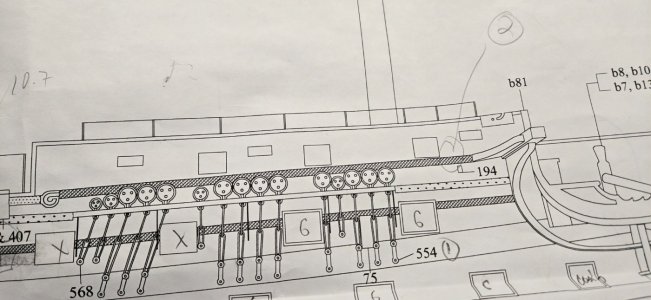
There is an omission in the directions concerning the installation of the fore and quarterdeck hammocks.
You can see the part list shows equal pieces supplied for both rails.
However, the foredeck only needs 6 inside brackets while the quarterdeck needs 8. It works out in the end, but it might be possible not to look ahead and see from the plans that you need 8 inside brackets and since you only have 7, re-calculate the distance needed between them. Odd....
You can also see that I lay the inside netting against the hammock line and sew towards myself. A curved needle would work wonders, but I only thought about that an hour ago...much too late!!!
Once I finish the inside, I calculate how much material I'll need for the outside and carefully cut away the excess. Then I run the outside line and sew, sew, sew.


- Joined
- Oct 21, 2022
- Messages
- 301
- Points
- 278

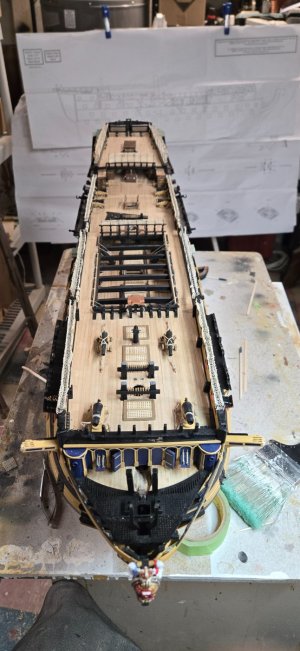
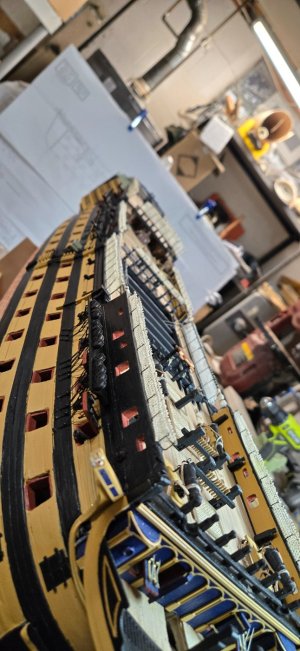
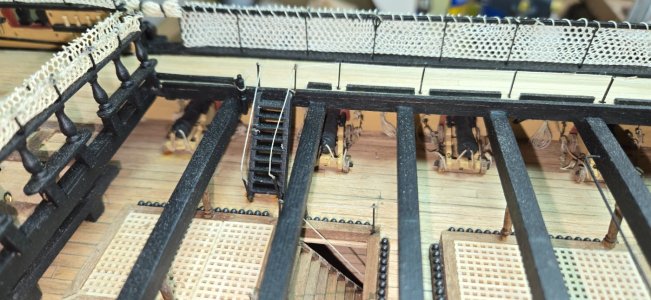
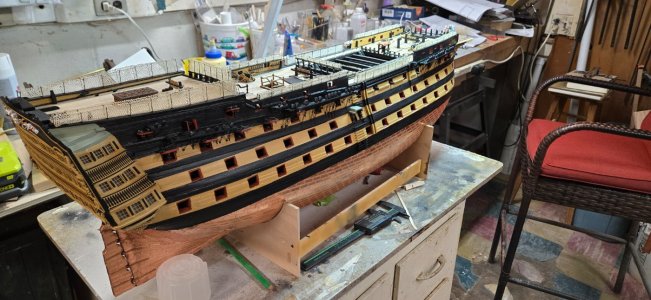
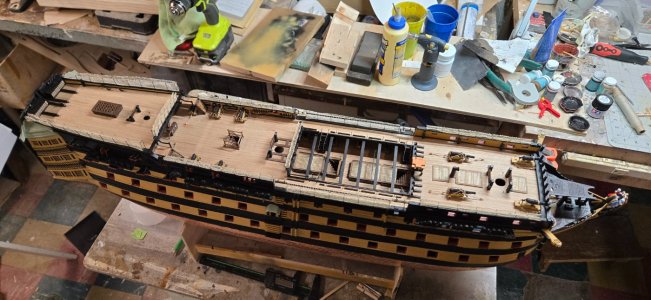
With that done, I can mark off the hammocks as finished. I have my new fangled cuticle scissors and I'll pick away at the frays over the next few days.
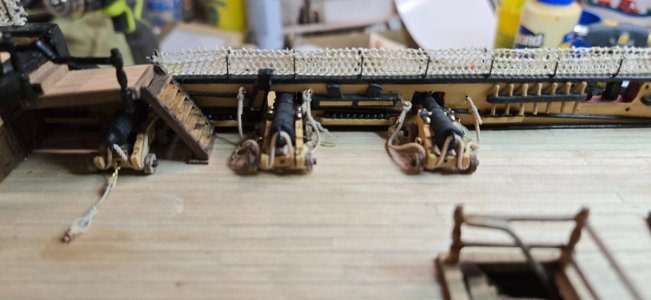
I did remove the original netting from the bow railings and I'll redo with the new netting. I also have to add the rails to the platforms and netting too. But I am concerned if I do that now, they will get in the way of all of the rigging work that will need to be done.
The problem in my mind is that once the standing rigging is in place is also going to make it difficult to add the railing/nettings. Once I have the masts in place, I should get a better idea of which path to take.
My next thought is to go back over the hull directions and make sure I have added all of the pieces required. After that, I need to make sure all the eyelets are in place and then paint them. I see many are still copper and need to be corrected.
Once done, I suppose I will have to tackle the cannon lids and get the lower deck cannons ready to install....and yes the 4 tackles on the quarterdeck cannons that I haven't done yet.
Then it's on to the mast!


- Joined
- Oct 21, 2022
- Messages
- 301
- Points
- 278

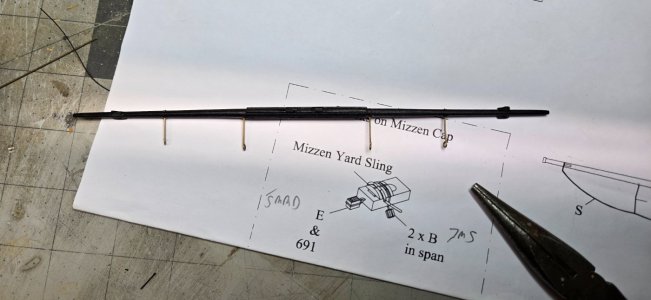
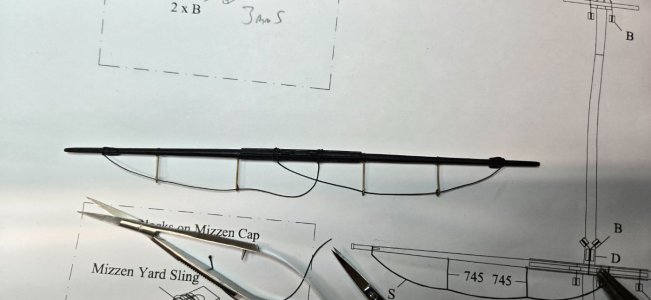
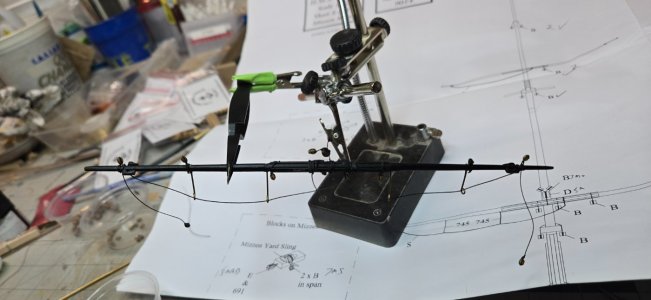
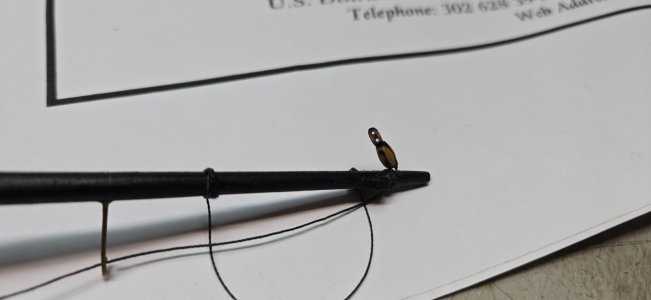
I began working on finalizing the various yards. There are a lot of blocks, horses, etc that need to be added to them before they are attached.
Although a ways away in the timeline and well after the shrouds and stays have been installed, I thought I would slowly work on them in between other tasks.
They are quite tedious and I've found it is best to alternate projects to keep from making mistakes or getting bored.
I also went over the rigging manual and marked what the belay points on the blueprints are to help in the future.
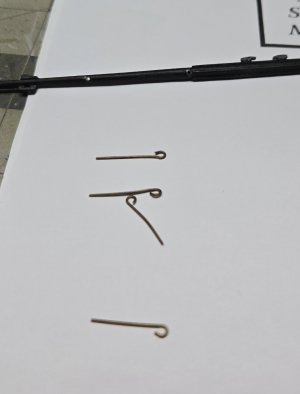
As for the yards, they required horses to walk on and some also have end flemish horses. I followed the directions and used .7mm gauge wire to create the stirrups. There was a learning curve to make sure they are perpendicular to the yards. I had to bend some after drilling the holes.
I also received the better sheaves from Dry Dock Models. They look great, but they didn't send out 3 bags of the 3mm single sheaves and 1 bag of the 5mm single sheaves. Thankfully they are going to take care of that, but there is a 12 day or so delay getting them to me. Oh well!
I started with the mizzen yards and began practicing on building the various blocks and attaching them. Again, a learning curve....
I did notice on one of the blue prints, there is a pair of 7mm sheaves that look to be attached to the mast, but I am not seeing that in any of my books. I think at this point I may have to sit down with pen and paper and draw out what needs to go where based on all 4 books I have, the plans, directions and pictures of other builds.
I think I am becoming overloaded with too much information and I can't seem to process it....or just pick one source and just follow that. I don't know.
Going forward, I am in undiscovered territory and have no idea what I'm doing!


