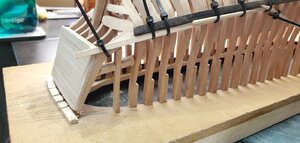
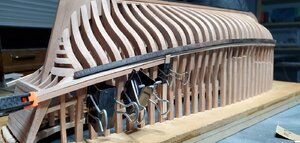
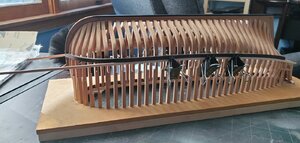
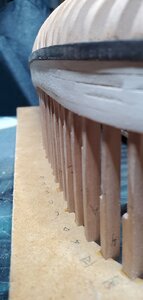
Hannah 1/48 - Lumberyard

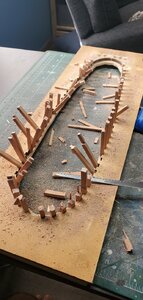
Rough couple of days in the shipyard.

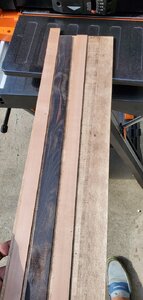
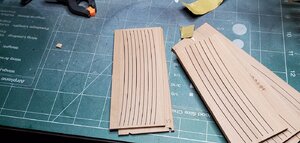
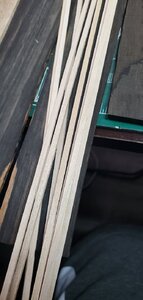
So next step was supposed to be the holly hull, but they needed to be cleaned up first. After I cleaned them I was measuring and realized that they weren't all the same width. So I then put together a Dremel routing table to sand down all the pieces to the same width, which is 1/8" or 3.1mm. It's important that they all be the same width so that when I cut out the gunports they are correctly placed on the decking. That all took some work but the holly came out nicely.
20200603_195602.jpg

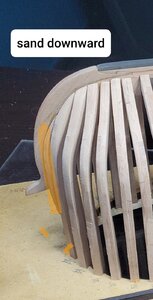
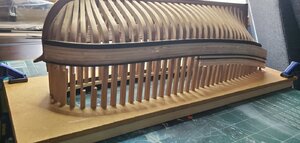
I'll have to pick and choose so that the grain and coloring match but thats no issue. Where I ran into my issue is when I put the holly in place and realized that the holly is 1/32" thick which happens to be exactly how thick my wales are. So because I want things to look semi right I decided to fix that by putting another laminated layer on. This is where things went sideways.

1. I broke one entire side off the boat
2. A number of ribs are loose now because I had already cut the ribs in half
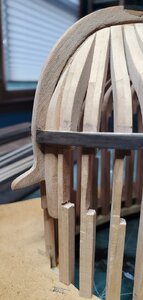
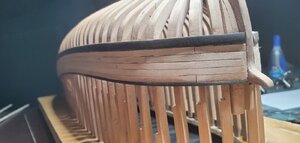
3. The piece of ebony I used on one side was the wrong side and has planer marks all down so it looks pretty bad.
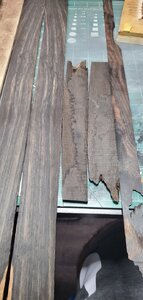
4. I realized that NONE of the ebony I'm using is the same.
20200603_174944.jpg

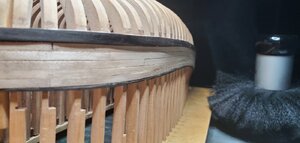
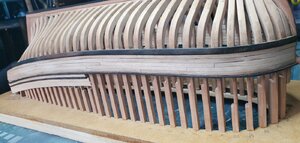
I'm using 3 different Ebony's and I only just noticed because the Wales are a completely different color than the false keel. It looks like I'm used ebony for the false keel, macassar ebony for the Wales, and the rest of the ship will be the ebony with white in it. There's really nothing that can be done about it now, I can't risk taking the Wales off again or the entire hull structure could fail. So I've got what I got. Moving on!

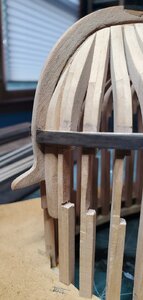
5. I didn't realize just how bad my bow is until I put the second layer on.
20200603_200416.jpg

Something happened when I first out the keel together I think, because the ribs are in the correct place, and in fact I think rib 8 is angled slightly inward. I may be able to fix this if I extend the keel piece with some pearwood, but I don't have any that thick so that may just be what it is.

Rough.

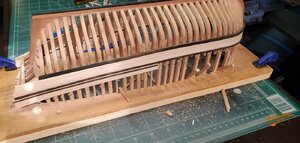
Anyway, that's really all just to document some of the issues I've had because this is a learning experience. Can only fix them on the next model. In the meantime I'm moving on to planking the holly now that I've finished fixing up the wales.

We move forward from here.
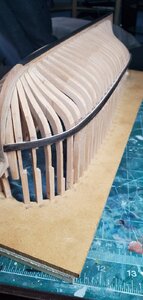
20200603_195227.jpg
 
You might PM @Dave Stevens (Lumberyard) to see if he can help with wood issue.

He has good customer support and is a member of the SoS, so he checks things all the time.

Yeah, if I had realized the issue sooner I would do that. But the problem now is that the framing wont support me taking the wales off again and putting it all back together again. So it is what it is. You'll only be able to tell that the false keel is a pure black, the rest will be fine I think. Next time I will know what to look for, for now I will chalk it up to a learning experience and move on.
 
Learning and getting experience, also with mistakes - this is also a big part of our hobby.
Sometimes it the only way to move forward and accept the situation - next ship it will be better
 
I understand that you are going to use holly to plank the hull with, this is a pretty hard wood, so I wonder how it goes when you bend the planks, very exciting, hope they are not so hard that they break when you bend them, greeting, knut-
 
I understand that you are going to use holly to plank the hull with, this is a pretty hard wood, so I wonder how it goes when you bend the planks, very exciting, hope they are not so hard that they break when you bend them, greeting, knut-
Holly is indeed hard wood, but not nearly as hard as ebony. 1mm thick planks bend like charm.
 
Rough couple of days in the shipyard.

So next step was supposed to be the holly hull, but they needed to be cleaned up first. After I cleaned them I was measuring and realized that they weren't all the same width. So I then put together a Dremel routing table to sand down all the pieces to the same width, which is 1/8" or 3.1mm. It's important that they all be the same width so that when I cut out the gunports they are correctly placed on the decking. That all took some work but the holly came out nicely.

View attachment 155206

I'll have to pick and choose so that the grain and coloring match but thats no issue. Where I ran into my issue is when I put the holly in place and realized that the holly is 1/32" thick which happens to be exactly how thick my wales are. So because I want things to look semi right I decided to fix that by putting another laminated layer on. This is where things went sideways.

1. I broke one entire side off the boat
2. A number of ribs are loose now because I had already cut the ribs in half
3. The piece of ebony I used on one side was the wrong side and has planer marks all down so it looks pretty bad.
4. I realized that NONE of the ebony I'm using is the same.

View attachment 155208

I'm using 3 different Ebony's and I only just noticed because the Wales are a completely different color than the false keel. It looks like I'm used ebony for the false keel, macassar ebony for the Wales, and the rest of the ship will be the ebony with white in it. There's really nothing that can be done about it now, I can't risk taking the Wales off again or the entire hull structure could fail. So I've got what I got. Moving on!

5. I didn't realize just how bad my bow is until I put the second layer on.

View attachment 155209

Something happened when I first out the keel together I think, because the ribs are in the correct place, and in fact I think rib 8 is angled slightly inward. I may be able to fix this if I extend the keel piece with some pearwood, but I don't have any that thick so that may just be what it is.

Rough.

Anyway, that's really all just to document some of the issues I've had because this is a learning experience. Can only fix them on the next model. In the meantime I'm moving on to planking the holly now that I've finished fixing up the wales.

We move forward from here.

View attachment 155207
Man, that was rough, but you fixed it really well. Looks really good.
 
Hurray, then I can do the same as you, I have a lot of that kind of wood, Knut-

Once you get a feel for how much you can push the ebony at 1mm thick you can bend it as far as you need. It will definitely come out better next time I do this.

I did figure out my mistake at the bow, I was supposed to sand down the ribs to match the rabbit line I had cut into the center bow piece.

20200608_000257.jpg

Because I didnt do this my bow is the wrong shape. I missed this step because I thought the jig would give me the correct shape and it doesn't. So now my bow looks like this.

20200603_200416.jpg

Live and learn.

So I moved on because that's not something easily fixed. On to planking.

20200604_235613.jpg
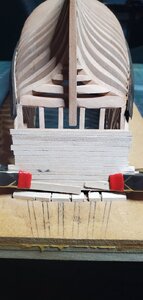
So right off the bat I made a mistake I didn't realize until I took this picture. There are 12 planks here at 3.1 mm a plank. That will give me the proper alignment with the hull planking. I decided to not plank the underside so that you can see all of that area, but because I didn't plank it I didn't align the bottom plank properly. So the entire thing is off by 1.5mm.

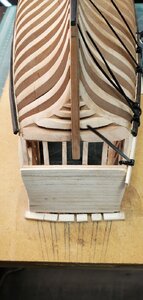
Another thing I worked on at this point was of dry fitting the first hull plank was the look of the entire back area. It needed a lot of reshaping. This is one of those things that's hard to see on paper and needs to be seen at the end. If you can tell the right side of the photo is the reshaped side.

20200606_172653.jpg
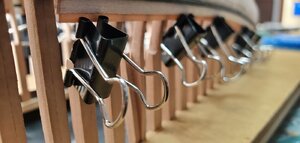
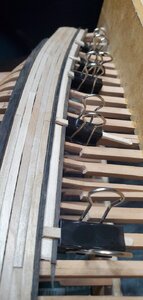
I was experimenting with different ways to hold the planks in place while they dried.

20200606_172701.jpg

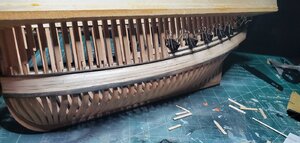
I settled with the method I used on my previous build. It would've taken too many zip ties and it was too damaging.

20200606_232344.jpg

20200607_192846.jpg

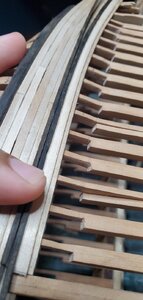
After glueing and some sanding I've finished planking the first 5 on one side. It's a tiny bit bumpy still.

20200607_235357.jpg

The view from the inside. My cuts weren't perfect, but the final plank seems to more or less follow along with the cuts. It'll need some clean up once I cut it off the jig I'm sure.

20200607_234819.jpg

Next up is the other side!
 
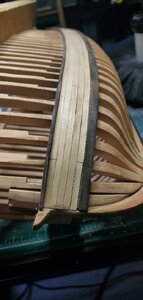
My Hannah is going to need a new name because at the rate I'm going she's going to be a completely different ship when I'm done. And not in a good way. I completed the 5 planks on both sides and found that my wales weren't angled properly at the bow. So they finished about 1/8 below where they should have at the bow.
20200610_235812.jpg 20200610_235822.jpg

The final plank should have ended higher. I noticed this because I was putting together the molding that makes up the railing and found it didn't fit properly.

Not only that but I found that the planking is twice as thick as it should be which is why they matched the thickness of my wales unexpectedly a few posts ago. They should have been 1/32 and mine are 1/16. I made the assumption that since the holly I had was the correct 1/8 wide that they were the correct thickness. I discovered this wasnt the case because the molding comes from a 1/16 square block but isn't supposed to be flush with the planking.

20200610_235837.jpg

Bad news aside, tho I'm sure there is much more to come because my decking will likely be very far off now on the bow. I spent the afternoon making 1/16 square strips out of ebony. Took about 2 hours. But the planer and the proxxon saw got the job done.

20200610_170808.jpg

This time I used a couple of similar thickness planks to limit the damage the ebony received while being reduced. It helped a fair amount I think. I was able to thin it to about 1.8mm then I cut 1.8 mm strips from the plank, then used the dremmel router table to make them as close to 1.6mm or 1/16 as possible. I think the strips came out very well. They just don't fit on the hull properly lol.
 
Hello Gventura, I am sure, it will be fine at the end. It is you model, and you build it the way you want. We all doing mistakes, unfortunately it is the part of our hobby. Please continue to post, we are waiting for your updates! :)
 
Well the first layer of ebony is down. Now a decision is to be made. On my Hannah the ebony is 1/16 square and sits perfectly against the 1/16 thick holly.

The decision is this, I can either leave it exactly as it is.

Or I can laminate another 1/16 ebony on top of this strip and make the decorative carving that is supposed to be there.
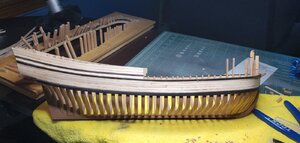
20200611_232519.jpg20200611_232528.jpg


We'll see what tomorrow brings. In order to get a good lamination I will need to make the decision now before I finish planking the hull above this line, and I'd like to move onto that tomorrow.
 
Ultimately I decided to not cut the molding. The reason is pretty simple, if I had done the molding cuts before I bent the ebony then the strips would have snapped during bending. One of them did break, but I was able to mend it. So I tried to do it after I put them in place, after testing out the cutter on a free piece of ebony (worked well), but the ebony strip didn't stick out far enough from the hull. So I would have destroyed the holly just below it. But it looks nice anyway.

20200613_104126.jpg

I cut a holly plank down to the correct size for the piece between ebony moldings and put that in place.
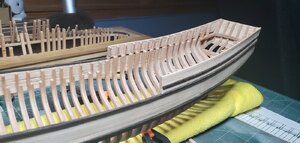
I'm on to planking the final few pieces at the rear of the ship. I didn't have enough ebony strips remaining to do the double ebony laminate in the 4 places remaining. So i resorted to how I built the wales, with a 1/16 piece of boxwood.
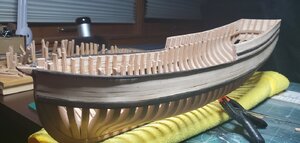
20200613_181542.jpg
20200613_230014.jpg 20200613_225940.jpg


I'm hopeful tomorrow I can finish planking and remove the Hannah from her jig!

20200613_235906.jpg

My only concern is I'm running low on room above the transom for 2 more hull planks and trim, it's going to be awfully close.
 
LOOKS VERY GOOD!

Thanks! Today was a milestone day!

20200614_163542.jpg

She's free!

Before I set the Hannah free I completed the upper planking. I stopped just short of putting in the final molding atop. I was concerned that I didn't have enough space at the transom to make it fit properly and I have enough ebony that really I can make the top railing one piece, opposed to a strip meeting a board like it will be on the main deck railing.

The holly got rather beat up during the course of building, alot of ebony sawdust mixed into it and some excess glue that got away, so I took a 150 grit to clean it all up. It makes a huge difference,

20200614_150610.jpg
20200614_150617.jpg

She'll need another scrub when everything is said and done but for not looks very nice.

Now, cutting her from her jig was stressful.

20200614_163542.jpg

20200614_162224.jpg

I used a saw and a circular saw bit on the Dremel to cut through all the pieces, I only broke one rib in a place I didn't want it removed but was able to glue it back together.

In fact the jig is still in rather good shape, the left over ribs knock right out with a hammer. So if I want to build another Hannah I could.

It took a good amount of work, that I didn't realize I didn't photograph, to cut down and sand down all the excess rib that didn't get sawed off. Here is what she looks like now.

20200614_233000.jpg

I've started rooming the pieces inside that need to come off. I've run into a small issue of some of the ribs breaking off from the hull planking, but nothing some new gluing won't fix I don't think.

20200614_233013.jpg

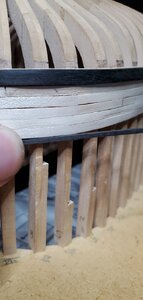
The ribs need to be just below the ebony line, where the new railing will attach.

20200614_233024.jpg
 
Great job, I bet you were pretty nervous when you dismantled her from the jig,

Very nerve racking. Trying to not break ribs as they're cut is difficult.

I've finished cleaning all the excess rib pieces and shaved down the planking to the correct size.

20200616_001251.jpg

She looks a lot cleaner now.

20200616_001309.jpg

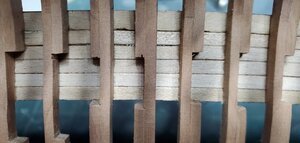
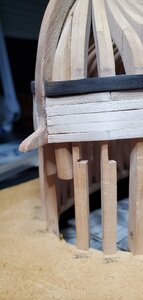
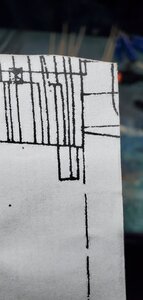
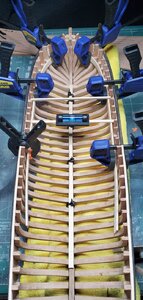
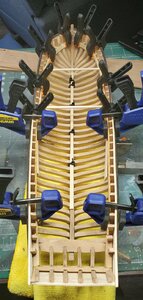
Next is to put in the railing that the deck will be built on. Big step, if it's not correct the rest of the model will be wrong. I've had some issues figuring out exactly where the rails should go. On the plans it looks like it should be about 11/16 down from the rail cap but that's much further down than where my ribs are currently cut in half. And those cuts are accurate to the templates I used before planking.

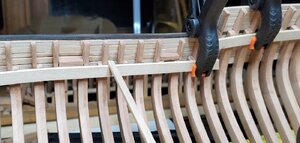
The cuts I have in place, where the rib goes from double to single look accurate from photos I've seen of the Hannah, but don't look exactly like the plans. I think I'm just going to go with the cuts I've already made instead of trying to make deeper cuts.

The last think I will try before I make my decision is testing out the laser cut cross beams that come with the timbering set. If those cross beams don't fit across where my ribs are cut currently then I'll have to go lower, if they do fit then I'll just go forward with what I have.

20200616_001243.jpg
 
Some progress for today.

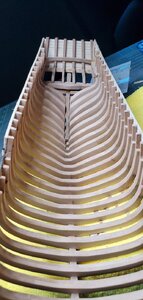
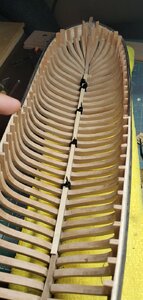
Installed the keelson

20200616_204818.jpg

This is another laser cut piece that is tapered in the stern to fit between the last couple ribs properly.

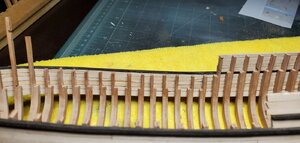
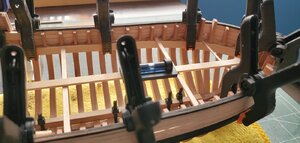
Next up is the rails for the decking. This is stock boxwood, same stuff I used to put the first layer of the wales on, its perfectly milled and is easy to shape with a good soak. To be honest I'm not 100% that this is where they are supposed to go. I used a template to cut these notches earlier and they are all pretty uniform, but I read the rail should be 11/16 below the molding, mine is not, probably 7/16. But it looks right so I'm going to roll with it.

20200616_233152.jpg 20200617_130232.jpg

I put in some test pieces to make sure the deck is level and even on both sides. Looks pretty good, there will be a few more adjustments before it's glued in place.

20200617_180617.jpg

Also put the gun ports in place.

20200617_220848.jpg

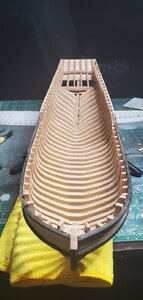
Next up will be drilling out the gun ports and sanding everything down nicely, once that's done I'll glue the deck supports in place. And move on to the beams.

The cross beams are laser cut pieces as well. They have had their first pass of sanding. They are all long enough and will need to be shortened. And the laser char will have to be sanded off.

20200617_221509.jpg
 
Back
Top