-

Win a Free Custom Engraved Brass Coin!!!
As a way to introduce our brass coins to the community, we will raffle off a free coin during the month of August. Follow link ABOVE for instructions for entering.
-

PRE-ORDER SHIPS IN SCALE TODAY!
The beloved Ships in Scale Magazine is back and charting a new course for 2026!
Discover new skills, new techniques, and new inspirations in every issue.
NOTE THAT OUR FIRST ISSUE WILL BE JAN/FEB 2026
You are using an out of date browser. It may not display this or other websites correctly.
You should upgrade or use an alternative browser.
You should upgrade or use an alternative browser.
HMS Blandford 1:48 POF Modelship Dockyard [COMPLETED BUILD]
You are a good builder Ken!Hi Dean, Thanks, I think that the quality of the kit helps me look like a good builder.
- Joined
- Dec 16, 2016
- Messages
- 1,192
- Points
- 493

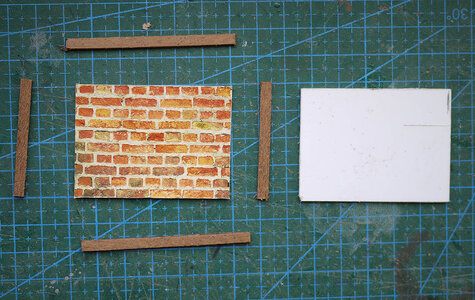
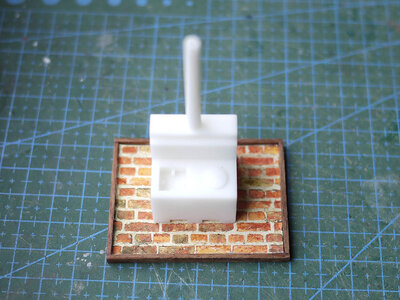
Hello, Here's just a little bit of detailing that I've just made. As many of you know I only make models from what is supplied in a kit, I don't do fine detailing, however I was inspired by Jacks presentation of his galley so I thought I'd make a small effort with the stove base. I didn't want to go to the lengths that Jack did so I just photographed a brick wall, I re sized it then printed it on some highly textured paper, stuck it onto some plasticard, put a wooden edge to it and hey presto! a realistic looking base.


Last edited:
This looks good! Threads like this are inspirational. You don't happen to have a link to the presentation mentioned above?Hello, Here's just a little bit of detailing that I've just made. As many of you know I only make models from what is supplied in a kit, I don't do fine detailing, however I was inspired by Jacks presentation of his galley so I thought I'd make a small effort with the stove base. I didn't want to go to the lengths that Jack did so I just photographed a brick wall, I re sized it then printed it on some highly textured paper, stuck it onto some plasticard, put a wooden edge to it and hey presto! a realistic looking base.
View attachment 402428
View attachment 402440
--
Jøran
- Joined
- Dec 16, 2016
- Messages
- 1,192
- Points
- 493

Hello and welcome, again thanks for your many likes and kind comments.
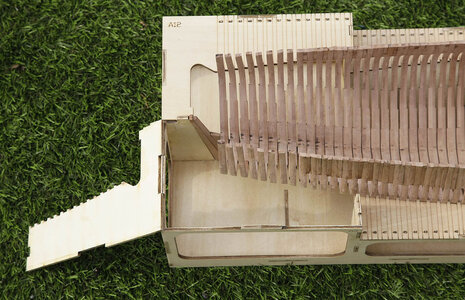
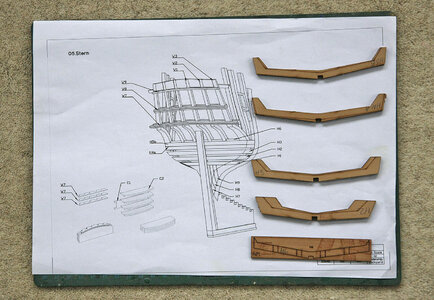
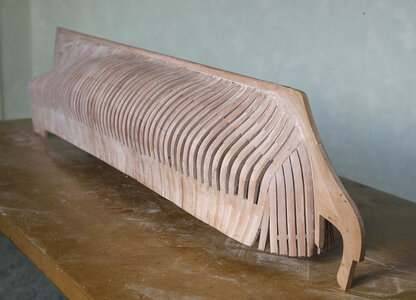
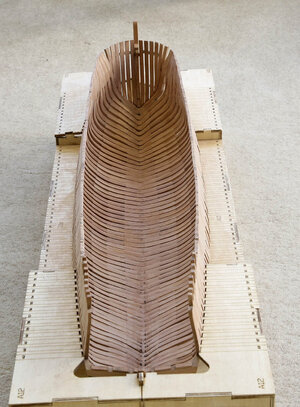
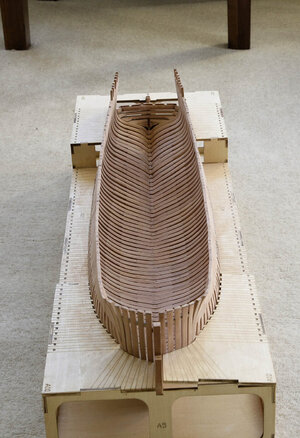
A roll of drums please and bring on the dancing girls! This is the big reveal; Blandford is released from her build jig and I can see for the first time the hull proper, I must say that I’m delighted. It was a bit of a struggle getting the stern free so I removed a rear quarter section of the jig rather than stress the structure, it now goes in and out easily. To give it some rigidity before giving it its first sanding I fitted the stern beams which support the transom, H6 was the top part of the upper beam, once glued into place four marked sections were cut away leaving recesses which the transom uprights slotted into. I put in some scrap as fillers to fair the lower part into the keel. Everything has gone to plan so far, may it continue.
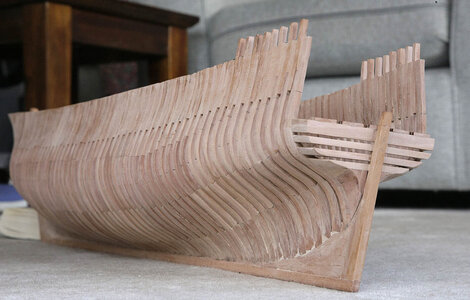
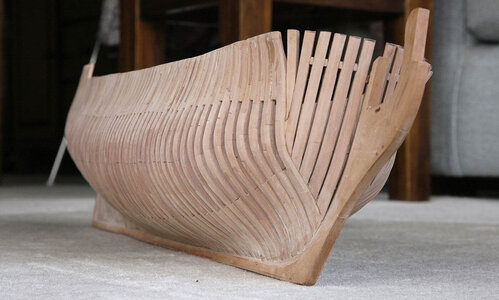
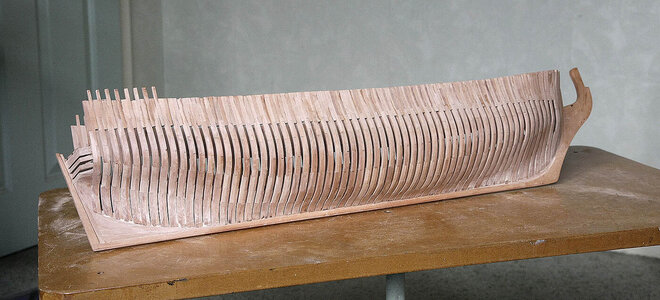
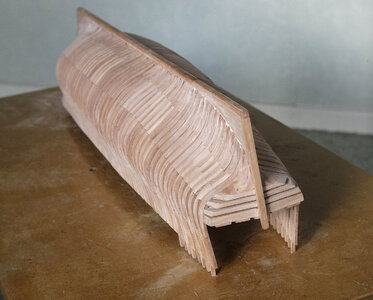
A roll of drums please and bring on the dancing girls! This is the big reveal; Blandford is released from her build jig and I can see for the first time the hull proper, I must say that I’m delighted. It was a bit of a struggle getting the stern free so I removed a rear quarter section of the jig rather than stress the structure, it now goes in and out easily. To give it some rigidity before giving it its first sanding I fitted the stern beams which support the transom, H6 was the top part of the upper beam, once glued into place four marked sections were cut away leaving recesses which the transom uprights slotted into. I put in some scrap as fillers to fair the lower part into the keel. Everything has gone to plan so far, may it continue.


Awesome! Congratulations on this major achievement Ken! And she sure is a beauty!
Congratulations with this milestone, Ken. Now she shows here lines beautiful.Hello and welcome, again thanks for your many likes and kind comments.
A roll of drums please and bring on the dancing girls! This is the big reveal; Blandford is released from her build jig and I can see for the first time the hull proper, I must say that I’m delighted. It was a bit of a struggle getting the stern free so I removed a rear quarter section of the jig rather than stress the structure, it now goes in and out easily. To give it some rigidity before giving it its first sanding I fitted the stern beams which support the transom, H6 was the top part of the upper beam, once glued into place four marked sections were cut away leaving recesses which the transom uprights slotted into. I put in some scrap as fillers to fair the lower part into the keel. Everything has gone to plan so far, may it continue.
View attachment 402972
View attachment 402973
View attachment 402974
View attachment 402975
View attachment 402977
View attachment 402978
View attachment 402979
View attachment 402980
View attachment 402981
Regards, Peter
- Joined
- Dec 16, 2016
- Messages
- 1,192
- Points
- 493

Thanks Paul, Yes a beauty, but not as beautiful as my wife and we’ve been married for over 50 years.Awesome! Congratulations on this major achievement Ken! And she sure is a beauty!
- Joined
- Dec 16, 2016
- Messages
- 1,192
- Points
- 493

Thanks for that Peter, I’ve surprised myself, at first I was uncertain that I’d get this far but it shows what can be done if you only try.Congratulations with this milestone, Ken. Now she shows here lines beautiful.
Regards, Peter
- Joined
- Dec 16, 2016
- Messages
- 1,192
- Points
- 493

Hi Loracs, Again thanks for your comment, it’s always uplifting to get compliments after you try your bestIndeed, quite an achievement. very nicely done. Congratulation!
- Joined
- Apr 20, 2020
- Messages
- 6,255
- Points
- 738

Dear friendHello and welcome, again thanks for your many likes and kind comments.
A roll of drums please and bring on the dancing girls! This is the big reveal; Blandford is released from her build jig and I can see for the first time the hull proper, I must say that I’m delighted. It was a bit of a struggle getting the stern free so I removed a rear quarter section of the jig rather than stress the structure, it now goes in and out easily. To give it some rigidity before giving it its first sanding I fitted the stern beams which support the transom, H6 was the top part of the upper beam, once glued into place four marked sections were cut away leaving recesses which the transom uprights slotted into. I put in some scrap as fillers to fair the lower part into the keel. Everything has gone to plan so far, may it continue.
View attachment 402972
View attachment 402973
View attachment 402974
View attachment 402975
View attachment 402977
View attachment 402978
View attachment 402979
View attachment 402980
View attachment 402981
your 4 beam stern structure and hull look great!
Your superior professional skills make you a top level maker/builder! Well done friend
- Joined
- Dec 16, 2016
- Messages
- 1,192
- Points
- 493

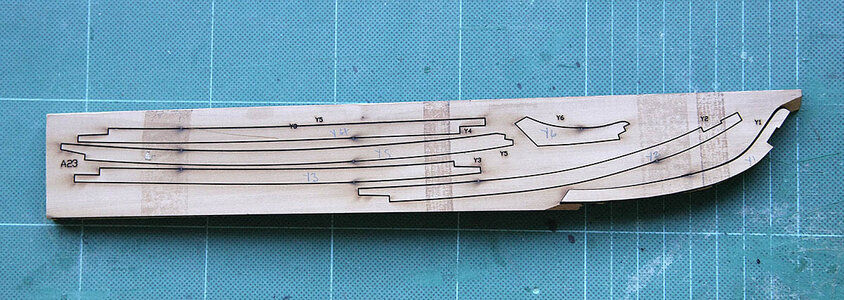
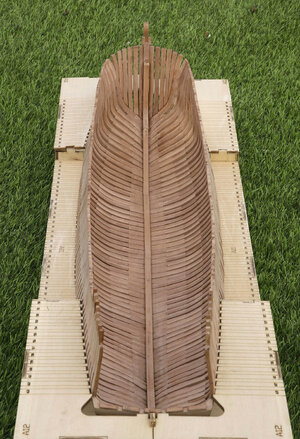
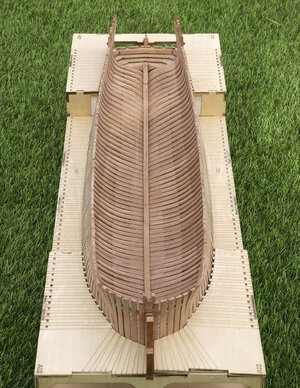
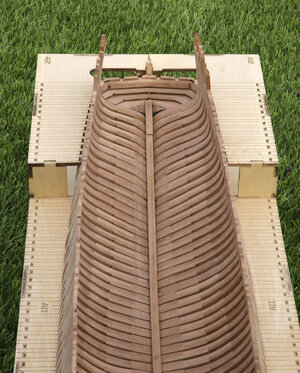
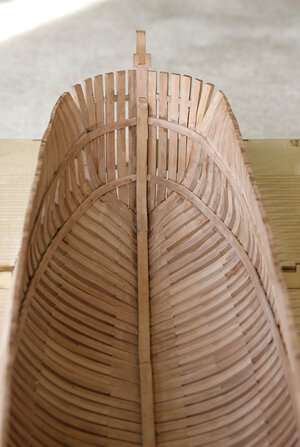
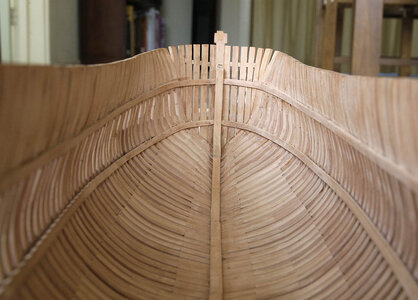
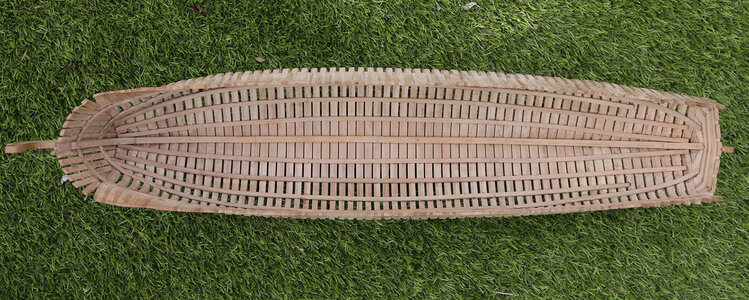
Hello, Thanks for visiting my build. Blandford has had it’s day of freedom and is now back in the build jig ready for the next stages. The instructions call for the building of the transom frame as the next stage, to me this structure looks very vulnerable to knocks so I’ll delay that until much later. I’ve now fitted the keelson, the thick stuff bands and the strakes. The keelson was pretty easy, its parts fitted well with just a groove cut into the frames at the bow and stern. The thick stuff band locations were determined by using the height of the deck beams as a reference and their position was pencilled along the ribs. The forward part of the bands were soaked in boiling water for about ten minutes after which they easily bent to shape. I don’t have any suitable clamps for holding these or the strakes down so I used cyno, a small dot was applied to each of the ribs and the band pressed into place and held for about thirty seconds, this worked perfectly with no issues. I did have an issue with the positioning the strakes, there is no guide anywhere on the plans or instructions as to exactly where they fit, and if you get them wrong they could foul later parts of the structure, there are six strakes to fit so I just made a guess and placed them at an equal distance apart and again used cyno, so fingers crossed. I’m surprised just how rigid the structure is now with these fitted, it feels indestructible.


Good evening Ken. Your “big reveal “ is applauded. Wonderful. Cheers Grant.Hello and welcome, again thanks for your many likes and kind comments.
A roll of drums please and bring on the dancing girls! This is the big reveal; Blandford is released from her build jig and I can see for the first time the hull proper, I must say that I’m delighted. It was a bit of a struggle getting the stern free so I removed a rear quarter section of the jig rather than stress the structure, it now goes in and out easily. To give it some rigidity before giving it its first sanding I fitted the stern beams which support the transom, H6 was the top part of the upper beam, once glued into place four marked sections were cut away leaving recesses which the transom uprights slotted into. I put in some scrap as fillers to fair the lower part into the keel. Everything has gone to plan so far, may it continue.
View attachment 402972
View attachment 402973
View attachment 402974
View attachment 402975
View attachment 402977
View attachment 402978
View attachment 402979
View attachment 402980
View attachment 402981
- Joined
- Oct 15, 2017
- Messages
- 1,191
- Points
- 443

Super work Ken. Love the lines on her. And your well manicured lawn is like perfect too, WOW!!Hello, Thanks for visiting my build. Blandford has had it’s day of freedom and is now back in the build jig ready for the next stages. The instructions call for the building of the transom frame as the next stage, to me this structure looks very vulnerable to knocks so I’ll delay that until much later. I’ve now fitted the keelson, the thick stuff bands and the strakes. The keelson was pretty easy, its parts fitted well with just a groove cut into the frames at the bow and stern. The thick stuff band locations were determined by using the height of the deck beams as a reference and their position was pencilled along the ribs. The forward part of the bands were soaked in boiling water for about ten minutes after which they easily bent to shape. I don’t have any suitable clamps for holding these or the strakes down so I used cyno, a small dot was applied to each of the ribs and the band pressed into place and held for about thirty seconds, this worked perfectly with no issues. I did have an issue with the positioning the strakes, there is no guide anywhere on the plans or instructions as to exactly where they fit, and if you get them wrong they could foul later parts of the structure, there are six strakes to fit so I just made a guess and placed them at an equal distance apart and again used cyno, so fingers crossed. I’m surprised just how rigid the structure is now with these fitted, it feels indestructible.
View attachment 403613View attachment 403614
View attachment 403615
View attachment 403616
View attachment 403617
View attachment 403618
View attachment 403619
View attachment 403620
Good morning. True story. That lawn would be right at home at Augusta or St AndrewsSuper work Ken. Love the lines on her. And your well manicured lawn is like perfect too, WOW!!
- Joined
- Dec 16, 2016
- Messages
- 1,192
- Points
- 493

Hi Ken and Grant, Thank you both for your response to my build and beautiful lawn. I have to admit though that I’m a bit of a fraud, my lawn is artificial, I got fed up with with spending so much time maintaining a real lawn when that time could be better spent modelling.Super work Ken. Love the lines on her. And your well manicured lawn is like perfect too, WOW!!
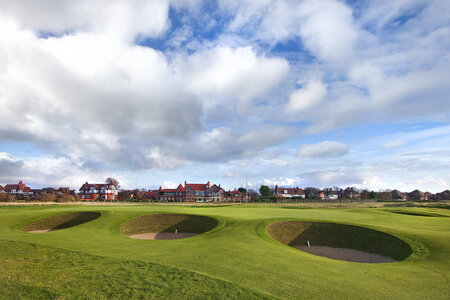
Ken, now this is a lawn that I think both yourself and Paul might appreciate, about a mile from me. The Royal Liverpool, 18th hole.
Last edited:
- Joined
- Dec 16, 2016
- Messages
- 1,192
- Points
- 493

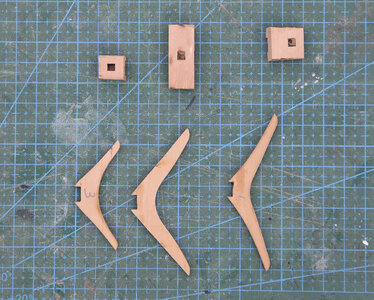
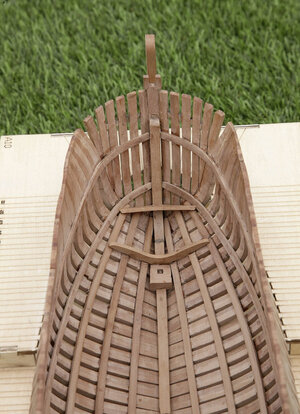
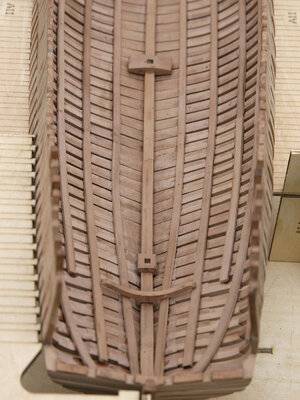
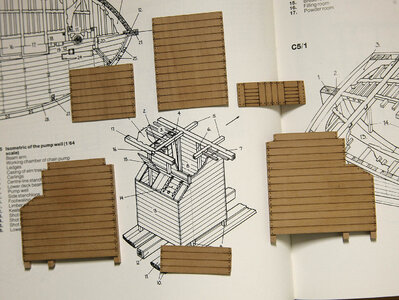
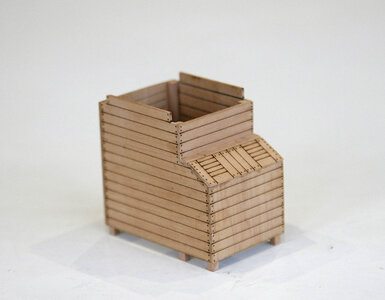
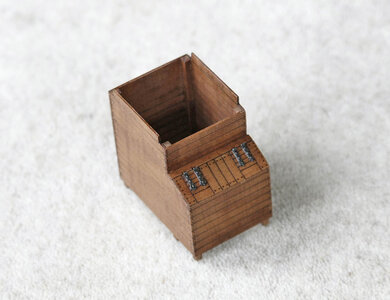
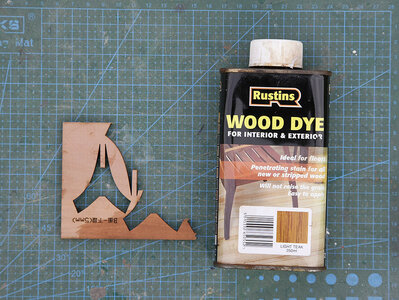
Hello again and welcome. A little more progress, this time down in the hold. The breast hooks and mast steps have now been fitted and I’ve made up the pump well. I find that the pear wood has a pink tinge to it which I’m not convinced will have the look that I want. I tried many combinations of stains, oils and varnishes and I think that I’ve settled on one that I like, it’s a spirit penetrating stain, light teak with just a touch of dark mahogany mixed in and for the finish a satin poly coating. The stain goes pretty deep into the wood, it does not raise the wood fibres like water based dyes and dries looking natural fairly quickly. I’ve tried it out on the pump well and got the result that I’d hoped for.
Next will be cutting out the gun ports, SCARY!
Next will be cutting out the gun ports, SCARY!


Last edited:


