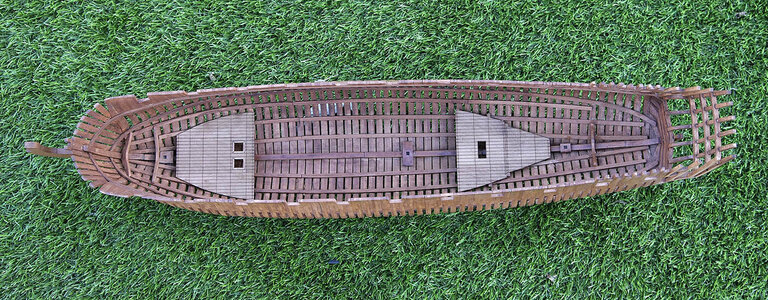
HMS Blandford 1:48 POF Modelship Dockyard [COMPLETED BUILD]

Hello and thanks again for taking the time to visit my build, and giving your likes and kind comments.

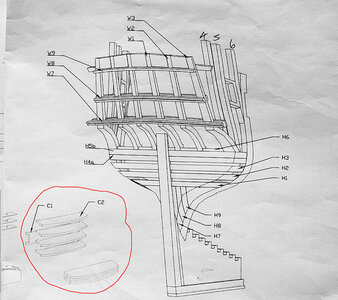
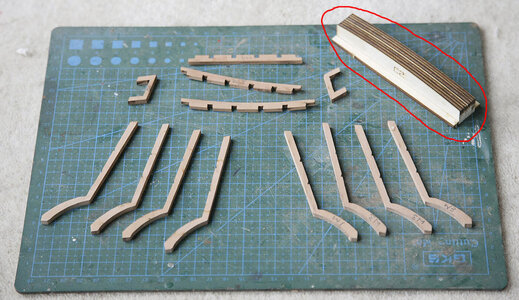
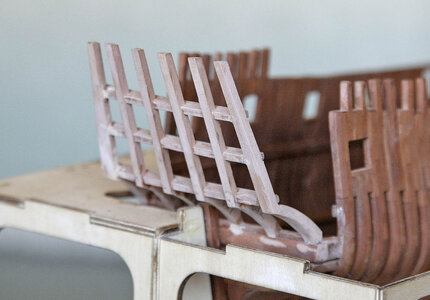
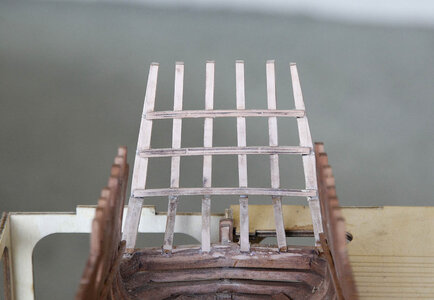
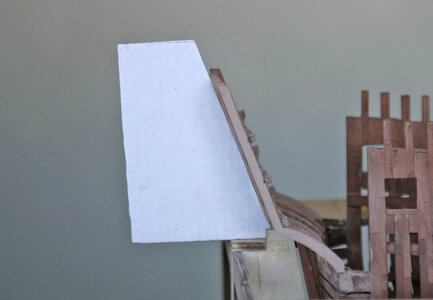
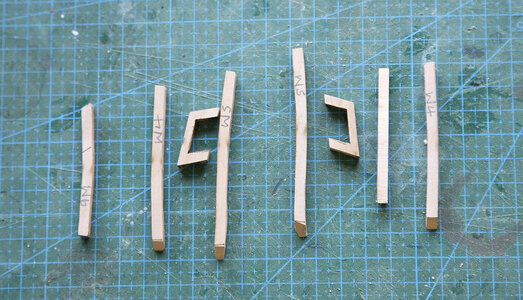
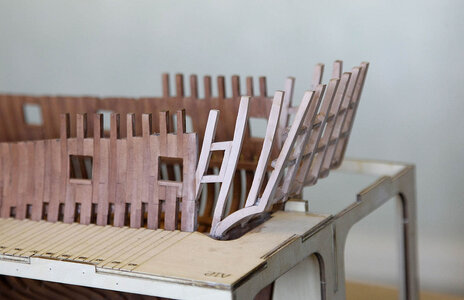
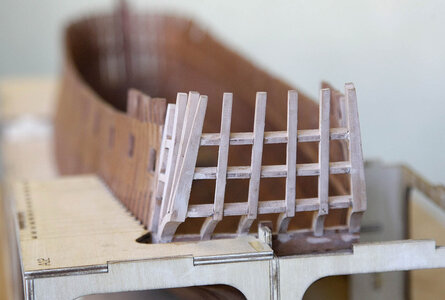
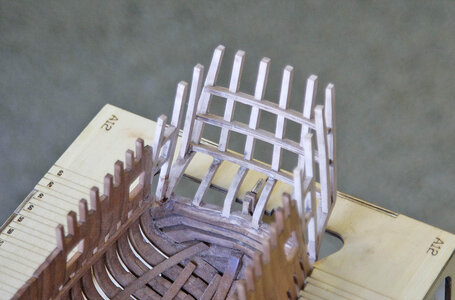
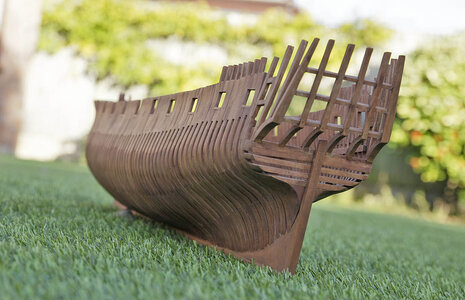
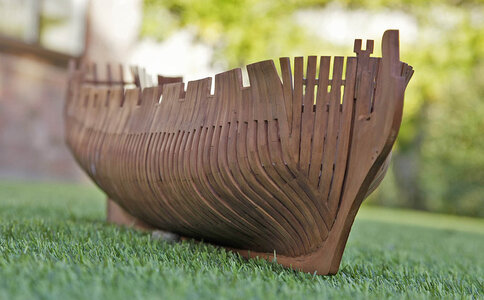
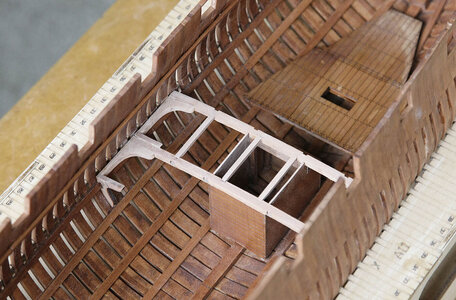
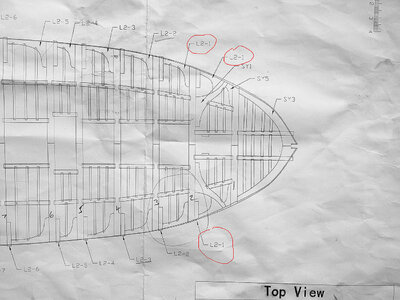
I’m making fair progress with Blandford, it’s not because I’m a particularly fast builder but more a case of the hours that I’m putting in. Today I’m showing my results with the transom and quarter gallery area, again just head scratching but no real difficulties. As usual with this kit the parts were a good fit and easy to work with. The cross beams were made up by laminating three strips together, as you can see the uprights are notched to take the cross beams correctly, apart from small tweaks it all slotted together well. One problem that I had was working out what the beam that I’ve circled in red was for, I took ages to find the parts until I realised that they were from the ply sheet that the jig came from, it was much larger than the diagram suggested, it was not part of the model but a former to get the curves of the crossbeams correct. Where the uprights curve under the counter they are thin and the grain goes across which made them very weak, I broke two whilst trying to fit them into the appropriate grooves in the hull, I ended up drilling and fitting brass pins into them for some strength, then not only gluing them to the hull but pining the joints as well. I made up and tacked a template onto the jig to position the transom at the correct angle whilst the glue dried. I think that the jig should have been extended to have included support and positioning for this part of the build.

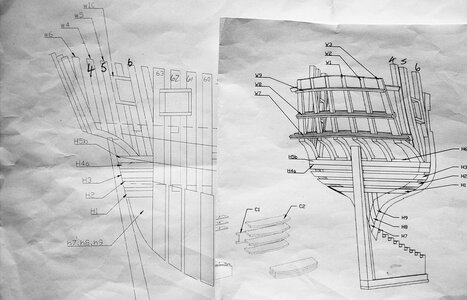
Now it was on to the quarter gallery area, again not difficult once I’d established how I would tackle it. I knew that as this area will be planked all that I needed to ensure was that it lined up correctly along the lines of the hull. I’ve shown the plan and build illustration side by side, you will see that they differ and the part numbers are wrong, I chose to make it up as per the guide and not the plan, it worked out quite well, I’ll need to be careful as at the moment it all looks a bit vulnerable.


179b.jpg

180.jpg

181.jpg

182.jpg

183.jpg

184.jpg

185.jpg

186.jpg

187.jpg

188.jpg
 
Last edited:
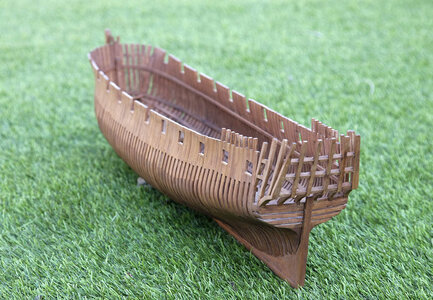
Hello again. This is just a short follow on from yesterdays post, it shows the transom frame sanded to a finish and stained, it now looks like it's integrated with the rest of the hull. Next job will be the lower deck beams.

View attachment 405279

View attachment 405280


View attachment 405282

View attachment 405283
Good morning Ken. You are owning this. That transom and quarter gallery construction process looks intricate, fragile and not easy. Awesome progress. Cheers Grant
 
Good morning Ken. You are owning this. That transom and quarter gallery construction process looks intricate, fragile and not easy. Awesome progress. Cheers Grant
Hi Grant, Thanks. Because of the fit it wasn’t difficult, just tricky, being sort of perched like that on its own it was fragile and really should have had support, sometime soon I think that I’ll add some bracing.
 
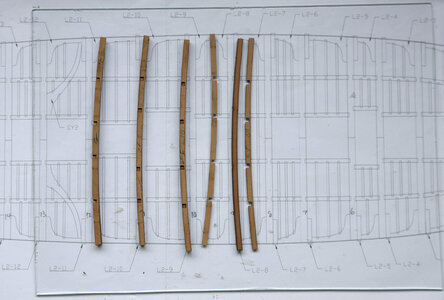
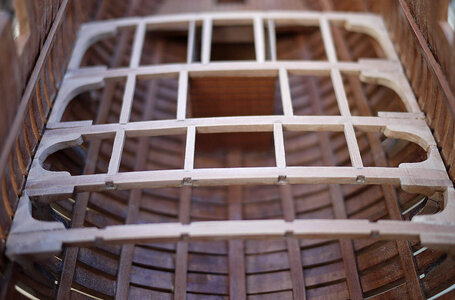
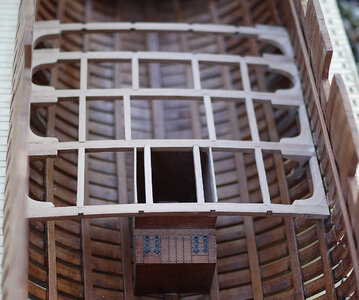
Hello and again thanks for dropping by. I’ve now made a start on the lower deck beams It took some thought to get my head around things at first as between this and the upper deck there is only one A4 sheet showing one cross beam, everything else is taken from the plan which at first looks ok. Including the small cross pieces there must be well over four hundred pieces, a bit like a jigsaw, some of the knees are above the deck but are not shown and the part numbers although different shapes are often duplicated, I’ve shown a picture of three parts given the same number yet each is slightly different in shape. Being aware that care is needed I’m sure that I’ll be able to work it all out as there appears to be a sequence to it.

To start you have a beam piece, you attach a .5mm piece to each side, these make up the cut outs which the longitude beams slot into, these are side specific so care was needed. The pump well has cut outs which the beams pass through so I fitted those beams and the pump well at the same time so that I could adjust them to fit each other as well as both the lodging and hanging knees. So far, so good.


194.jpg

196.jpg

195.jpg

274.jpg


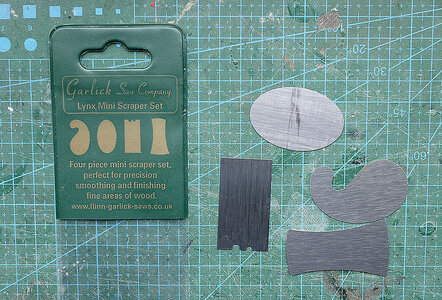
After reading favourable comments about these little scrapers I bought a set from an Ebay shop, they only cost £11, hopefully they'll prove useful.

275.jpg
 
Last edited:
Hi Ken. Very sorry for not tuning in on your build log for a while, but just caught up with your progress and l must say it's a pleasure to read and see what a wonderful job you're making of this kit. Absolutely superb workmanship. So much for telling me you were dubious about your ability to make a good job. It's about as perfect as you could get it and l'm so glad you are enjoying the experience too. l shall keenly keep more regular check-ins of this great build in future. Well done mate
 
Hi Ken. Very sorry for not tuning in on your build log for a while, but just caught up with your progress and l must say it's a pleasure to read and see what a wonderful job you're making of this kit. Absolutely superb workmanship. So much for telling me you were dubious about your ability to make a good job. It's about as perfect as you could get it and l'm so glad you are enjoying the experience too. l shall keenly keep more regular check-ins of this great build in future. Well done mate
Hi Keith, Thanks very much for that compliment. When I started I was genuinely concerned about being able to build this type of model, I think that we are all scared a little entering new territory and underestimating our abilities but now I can’t wait for each session such is the enjoyment I’m getting from this project. I wouldn’t have considered it before I saw your log which enthused me, so at least I have somebody to blame for my long hours at the bench. I was getting a little stagnated in the hobby but I’m now spoilt for future builds as for me this is the way to go. Ken
 
Hi Keith, Thanks very much for that compliment. When I started I was genuinely concerned about being able to build this type of model, I think that we are all scared a little entering new territory and underestimating our abilities but now I can’t wait for each session such is the enjoyment I’m getting from this project. I wouldn’t have considered it before I saw your log which enthused me, so at least I have somebody to blame for my long hours at the bench. I was getting a little stagnated in the hobby but I’m now spoilt for future builds as for me this is the way to go. Ken
You are exactly like me, now you've tried it you're hooked. This is the way forward for me too from now on. There are a lot of great new Chinese PoF kits on the market and being developed at the moment. l have gone for the full hull PoF HMS Granado by CAF Models for my next project after Alert. A bit expensive but it's an absolutely superb kit full of detail. If you want, you can split the cost as it comes in three sessions, each around £400 delivered to UK. l have all 3 at home and am champing at the bit to get started but will not rush my present project which l expect to finish Feb/March next year.
 
Hello and again thanks for dropping by. I’ve now made a start on the lower deck beams It took some thought to get my head around things at first as between this and the upper deck there is only one A4 sheet showing one cross beam, everything else is taken from the plan which at first looks ok. Including the small cross pieces there must be well over four hundred pieces, a bit like a jigsaw, some of the knees are above the deck but are not shown and the part numbers although different shapes are often duplicated, I’ve shown a picture of three parts given the same number yet each is slightly different in shape. Being aware that care is needed I’m sure that I’ll be able to work it all out as there appears to be a sequence to it.

To start you have a beam piece, you attach a .5mm piece to each side, these make up the cut outs which the longitude beams slot into, these are side specific so care was needed. The pump well has cut outs which the beams pass through so I fitted those beams and the pump well at the same time so that I could adjust them to fit each other as well as both the lodging and hanging knees. So far, so good.


View attachment 405502

View attachment 405504

View attachment 405503

View attachment 405505


After reading favourable comments about these little scrapers I bought a set from an Ebay shop, they only cost £11, hopefully they'll prove useful.

View attachment 405506
First I would like to praise your work which is both professional and beautiful
A Question: I also bought the scrapers because of everything the friends recommended, and the truth is that I don't know how they work? Do you have to polish them or do you work with them as they are? I would be happy to receive as much detailed instruction as possible from any friend who has experience with the scrapers
thanks
 
Ken, super work on the stern plate. Many would say this is one of the most difficulty structures to construct due to the complex 3 dimensional geometry. It looks like you've locked it down nicely. Well done!
Hi Ken, Many thanks for your comment, surprisingly it didn’t seem very difficult just tricky, I think that the kit designers got it about right for their targeted buyers ability, it was also much easier without the help of a dog. I love your Le Flouron, a beautiful but difficult ship to take on, I see that Modelship Dockyard are developing a kit of this, now that I know their quality I’ll keep my eye on that one as a possible next project.
 
Last edited:
Chinese puzzle Ken, but If anyone can work it out it will be you. Looks great and getting better.

Cheers JJ..
Hi Jack, Thanks. You’re right in saying Chinese puzzle. I’m getting my mind around it now and as I’m sure that you found, once a few of the deck beams and knees have been done it sort of all falls into place and the plans make more sense, you just need to find the right pieces, that’s the challenge.
 
I have just gone over your build log and must say you are an accomplished builder. Quite a collection you have built over the years. Impressive progress on the Blandford, she is rapidly getting in perfect shape.
Hi Herman. Thanks very much for your comment, coming from a modeller of your ability is quite a compliment. Nothing that I do could compare with your model building, your Provincien is magical, even if I don’t have the dedication to create such a model it does give me inspiration. Ken
 
First I would like to praise your work which is both professional and beautiful
A Question: I also bought the scrapers because of everything the friends recommended, and the truth is that I don't know how they work? Do you have to polish them or do you work with them as they are? I would be happy to receive as much detailed instruction as possible from any friend who has experience with the scrapers
thanks
Hi Shota, again thanks. As I haven’t had a chance to use these scrapers yet I don’t know how good they are. I would normally use a Stanley blade for levelling the planks on the deck and hull sides before sanding, but with a straight blade I couldn’t do the stern or bow but that’s where I think these shaped ones will help. As the name suggests you just drag them across the surface in a scraping motion, most useful for levelling the slight differences in plank heights, it’s much better initially than sanding surfaces to get them level. There isn’t a particular technique that I know of, use them as they come, once you start it’s pretty intuitive, almost therapeutic. Ken
 
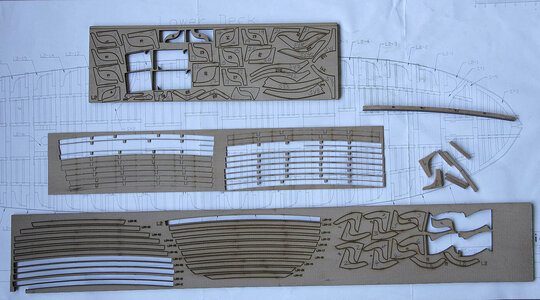
Hello everyone. Following on from yesterday I’ve managed to get an understanding of the deck parts and their relationship with the plan and their numbering. I’ve found the plan to be simple but accurate and quite good it doesn’t really need any more instructions, however the numbering doesn’t always follow the numbering on the plan so you must try the parts against the plan before fitting rather than taking their numbering as accurate then you can’t go wrong. There’s plenty of very nice strip wood to make up the longitude beams, again using the plan, I can see this part of the build being reasonably successful if I’m careful and take my time.

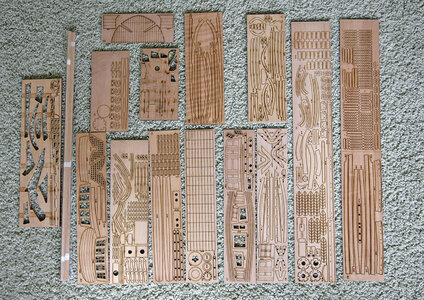
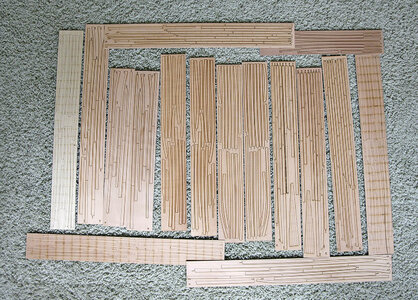
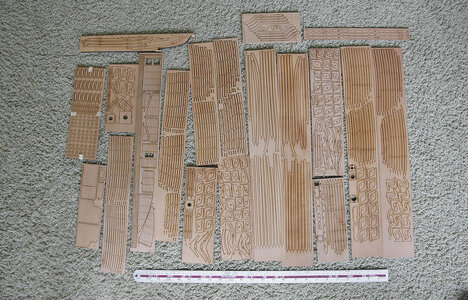
I’ve shown more of the kit contents, perhaps giving an insight into just how complete it is, more so than I originally realised. There are forty eight sheets of various sizes left, probably around a thousand pieces and a bundle of strip wood, so plenty to do, happy days.


197.jpg

198.jpg

141.jpg142.jpg143.jpg
 
Last edited:
Back
Top