-

Win a Free Custom Engraved Brass Coin!!!
As a way to introduce our brass coins to the community, we will raffle off a free coin during the month of August. Follow link ABOVE for instructions for entering.
-

PRE-ORDER SHIPS IN SCALE TODAY!
The beloved Ships in Scale Magazine is back and charting a new course for 2026!
Discover new skills, new techniques, and new inspirations in every issue.
NOTE THAT OUR FIRST ISSUE WILL BE JAN/FEB 2026
You are using an out of date browser. It may not display this or other websites correctly.
You should upgrade or use an alternative browser.
You should upgrade or use an alternative browser.
HMS Blandford 1:48 POF Modelship Dockyard [COMPLETED BUILD]
- Joined
- Dec 16, 2016
- Messages
- 1,192
- Points
- 493

Only three strokes, your bragging now!Ken, love the pump well. As far as Royal Liverpool, it would be a joy taking 3 strokes to get out of one of those pot bunkers while taking in all the beauty of that land.
On the third one he decided go backwards up the fairway...Only three strokes, your bragging now!
Hi Ken and Grant, Thank you both for your response to my build and beautiful lawn. I have to admit though that I’m a bit of a fraud, my lawn is artificial, I got fed up with with spending so much time maintaining a real lawn when that time could be better spent modelling.
Ken, now this is a lawn that I think both yourself and Paul might appreciate, about a mile from me. The Royal Liverpool, 18th hole.
View attachment 404033
When I have played Royal Liverpool it always had a Carnoustie (below) vibe to it (though Liverpool is a bit less penal):

I am SO jealous you can walk there from your house, Ken!
- Joined
- Dec 16, 2016
- Messages
- 1,192
- Points
- 493

Hi Paul, I'm mightily impressed that you have taken the time to visit my part of the world, Hoylake. Here's a photo of the clubhouse to hopefully bring back memories, at this time of year it starts to look rather splendid. I bet you got out of the bunker in one.When I have played Royal Liverpool it always had a Carnoustie (below) vibe to it (though Liverpool is a bit less penal):
View attachment 404195
I am SO jealous you can walk there from your house, Ken!
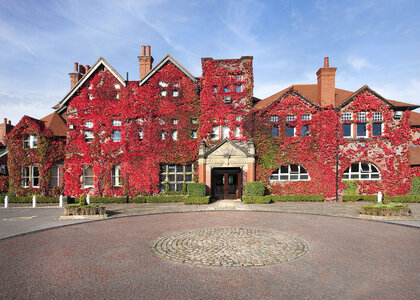
Good morning Ken. This work is as beautiful as the Royal Liverpool club house. Cheers GrantHello again and welcome. A little more progress, this time down in the hold. The breast hooks and mast steps have now been fitted and I’ve made up the pump well. I find that the pear wood has a pink tinge to it which I’m not convinced will have the look that I want. I tried many combinations of stains, oils and varnishes and I think that I’ve settled on one that I like, it’s a spirit penetrating stain, light teak with just a touch of dark mahogany mixed in and for the finish a satin poly coating. The stain goes pretty deep into the wood, it does not raise the wood fibres like water based dyes and dries looking natural fairly quickly. I’ve tried it out on the pump well and got the result that I’d hoped for.
Next will be cutting out the gun ports, SCARY!
View attachment 404071
View attachment 404073
View attachment 404074
View attachment 404075
View attachment 404076
View attachment 404077
View attachment 404078
- Joined
- Dec 16, 2016
- Messages
- 1,192
- Points
- 493

Hello, Thanks for dropping by, also for your likes and comments, even when I drifted off the build you came along.
As I mentioned my next task was to tackle the gun ports. I was a bit nervous about this part of the build because it meant cutting away chunks of the hull, get it wrong and it would be quite a task to rectify, thankfully everything went smoothly with no difficulties encountered. I cut out templates from the supplied plans to position the ports, taped them to the hull and marked the cut out needed for the ports. I was able to use a saw for most of the sides which made things easy and for the ones not open at the top I drilled and then cut them out. I filed the edges and fitted the lower sills to complete this part of the build, thankfully it turned out to be much easier than I'd expected.
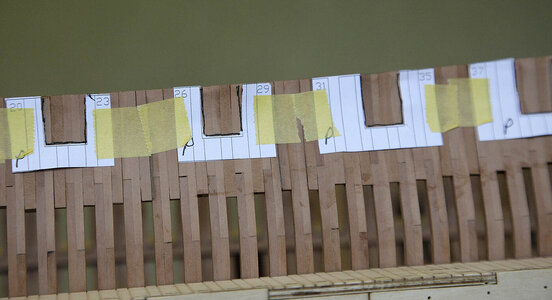
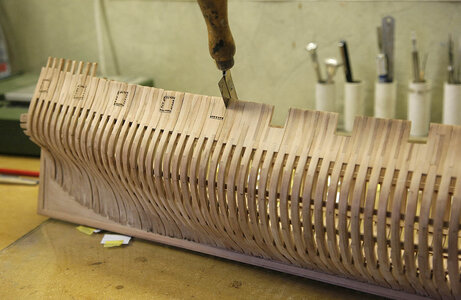
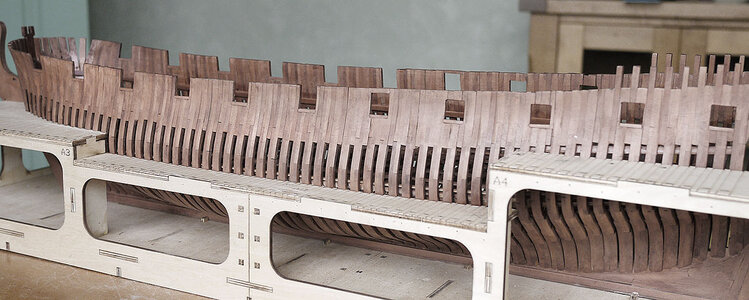
As I mentioned my next task was to tackle the gun ports. I was a bit nervous about this part of the build because it meant cutting away chunks of the hull, get it wrong and it would be quite a task to rectify, thankfully everything went smoothly with no difficulties encountered. I cut out templates from the supplied plans to position the ports, taped them to the hull and marked the cut out needed for the ports. I was able to use a saw for most of the sides which made things easy and for the ones not open at the top I drilled and then cut them out. I filed the edges and fitted the lower sills to complete this part of the build, thankfully it turned out to be much easier than I'd expected.


This was probably not an example of measuring twice and cutting once for you. For me it would have been more like measure twice, stew about it for a while, measure twice again, and repeat for a couple of more cycles before finally cutting once (hopefully).Hello, Thanks for dropping by, also for your likes and comments, even when I drifted off the build you came along.
As I mentioned my next task was to tackle the gun ports. I was a bit nervous about this part of the build because it meant cutting away chunks of the hull, get it wrong and it would be quite a task to rectify, thankfully everything went smoothly with no difficulties encountered. I cut out templates from the supplied plans to position the ports, taped them to the hull and marked the cut out needed for the ports. I was able to use a saw for most of the sides which made things easy and for the ones not open at the top I drilled and then cut them out. I filed the edges and fitted the lower sills to complete this part of the build, thankfully it turned out to be much easier than I'd expected.
View attachment 404305
View attachment 404306
View attachment 404307
- Joined
- Dec 16, 2016
- Messages
- 1,192
- Points
- 493

Hi Jeff, I must admit that I’m a bit impulsive, when I think something is right I just go straight in, mostly I get it right but it does occasionally invite disaster. This was a no brainier, the template was marked with the rib number, the rib numbers are on the jig so all that I really needed to do was align with the correct rib and the top of the hull and that should be the correct opening, it worked a treat.This was probably not an example of measuring twice and cutting once for you. For me it would have been more like measure twice, stew about it for a while, measure twice again, and repeat for a couple of more cycles before finally cutting once (hopefully).
It’s always impressive to see a saw going into (a part) the hull. A nice outcome, Ken.Hello, Thanks for dropping by, also for your likes and comments, even when I drifted off the build you came along.
As I mentioned my next task was to tackle the gun ports. I was a bit nervous about this part of the build because it meant cutting away chunks of the hull, get it wrong and it would be quite a task to rectify, thankfully everything went smoothly with no difficulties encountered. I cut out templates from the supplied plans to position the ports, taped them to the hull and marked the cut out needed for the ports. I was able to use a saw for most of the sides which made things easy and for the ones not open at the top I drilled and then cut them out. I filed the edges and fitted the lower sills to complete this part of the build, thankfully it turned out to be much easier than I'd expected.
View attachment 404305
View attachment 404306
View attachment 404307
Regards, Peter
- Joined
- Jan 31, 2021
- Messages
- 570
- Points
- 353

Looking Great!!Hello and welcome, again thanks for your many likes and kind comments.
A roll of drums please and bring on the dancing girls! This is the big reveal; Blandford is released from her build jig and I can see for the first time the hull proper, I must say that I’m delighted. It was a bit of a struggle getting the stern free so I removed a rear quarter section of the jig rather than stress the structure, it now goes in and out easily. To give it some rigidity before giving it its first sanding I fitted the stern beams which support the transom, H6 was the top part of the upper beam, once glued into place four marked sections were cut away leaving recesses which the transom uprights slotted into. I put in some scrap as fillers to fair the lower part into the keel. Everything has gone to plan so far, may it continue.
View attachment 402972
View attachment 402973
View attachment 402974
View attachment 402975
View attachment 402977
View attachment 402978
View attachment 402979
View attachment 402980
View attachment 402981
- Joined
- Sep 23, 2021
- Messages
- 266
- Points
- 168

Hi Ken,
I didn't compliment you on your Ajax, looks fantastic. Your new build is already looking impressive.
I was out your way earlier this week (before all the rain!). My wife and I like to cycle out to the red rocks and have a picnic on the beach, it's really very nice out there. I should call in and pick up a few tips from you!
Dom
- Joined
- Dec 16, 2016
- Messages
- 1,192
- Points
- 493

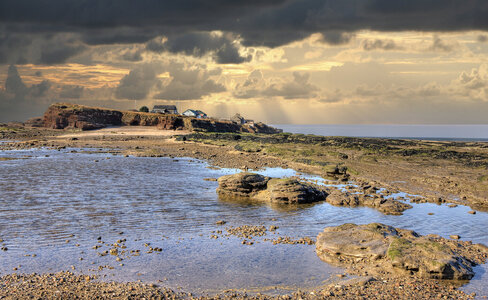
Hi Dom. Thanks for the compliment. I also appreciate Hilbre Island and agree that the weather at the moment is not conducive to having a picnic. Cycling was also a passion of mine until age took its toll, so we have things in common. You are welcome to drop by and have a cup of tea, message me. Meanwhile here's a photo of Hilbre to savour until you can get there again. KenHi Ken,
I didn't compliment you on your Ajax, looks fantastic. Your new build is already looking impressive.
I was out your way earlier this week (before all the rain!). My wife and I like to cycle out to the red rocks and have a picnic on the beach, it's really very nice out there. I should call in and pick up a few tips from you!
Dom
- Joined
- Dec 16, 2016
- Messages
- 1,192
- Points
- 493

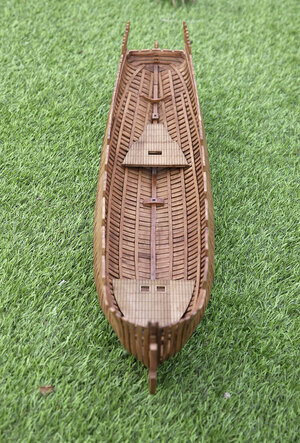
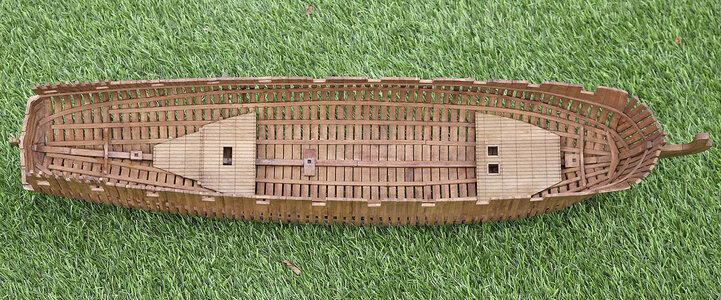
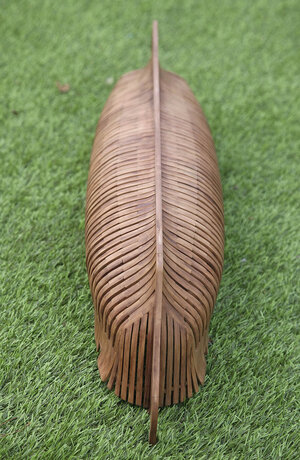
Hello and again welcome. I’m making quite nice progress and Blandford is starting to show its character which is encouraging. I have now made up and fitted the lower platforms and given the hull a coating of dye which went on well, an even colour with no blotches, I’m pleased with the colour. I varnished the keelson to see the effect and this gave a richer look with a nice sheen. The decking for the platforms was made up from several pieces, the instructions had you fit the supporting beams to the hull first then piece the decking together on them. I felt that a neater solution was to assemble the decking on a flat surface, glue the beams to their underside and the fit them to the hull as a made up unit, this worked out very well. I made a small mistake with the rear platform, there was supposed to be a small step in it but mine is all level, not an issue as it’s below the lower deck and won’t be seen. Next up will be my attempt at the transom


A lovely tone to the wood Ken! Was the decking a lasered sheet or did you lay planks? It looks very tidy.
- Joined
- Dec 16, 2016
- Messages
- 1,192
- Points
- 493

Hi Paul, Thanks, the sheets were laser engraved, I can’t lay planks that neatly. KenA lovely tone to the wood Ken! Was the decking a lasered sheet or did you lay planks? It looks very tidy.
Last edited:
- Joined
- Apr 20, 2020
- Messages
- 6,255
- Points
- 738

Dear KenHello and again welcome. I’m making quite nice progress and Blandford is starting to show its character which is encouraging. I have now made up and fitted the lower platforms and given the hull a coating of dye which went on well, an even colour with no blotches, I’m pleased with the colour. I varnished the keelson to see the effect and this gave a richer look with a nice sheen. The decking for the platforms was made up from several pieces, the instructions had you fit the supporting beams to the hull first then piece the decking together on them. I felt that a neater solution was to assemble the decking on a flat surface, glue the beams to their underside and the fit them to the hull as a made up unit, this worked out very well. I made a small mistake with the rear platform, there was supposed to be a small step in it but mine is all level, not an issue as it’s below the lower deck and won’t be seen. Next up will be my attempt at the transom
View attachment 404871
View attachment 404873
View attachment 404872
the ship hull and The lower decks look beautiful, this is a reflection of your quality work. well done my friend

- Joined
- Dec 16, 2016
- Messages
- 1,192
- Points
- 493

Hi Keith, Thanks for the compliment, there’s always another model that needs building. KenSo this is what you are doing now! It's good to see your other models, I was only aware of your RW. Great progress on this ship, she looks amazing.
- Joined
- Sep 23, 2021
- Messages
- 266
- Points
- 168

Hi Ken,
The framing looks really good, a very interesting model to build showing all the detailed interior construction of a period ship. A lot of detailed work needed.
Thank you for the invite it would be really nice to see some of your models up close and pick up a few modelling tips from you. I'll drop you a message on SOS when we are heading out your way on our bikes to check if it is a convenient to call in for a few minutes and say hello. Hopefully the weather will improve soon!

