-

Win a Free Custom Engraved Brass Coin!!!
As a way to introduce our brass coins to the community, we will raffle off a free coin during the month of August. Follow link ABOVE for instructions for entering.
-

PRE-ORDER SHIPS IN SCALE TODAY!
The beloved Ships in Scale Magazine is back and charting a new course for 2026!
Discover new skills, new techniques, and new inspirations in every issue.
NOTE THAT OUR FIRST ISSUE WILL BE JAN/FEB 2026
You are using an out of date browser. It may not display this or other websites correctly.
You should upgrade or use an alternative browser.
You should upgrade or use an alternative browser.
- Joined
- Jan 10, 2022
- Messages
- 860
- Points
- 403

At last l can get round to (hopefully) answering your question. l can tell you the way l did it, and it worked for me. You need to have trimmed the frames down to their correct heights. You can get this by measuring each one from the keel up as marked on the 1:1 drawing of the side view. Also on the same drawing you will see two lines of little squares joined by dotted lines. These are the positions of the upper and lower deck beams. Obviously, the beams sit on the deck clamps, so the bottom of each square beam is the position for the top of the deck clamp which you can mark off on the inside of the hull from the top down. The deck clamps are fitted first followed by the strakes. Take the positions for these from the drawings on page 8 of the pdf manual which are remarkably accurate. They should start and finish as shown. Hope this helpsno problem Keef, get well soon.
At last l can get round to (hopefully) answering your question. l can tell you the way l did it, and it worked for me. You need to have trimmed the frames down to their correct heights. You can get this by measuring each one from the keel up as marked on the 1:1 drawing of the side view. Also on the same drawing you will see two lines of little squares joined by dotted lines. These are the positions of the upper and lower deck beams. Obviously, the beams sit on the deck clamps, so the bottom of each square beam is the position for the top of the deck clamp which you can mark off on the inside of the hull from the top down. The deck clamps are fitted first followed by the strakes. Take the positions for these from the drawings on page 8 of the pdf manual which are remarkably accurate. They should start and finish as shown. Hope this helps
- Joined
- Jan 10, 2022
- Messages
- 860
- Points
- 403

M3,M4, M5 and M6 are positioned exactly as they are shown in the illustration on page 8 of the pdf manual downloaded from the internet.Hello Keef, thanks for that hope your feeling better! i think iv made a mistake in my question, its the lower strakes i can't position, M3, M4,M5,M6. if you can help i would really appreciate it.
Lezzers
- Joined
- Jan 10, 2022
- Messages
- 860
- Points
- 403

Hi everyone. At last here are some work-in-progress pics including quarter deck and forecastle beams, cathead, head timbers and lion figurehead. All work is still very much on-going at this stage, l just couldn't wait until the elements were finished to post the pics. The figurehead will lose that glossy effect when the stain has completely dried and will match in with the rest
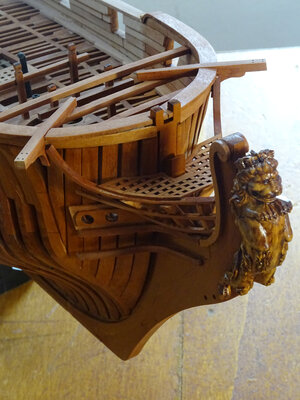
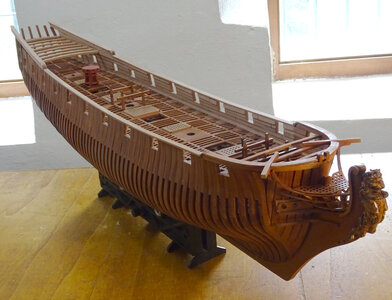
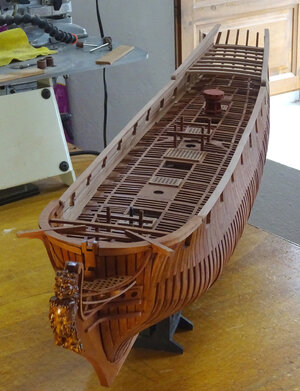
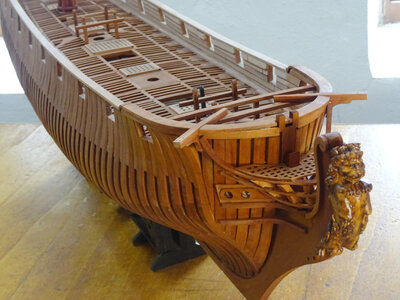
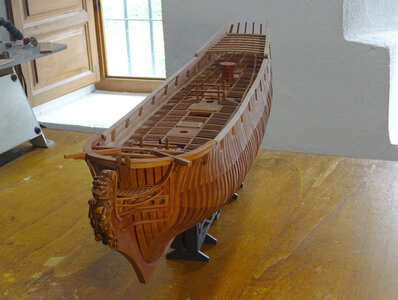
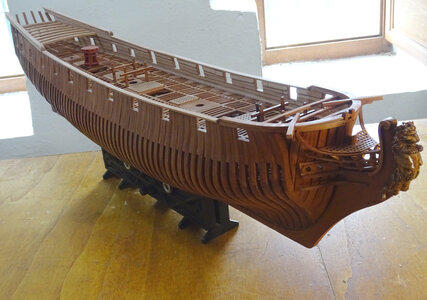


Very nice Keef! She's a real beauty!
Keefe, good afternoon.Hi everyone. At last here are some work-in-progress pics including quarter deck and forecastle beams, cathead, head timbers and lion figurehead. All work is still very much on-going at this stage, l just couldn't wait until the elements were finished to post the pics. The figurehead will lose that glossy effect when the stain has completely dried and will match in with the rest
View attachment 361301
View attachment 361302
View attachment 361303
View attachment 361304
View attachment 361305
View attachment 361306
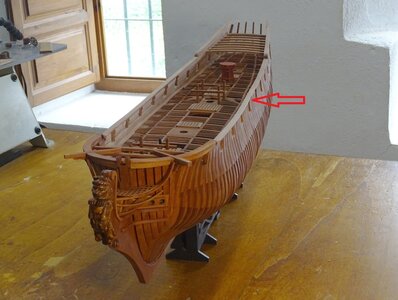
At first I thought that it seemed to me. But this is in two different photos. Is that the gunwale joint at this location?
- Joined
- Jan 10, 2022
- Messages
- 860
- Points
- 403

Yes. lt's a scarf jointKeefe, good afternoon.
At first I thought that it seemed to me. But this is in two different photos. Is that the gunwale joint at this location?View attachment 361338
Hi Keith.
Sehr schöne Arbeit. Gratulation.
Karl
Sehr schöne Arbeit. Gratulation.
Karl
- Joined
- Jan 10, 2022
- Messages
- 860
- Points
- 403

Vielen dank KarlHi Keith.
Sehr schöne Arbeit. Gratulation.
Karl
There is very little in the way of written instructions provided with this kit. A manual is available to download from the internet with 3D drawings of each part of the build. They are relatively easy to follow with a bit of thought. All the other details and measurements can be got from the excellent scale drawings of the hull, both side and top views. This is not the kit for a beginner
Hi Keith.
Please show the link for the PDF manual.
Thanks
Karl
- Joined
- Jan 9, 2020
- Messages
- 10,566
- Points
- 938

Hi Keith. It has been quite some time since I have last been following the forum in earnest. When I opened your log today, I was blown away by your progress and by the overall quality of this build. I have been wanting to tell you for this a while, and I think now is the time. In my opinion, this is the best POF hull structure build from a kit that I have seen on SOS! You fully deserve all the accolades that you have received for this build.
- Joined
- Jan 10, 2022
- Messages
- 860
- Points
- 403

Hi Keith.
Please show the link for the PDF manual.
Thanks
Karl
Attachments
- Joined
- Jan 10, 2022
- Messages
- 860
- Points
- 403

Wow. Thank you very much for your kind words Heinrich. I really appreciate your comment and it gives me great encouragement to know you appreciate my work on this kit. Thank youHi Keith. It has been quite some time since I have last been following the forum in earnest. When I opened your log today, I was blown away by your progress and by the overall quality of this build. I have been wanting to tell you for this a while, and I think now is the time. In my opinion, this is the best POF hull structure build from a kit that I have seen on SOS! You fully deserve all the accolades that you have received for this build.
- Joined
- Jan 10, 2022
- Messages
- 860
- Points
- 403

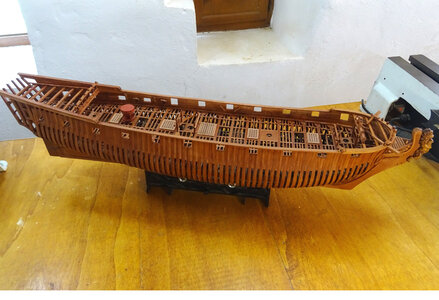
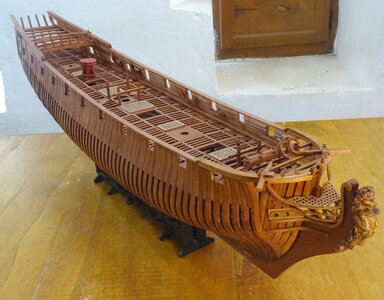
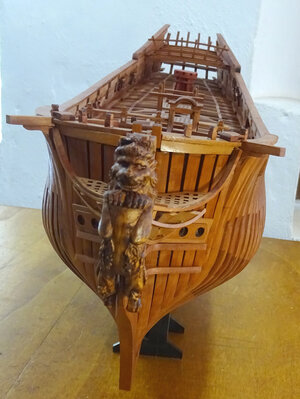
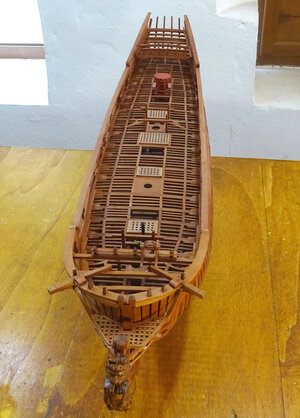
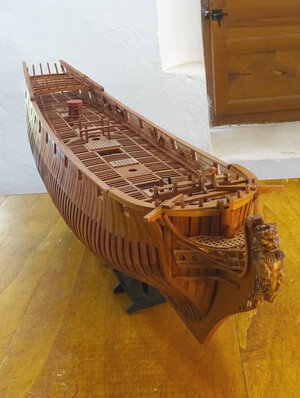
The inner hull is now complete with the addition of the forecastle breast rail and belfry, quarterdeck breast rail, various cleats and attachments on the bulwarks and finally a coat of wood preservative over the lot to finish. My box of bits for this kit is getting lighter now. Next, l shall move on the outer hull details and possibly hang the anchors before attempting to make up the armament of 20 cannons and mortar
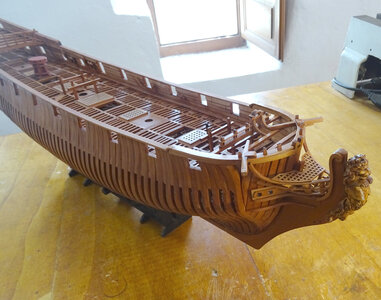
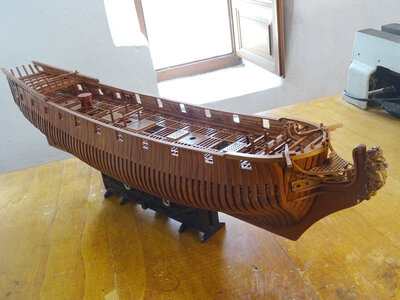
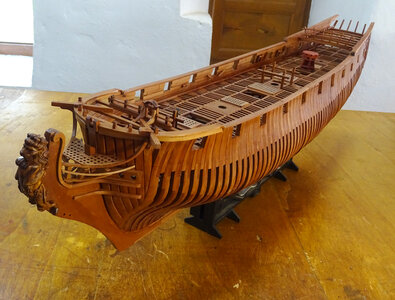
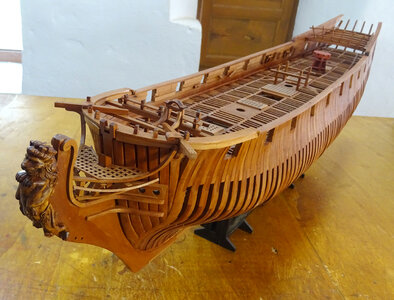
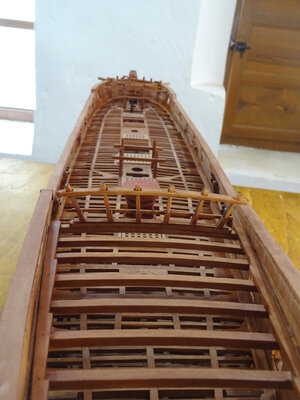


Wow. beautiful result Keef.
Looking forward to the rest of your building progress.
Looking forward to the rest of your building progress.
Hi Keef,
my apologies for not reviewing your build soooner. I have time in my office to review some ships and I am looking at yours now. It is a pleasure to see this ship come to life. You have done a splendid job of craftsmanship on this project. It is truly an Admiralty style and you have done it justice. I wish that I had reviewed this earlier, but I have now read most of your log - incredible.
my apologies for not reviewing your build soooner. I have time in my office to review some ships and I am looking at yours now. It is a pleasure to see this ship come to life. You have done a splendid job of craftsmanship on this project. It is truly an Admiralty style and you have done it justice. I wish that I had reviewed this earlier, but I have now read most of your log - incredible.
- Joined
- Jan 10, 2022
- Messages
- 860
- Points
- 403

Thank you so much, everybody, for your kind words and support for my build log. This is the first build log l have ever done and also the first P.o.F. kit l have attempted. When l set out on this project almost 1 year ago now, l had only hopes but no idea l could even complete it, but the support and comments of you good people have given me encouragement all along the way to do the very best l could achieve. l will be the first to say it is by no means perfect but l am extremely pleased with the result so far (mostly down to the quality of this great kit) and very grateful for all your comments. THANK YOU
Hello Keef,There is very little in the way of written instructions provided with this kit. A manual is available to download from the internet with 3D drawings of each part of the build. They are relatively easy to follow with a bit of thought. All the other details and measurements can be got from the excellent scale drawings of the hull, both side and top views. This is not the kit for a beginner
can you show a link for this manual in pdf?
Thanks
Karl


