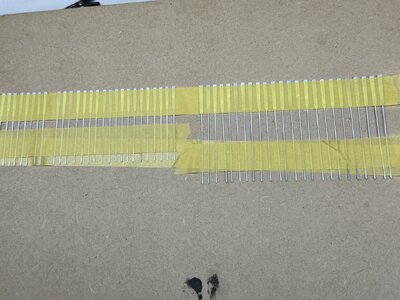
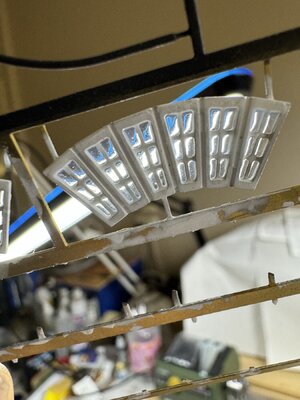
Good morning Michael. Wonderful execution of a tricky task. Cheers GrantView attachment 439046View attachment 439047View attachment 439048Starboard fore channel deadeyes and chains and bolts installed.
View attachment 439049
-

Win a Free Custom Engraved Brass Coin!!!
As a way to introduce our brass coins to the community, we will raffle off a free coin during the month of August. Follow link ABOVE for instructions for entering.
-

PRE-ORDER SHIPS IN SCALE TODAY!
The beloved Ships in Scale Magazine is back and charting a new course for 2026!
Discover new skills, new techniques, and new inspirations in every issue.
NOTE THAT OUR FIRST ISSUE WILL BE JAN/FEB 2026
You are using an out of date browser. It may not display this or other websites correctly.
You should upgrade or use an alternative browser.
You should upgrade or use an alternative browser.
HMS Vanguard 1787 1:72 a Victory Models kit
- Thread starter Chestcutter
- Start date
- Watchers 62
-
- Tags
- amati vanguard victory models
Grant thank you for your compliment and interest, it is truly appreciated.Good morning Michael. Wonderful execution of a tricky task. Cheers Grant
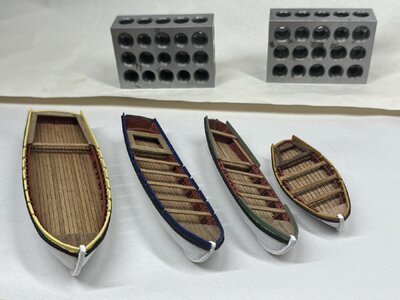
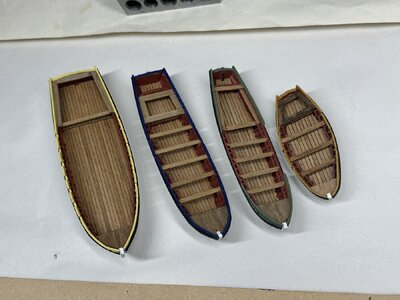
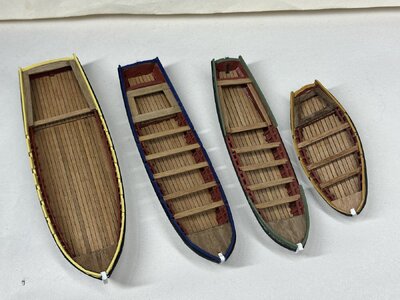
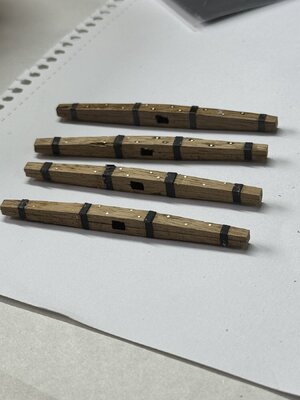
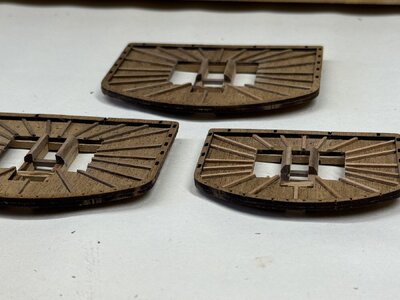
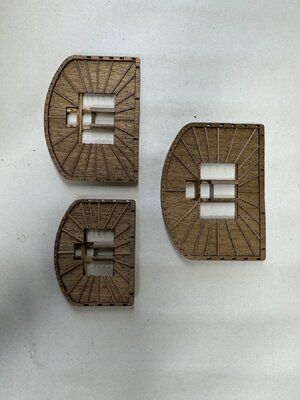
Making progress with the ship boats and building the mast tops.
The boats are challenging projects as the smaller size accentuates any imperfections.
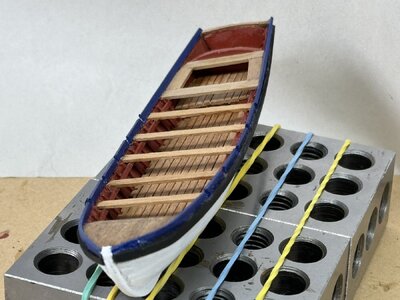
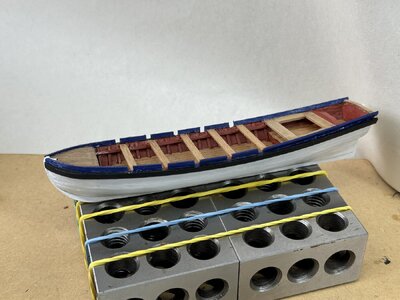
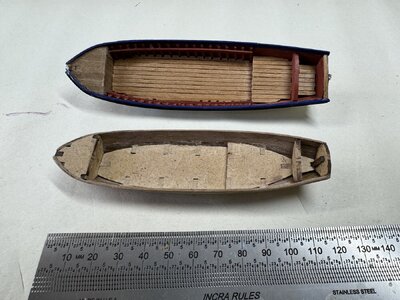
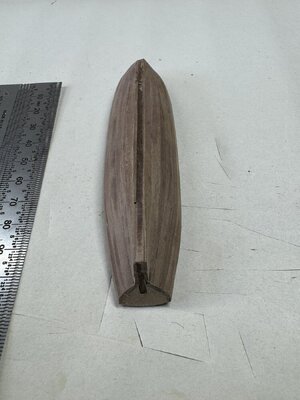
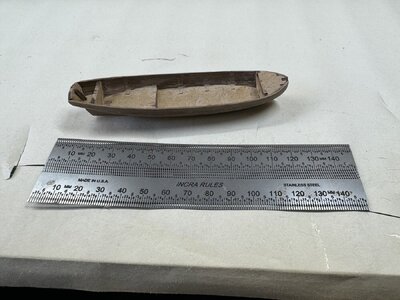
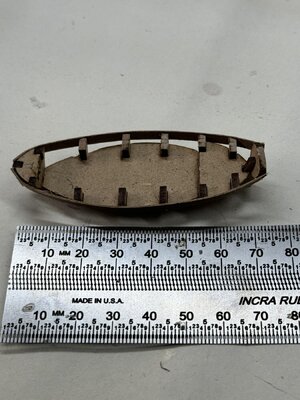
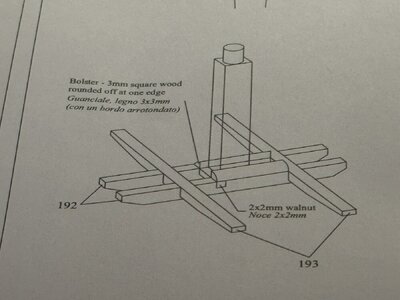
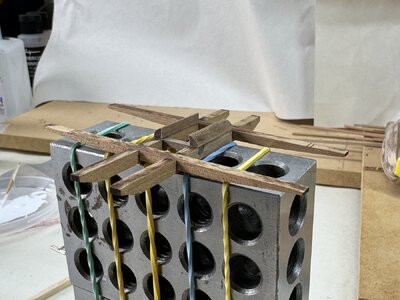
Creating the rounded edges of the 3x3 bolsters on the tops required me to use my MF70 with a router bit. I am happy with the result but couldn’t think of any other way to achieve the same result by hand. I would be interested to know if anyone has any suggestions or experience to do the same.
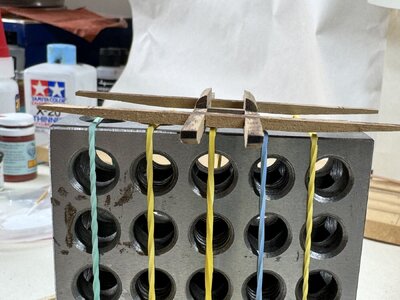
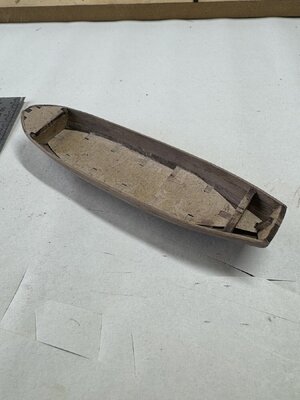
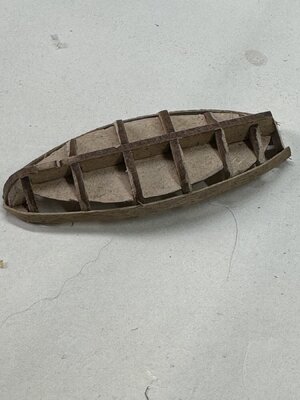
The boats are challenging projects as the smaller size accentuates any imperfections.


Creating the rounded edges of the 3x3 bolsters on the tops required me to use my MF70 with a router bit. I am happy with the result but couldn’t think of any other way to achieve the same result by hand. I would be interested to know if anyone has any suggestions or experience to do the same.


Good morning.Small and tricky these little boats may be, however you are owing them! Cheers GrantMaking progress with the ship boats and building the mast tops.
The boats are challenging projects as the smaller size accentuates any imperfections.
View attachment 442772View attachment 442773View attachment 442776View attachment 442778View attachment 442779View attachment 442780
Creating the rounded edges of the 3x3 bolsters on the tops required me to use my MF70 with a router bit. I am happy with the result but couldn’t think of any other way to achieve the same result by hand. I would be interested to know if anyone has any suggestions or experience to do the same.
View attachment 442771View attachment 442774View attachment 442775
View attachment 442777
View attachment 442781
Thanks Grant. They will be filled with equipment, oars, rope, grapple anchor and pikes.Good morning.Small and tricky these little boats may be, however you are owing them! Cheers Grant
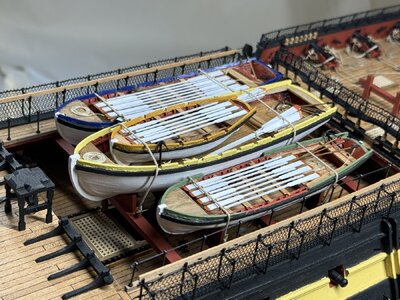
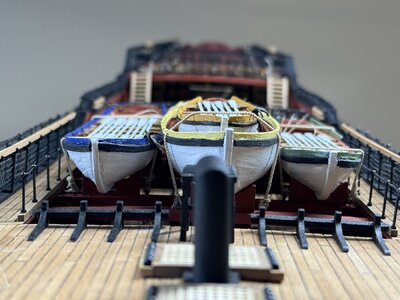
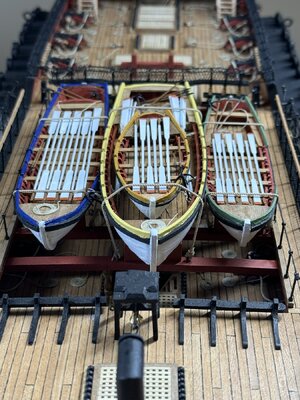
All the boats stocked mounted and lashed to the beams. Used 1mm beige rope from Ropes of Scale for lashing and love the appearance.
For others who may be following it is important to note the 34’ launch is not set in the middle of the beams and the cradles for the beams need careful placement and adjustment, not consistent with the plans.
Major transition in the build as I will start on the masts and yards.
Thanks for following along.


Last edited:
NIIICCCEE
Your boats look quite nice. For the future keep in mind barges and pinnaces were typically single banked. Even a 36 foot barge was single banked and had ten thwarts with one rower per thwart so the tholes alternated on each side. Cutter were single banked most, if not all of the time and were lap straked (clinker built) rather than carvel built. I realize these are probably kit boats/instructions, but for any build it is often a good idea to look at drawings and information based on contemporary sources to confirm or correct what may be in the kit. There are a LOT of details on ships boats in Brian Lavery's The Arming and Fitting of English Ships of War and in W.E. May's The Boats of Men of War. Actually, making boats from scratch is not difficult and the results are usually superior.
Thanks Allan. Your comments are always well considered and well received. I will read up on these references.Your boats look quite nice. For the future keep in mind barges and pinnaces were typically single banked. Even a 36 foot barge was single banked and had ten thwarts with one rower per thwart so the tholes alternated on each side. Cutter were single banked most, if not all of the time and were lap straked (clinker built) rather than carvel built. I realize these are probably kit boats/instructions, but for any build it is often a good idea to look at drawings and information based on contemporary sources to confirm or correct what may be in the kit. There are a LOT of details on ships boats in Brian Lavery's The Arming and Fitting of English Ships of War and in W.E. May's The Boats of Men of War. Actually, making boats from scratch is not difficult and the results are usually superior.
Nice clean work my friend!
That it most certainly is. Cheers GrantNice clean work my friend!
Thank you for your continued interest in my build log, Paul.Nice clean work my friend!
I am reminded that part of the enjoyment of the entire modelling and building process requires admiration and enjoyment others get from viewing my efforts.
Thanks Grant for the same reason.That it most certainly is. Cheers Grant
My hope is to continue to post and document the details of my build in this the mast and rigging stage. Many other logs seem to fade towards this later stage.
The benefit of logging for me is to be able to receive valuable feedback and comments from all the SoS and modelling community and importantly to allow me to reflect on and review my journey of discovery and learning.
Thank you for contributing.
Michael
Just looked through your whole build. Now following your updates. Fantastic work. Great skill and patience.
Gorgeous looking ship.
Gorgeous looking ship.
Thanks Neil. Welcome aboard.Just looked through your whole build. Now following your updates. Fantastic work. Great skill and patience.
Gorgeous looking ship.
All good. But I suggest making your own tools. Crocodile clips ok but needs softening ?on jaws or jig. Cradle needs update : awkward at times? Small details needs updating. Kit building always look rough to begin with. You have experiences for model …. Try scratch building a few items. Then your model will lift off / improve skills. Rails look a bit scary to use : this is an excellent scratch build with spectacular results! My imperfections are there …. I feel no one gets 100% correct. As models need some licence to adapt. Can you char strakes like William 1st rate? Cork / tar planking …. Imperfections in my opinion makes a model from a kit of pieces to something with feelings. Keep going, I am sure it will be a fine looking model!
 . I'm confused, Is this a kit or a scratch build?
Bill
I’m building the Victory Models (Amati) kit of the Vanguard. I have made some minor substitutions for example the carronades, but mostly the kit as supplied.. I'm confused, Is this a kit or a scratch build?
Bill
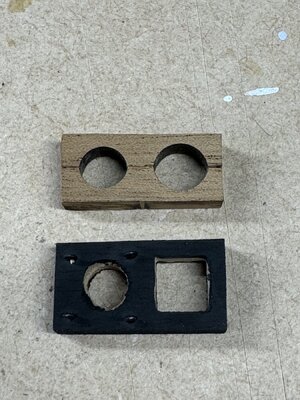
Currently working on main mast. Also starting on Main top mast. Also made from scratch the mast caps as the kit supplied two halves with circular holes for both, which is not correct, and also the holes were not perfectly round.
The boarding pikes were fiddly to make. The rings needed enlarging on the inner diameter and also each of the holes. This was easier to do when the ring was still in the PE sheet.
Also learnt the hard way to install the top before making the iron bands on the top part of the mast.
Nowhere in the kit instructions or in the AOS of the Bellona can I find the painting scheme for top masts and topgallants.
Can anyone tell me or steer me to some information about whether these elements of the masts were painted and their paint schemes?
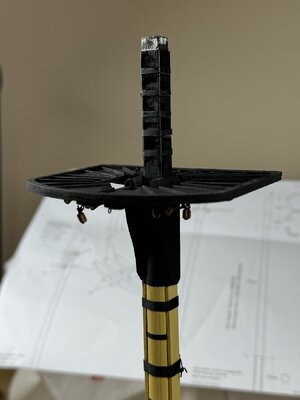
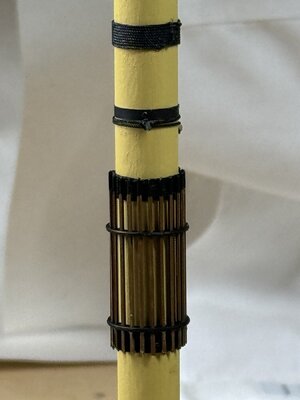
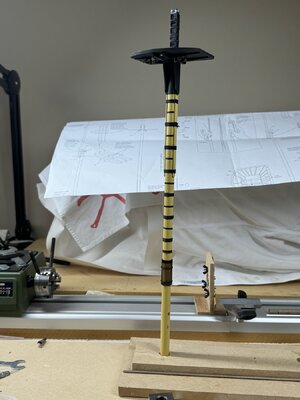


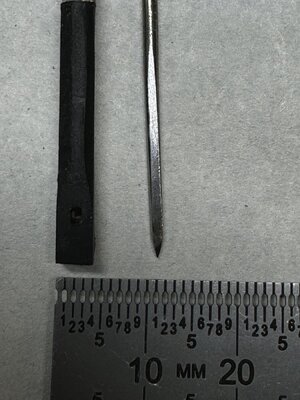
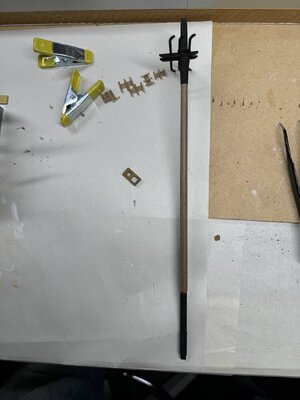
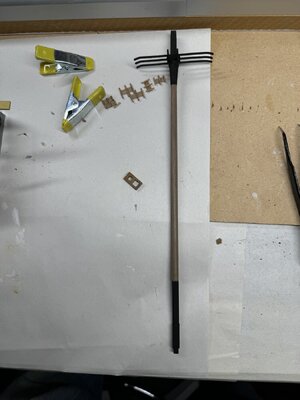
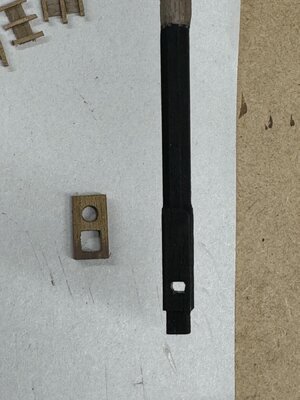
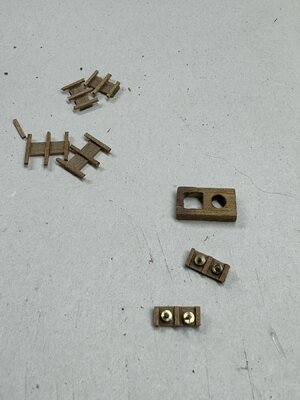
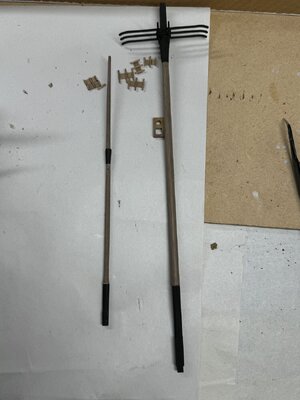 Making the top mast and top gallant for the main mast.
Some thoughts and reflections.
The lower ends have hex and square sections which initially I did first with the micro-mill but when the time came to use the lathe to taper the mast it was harder to secure the mast evenly in the chuck. I ended up breaking two at the point where the topgallant has an expanded area (false cheeks). So I recommend doing the tapering in the lathe first then squaring and hexing the lower bits.
Also creating square holes to accept the fids is challenging to not spilt the wood or oversize the hole. It is especially hard for the 1mm square hole for the upper fid in the topgallant.
I found a technique by AEW (Arthur) to grind down a nail to square and use it to create the hole. So I drilled through with a 0.7mm bit first and the gently introduced the nail from both sides to get a nice 1.15mm square hole.
Also made the sheave blocks for the top masts, using 2.5 and 4 mm sheaves. Made new caps from spare wood from the edges of the kit sheets. To fit the topgallant through I will need to cut the round section and reform it after.
Starting the foremast now.
Thanks for visiting.


