LE ROCHEFORT

Don I haven't forgotten you,just lost my modelling Mojo at the moment.I was involved in laying off 130 workers at the weekend due to COVID 19 and it's effect on the construction industry.I am still at work but now on Dayshift for the time being.I know the bigger picture is much more important,but it is no fun seeing my lads potentially being put in financial hardship.
Back to your build,if you are leaving the notches till later,my thoughts are for building the frame up with straight blanks mitred in Hahn fashion,then gluing a one piece copy of the frame drawing on the frame after assembly and cutting it out.If you are leaving so much meat on there,why even bother putting any shape on?I am still saying build the model right way up,I just refer to how the frames are assembled.

Kind Regards

Nigel
 
THANK YOU NIGEL, KNOW YOU ARE BUSY WITH WHAT IS GOING ON, really scary stuff you mentioned CONSTRUCTIO I WAS A PROJECT MANAGER/ ESTIMATER IN SOUTH FLORIDA FOR OVER 45 YEARS DOING SOME OF THE LARGEST PROJECTS IN SOUTH FLORIDA in the boom of the 60s, 70s, and 80,s the projects would put trumps to shame theb cost in todays dollares woul total in the billions, let us compare notes by pm, join us for this journy when you can. LOOKING FORWARD TO YOUR INPUT Don

Thanks Don for your understanding,my head is spinning with work at the moment.I will chime in when I can

Kind Regards

Nigel
 
Hi Don,

As discussed I am also willing to help and looking at all the posts and work you and Gilles already put into your methode of building frames I think it is best to continue with that if that is working for you. If you then have questions or problems you can post it in your blog with relevant pictures and we can help you. In this way you will tackle your problems step by step and we can step in where you are now.

As every body is using their own methodes of doing things they will advise you their way which is maybe not working for you and then you have to switch from methode to methode without booking any progression.
There for I think you just have to start building and post your specific and brief question here so we can help you growing your skils.

But also remember that it sometimes also takes time to look into and for most of us it is a hobby next to a daily busy job with just a few hours per week able to spend on this hobby.

Hope with the efforts of all followers of your blog we can get you up and running.
 
THANK YOU ALL FOR COMING TO MY RESCUE, LAWRENCE WHAT I AM THINKING ABOUT A COMBANATION of the 2 items this may be crazy but it could work out for me may not be for everyone, but for me it could work, I AM SATISFIED AT THE WAY I AM DOING MY FIRST LAYER OF THE FRAMES THE JOINTS AS YOU CAN SEE ARE DONE QUITE WELL, the second layer is giving me fits i cane fudge it to work but do not want to do that see my latest pictures i can not even draw up the blanks terrible outcome have not got a clue to how t do it, but with help maybe, the question i have of doing it that way is what do i do with the keel notch as it is the smallest of the notches, GILLES SUGGESTED THAT i did not need the patterns on the second layer but due to the way the frames are done on the plans the lines on the 2 layers are different and it measn a lot i think in the final sanding not sure this is just my idea help is needed, I THANK YOU ALL FOR JUMPING IN TO HELP LET US CONTINUE. THANKS Don
 
THANK YOU AGAIN MAARTEN, YOU ARE EXACTLY RIGHT YOU HAVE EXPRESSED MY IDEA IN A MOST BRIEF AND CONSISE WAY BRAVO, and yes sometimes i forget pepole do work it has been a long time for meit has been 17 eventful years some very happy some not so happy< AND I THANK JESUS FOR WHAT HE HAS GIVEN ME TODAY NOT WHAT I HAVE NOT GOT TODAY I AM WHERE HE WANTS ME TO BE TODAY. SO onward all to a sucessful completion of a difficult project. Doin
 
not so much of an update tonight just waiting to get organized again but work does continue now doing all the frames made up reducing to the 3mm on both sides not a fun thing but a necessary thing to get done good time now, thanks guys for the help coming on this unusual project, SEE YOU ALL TOMORROW Don
 
THANK YOU ALL FOR COMING TO MY RESCUE, LAWRENCE WHAT I AM THINKING ABOUT A COMBANATION of the 2 items this may be crazy but it could work out for me may not be for everyone, but for me it could work, I AM SATISFIED AT THE WAY I AM DOING MY FIRST LAYER OF THE FRAMES THE JOINTS AS YOU CAN SEE ARE DONE QUITE WELL, the second layer is giving me fits i cane fudge it to work but do not want to do that see my latest pictures i can not even draw up the blanks terrible outcome have not got a clue to how t do it, but with help maybe, the question i have of doing it that way is what do i do with the keel notch as it is the smallest of the notches, GILLES SUGGESTED THAT i did not need the patterns on the second layer but due to the way the frames are done on the plans the lines on the 2 layers are different and it measn a lot i think in the final sanding not sure this is just my idea help is needed, I THANK YOU ALL FOR JUMPING IN TO HELP LET US CONTINUE. THANKS Don
Hi Don, When you ask for help, I was just trying to help you out, I was in no way implying that my way was the only way, just trying to give you a way around your little problem. Welcome back and Happy Ship Building.
Regards Lawrence
 
Don,
I am NOT good at 3D drawings. I did this as an example to maybe help you understand the front view and the hidden lines. I know that you already know this and I also know that many people have contributed a great amount of work and effort for you and this is NOT to replace anything that anyone has told you. Many people have done an excellent job of explaining things to you. Maybe this might help, I do not know.

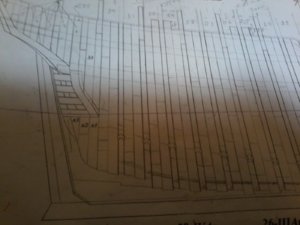
THIS FIRST DRAWING IS 2 DIMENSIONAL AND IS SHOWS ON THE LEFT SIDE THE "MECHANICAL DRAWINGS". THE BLUE LINES SHOW WHAT YOU SEE FROM THE FRONT OF PART OR OBJECT. THE RED AND GREEN DASH LINE IS WHAT IS HIDDEN (UNTIL TO FLIP THE PART OVER AND LOOK AT OTHER SIDE)

3d-1.jpg


THIS DRAWING IS 3 DIMENSIONAL AND IT SHOWS WHAT THE PART LOOKS LIKE IN REAL LIFE AS YOU ARE LOOKING AT PART HEAD ON.
THIS WOULD BE THE COMPLETED PART GLUED TOGETHER

3d-2.jpg


THIS NEXT IS WHAT THE PART LOOKS LIKE IF YOU FLIP THE PART UPSIDE DOWN. YOU SEE THE DOTTED DASH LINE,
THIS SIDE PART IS MUCH NARROW.
THIS WOULD BE THE COMPLETED PART GLUED TOGETHER

3d-3.jpg


THIS PART SHOW THE FINAL PART IS BACK AT THE FRONT VIEW AGAIN AND IT SHOWS HOW THE DASH LINE WILL MAKE THE
PART HAVE A TAPER TO IT.
THIS WOULD BE THE COMPLETED PART GLUED TOGETHER
3d-4.jpg


THIS LAST IMAGE IS I SLICED THE IMAGE SO YOU CAN SEE WHAT MIGHT HAPPEN IF YOU HAVE TWO FRAMES AND YOU CAN NOW SEE
WHY YOU HAVE SO MANY HIDDEN AND SOLID LINES ON ONE DRAWING.
SO YOU CAN SEE NOW HOW YOU CAN HAVE 4 OR 6 SOLID LINES AND 4 OR 6 DASH LINES.

3d-5.jpg


IN STUDYING SOME OF THE ROCHEFORT PLANS, WHAT MAKES (TO ME AND MY PERSONAL OBSERVATION) IS THAT THE FRAMES ARE DOUBLE AND HE IS DRAWING BOTH FRAMES AT THE SAME TIME STACKED ON TOP OF EACH OTHER. YOU COMBINE THAT WITH HIDDEN LINES AND SOLID LINES THEN IT CAN GET VERY CONFUSING IF YOU ARE NOT USED TO VIEWING THINGS FROM A 2 DIMENSIONAL ASPECT.
THE DRAWING THAT I DEMONSTRATE IS ONLY LIKE ONE FRAME. NOW IMAGINE IF THIS FRAME WERE TO BE SLICED INTO TWO PIECES HORIZONTALLY, THEN YOU MIGHT CAN VISUALIZE.
IT TAKE A PRETTY LONG TIME FOR ME TO BE ABLE TO DO JUST THIS RENDER FOR YOU.

NOTE: IF I UNDERSTAND THE PLANS AND WHAT OTHERS HAVE SAID, THEN YOU WILL HAVE PERHAPS 4 SOLID LINES AND 4 DASHED LINES AND THEN YOU NEED TO BUILD TWO SEPARATE FRAMES.
IF I WERE DOING THIS, I WOULD TAKE A COLORED PENCIL AND OUTLINE EACH FRAME A DIFFERENT COLOR. I WOULD USE BLUE, RED, AND GREEN PENCILS. I WOULD ALSO USE BLUE, RED, AND GREEN FOR THE DASH LINES. THIS WAY YOU WILL SEE THAT YOU HAVE TWO FRAMES THAT NEED TO BE CONSTRUCTED. THEN WHEN COMPLETED, I WOULD THEN TAPER OR SAND EACH FRAME FROM THE SOLID LINE TO THE DASH LINE, THIS IS YOUR BEVEL OR TAPER.
THEN DO THE SAME FOR THE NEXT FRAME. SAND LIGHTLY FROM THE SOLID LINE TO THE DASH LINE AND MAKE SURE YOU LEAVE ABOUT 2 MM OF MEAT ON YOUR BEVEL OR TAPER. THEN AFTER THAT, I WOULD GLUE THE TWO FRAMES TOGETHER, THEN FINISH THE BEVELING.
I AM NOT AN EXPERT.
 
LAWRENCE THERE IS NO PROBLEM AT ALL, other perspectives are always needed, DONNIE you are one HEEL of a draftsman and oh my #-DWHERE ARE YOU, A BUNCH OF US NEED THIS. Don
 
Donnie as always need a little time for this to sink in, if you notice on my log you see a blue dash lines these follow the outside extremities what i use other the colored pencils to heavy a line i use PAINT PENS got a set from HOBBY LOBBY $8.00, they are great to use even on wood when you need a thin line of paint, and i do not no why i have not thought of this before for the 2nd layer i will use a different color for it now what i am trying to do as I HAVE the first layer pretty well in my mind now cmes the problem you MUST MAKE SURE OF THE TOP TIMBER so that has to line up on both the first layer and the second layer as well as the keel notch one thing that we did is to keep things in line is all the frames with the long floor timber is 1st layer both bow an stern the short floor timber is the 2 nd layer both bow and stern i wlll post a lot of pictures tomorrow. THANKS ALL, GOD BLESS AND BE SAFE ( BELIEVE IN FAITH NOT SIGHT) Don
 
ok guys, here we go a lot of pictures not to much texts, this is what is going right and showing what is going wrong,,, tommorrow will show prep work for frame No.28, what i amshowing now is frame No.27 first layer complete second layer problem20200413_010021.jpg20200413_005855.jpg20200413_010145.jpg20200413_011010.jpg20200413_011702.jpg20200413_011900.jpg20200413_012325.jpg20200413_012449.jpg20200413_012635.jpg
 
Aren’t you supposed to make each top and bottom separate? Looks like you clamp the top and bottom frames together ??
I wonder why u did this. I thought the top and bottom frames should be cut, glued and then the two half’s then glued to each other. You know like the Blandford frames are double frames like this is. Right ?
 
NO DONNIE EACH IS SEPERATE FLOOR TIMBERS, FUTTOCK,ANDV TOP TIMBER, ON BOTH THE 1st layer and the 2nd layer the clamps you see is a dry fit of the second layer onto the first if you notice the top timber on one side you will see how it fits on the 1stblayer it is wrong look at the top timbers and you will see the dry bfit as it is supposed to be at the top timbers but in order to do that you see the joint has a large gap now i can fudge it as i have been doing but the big question to me is i want to do nit right do not know why it happens and do not know how to correct it. Don
 
tomorrow i will show how i prep frame No.28 red donnie 2nd layer blue first layer, if you notice theb patterns you will see dashes in blue this is the outline of the frame you will see the 2nd layer also in blue whitch is the frame line of the 2nd layer. Don
 
if possible, I would like to have ONE picture of one of those frames that has A LOT of the lines and dotted lines. If you could somehow get a good straight-on shot.
Does your camera have anti-vibration or anti-shake? What kind of camera do you have? Sometimes very low lighting will make images blurry.
I can try and use CAD to draw a 3D image of a frame, but I cannot promise how it will look. I am not sure if I can do it or not. the curve lines might be a problem. I know that Dave is the Master of Ship CAD.
I do CAD at my office at work, but it is simple line drawings of electrical things and nothing 3D. I have done 3D before several times and was practicing it. I got fairly good at it, but then when I tried to draw 3D images for ship frames, I then had a lot of problems with the CAD software performing the frame drawings. It was very frustrating. I tried to draw the Blandford in 3D and just gave up because apparently the bezier curve method in TurboCad is different in the AUTOCAD
 
hi all pictures of frame no 28 prep,,,,,frame no26 sanding, not happy with the outcome also problem keelson notch20200413_060454.jpg20200413_060724.jpg20200413_061035.jpg20200413_174414.jpg20200413_174637.jpg20200413_174825.jpg20200413_175415.jpg
 

Attachments

  • 20200413_061122.jpg
    20200413_061122.jpg
    131.2 KB · Views: 0
DON
I MIGHT BE WRONG, BUT IT SEEMS THAT THE PLAN SHOULD BE ATTACHED TO THE BACK SIDE TOO. HOW ELSE WOULD YOU DETERMINE HOW FAR DOWN TO BEVEL THE FRAME. YOU HAVE THE SOLID LINE FOR THE FRONT, BUT WHEN YOU BEVEL, IT IS JUST A GUESS, YOU NEED TO HAVE THE PLAN ALSO ON THE REAR SIDE OF PARTS SO YOU CAN SEE FROM THAT SIDE HOW FAR YOU ARE BEVELING.
IF I HAVE TIME, I WILL SEE IF I CAN MOCK UP AN EXAMPLE HERE - NO PROMISES, BUT TRY.
 
Back
Top