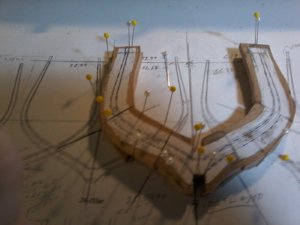
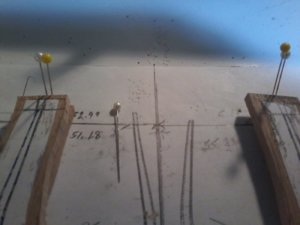
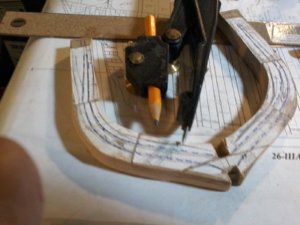
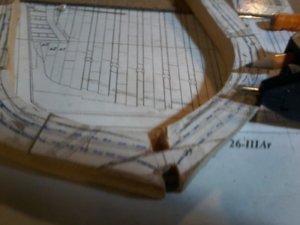
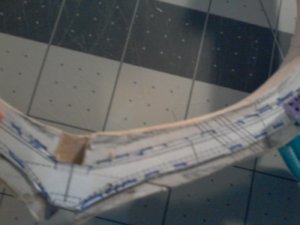
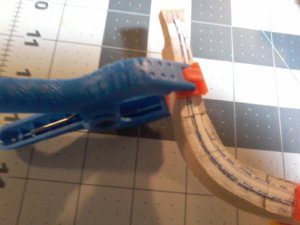
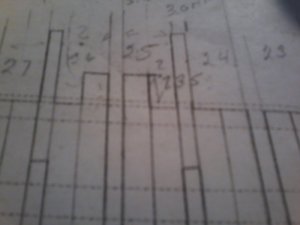
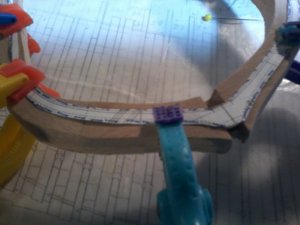
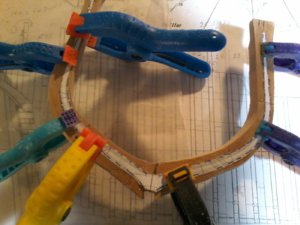
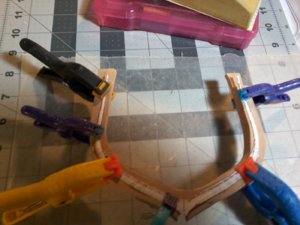
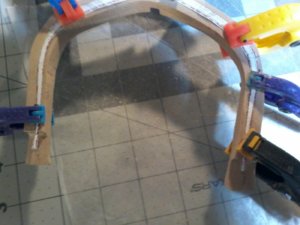
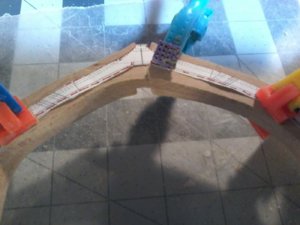
Donnie do you mean on both the first and second layer i do have the pattern on both of those, it is confusing the way to tell the 2 layers is by the floor timber first layer is always the larger floor member the second layer always the shorter one you have to bevel when the frame is complete the double frame is the complete frame but if you mean the back and front of each nlayer the pattern is sandwitched between the 2 layers. THANKS Don
-

Win a Free Custom Engraved Brass Coin!!!
As a way to introduce our brass coins to the community, we will raffle off a free coin during the month of August. Follow link ABOVE for instructions for entering.
-

PRE-ORDER SHIPS IN SCALE TODAY!
The beloved Ships in Scale Magazine is back and charting a new course for 2026!
Discover new skills, new techniques, and new inspirations in every issue.
NOTE THAT OUR FIRST ISSUE WILL BE JAN/FEB 2026
You are using an out of date browser. It may not display this or other websites correctly.
You should upgrade or use an alternative browser.
You should upgrade or use an alternative browser.
LE ROCHEFORT
- Thread starter donfarr
- Start date
- Watchers 37
-
- Tags
- ancre le rochefort
I am responding soon with my idea. But I think we are talking the same method.
I have a video I made.
I have a video I made.
Donnie, I JUST THOUGHT OF SOMETHING,, GILLES POSTED A PDF OF HIS FORUM ON THE GROSS VENTURE I DO NOT REMEMBER WHERE ON MY LOG THE LINK IS I THINK SOMWHERE AROUND 13 GO TO VOL ONE ISSUE THREE STARTING ON PAGE 76 is a wonderful explanation of the framwes witch can also be applied to the Le Rochefort, i still have not digested all of it yet still working on it and am having a really bad time understanding the the tracing method he describes, LOOK IT UP DONNIE USEFULL STUFF THERE. Don
OK, THAT IS GOOD. FOR EVERYONE ELSE, THE REASON FOR ALL CAPS IS SO THAT DON CAN EASILY READ THIS POST. SO, I REALIZE THAT THIS POST IS PREACHING TO THE CHOIR AND I AM NOT EXPERT ON THIS, BUT JUST DOING MY LITTLE PART TO HELP DON.
THIS WOULD DEMONSTRATE A TYPICAL PLAN TEMPLATE OF A FRAME.
IT COULD BE TWO FRAMES FOR DOUBLE, WHICH EVER IS APPLIED HERE.
DAHS LINES ARE OBVIOUS THE BEVELS.
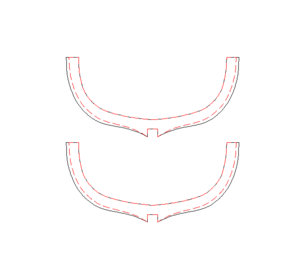
THIS IS ALSO OBVIOUS THAT I USED A GLUE STICK FOR THE TEMPLATE AND WOOD.
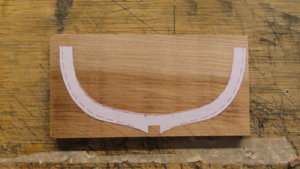
A POWER SCROLL SAW ROUGH CUT THE OUTLINE. I ALSO USED THE SCROLL SAW TO CUT SLIVERS WHERE THE NOTCH IS.
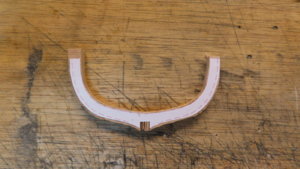
THIS IS A ROUGH EXAMPLE OF JUST USING AN EXACTO TO CLEAN OUT SLIVERS.
THEY REALLY BREAK QUCK AND EASY W NOT MUCH PRESSURE.
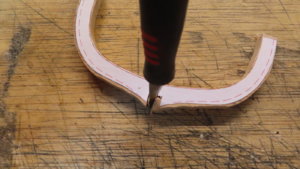
THIS FRAME HAS BEEN SANDED USING DRUM SANDER AND THE BACK OR REAR SIDE WILL ALSO HAVE THE TEMPLATE APPLIED.
IF YOU ARE USING ONLY ONE FRAME, THEN CUT THE OTHER PATTERN EXACTLY WITH NO WASTE AS YOU WILL
GLUE IT TO THE REVERSE SIDE OF THIS WOOD. IF YOU ARE USING DOUBLE FRAMES, THEN JUST REPEAT THE PROCESS BELOW. YOU MIGHT
CAN USE DOUBLE SIDED TAPE TO HOLD THE TWO FRAMES BACK TO BACK TO MAKE THE BEVELS OR YOU MIGHT NEED TO MAKE
THE BEVELS BEFORE YOU GLUE THE DOUBLE FRAMES.
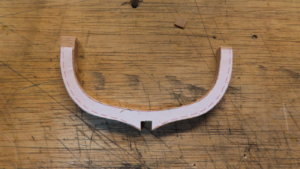
THE FOLLOWING VIDEOS ARE ELEMENTARY AND WE ALL KNOW THE PROCESS, HOWEVER, THERE MIGHT BE SOMETHING
HERE THAT YOU MIGHT HELP YOU THINK OF SOME OTHER IDEAS. THIS IS ALL THIS IS ABOUT IS CREATING A PROCESS OF THINKING. I AM NOT
AN EXPERT, BUT LEARNING MYSELF. SINCE I DO NOT HAVE THE ROCHEFORT SITTING IN FRONT OF ME, IT IS VERY DIFFICULT TO HELP, BUT
I THINK THIS IS SOME WORTH THE EFFORT. THE BLACK PENCIL LINE DOWN THE MIDDLE ONLY REPRESENTS IF THIS MIGHT BE A DOUBLE FRAME.
THERE ARE OTHERS HERE THAT HAVE TONS MORE EXPERIENCE AT THIS THAN I DO.
I PERSONALLY THINK WHAT MAKES THE ROCHEFORT A BIT MORE DIFFICULT IS THAT BOTH FRAMES AND BEVELS ARE DRAWN ON TOP OF EACH OTHER
AS A COMPOSITE.
IT COULD BE TWO FRAMES FOR DOUBLE, WHICH EVER IS APPLIED HERE.
DAHS LINES ARE OBVIOUS THE BEVELS.

THIS IS ALSO OBVIOUS THAT I USED A GLUE STICK FOR THE TEMPLATE AND WOOD.

A POWER SCROLL SAW ROUGH CUT THE OUTLINE. I ALSO USED THE SCROLL SAW TO CUT SLIVERS WHERE THE NOTCH IS.

THIS IS A ROUGH EXAMPLE OF JUST USING AN EXACTO TO CLEAN OUT SLIVERS.
THEY REALLY BREAK QUCK AND EASY W NOT MUCH PRESSURE.

THIS FRAME HAS BEEN SANDED USING DRUM SANDER AND THE BACK OR REAR SIDE WILL ALSO HAVE THE TEMPLATE APPLIED.
IF YOU ARE USING ONLY ONE FRAME, THEN CUT THE OTHER PATTERN EXACTLY WITH NO WASTE AS YOU WILL
GLUE IT TO THE REVERSE SIDE OF THIS WOOD. IF YOU ARE USING DOUBLE FRAMES, THEN JUST REPEAT THE PROCESS BELOW. YOU MIGHT
CAN USE DOUBLE SIDED TAPE TO HOLD THE TWO FRAMES BACK TO BACK TO MAKE THE BEVELS OR YOU MIGHT NEED TO MAKE
THE BEVELS BEFORE YOU GLUE THE DOUBLE FRAMES.

THE FOLLOWING VIDEOS ARE ELEMENTARY AND WE ALL KNOW THE PROCESS, HOWEVER, THERE MIGHT BE SOMETHING
HERE THAT YOU MIGHT HELP YOU THINK OF SOME OTHER IDEAS. THIS IS ALL THIS IS ABOUT IS CREATING A PROCESS OF THINKING. I AM NOT
AN EXPERT, BUT LEARNING MYSELF. SINCE I DO NOT HAVE THE ROCHEFORT SITTING IN FRONT OF ME, IT IS VERY DIFFICULT TO HELP, BUT
I THINK THIS IS SOME WORTH THE EFFORT. THE BLACK PENCIL LINE DOWN THE MIDDLE ONLY REPRESENTS IF THIS MIGHT BE A DOUBLE FRAME.
THERE ARE OTHERS HERE THAT HAVE TONS MORE EXPERIENCE AT THIS THAN I DO.
I PERSONALLY THINK WHAT MAKES THE ROCHEFORT A BIT MORE DIFFICULT IS THAT BOTH FRAMES AND BEVELS ARE DRAWN ON TOP OF EACH OTHER
AS A COMPOSITE.
Donnie latter on tonight or maybe in the morning I will send you some pictures of MAY BE A SOLUTION TO THE 2nd LAYER problem,, have to wait HAVING A CASE OF THE HE BE GEBES RIGHT NOW ONE HAPPY PILL NEEDE. Don
Hi Heinrich, THANK YOU FOR YOUR COMMENT and i TOO AM LEARNING A LOT, still have some simple questions to ask but critical questions but one thing at a time. Don
- Joined
- Oct 23, 2018
- Messages
- 886
- Points
- 403

Don,
if you look at your frame, you can see some small inaccuracies where the different timbers comes together. This is in the moment not a big problem, because you can solve it very easy.
Glue a piece of scrap wood on top of your frame and mark the Center Line of the frame on it. With the position of the CenterLine on top and the notches and Centerline on the bottom you can glue a new template on the frame. After glueing you can cut the waste paper with a knife. Now you have a nice frame.
Hi Don,
As mentioned above and via a PM to you. Before you start sanding the frames it is best to remove the paper from the frames and glue a new one to them which is stil in one piece. This ensures you the shape of your frame is correct before sanding it.
You can allign the paper with the keel notch and the frame section marks on the side of the glued frame. You do this on both sides of the frame if you want to bevel the frame outside the ship. As discussed with Gilles some time ago you can also decide to just sand the frame square and bevel it when all the frame are installed in the ship, like you do with a POB kit. Maybe that is more simple and far less prone to making errors ans the hull shape will guide you when bevelling the frames.
If I have time this week I will make a step by step plan of preparing the frames for you, just a simple guideline.
Regarding the sanding keep in mind you can only remove material and not add, so it is best to look twice before sanding, sand a bit and look, etc. etc.
Maybe it is usefull for you to sand below a magnifying lamp, it provides extra light and enlarges 3 to 5 times to properly see it.
THANKS WONDERFUL SUGESTIONS, only one problem, we are under lockdown here, hope it ends soon and i am running out of plans to cut o.ut will use all that i have left, and after trying to do the sanding i am going back to do the final as all sugested before to do final after frames installed, ONE QUESTION MAARTEN are you saying the new template be in one piece should i highlight the lines as befor, getting there guys,, another question is there a glue that can be used temporaly and then taken apart i think at one time JIM said there is. GOD BLESS ALL STAY SAFE PLEASE Don PS found out yesterday that after 6 weeks the small building slip has come in will be mailed today from hobby world ( US DISTRBUTOR FOR HOBBY ZONE
Rubber cement worked quite well for me. Once you are done with cutting, it easily peels off.THANKS WONDERFUL SUGESTIONS, only one problem, we are under lockdown here, hope it ends soon and i am running out of plans to cut o.ut will use all that i have left, and after trying to do the sanding i am going back to do the final as all sugested before to do final after frames installed, ONE QUESTION MAARTEN are you saying the new template be in one piece should i highlight the lines as befor, getting there guys,, another question is there a glue that can be used temporaly and then taken apart i think at one time JIM said there is. GOD BLESS ALL STAY SAFE PLEASE Don PS found out yesterday that after 6 weeks the small building slip has come in will be mailed today from hobby world ( US DISTRBUTOR FOR HOBBY ZONE
OK just some questions so i can get this right, OK i cut out another pattern COMPLETE do i cut it to the line or leave a bit (HOPEFULLY TO THE LINE) do i indicate the lines using the dashes (BLUE FIRST LAYER RED SECOND LAYER) now i am leaving the meat on about 3mm then final FAIRING AFTER THE FRAMES ARE SET, now the question is once the frames are on the keel the patterns are gone correct how do i know the lines to do final shapping and beveling, after doing what i did last night is a NO, NO, for me so we go back to what you guys recommended the first time, i am going to do the same frame that i did last night using the markers of dashes. THANKS Don
You can highlight the correct lines on the correct side of the double frame if you want to fair them outside the ship.THANKS WONDERFUL SUGESTIONS, only one problem, we are under lockdown here, hope it ends soon and i am running out of plans to cut o.ut will use all that i have left, and after trying to do the sanding i am going back to do the final as all sugested before to do final after frames installed, ONE QUESTION MAARTEN are you saying the new template be in one piece should i highlight the lines as befor, getting there guys,, another question is there a glue that can be used temporaly and then taken apart i think at one time JIM said there is. GOD BLESS ALL STAY SAFE PLEASE Don PS found out yesterday that after 6 weeks the small building slip has come in will be mailed today from hobby world ( US DISTRBUTOR FOR HOBBY ZONE
If you do the fairing after installation you only have to sand down to the outer contours.
ok now my head is turning from side to side, one day take the frame as close to the line as i can get, thenext day leave the meat on and fair it when the frames are attached DO NOT KNOW WITCH ONE TO DO TO GIVE ME GOOD RESULTS if i can get frame to the line and do the beveling off ship would to me be the best I THINK, doing it with all the meat on gives me a problem of breakage and difficult to do interiors and the most important thing that i can not grasp is what to do with the pattern, hope i am explaining it OK, GEEZ believe it or not i am making progress good progress GREAT MODELERS HELPING THANKS ALL GUYS also i am going to continue doing the patterns from the aft forward have more plans for the patterns. THANKS Don
Hi Don,ok now my head is turning from side to side, one day take the frame as close to the line as i can get, thenext day leave the meat on and fair it when the frames are attached DO NOT KNOW WITCH ONE TO DO TO GIVE ME GOOD RESULTS if i can get frame to the line and do the beveling off ship would to me be the best I THINK, doing it with all the meat on gives me a problem of breakage and difficult to do interiors and the most important thing that i can not grasp is what to do with the pattern, hope i am explaining it OK, GEEZ believe it or not i am making progress good progress GREAT MODELERS HELPING THANKS ALL GUYS also i am going to continue doing the patterns from the aft forward have more plans for the patterns. THANKS Don
That is right, you have to do it all. Only now in the proper order. First leave meat on, then glue together, then sand down.
As said I will prepare a step by step overview. But that takes time to do.


