-

Win a Free Custom Engraved Brass Coin!!!
As a way to introduce our brass coins to the community, we will raffle off a free coin during the month of August. Follow link ABOVE for instructions for entering.
-

PRE-ORDER SHIPS IN SCALE TODAY!
The beloved Ships in Scale Magazine is back and charting a new course for 2026!
Discover new skills, new techniques, and new inspirations in every issue.
NOTE THAT OUR FIRST ISSUE WILL BE JAN/FEB 2026
You are using an out of date browser. It may not display this or other websites correctly.
You should upgrade or use an alternative browser.
You should upgrade or use an alternative browser.
Medieval Spanish Coca - AMATI 1:60 [COMPLETED BUILD]
- Thread starter Michiel de Ruyter
- Start date
- Watchers 21
- Joined
- Feb 15, 2021
- Messages
- 97
- Points
- 143

Hi Heinrich and dear friends, here we are!
As far as the shrouds are concerned, after having seen many solutions, I was inspired by this one, described by the following drawing for simplicity's sake:
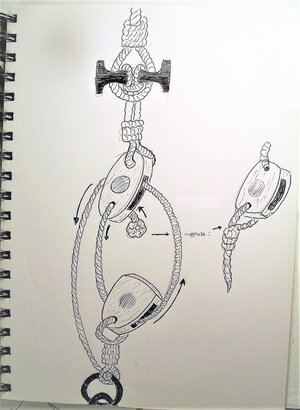
Somewhere I read that the taggle (in black in the drawing) was made of metal (but maybe also wood was used), so I shaped some brass columns to try to fit. Then I colored them black:
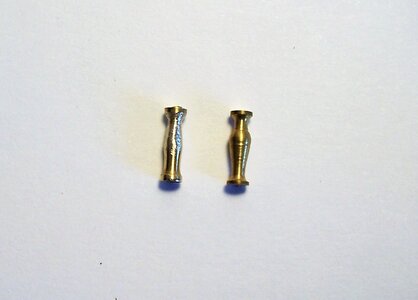
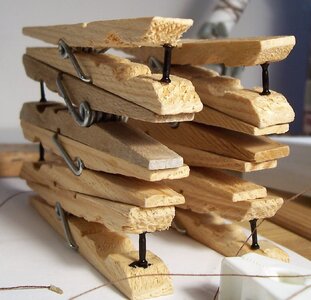
Then I tried to tie the block to the taggle at the same distance for all eight structures:
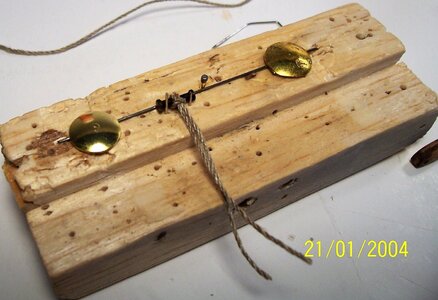
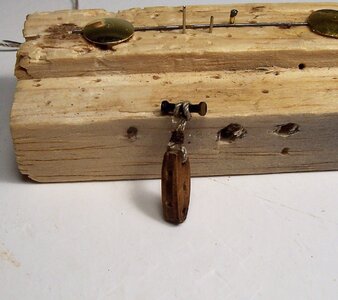
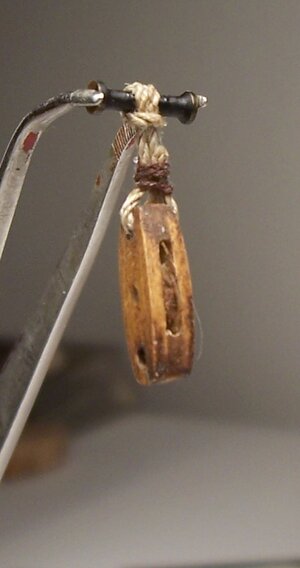
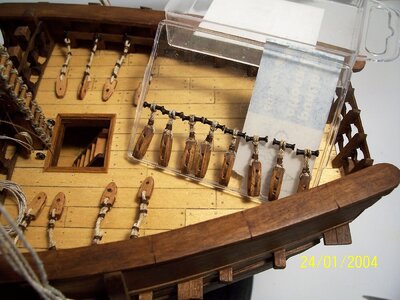
Now all that's remaining is the binding between them, trying to maintain certain linearity and symmetry, which I expect will not be easy.
See you soon,
Rodolfo
As far as the shrouds are concerned, after having seen many solutions, I was inspired by this one, described by the following drawing for simplicity's sake:

Somewhere I read that the taggle (in black in the drawing) was made of metal (but maybe also wood was used), so I shaped some brass columns to try to fit. Then I colored them black:


Then I tried to tie the block to the taggle at the same distance for all eight structures:


Now all that's remaining is the binding between them, trying to maintain certain linearity and symmetry, which I expect will not be easy.
See you soon,
Rodolfo
- Joined
- Feb 15, 2021
- Messages
- 97
- Points
- 143

Thanks to Heinrich for the support!
Dear friends,
the work went on trying to fix the blocks uniformly. Pictures of that time show both blocks fixed close to the bulwark and also at a greater distance; the lanyards can also be short or long. So there is a lot of freedom of action: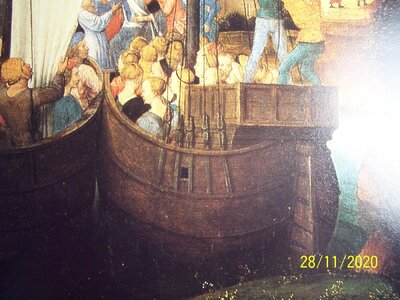
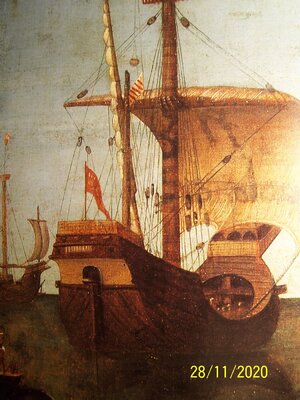
First I shaped a steel wire to keep the distance uniform. Then I tied the block to the rigging, removing the excess cable at the end:
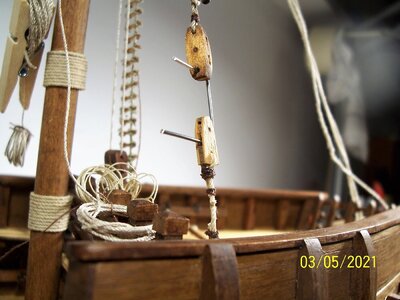
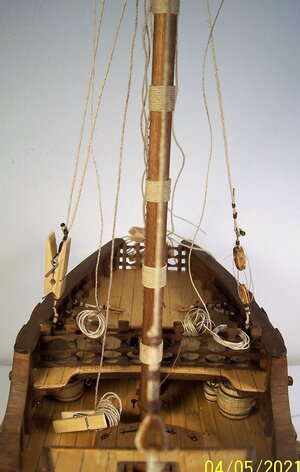
At the end a lanyard of clear elastic thread temporarily joined the upper and lower blocks so that I could get an overview:
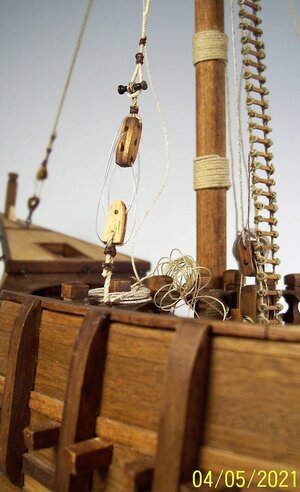
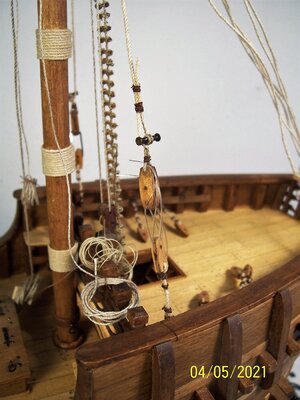
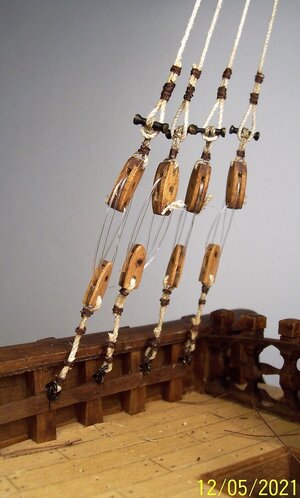
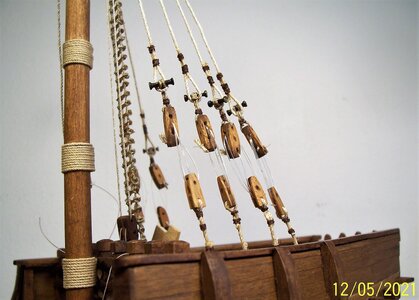
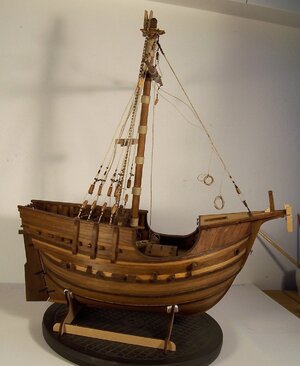
If I could go back, I would tie the blocks to the deck by means of rings attached directly to it or to a rafter; but that's done now. In any case, it's an improvement on the three shrouds proposed by AMATI: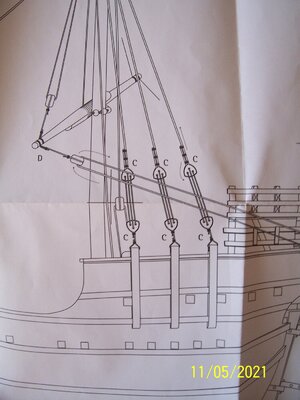
After that, I will cut away the elastic thread, remove the blocks with the taggles and lower the yard down to try to put the sail on.
See you later!
Rodolfo
Dear friends,
the work went on trying to fix the blocks uniformly. Pictures of that time show both blocks fixed close to the bulwark and also at a greater distance; the lanyards can also be short or long. So there is a lot of freedom of action:


First I shaped a steel wire to keep the distance uniform. Then I tied the block to the rigging, removing the excess cable at the end:


At the end a lanyard of clear elastic thread temporarily joined the upper and lower blocks so that I could get an overview:


If I could go back, I would tie the blocks to the deck by means of rings attached directly to it or to a rafter; but that's done now. In any case, it's an improvement on the three shrouds proposed by AMATI:

After that, I will cut away the elastic thread, remove the blocks with the taggles and lower the yard down to try to put the sail on.
See you later!
Rodolfo
- Joined
- Feb 15, 2021
- Messages
- 97
- Points
- 143

Thanks, Heinrich!
Dear friends, now it's time to work on the sail.
In the opinion of the manufacturer "AMATI ", it is a kind of sausage with six laces that bind it to the yard. "AMATI" puts the picture of the ship with the sail only on the cover of the box; nothing about it appears in the drawing:
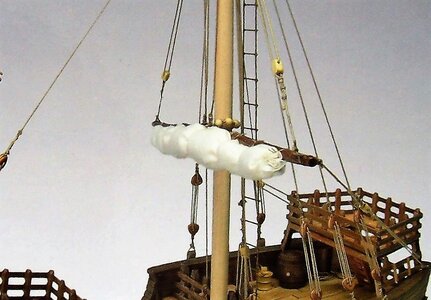
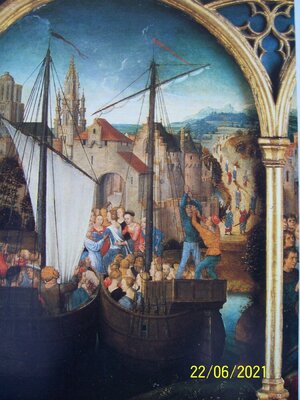
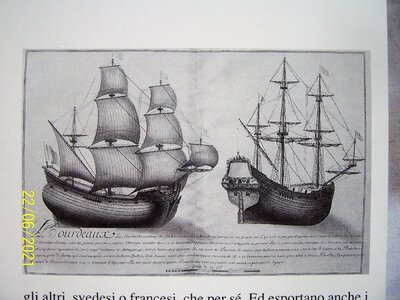
In fact, the sails wrapped around the yard appear as a much more thin structure:
It is clear that the model sail cannot be reproduced in perfect scale because it is too thick compared to the original.
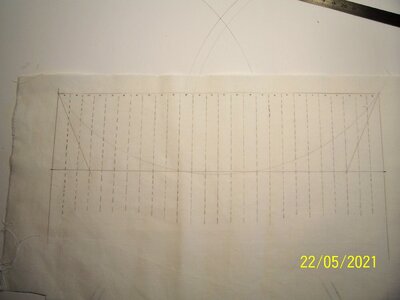
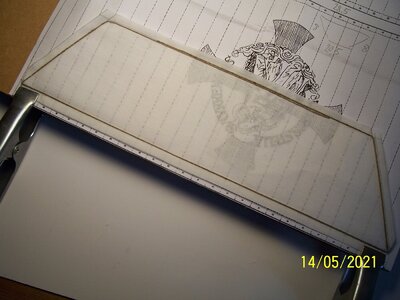
So I cut the fabric in a reduced way compared to the theoretical sail (I took as reference the mainsail of the Santa Maria of Adamentz' drawings in proportion to the yard of the Cocca). The sail cloths are simulated on the back of the sail with a pencil.
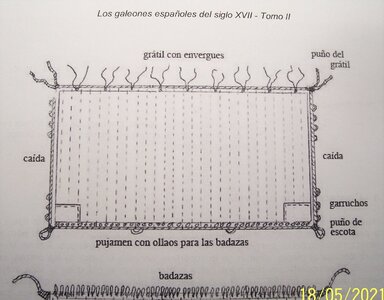
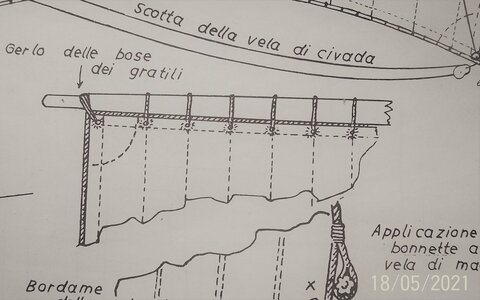
As for the way to mount the sail on the yard, I chose what is described in: "Los galeones españoles del siglo XVII - Tomo II" authors Cayetano Hormaechea, Isidro Rivera and Manuel Derqui, Ediz. "Associació d'Amics del Museu Marítim de Barcelona" with the addition of a drawing by H.E. Adametz (for his Santa Maria):
I glued a 0.5 mm wire along the inside perimeter, cut out the sail leaving a side margin along the perimeter, and then folded the outside overhang gluing it and embedding the inner string. Next, I glued another cord (the luff cord) of about 0.8 mm diameter to the outside, with rings at the lower corners. My advice in retrospect, though, is to put a loop of rope at each corner: it saves the inconvenience of tying the sail to the ends of the yardarm.
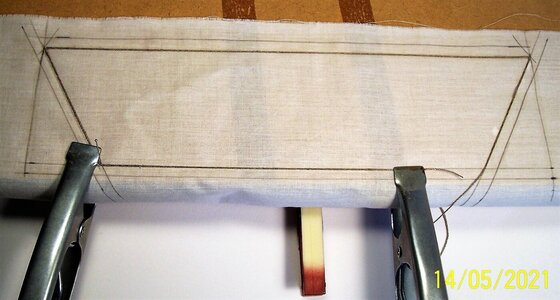
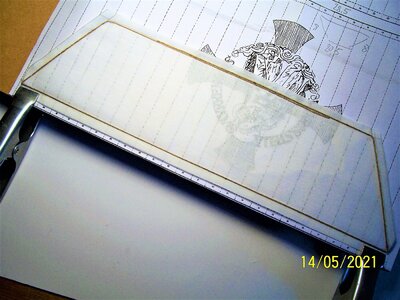
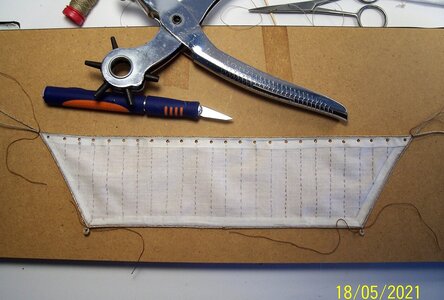
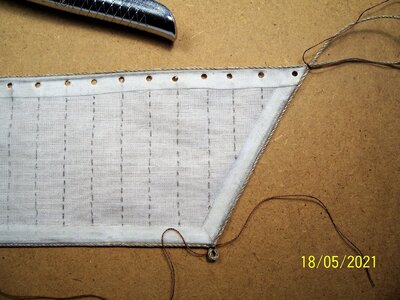
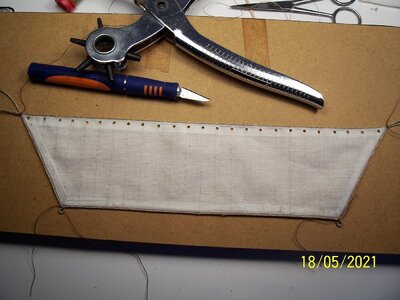
In the previous photos, this is the first attempt. The holes were bored with the tool in the photo. Then I made two more attempts. In the last one, I drilled the holes through the fabric with a very hot needle and, in my opinion, the result is much better as the burn around the hole simulates the sewing.
The following sail is the result of the third attempt, I finished the tissue of AMATI and I decided it is enough:
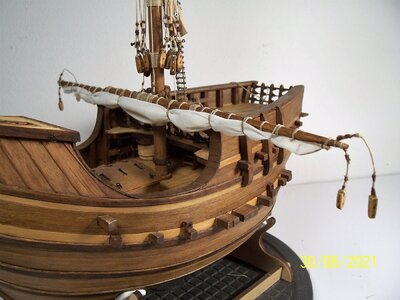
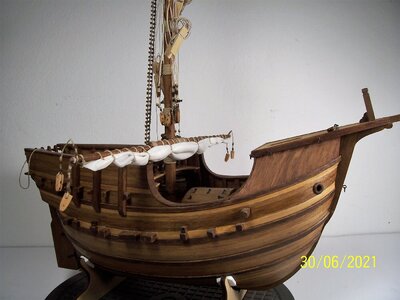
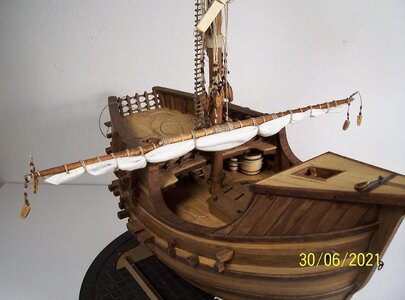
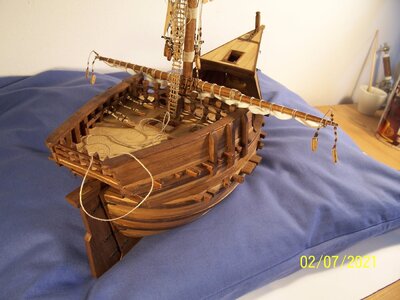
An important detail has appeared now: it is much better to put the blocks after fixing the sail, and not before. It becomes a much more comfortable work:
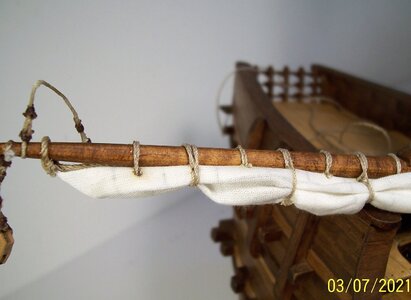
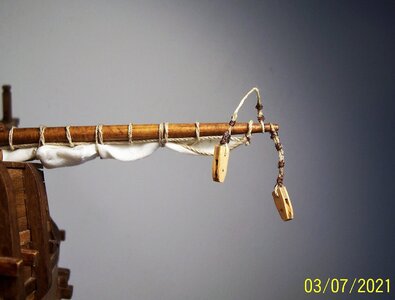
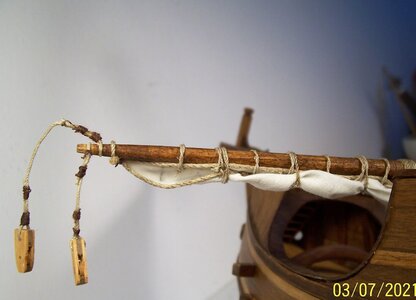
In addition, the strops of the blocks should be placed side by side, unlike what is written in the instructions. The topping lift blocks go on the outside and the brace blocks on the inside. Having already glued the strops, it's too late for me to change now, but you're still in time!
Next step: the cathead.
See you soon!
Rodolfo
Dear friends, now it's time to work on the sail.
In the opinion of the manufacturer "AMATI ", it is a kind of sausage with six laces that bind it to the yard. "AMATI" puts the picture of the ship with the sail only on the cover of the box; nothing about it appears in the drawing:

In fact, the sails wrapped around the yard appear as a much more thin structure:


It is clear that the model sail cannot be reproduced in perfect scale because it is too thick compared to the original.
So I cut the fabric in a reduced way compared to the theoretical sail (I took as reference the mainsail of the Santa Maria of Adamentz' drawings in proportion to the yard of the Cocca). The sail cloths are simulated on the back of the sail with a pencil.


As for the way to mount the sail on the yard, I chose what is described in: "Los galeones españoles del siglo XVII - Tomo II" authors Cayetano Hormaechea, Isidro Rivera and Manuel Derqui, Ediz. "Associació d'Amics del Museu Marítim de Barcelona" with the addition of a drawing by H.E. Adametz (for his Santa Maria):


I glued a 0.5 mm wire along the inside perimeter, cut out the sail leaving a side margin along the perimeter, and then folded the outside overhang gluing it and embedding the inner string. Next, I glued another cord (the luff cord) of about 0.8 mm diameter to the outside, with rings at the lower corners. My advice in retrospect, though, is to put a loop of rope at each corner: it saves the inconvenience of tying the sail to the ends of the yardarm.


In the previous photos, this is the first attempt. The holes were bored with the tool in the photo. Then I made two more attempts. In the last one, I drilled the holes through the fabric with a very hot needle and, in my opinion, the result is much better as the burn around the hole simulates the sewing.
The following sail is the result of the third attempt, I finished the tissue of AMATI and I decided it is enough:


An important detail has appeared now: it is much better to put the blocks after fixing the sail, and not before. It becomes a much more comfortable work:


In addition, the strops of the blocks should be placed side by side, unlike what is written in the instructions. The topping lift blocks go on the outside and the brace blocks on the inside. Having already glued the strops, it's too late for me to change now, but you're still in time!
Next step: the cathead.
See you soon!
Rodolfo
- Joined
- Feb 15, 2021
- Messages
- 97
- Points
- 143

Hi phpero,
the supplier AMATI" unfortunately gives only the sheet I've reported on the first page of this thread. Maybe in "WINTER, Heinrich. Die Katalanische Nao von 1450. Magdeburg, 1956." you can find something, or in other books.
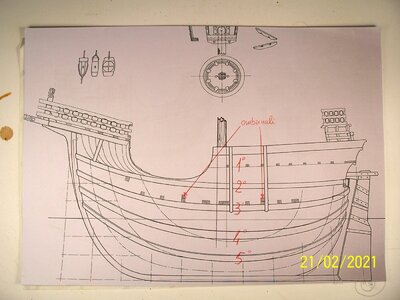
This picture is clearly about the Mediterranean Cocca; coming from a forum.
the supplier AMATI" unfortunately gives only the sheet I've reported on the first page of this thread. Maybe in "WINTER, Heinrich. Die Katalanische Nao von 1450. Magdeburg, 1956." you can find something, or in other books.

This picture is clearly about the Mediterranean Cocca; coming from a forum.
Wow, just worked my way through your fantastic build log. What a great tutorial.
Jan
Jan
- Joined
- Feb 15, 2021
- Messages
- 97
- Points
- 143

Thanks, Jan; I'm glad my work was helpful! And a warm welcome to all naval modelers.
After the sail, it is the turn of the catheads, which have been completely neglected by the manufacturer. The Nao of Matarò has them well detailed (and the accuracy of the work makes me think that the builder of the time was very skilled);
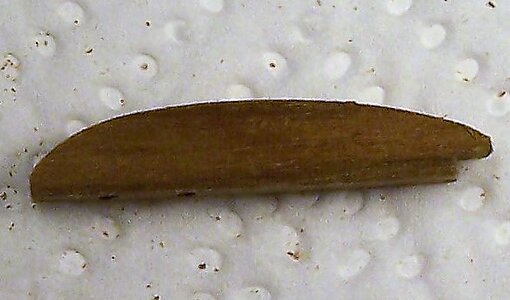
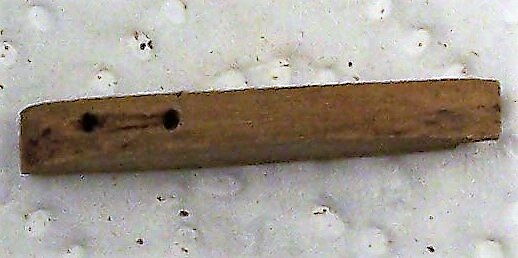
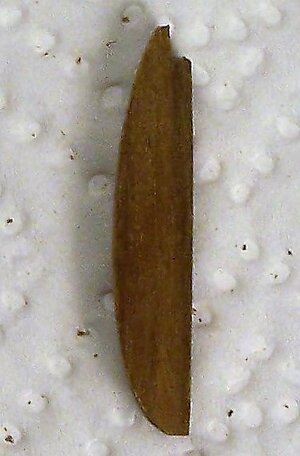
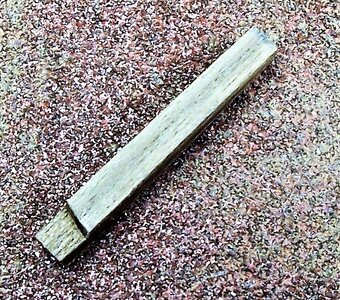
I preferred a simpler solution, shaping slightly curved strips of walnut 6x6 mm. The pulley is only hinted at by digging the wood a bit between the holes.
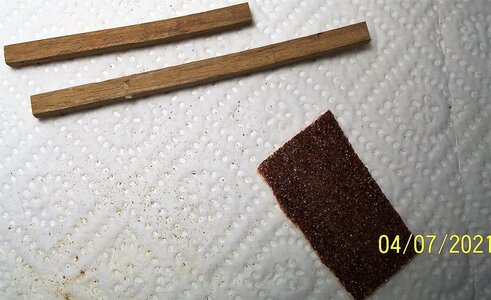
To glue the cathead, it is necessary to lightly sand the clinker area.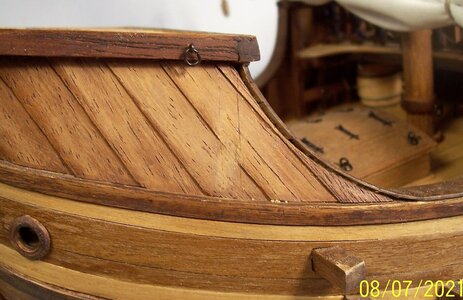
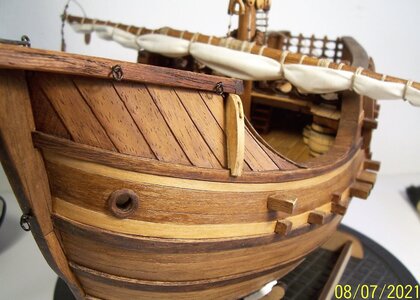
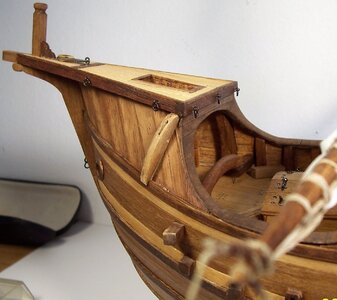
Obviously the operation must be repeated on the other side. At this step, the problem arises on the opposite side of Nao di Matarò, which has the cathead in a more advanced position: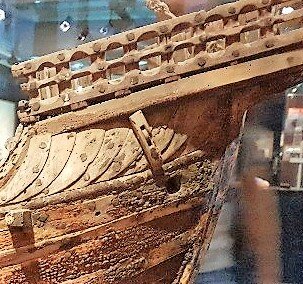
The problem is to decide if the ship had four catheads and two were lost or if someone made a wrong repair (not likely, also because the dimensions are different). I've never come across drawings or paintings with four cranes, though (there are few with two, too...).
Ultimately, it seems to me that the most reasonable solution is to have only two catheads. Here they are glued in place, with the pulleys a little darkened and a coat of oak colored impregnation:
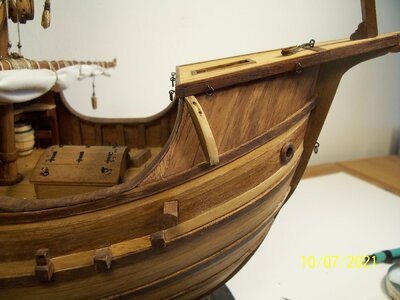
See you soon!
Rodolfo
After the sail, it is the turn of the catheads, which have been completely neglected by the manufacturer. The Nao of Matarò has them well detailed (and the accuracy of the work makes me think that the builder of the time was very skilled);
I preferred a simpler solution, shaping slightly curved strips of walnut 6x6 mm. The pulley is only hinted at by digging the wood a bit between the holes.


To glue the cathead, it is necessary to lightly sand the clinker area.


Obviously the operation must be repeated on the other side. At this step, the problem arises on the opposite side of Nao di Matarò, which has the cathead in a more advanced position:

The problem is to decide if the ship had four catheads and two were lost or if someone made a wrong repair (not likely, also because the dimensions are different). I've never come across drawings or paintings with four cranes, though (there are few with two, too...).
Ultimately, it seems to me that the most reasonable solution is to have only two catheads. Here they are glued in place, with the pulleys a little darkened and a coat of oak colored impregnation:

See you soon!
Rodolfo
- Joined
- Jan 9, 2020
- Messages
- 10,566
- Points
- 938

The catheads are looking good. However, what about adding the pulleys and not just suggesting them. Your abilities show that it is entirely within your reach. I think the depth that it will add to the catheads will be worth the effort! What do you think?
- Joined
- Aug 8, 2019
- Messages
- 5,584
- Points
- 738

I agree. It would be a big upgrade. You can use deadeyes.what about adding the pulleys and not just suggesting them. Your abilities show that it is entirely within your reach
But without, I love the efford and details you already did.
- Joined
- Feb 15, 2021
- Messages
- 97
- Points
- 143

Dear friends, thank you so much for your attention and suggestions!
You are perfectly right; sadly, I had an attack of laziness. It would have been better to dig between the holes and insert a small wooden disc. Unfortunately, now it is no longer possible to go back because the gluing is firm and I fear ruining the thin layer of planking made in the "clinker" way.
But a layer of graphite already improves the image, and the rope joining the catheads to the anchor ring will hide much of the fake pulleys:
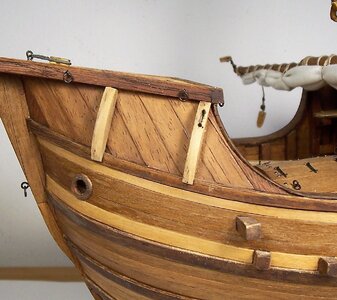
This image dates back to the time when I was hesitant about two or four catheads; the anterior crane is not glued, just stuck.
See you soon!
Rodolfo
You are perfectly right; sadly, I had an attack of laziness. It would have been better to dig between the holes and insert a small wooden disc. Unfortunately, now it is no longer possible to go back because the gluing is firm and I fear ruining the thin layer of planking made in the "clinker" way.
But a layer of graphite already improves the image, and the rope joining the catheads to the anchor ring will hide much of the fake pulleys:

This image dates back to the time when I was hesitant about two or four catheads; the anterior crane is not glued, just stuck.
See you soon!
Rodolfo
- Joined
- Feb 15, 2021
- Messages
- 97
- Points
- 143

Greetings to all friends of the forum!
Finally starting to get the first moving rigging in place. The ropes have been tensioned :
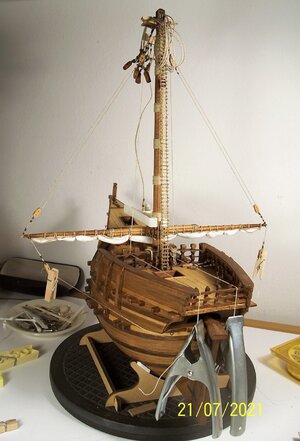
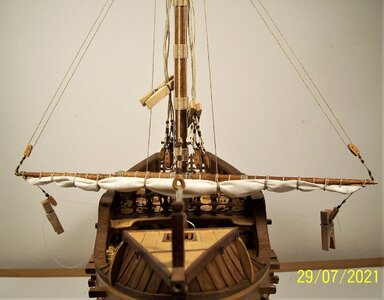
and then smeared with thinned vinyl glue using a brush.
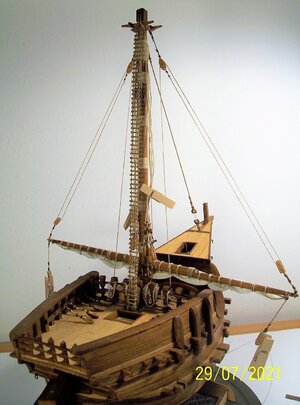
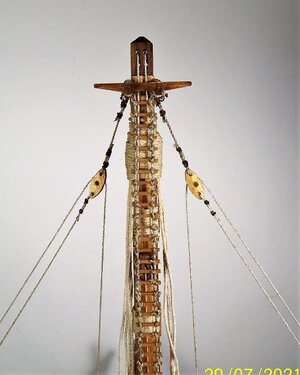
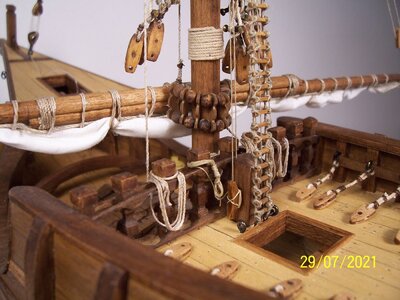
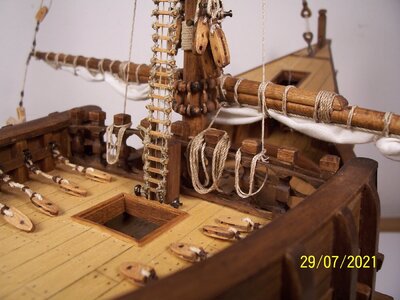
The next step will be the three rails of the forecastle, which looks quite laborious.
See you soon and good work everyone!
Rodolfo
Finally starting to get the first moving rigging in place. The ropes have been tensioned :


and then smeared with thinned vinyl glue using a brush.


The next step will be the three rails of the forecastle, which looks quite laborious.
See you soon and good work everyone!
Rodolfo
- Joined
- Feb 15, 2021
- Messages
- 97
- Points
- 143

Thank you very much Heinrich for your benevolent comments; I hope to continue so...
The bow rails of the AMATI instructions are very basic and linear: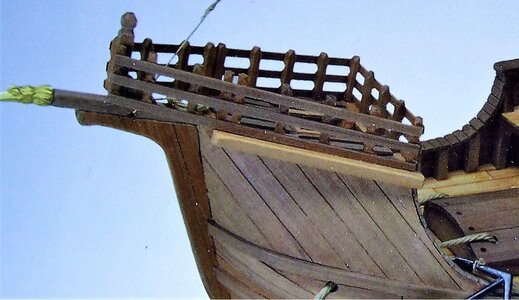
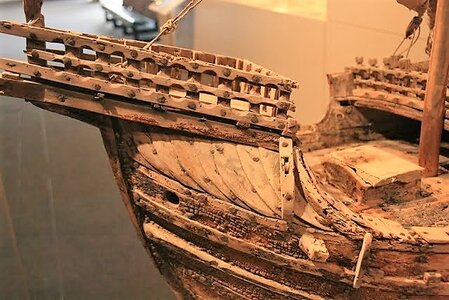
On the contrary, the Nao of Matarò has them much more refined: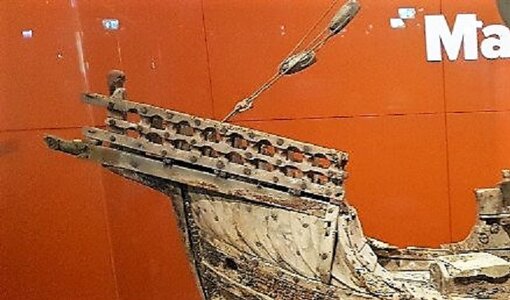
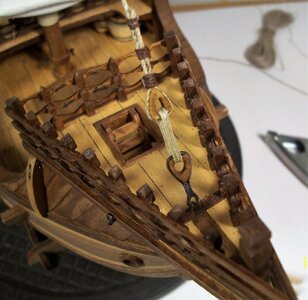
The work continues therefore trying to give the effect of the Spanish model. The first thing to do is to cut to size and shape the supports; the corner ones are 4x4 mm (or even 5x5) and the others 3x3: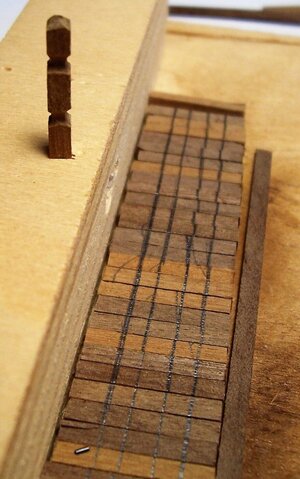
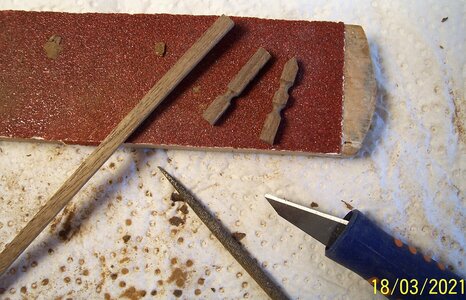
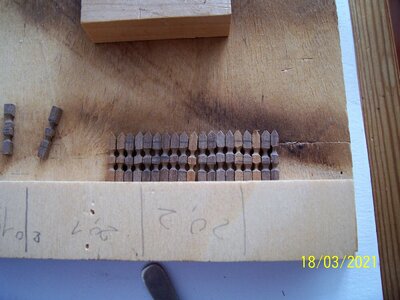
Then we choose the ones that look the most similar to each other and glue them to the laths; after that, we glue the three sections together, after shaping the ones that end in a bow tip: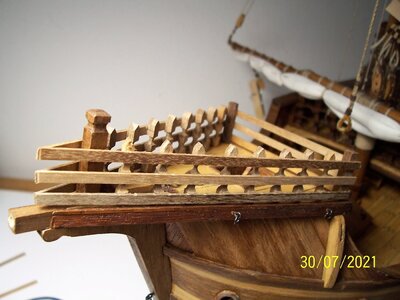 Here it is only leaning.
We shape the strips with a round and half-round file: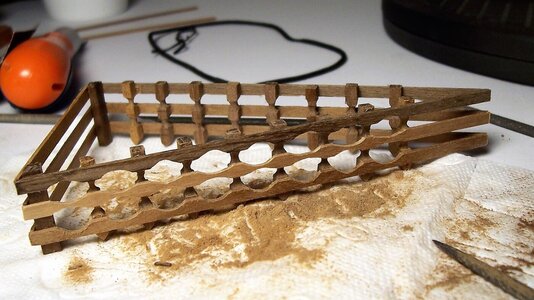
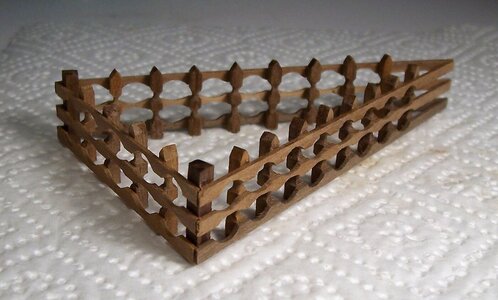
Varnish with a walnut impregnating agent, let it dry, and finally glue the rails to the deck:
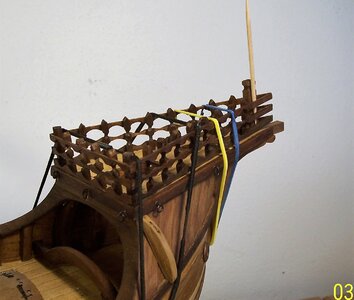
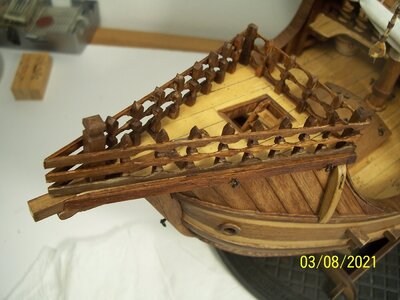
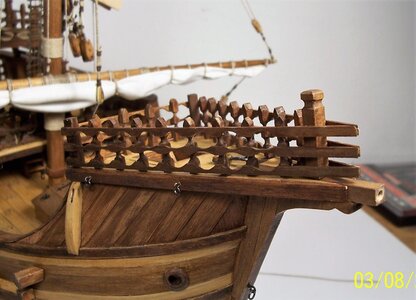
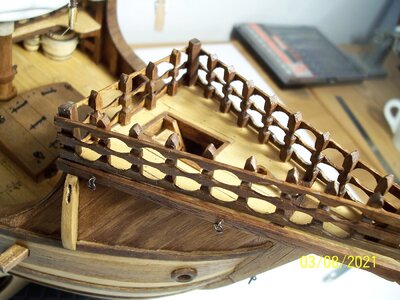
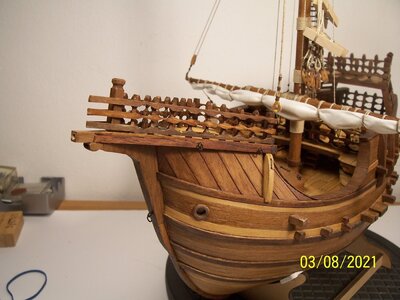
Next step: fixing the mainstay. See you soon!
Rodolfo
The bow rails of the AMATI instructions are very basic and linear:

On the contrary, the Nao of Matarò has them much more refined:

The work continues therefore trying to give the effect of the Spanish model. The first thing to do is to cut to size and shape the supports; the corner ones are 4x4 mm (or even 5x5) and the others 3x3:


Then we choose the ones that look the most similar to each other and glue them to the laths; after that, we glue the three sections together, after shaping the ones that end in a bow tip:
 Here it is only leaning.
We shape the strips with a round and half-round file:

Varnish with a walnut impregnating agent, let it dry, and finally glue the rails to the deck:


Next step: fixing the mainstay. See you soon!
Rodolfo
- Joined
- Feb 15, 2021
- Messages
- 97
- Points
- 143

- Joined
- Jan 9, 2020
- Messages
- 10,566
- Points
- 938

Your rigging is really something special Rodolfo. I particularly like the atmosphere that you are conveying in the finishing of the model. It looks "weathered" without being weathered - but always truly authentic and life-like. I hope that makes sense.

