I am a little behind on your build but it’s always a pleasure to follow your excellent, informative work. The floral decoration with the laser burner is most impressive. I think I need to learn more about laser burners  .
.
-

Win a Free Custom Engraved Brass Coin!!!
As a way to introduce our brass coins to the community, we will raffle off a free coin during the month of August. Follow link ABOVE for instructions for entering.
-

PRE-ORDER SHIPS IN SCALE TODAY!
The beloved Ships in Scale Magazine is back and charting a new course for 2026!
Discover new skills, new techniques, and new inspirations in every issue.
NOTE THAT OUR FIRST ISSUE WILL BE JAN/FEB 2026
You are using an out of date browser. It may not display this or other websites correctly.
You should upgrade or use an alternative browser.
You should upgrade or use an alternative browser.
POF L'Amarante Corvette de 12 canons 1744 1:36 (Ancre Monograph- Gérard Delacroix) By Shota
- Joined
- Apr 20, 2020
- Messages
- 6,241
- Points
- 738

Dear RogerI am a little behind on your build but it’s always a pleasure to follow your excellent, informative work. The floral decoration with the laser burner is most impressive. I think I need to learn more about laser burners.
thanks for your kind words and compliments
I will help you with a great pleasure
- Joined
- Apr 20, 2020
- Messages
- 6,241
- Points
- 738

thanks for your kind words and tipsI think you should take a look on Bill Short on MSW, he also sells here a PDF on how he does the carving. It's simpel and with a little practice you can make wonderful things and in combination with your laser tool! It can be even more.
can you give me a link to Bill Short work on MSW,
- Joined
- Aug 8, 2019
- Messages
- 5,568
- Points
- 738

Reading this and looking to tips from Janos in the carving section is for free. And rotary tools look for these:
Purchased shortly ago / sthg new in your workshop -> present it here
@donfarr https://nl.aliexpress.com/item/33031487878.html?spm=a2g0s.8937460.0.0.39362e0eTovQRR https://nl.aliexpress.com/item/32991354197.html?spm=a2g0s.8937460.0.0.39362e0eTovQRR plus...
shipsofscale.com
- Joined
- Apr 20, 2020
- Messages
- 6,241
- Points
- 738

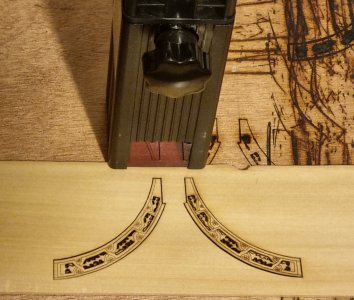
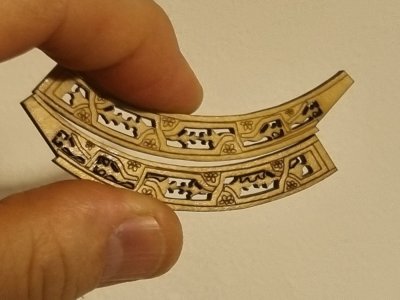
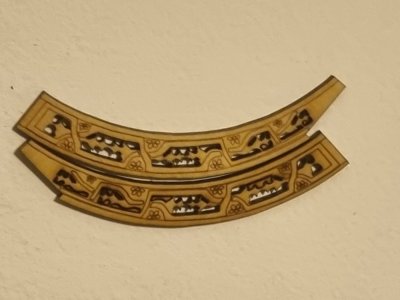
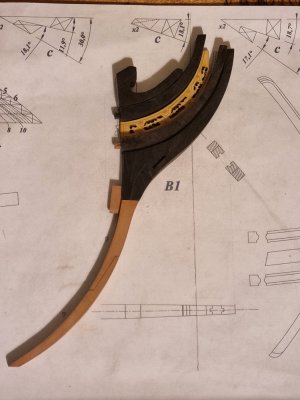
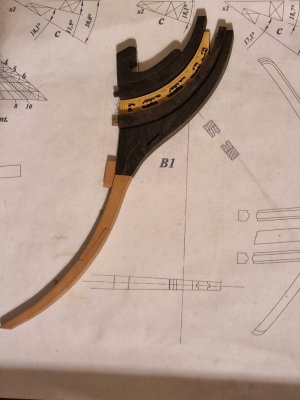
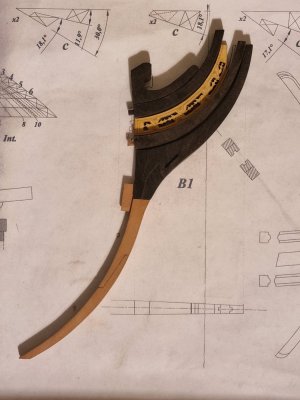
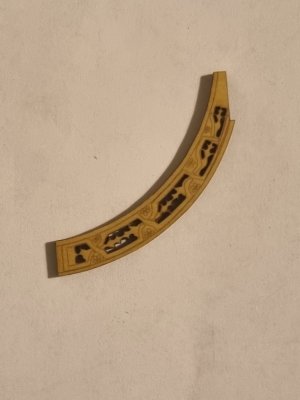
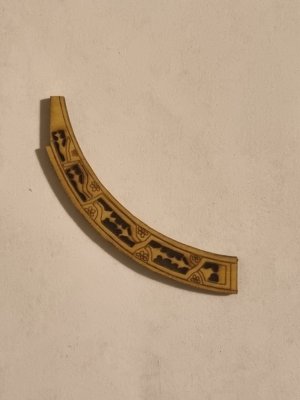
Good evening dear friends
Tonight I applied the process of experimenting and learning from yesterday on a boxwood board.
I made two opposite cuts of the motif with a thickness of 1.6 mm and connected them so that both sides came out the same.
I will let you get an impression of the intermediate result.
in the coming days I will practice hand carving the flower decorations and the lines of the wreaths.
Good night and hope you like the results, any instructive/advisory comments will be gladly accepted


- Joined
- Mar 1, 2022
- Messages
- 684
- Points
- 308

Brilliant!Good evening dear friends
Tonight I applied the process of experimenting and learning from yesterday on a boxwood board.
I made two opposite cuts of the motif with a thickness of 1.6 mm and connected them so that both sides came out the same.
I will let you get an impression of the intermediate result.
in the coming days I will practice hand carving the flower decorations and the lines of the wreaths.
Good night and hope you like the results, any instructive/advisory comments will be gladly accepted
View attachment 471637View attachment 471638View attachment 471639View attachment 471640View attachment 471641View attachment 471642
- Joined
- Jul 18, 2024
- Messages
- 475
- Points
- 323

Beautiful work. And inspires me to do more with my laser cutter.
About soot: I read somewhere that wetting the wood helps. But be sure to do some tests, as I can see a risk at warping.
About soot: I read somewhere that wetting the wood helps. But be sure to do some tests, as I can see a risk at warping.
- Joined
- Apr 20, 2020
- Messages
- 6,241
- Points
- 738

Witaj
Podoba mi się Shoto trochę bym dopieścił pilniczkami ale że ty potrafisz rzeźbić to spróbuj. Pozdrawiam Mirek
Brilliant!
Thank you very much, dear friends, for the praise and words of encouragementBeautiful work. And inspires me to do more with my laser cutter.
About soot: I read somewhere that wetting the wood helps. But be sure to do some tests, as I can see a risk at warping.
Indeed a damp wipe helps in cleaning the soot
- Joined
- Apr 20, 2020
- Messages
- 6,241
- Points
- 738

Good evening dear friends
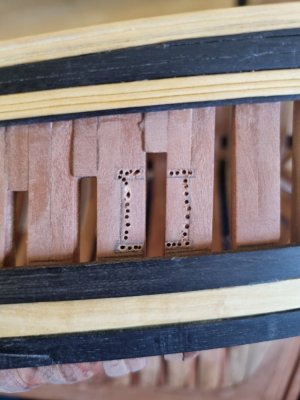
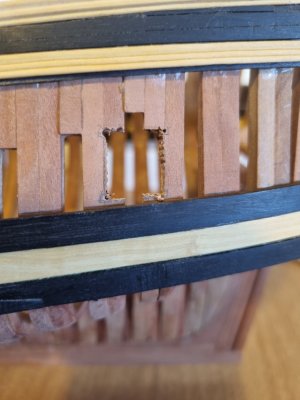
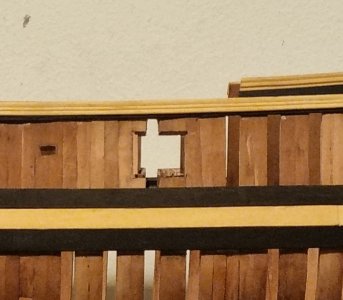
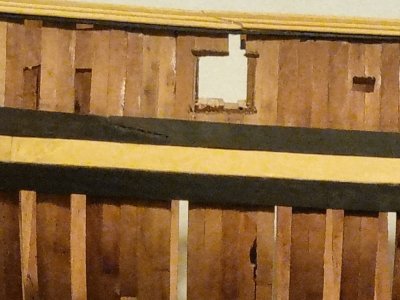
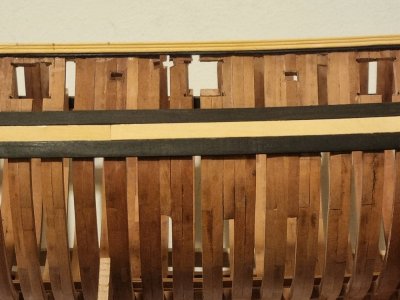
In the last few days I started working on the hatches of the 12 Cannons windows add the drainage.
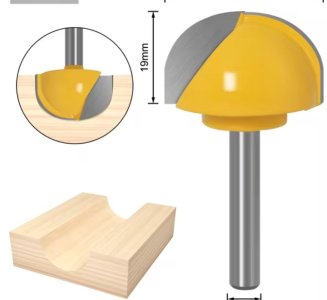
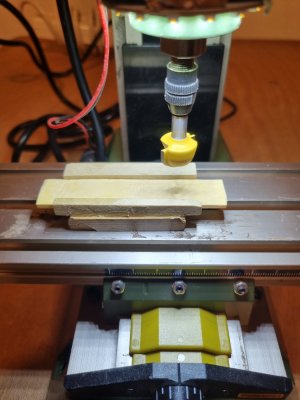
it's the first step in the process of creating the openings requires more gentle and smooth sanding of the openings as well as the creation of the slightly concave window base. For that, I purchased a matching milling had


Good night and peace everyone
In the last few days I started working on the hatches of the 12 Cannons windows add the drainage.
it's the first step in the process of creating the openings requires more gentle and smooth sanding of the openings as well as the creation of the slightly concave window base. For that, I purchased a matching milling had


Good night and peace everyone
Last edited:
True storyBrilliant!
I'm curious what the result of that 'heavy half sphere' will be, Shota. But just like your ‘laser carvings’, you'll have thought about this.Good evening dear friends
In the last few days I started working on the hatches of the 12 Cannons windows add the drainage.
it's the first step in the process of creating the openings requires more gentle and smooth sanding of the openings as well as the creation of the slightly concave window base. For that, I purchased a matching milling had
View attachment 472588View attachment 472590View attachment 472593View attachment 472594View attachment 472595View attachment 472598View attachment 472596View attachment 472597
Good night and peace everyone
Regards, Peter
- Joined
- Apr 20, 2020
- Messages
- 6,241
- Points
- 738

True story
thank you very much my dear friends for your kind words, I'm doing my bestI'm curious what the result of that 'heavy half sphere' will be, Shota. But just like your ‘laser carvings’, you'll have thought about this.
Regards, Peter
- Joined
- Apr 20, 2020
- Messages
- 6,241
- Points
- 738

Good evening dear friends
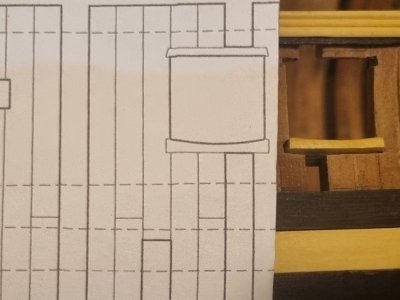
In the last few days I continued with the experiments and working on the windows of the cannon openings.
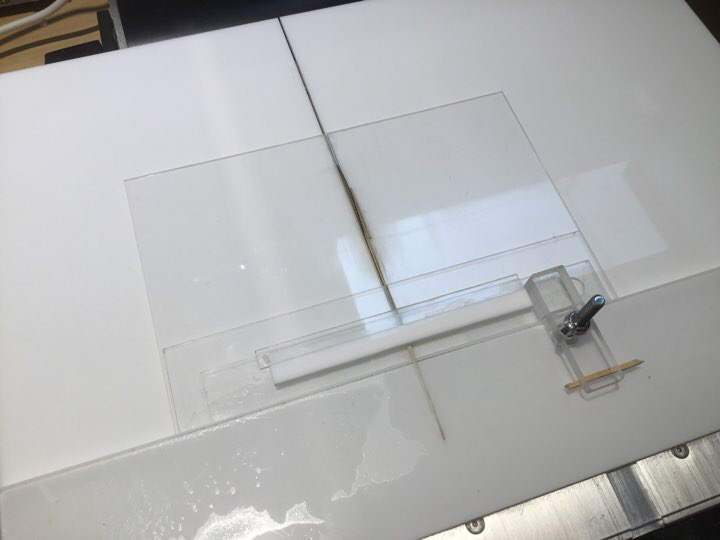
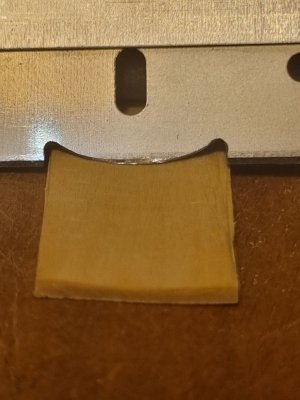
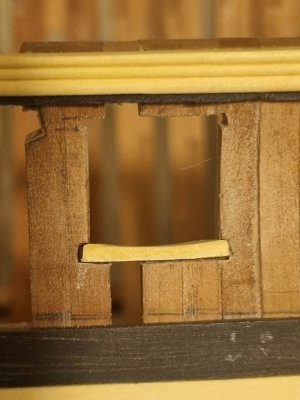
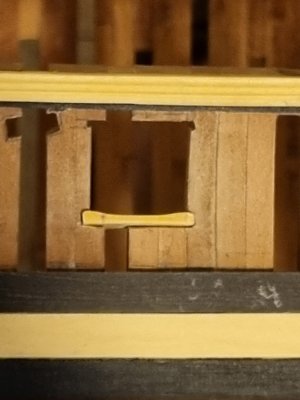
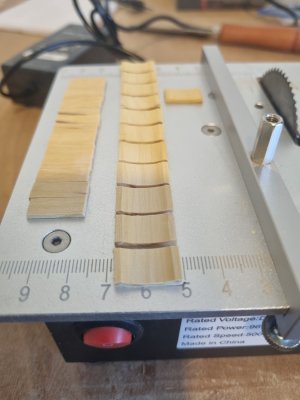
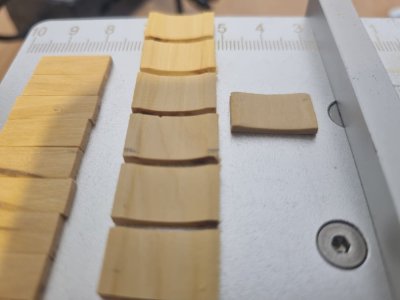
First I performed two processes at the same time to find the best process for me for the windowsill. The first I sharpened and created a curved razor and the second I examined the results of the special nibbling. After two attempts I chose the window sill that was made with the chisel.
In the picture of the parts on the saw, the only window sill on the right is the one that was made by hand.
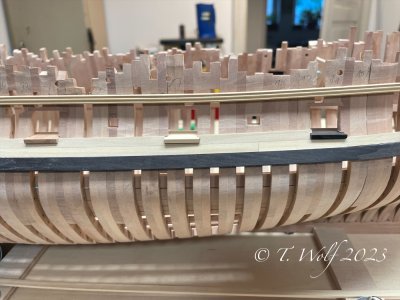
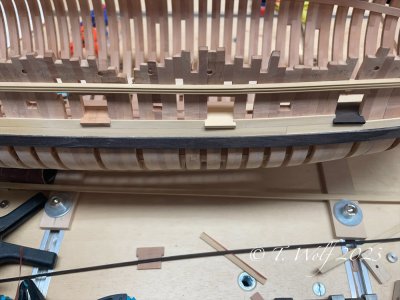
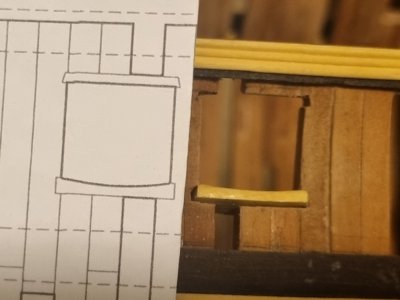
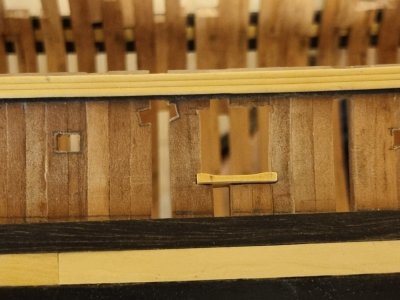
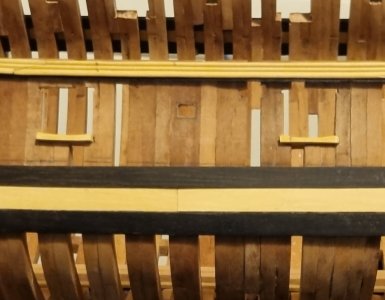
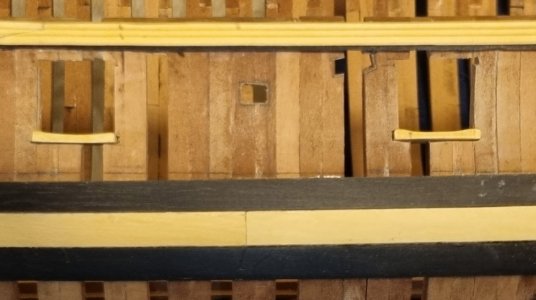
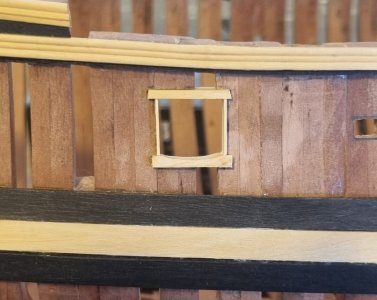
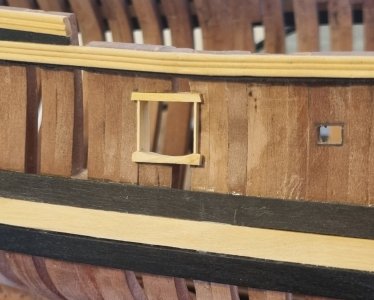
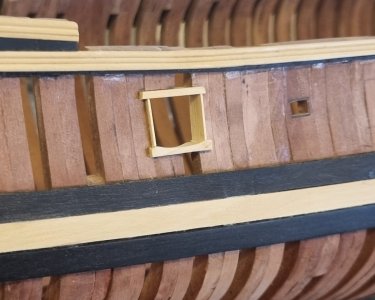
Later I decided to build the window frames from boxwood while the planking around them will be from pear wood. I also decided to give a personal interpretation and add two thin side panels with a thickness of 0.45 mm to the window frame.
For now I have installed 6 window sills and I made one window in its entirety, I admit that this strengthened my choice of design henna and the combination of the different shades of the trees.
Attaches documents documenting the steps in the work process and the intermediate result.
I wish you all a fun and safe weekend


Those ports are looking good Shota, I like the way you approached it. As Peter @Peter Voogt mentioned, you have thought about this and always come up with a good solution.
Stay safe.
Stay safe.
- Joined
- Apr 20, 2020
- Messages
- 6,241
- Points
- 738

it's a very kind words, thanks RogerThose ports are looking good Shota, I like the way you approached it. As Peter @Peter Voogt mentioned, you have thought about this and always come up with a good solution.
Stay safe.
- Joined
- Apr 20, 2020
- Messages
- 6,241
- Points
- 738

as you know, I'm always checking your magnificent modelsVery nice result, I can still remember the process at La Palme. I filed a piece of wood to size and covered it with sandpaper. I also had three different window sills to choose from, but I decided to go with the pear-shaped version.
View attachment 473772
View attachment 473773
from left to right: pear, boxwood, ebony.
it's helping me a lot


