-

Win a Free Custom Engraved Brass Coin!!!
As a way to introduce our brass coins to the community, we will raffle off a free coin during the month of August. Follow link ABOVE for instructions for entering.
-

PRE-ORDER SHIPS IN SCALE TODAY!
The beloved Ships in Scale Magazine is back and charting a new course for 2026!
Discover new skills, new techniques, and new inspirations in every issue.
NOTE THAT OUR FIRST ISSUE WILL BE JAN/FEB 2026
You are using an out of date browser. It may not display this or other websites correctly.
You should upgrade or use an alternative browser.
You should upgrade or use an alternative browser.
Saint-Philippe 1693-POF to the Monograph by Jean-Claude Lemineur by NMBrook-1/36
- Thread starter NMBROOK
- Start date
- Watchers 81
-
- Tags
- ancre saint-philippe 1693
Very impressive Nigel! I’m amazed with every post.
Thankyou very much Heinrich and Mike
Kind Regards
Nigel
Kind Regards
Nigel
The initial section of the jig is now complete.The aft end piece will be sawn off later when this fits into the full length jig.The square ends allow me to rotate onto all four sides to ease working.
The frames are glued and screwed in place apart from the two furthest aft.These will be removed and used as the starting block for assembling the next group of frames.
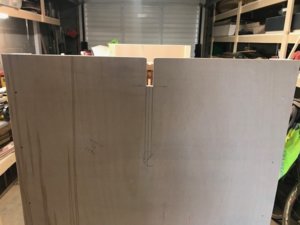
The slot in the rear plate of the jig will be to support the keel in the correct place when doing trial assemblies.There are notches in the deadwood to take the frames,the positions will be scribed with the keel trial fitted to guarantee everything lines up.
Last picture is a "money shot" I tried to capture the fact that jig slot,slots in the base of the frames and gap between hawse timbers all line up perfectly to take the keel.Not so easy to capture on camera.I am pleasantly relieved everything has worked as intended.
Kind Regards
Nigel
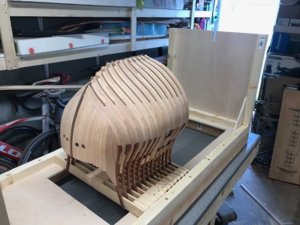
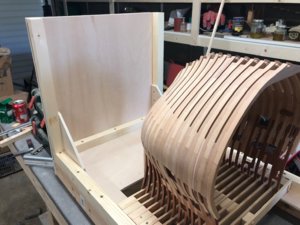
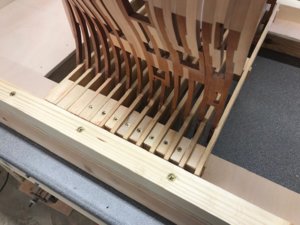
The frames are glued and screwed in place apart from the two furthest aft.These will be removed and used as the starting block for assembling the next group of frames.
The slot in the rear plate of the jig will be to support the keel in the correct place when doing trial assemblies.There are notches in the deadwood to take the frames,the positions will be scribed with the keel trial fitted to guarantee everything lines up.
Last picture is a "money shot"
 I tried to capture the fact that jig slot,slots in the base of the frames and gap between hawse timbers all line up perfectly to take the keel.Not so easy to capture on camera.I am pleasantly relieved everything has worked as intended.
Kind Regards
Nigel


wow.. that is excellent workmanship. I hope to be able to build like that one day
Hi Nigel,
I see the Corona virus has made you more productive in the workshop. Great stuff.
I see the Corona virus has made you more productive in the workshop. Great stuff.
Hi Nigel, your building jig already is more refined than many kits. Just amazing work.
NIGEL I AGREE WITH MARRATEN THE JIG ITSELF IS A WONDER< HOW DO YOU DO THIS KIND OFWORK LIKE AN ARTIST FROM THE RENASONCE< MASTERFUL IN ALL ASPECTS. Don
Hallo Nigel my friend,
please do not reduce the size of the photos before uploading them - would be great to see your work "FULL SIZE"
please do not reduce the size of the photos before uploading them - would be great to see your work "FULL SIZE"
Thanks everyone for your comments.Regarding images I will look at options when I do my next update.I do not have much interest in Photography so use my work iPhone to take pictures.I am mindful not to take the mick when it comes to volume of data I send.Invariably I email the pics to my home email from work phone.I no longer have a personal mobile.
Kind Regards
Nigel
Kind Regards
Nigel
Rabbet time
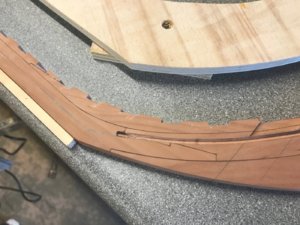
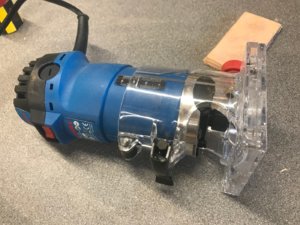
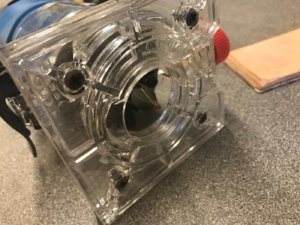
I bought a laminate trimmer in one of the Aldi offers solely for this purpose.The rabbet will be somewhat simplified in the horizontal(ish) area of the keel.This is due to the fact I will be fitting a few planks either side of the keel on the lower hull.Personally I feel no need to go the pain of creating the transitions of this groove when a plank edge will cover it given the rabbet is over 1.5 metres long.
On to cutting the curved section at the front.Firstly I bought a Trend 60 degree V bit.This nearly cost as much as the trimmer
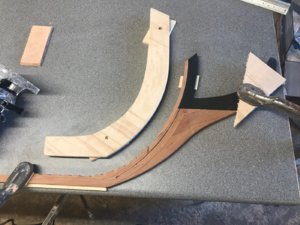
I next traced the line of the rabbet from the plan and then marked a new curve half of the width of the trimmers base inside the rabbet line.This was then glued to some scrap ply and the shape cut out.
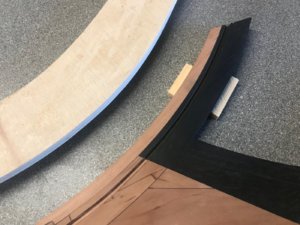
This template was then screwed to the bench and the keel clamped down to the bench with the correct dimensional relationship between them.The rabbet was then cut very slowly ensuring the trimmer base was hard against the template at all times.I didn't go all the way to the main Rabbet.The last bit will be cut with a scalpel to avoid any mishaps.The pictures,I feel,are fairly self explanatory.
Kind Regards
Nigel


Very clean, top work. Cut the rabbet is a heartbeat-action. You can kill a lot of hours of work with one little move. I cutted my rabbet with a blade, but this wasn´t the best option. Or maybe i am not the best craftsman for this option. Whatever, the next projct will be milled as well.
Difficult is now the crossing between horizontal and vertical. Difficult because you have to follow with the clean sharp edges. To continue with them on the crossing is the art in my opinion. But with your skill, i have no doubt that it will look great like the rest of your fantastic building.
Difficult is now the crossing between horizontal and vertical. Difficult because you have to follow with the clean sharp edges. To continue with them on the crossing is the art in my opinion. But with your skill, i have no doubt that it will look great like the rest of your fantastic building.
Smart way to cut the rabbet. Saves you a week of work.
One of the examples of the perfect craftsmanship and obviously talent! This is really difficult framing, and you made it easy!!! Applaud laud!
Thankyou Jim and Happy Birthday mate


All the best
Nigel


All the best
Nigel
Thank you very much, my friend, much appreciated!!!Thankyou Jim and Happy Birthday mate
All the best
Nigel
Rough faired?!?! I've never seen a model so beautifully shaped. Nigel, there is some force at work here, besides your patience. I understand you are not willing to share that force, that's OK. In the meantime, I'll crawl back to my hole and never surface again. Happy birthday Jim!Thankyou Oliver and Maarten
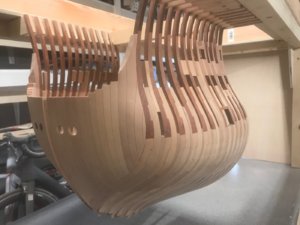
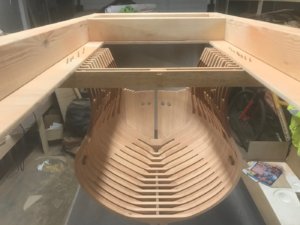
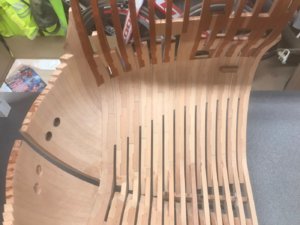
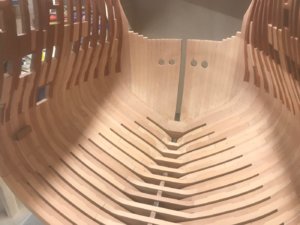
I cut out the crossmembers between the frames to gain access to the inside.The inside shape has been rough faired.I am going to order a shaped cabinet scraper to refine the lines.
Kind Regards
Nigel
View attachment 141621View attachment 141622View attachment 141623View attachment 141624


