-

Win a Free Custom Engraved Brass Coin!!!
As a way to introduce our brass coins to the community, we will raffle off a free coin during the month of August. Follow link ABOVE for instructions for entering.
-

PRE-ORDER SHIPS IN SCALE TODAY!
The beloved Ships in Scale Magazine is back and charting a new course for 2026!
Discover new skills, new techniques, and new inspirations in every issue.
NOTE THAT OUR FIRST ISSUE WILL BE JAN/FEB 2026
You are using an out of date browser. It may not display this or other websites correctly.
You should upgrade or use an alternative browser.
You should upgrade or use an alternative browser.
Soleil Royal- Re-engineering Artesania Latina's New Kit by NMBROOK
I love your approach to this model. Are you planning to improve the frieze decor on the upper hull?Hi All
I was determined not to buy any more kits as I have enough projects and pastimes to keep me going beyond retirement. However this release changed all that, I simply HAD to build it. Not because it is an amazing model straight out of the box but more a case that I realised the potential of the kit.
The kit supplied decoration has far more than a passing resemblance to the late Michel Saunier's model.His build is shown on MSW and Gerard Delecroix's forum.The quality of the castings is far greater than the one's you get in a current Mantua group model.It also includes some very fine photo etch details for bow and stern.
The biggest issue is that whilst the bow and stern are done well, everything in-between needs a redesign if you want a model that follow's French practice of the period. The gunport spacings are wrong, the deck Sheer is wrong and all the decks are enclosed on their ends, these would have most likely been open.
When the marketing video first appeared it stated 1/65, now the box and catalogue state 1/72?? So which is it? Working from the height between decks, this works out at 1/65.You cannot work from the model's length, the design for some reason has been shortened and the model is far too short for either scale.Given that the original is stated as having a length (gun deck) of 160 French feet, this model is at least 100mm too short.
It is my intention to redesign the kit's false keel to make the model the correct length and space out the kit bulkheads to compensate.The last few bulkheads at bow and stern will remain stock spacing as not to interfere with the kit decor.I am hoping that this "stretch" shall maintain the hull profile and just make the transition of curves a little more gradual.
I have already started to draw out the revised side view of the ship and have enough information established to start on the keel.The picture below shows the kit keel dry assembled on top of my work in progress drawing.In the next post I will show the extended version
Kind Regards
Nigel
View attachment 300503View attachment 300505
Bill
I imagine he'd have to replace some of the metal castings in order to make any improvements in detail, and that would be a lot of carving and small piece work. The casting s for this model look pretty good, and all you probably have to do is to add scratches on the plain metal surfaces to simulate wood grain texture in order to blend them in with the rest of the model and fill in some seam gaps. This model is splendid as-built right out of the box, but Nigel will add things to make it glorious.I love your approach to this model. Are you planning to improve the frieze decor on the upper hull?
Bill
I love your approach to this model. Are you planning to improve the frieze decor on the upper hull?
Bill
Thanks Bill
There is no frieze detail included in the kit for the upper hull. I will try to emulate Berain's artwork the best as is possible within the constraints of the Taffrail height of the kit stern
Regards
Nigel
Work continues on the outside.Lower main wale and the final planking above have beed added to the Stbd side.I have to had "dig out', remake and replace the forward section of the wale as I wasn't happy with the symmetry. Now all behind me thankfully
The penultimate layer of planking has been fitted on the port side. This boxwood will tie in with my port lids which will be blue outside and box inside then a further layer of blue inside with boxwood frame to replicate Berain's artwork.
Kind Regards
Nigel
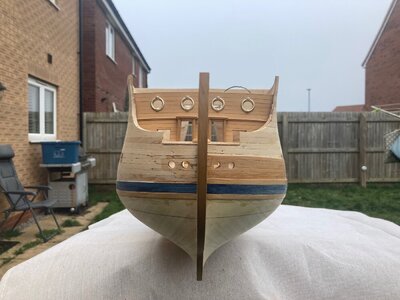
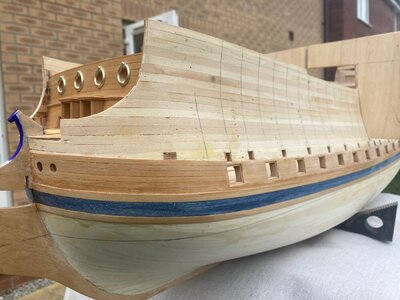
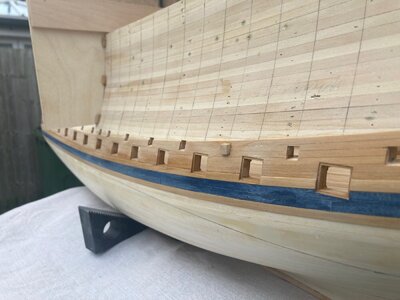
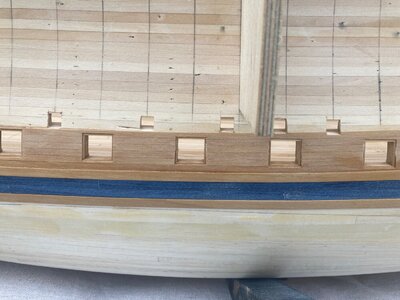
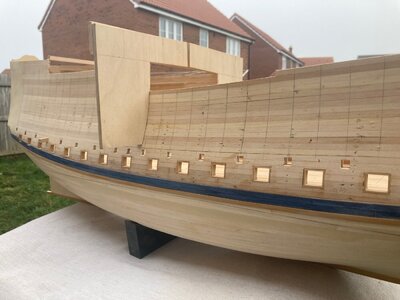
The penultimate layer of planking has been fitted on the port side. This boxwood will tie in with my port lids which will be blue outside and box inside then a further layer of blue inside with boxwood frame to replicate Berain's artwork.
Kind Regards
Nigel


The cloth on the trash bin is a nice improvement... Oh, and the modeling is brilliant too!
So, in the final sheathing there will be very little projection of the boxwood wales above the blue planking; a very subtle step.
So, in the final sheathing there will be very little projection of the boxwood wales above the blue planking; a very subtle step.
Yes Marc, 0.5mm step.The bottom wale to the lower hull is flush. The projection of the Wales on kits is nearly always over exaggerated. The steps should be subtle on French ships.
Last edited:
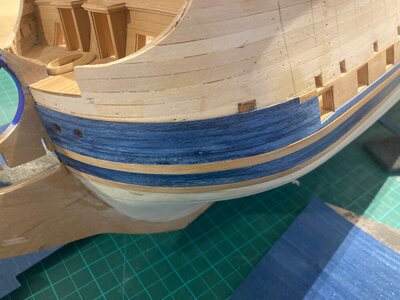
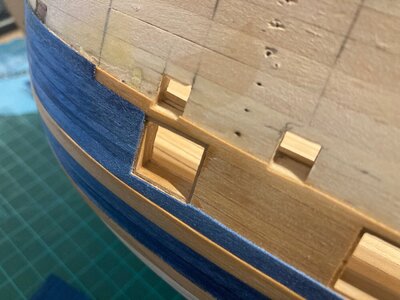
A further smaller update, the bow area has the final layer of planking up to the next wale. this is as far as I am going with the blue planking for now, just need to get the other side to the same stage. Reasoning is I need to finalise the area around the hawse holes before I fit the first two Beak grating support frames, which in turn have to be fitted before I complete the prow details.You get the idea, very much chicken and egg in this build.
Kind Regards
Nigel
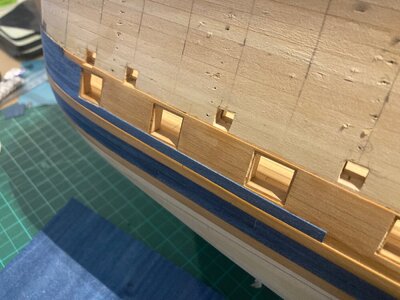
Kind Regards
Nigel


- Joined
- Oct 25, 2022
- Messages
- 294
- Points
- 128

Nice progress, I'd like to see what your blue SR will look like in the end (mine will have a white hull).
Hi Nigel,
Very immaculate work as allways. Why are you using nice boxwood strips if you cover them with your blue coloured strips anyway?
Very immaculate work as allways. Why are you using nice boxwood strips if you cover them with your blue coloured strips anyway?
Cool - that’s an interesting detail concerning the LMW.Yes Marc, 0.5mm step.The bottom wale to the lower hull is flush. The projection of the Wales on kits is nearly always over exaggerated. The steps should be subtle on French ships.
Thankyou Maarten.
Simple, I have loads in my stash
Kind Regards
Nigel
Simple, I have loads in my stash
Kind Regards
Nigel
With work out of the way until the third of January, I have two weeks minus celebrations to work on my model. I do have to fit a brand new inlet manifold assembly to my Marc CLK but hope that won't take too long
My main focus is to sort the "ends" out over the holidays. I need to fit the lower balcony to finish the counter planking but first have to fit the rear etched panel, which means I need to install the timbers between the windows, you get the idea.
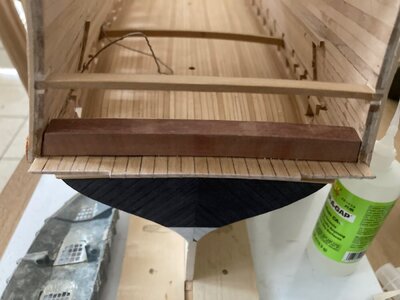
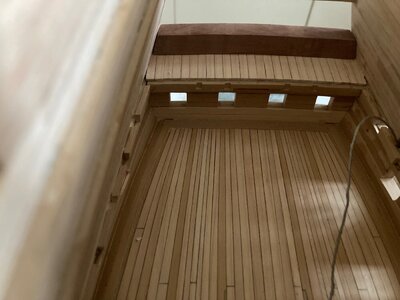
I first installed a short section of deck planking that forms the balcony.The internal deck planking will butt up to this when I get to that stage. The join will be covered eventually by Pear veneer Parquet flooring.
I then fitted a Pear blank, parallelogram in section which will be covered in veneer and form the storage/window seats at the rear of the cabin.I have also painted the etch panel and the tailboard etch filigree ( this is two pieces joined back to back). Painting looks rough in macro but good in normal viewing.The area under the windows will have a fine boxwood moulding and vertical blue planking below it.
Kind Regards
Nigel
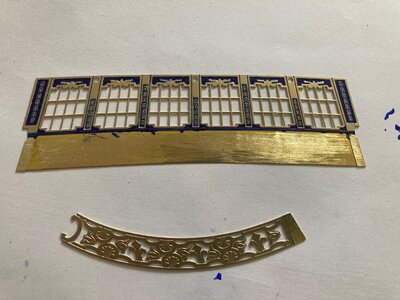
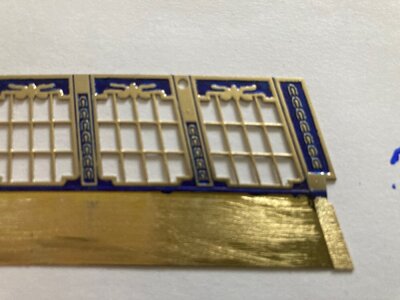
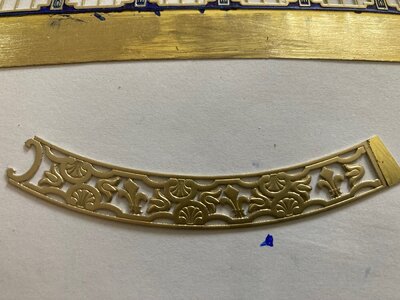


This phase raises an interesting series of questions for me and I don’t know the correct answers: is the short planking of the balconies merely an extension of the deck planking on that level? If so, should it also reflect the tapering of the deck planking, as it comes aft? What would be the structural argument against balcony deck planking that runs athwartship?
This phase raises an interesting series of questions for me and I don’t know the correct answers: is the short planking of the balconies merely an extension of the deck planking on that level? If so, should it also reflect the tapering of the deck planking, as it comes aft? What would be the structural argument against balcony deck planking that runs athwartship?
Marc, it is my belief that the balconies are "sprung" i.e. the deck planking runs through and is a cantilever. The total thickness of balcony deck to the underside of the counter equates to 2mm, 130mm in full-size, which would give little room for internal structure if the planks ran athwartship.
Very observant, ideally these planks would follow the taper but I would need to plank the next deck to do that convincingly and the order of build would become even more complex. It is edging on the ridiculous now
Kind Regards
Nigel
So, it must simply be a light framework that the sprung planking nails to and which is supported from below by corbels and statuary.
Yes, I think the upper balconies are different, the large ness would allow transverse planking of the deck. On Gino's model you can see that the lower balcony is false whereas the upper can be used.
Before I fit the vertical timbers that go inside between the windows I need to clad the pear block.My first section is made from 2 layers of the white Tulip veneer, the top layer is cut to mimic the panelled structure.
This was sprayed with Flat Clear Tamiya Acrylic Laquer. This stuff is crystal clear so won't make the white colour yellow.
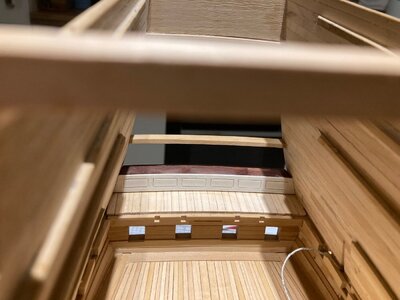
Final picture is the piece glued in place. the gap underneath is the thickness of the Pear veneer so my Parquet pieces can slip under.
Kind Regards
Nigel
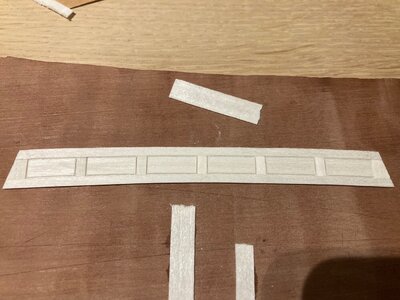
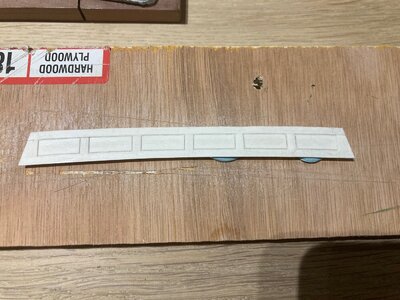
This was sprayed with Flat Clear Tamiya Acrylic Laquer. This stuff is crystal clear so won't make the white colour yellow.
Final picture is the piece glued in place. the gap underneath is the thickness of the Pear veneer so my Parquet pieces can slip under.
Kind Regards
Nigel


