The Naval Cutter ALERT- 1777, POF by Jimsky

Thanks for the information. The CAF stove is the wrong scale I’m trying to find 1/64. I did find a stove that might work for my HMS Fly here
1/64 Stove
Sorry Jim for being off topic
To order the correct stove for your Fly you should also check the period and the size of stove to be correct for the Fly
Here fore this topic may help also:
 
Sorry Jim for being off topic
To order the correct stove for your Fly you should also check the period and the size of stove to be correct for the Fly
Here fore this topic may help also:
There is no such thing as off-topic here, this is exactly the thread I was suggesting Chris @TechTrek find and read. So... thank you!!
 
Meanwhile... (this what I call in-between the main build). I thought it would be interesting to change the routine, I would still need to do it for the kit so...

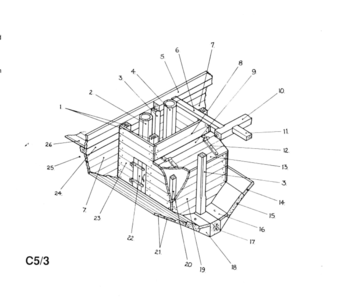
Here is the part from the internal hull section, which we will be building next year. The pump well and shot locker. Below is the image for reference from the AOTS book. This is an isometric projection in scale 1:48. I think, the image definitely has some flaws, take a look at the door from the pump well. How will it open, unless it opens 'inside'?
1609381012039.png

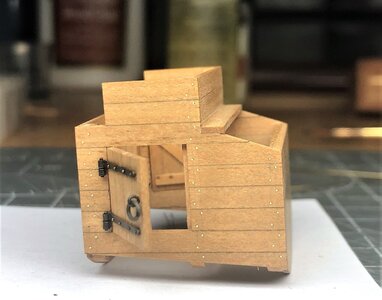
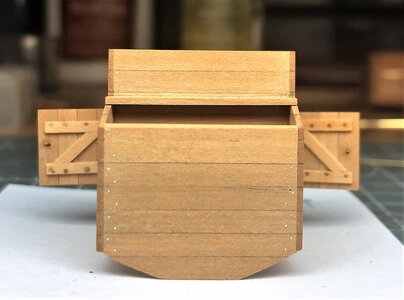
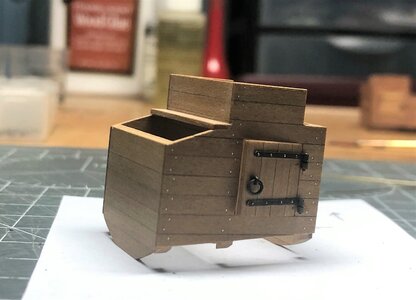
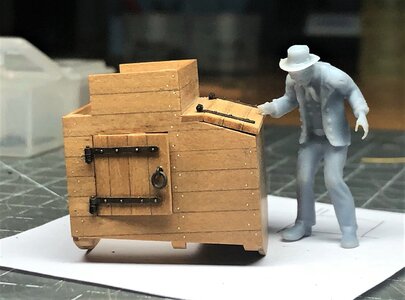
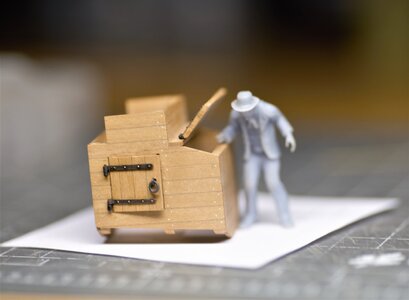
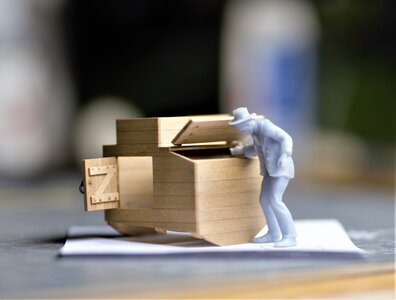
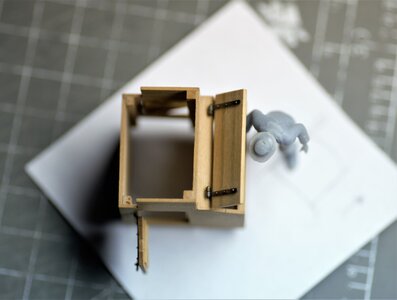
I will show the pump well assembly from the kit once we get to this point, today, just for fun a will show this little project a cratch build pump well. This will include woodwork and metalsmith. The idea to make functional doors and show nails.

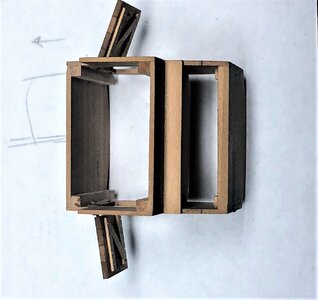
I took the templates from our kit and compared them to plans from the book, and come on with my own design. I use SwissPear and Pearwood as the main timber.
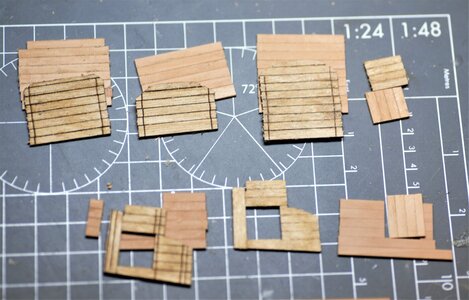
600_1233.jpg

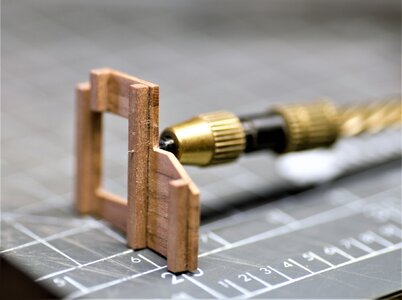
Then, I build sides. Each plank is 3mm wide, the same as from our kit. 0.23mm drill bit used to make holes for future nails (30 gouges brass wire, about 0.24mm)
600_1249.jpg600_1250 (2).jpg

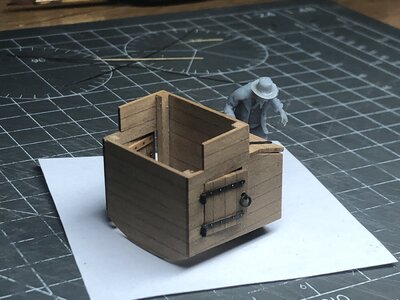
Next, all the internal dividers and glue everything together. To imitate nails a brass wire was inserted and cut flush.
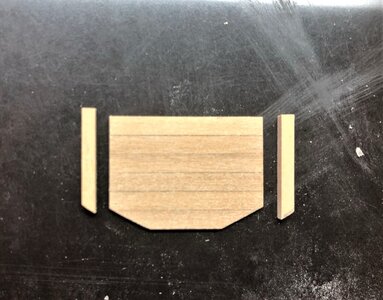
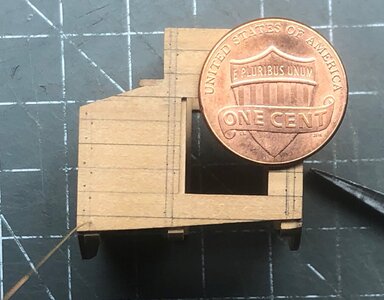
IMG_1790.JPEGIMG_1792.JPEG


IMG_1788.JPEG

IMG_1789.JPEG
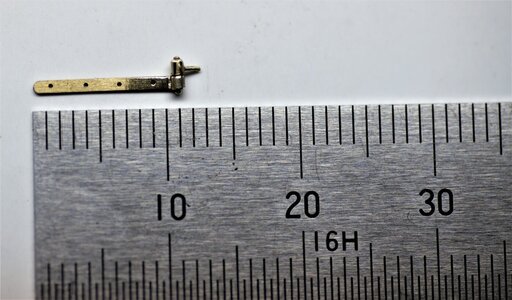
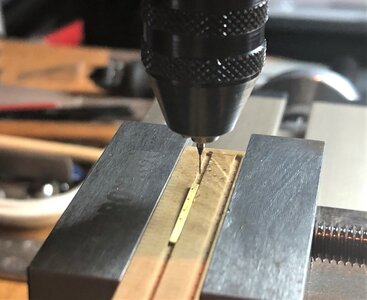
A much more exciting and at the same time challenging work was the metalsmith- making hinges. A strip brass 0.9mm wide and 0.3mm thick predrilled using the mill and 0.25mm drill bit. This time I achieved better results (I think ;) ) compared to my test, the holes are straight, for the most part.

IMG_1776.JPEG

1mm brass tubing cut into small pieces, then I will solder to this strip to make individuals hinges. I made the jig to make all the cut pieces the same
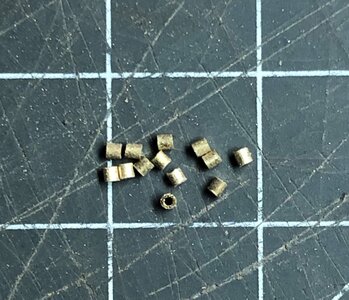
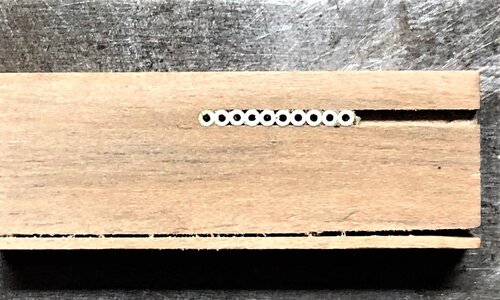
IMG_1775.JPEG IMG_1780.JPEG
Here is the part ready to solder
600_1400.jpg

Knuckle made from the same tubing, but before it cut for pieces the 0.3mm hole made.
600_1397.jpg600_1398.jpg

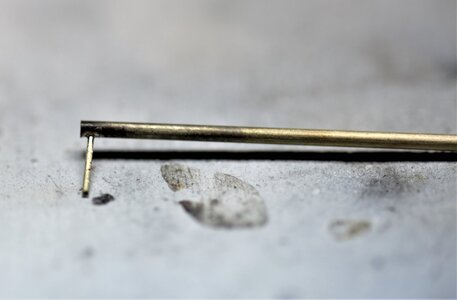
Once the hole drilled, the part cut to the same length as the hinge. The knuckle assembled by soldering a pin and knuckle holder together.
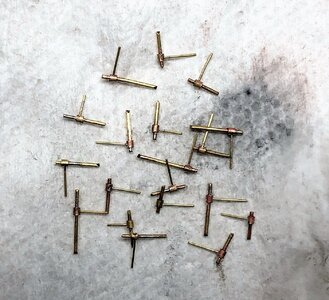
IMG_1783.JPEG

600_1403.jpg

Parts were trimmed to the required size, the ends of the pins were rounded using cup bur. All parts where blackened using 'Brass Black'
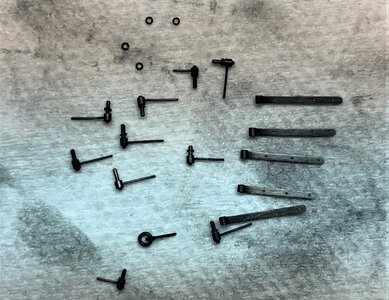
IMG_1784.JPEG

Assembly the pump well and shot locker was the most fun. I re-do twice as I didn't like it. Below is the first variant. Macro reviled all the blemish and mistakes. Why the hinge too short and the bolts go between the planks? Well, no answer but re-do.
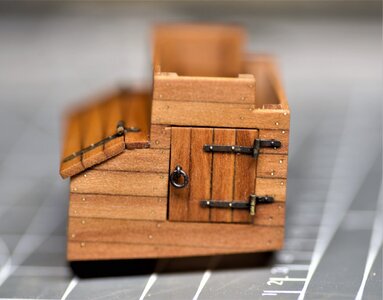
600_1276.jpg

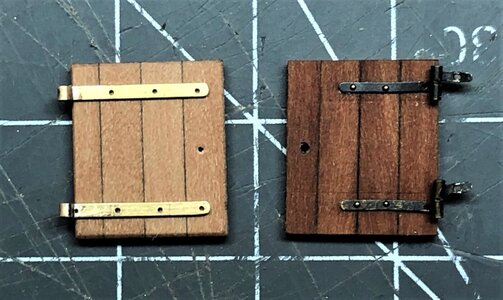
A much better variant, but still is not up to my acceptance level (on the right side the old one, on the left is the new one)
IMG_1777.JPEG

This is the one I like the most!
IMG_1795.JPEG

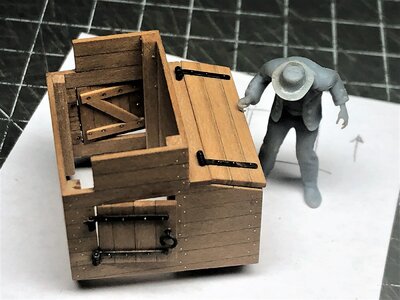
Both doors in action.
IMG_1796.JPEG

IMG_1797.JPEG
IMG_1799.JPEG
IMG_1798.JPEG

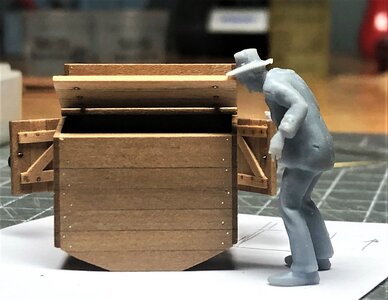
Well... since there so many mistakes were made during construction a Supervisor was called to maintain and monitor the further Alert assembly, He starts his job immediately before the New Year, His first assignment was a completed pump well and shot locket built from scratch.
IMG_1801.JPEG
 
continue the final photos
IMG_1802.JPEG
IMG_1803.jpeg
IMG_1804.JPEG
600_1427.jpg
600_1423.jpg
600_1428.jpg
600_1429.jpg
600_1426.jpg

The Supervisor mak this project acceptable, How about you? Any critics\comments always welcome! Well The Year coming to the end, and I welcome a brand New Year, I am hoping it will be much better for all of us. Wish you and your families the best of everything you will wich for yourself. Happy New Year!!! Bottle
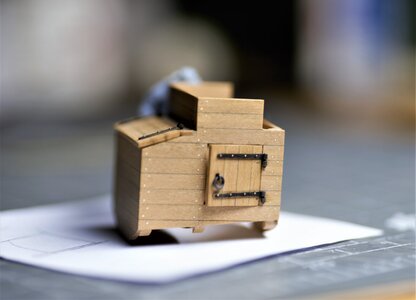
 
The only criticism I have is if this gets lost in the bowels of the ship where it can't be appreciated it would be a real shame.
Thanks, John! Your critics well accepted. You are correct, most of the details will buried in the hold, but if you know how much fun I had while building it... also, I will always know - they are there. ;)
 
continue the final photos
View attachment 202479
View attachment 202480
View attachment 202483
View attachment 202490
View attachment 202491
View attachment 202494
View attachment 202493
View attachment 202492

The Supervisor mak this project acceptable, How about you? Any critics\comments always welcome! Well The Year coming to the end, and I welcome a brand New Year, I am hoping it will be much better for all of us. Wish you and your families the best of everything you will wich for yourself. Happy New Year!!! Bottle
Very precise small work for the supervisor to inspect. I am interested in where you got the brass F-Clamps for the pump well construction???? I would also like to ask how you held the brass strip secure while drilling as I have to do that for a rudder pintle/gudgeon connection. Your work will not be lost as you have it in your mind. Well done. Rich
 
Hello Jim, a very successful and beautiful, clean work! The inspector was probably also very satisfied.Especially the tiny little parts require a steady hand, the best eyes and ingenuity - you have plenty of everything, congratulations!
Maybe I may give a little hint (not meant in a know-it-all way): The diagonal part at the upper end of the Z-wood at the doors should point outwards, the inner part inwards. At least that's what I think I saw on old barn doors and cellar doors. But I could be wrong.
I wish you and all fellow readers a happy new year, may Corona soon disappear forever!
Many greetings
Fritz Baur (schiffbaur)

Translated with www.DeepL.com/Translator (free version)
 
Very precise small work for the supervisor to inspect. I am interested in where you got the brass F-Clamps for the pump well construction???? I would also like to ask how you held the brass strip secure while drilling as I have to do that for a rudder pintle/gudgeon connection. Your work will not be lost as you have it in your mind. Well done. Rich
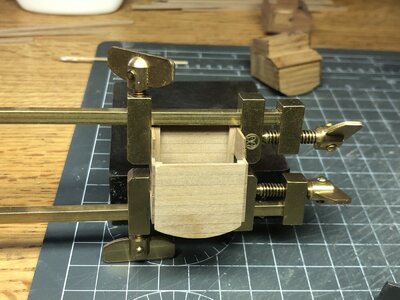
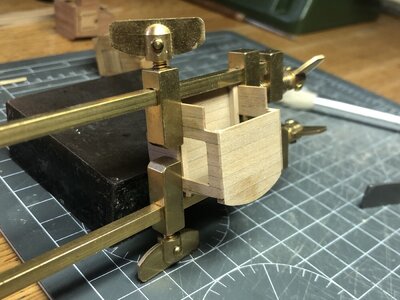
Many thanks, Rich! for the F-clamps, I bought them a long time back on e-bay. If you 'Google' search for Japanese clamps, you will have the result, you are looking for. They come in a variety of sizes and different nuts configurations, be careful when choosing for purchase. Below is an example of clamps on Amazon.


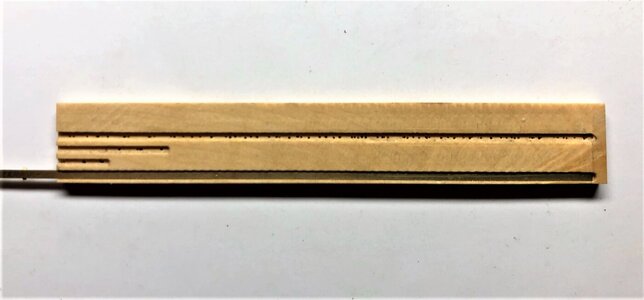
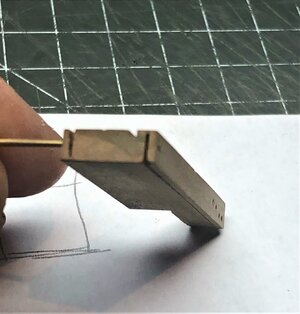
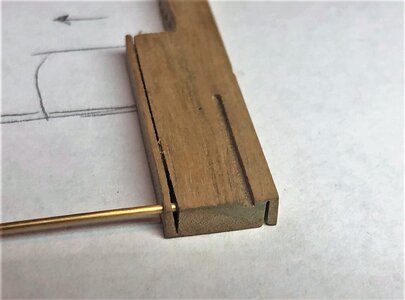
As for securing the brass strip, I made the jig out of Russian Boxwood, not the Castello. For some reason, both timbers called the Boxwood, but Russian (Samshit) is very hard. This property (hard) will help to hold edges. I mill the groove 0.90mm to fit the brass strip. Click on each photo to enlarge.

IMG_1808.JPEGIMG_1806.JPEG
IMG_1813.jpeg

In addition, here is the 'jig' to cut the tubing on the table saw.
IMG_1809.JPEGIMG_1811.JPEG

Please let me know if other questions, I will be glad to help. Happy New Year!!
 
@PT-2 Rich, @PoulD Poul, @Norway Kurt @TechTrek Chris, @Gennaro, @schiffbaur Fritz, @Thomas Marocke Tomas -many thanks for the comments and 'likes'. I think we (I and Supervisor) reach a consensus on this part of the build. We will see how it goes in the next year...it is knocking on the door of my shipyard.

Happy New Year! I wish you all a much better year and only smile and happiness for you and your loved ones!
 
Many thanks, Rich! for the F-clamps, I bought them a long time back on e-bay. If you 'Google' search for Japanese clamps, you will have the result, you are looking for. They come in a variety of sizes and different nuts configurations, be careful when choosing for purchase. Below is an example of clamps on Amazon.


As for securing the brass strip, I made the jig out of Russian Boxwood, not the Castello. For some reason, both timbers called the Boxwood, but Russian (Samshit) is very hard. This property (hard) will help to hold edges. I mill the groove 0.90mm to fit the brass strip. Click on each photo to enlarge.

View attachment 202600View attachment 202602
View attachment 202603

In addition, here is the 'jig' to cut the tubing on the table saw.
View attachment 202604View attachment 202605

Please let me know if other questions, I will be glad to help. Happy New Year!!
I have also glued the brass strip to a wood plate with wood hold down strips crosswise between the holes locations in order to drill fine holes in small pieces.
 
Back
Top