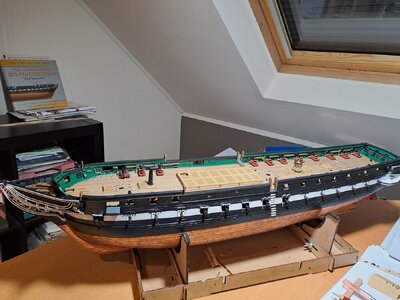
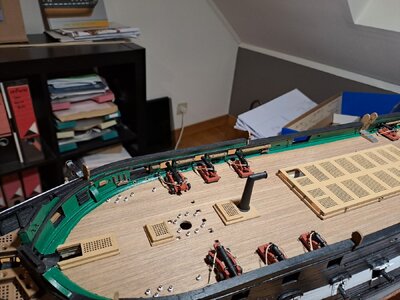
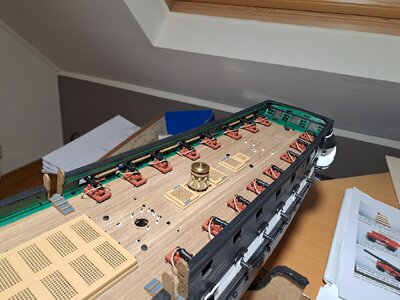
USS Constitution by Model Shipways 1:76 scale

1703346114585.png

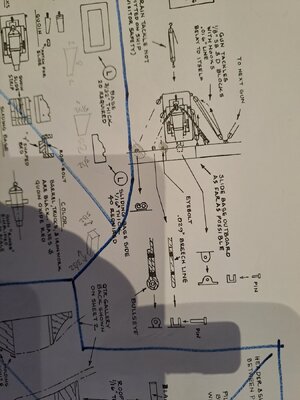
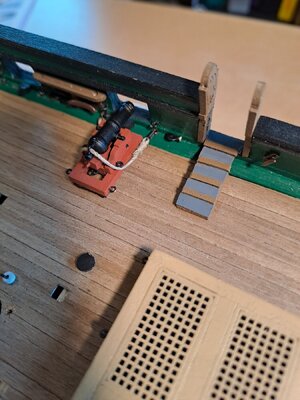
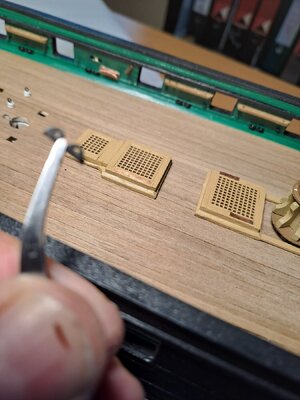
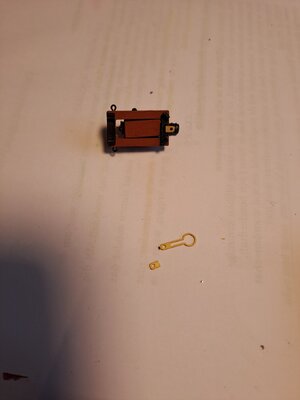
The next step is the mounting of the mounting hooks for the Guns...Really an example of detail work...and since there are no pre-fabrication parts in the kit, do-it-your self...
I didn't think it was a good idea to make such small and delicate hooks in wood... so let's be creative...
I still had several Parrel Ribs left over from my previous kit (HMS Endeavour): I used these for the double ring (after adjustment)t. I recovered the ring for attachment to the GUN frame from deadeye mounting rings.. see photo.. Simple but beautifully finished in Brass...
Tony260.jpg

Tony261.jpg

Tony262.jpg
 
Oh boy. This sure will be testing my skills when I get to this step.
I have finished chapter 1 and working on chapter 2 of Bob Hunt's Practicum. I must confess that I am struggling even with this practicum. But I will continue working at it albeit a very slow pace.
Truthfully, I am not sure I would have been able to do this without the practicum.
Yes you can! Please ask questions.......we are here to help (but of course we don't have the wisdom, right)
 
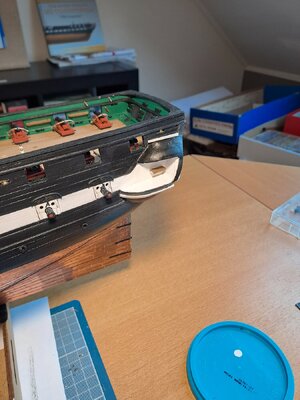
Tony, if you've read my log, you'll noticed that I had a lot of trouble with the windows. Even with the US Navy plans, I still could not get a good handle on the exact shape of these things. The windows supplied in the kit are useless as they are based on the foreshortened elevation view in the MS plans. The most forward window is the worst. To do it right, you have to make your own and trial fit each element of the window sashes as you progress. Each window is different, your working on a curved surface and there are no right angles. I was not satisfied with my efforts. However with your superior woodworking skills, I think your results will surpass my results.

Jon
Hi Jon
Thanks for the very encouraging comments although I wonder about my woodworking skills.
I have been referring to your excellent log since I started this build it's been a big help.
I agree with you about the supplied windows. I'm currently playing with a few ideas to make my own windows. I'm finding it very difficult to make the frames using 1/32 square timber, anything larger doesn't look right.
Tony
 
Tony,

Very clever way. But keep in mind that you have to fit the roof block... I have the impression that you top left corner is a little bit to far behind the gun port....
Well intentioned, because it looks beautiful again.....:)
Hi Marc
Sorry for the late reply I'm just catching up with the logs.
When I started the gallery I noticed that a few things didn't match the drawing the angle of the stern may be the main cause. At this stage I have no intention to try fixing the errors I will try working around the issues. If it looks bad or I can't get the parts to fit then it will be major rework.
I like the way your cannons are looking I find this is one of my favourite parts of the build.

Tony
Dear Tony,

The Gods became crazy in Belgium.... see picture.
I was so angry with myself about the miserable job that today I just took my cutter and literally cut everything out... A new coat of paint and now I'm starting over...
I look forward to seeing how you will solve it... Mustafa's solution also seems very good to me... I will take my time...
In the meantime I had started wiring the carronades....

Tony264.jpg
 
As mentioned above I started with the rigging of the Carronades... Very time consuming but very important...And again the details are important. They make beautiful drawings of the rigging, but make your own plans with hooks...This is why I bought hooks on the net...
Which again were not supplied with the kit... And this is something indispensable because it is difficult to make them yourself...
1703775303373.png

Tony267.jpg

Tony266.jpg

Tony265.jpg

Tony298.jpg
 
Dear Tony,

The Gods became crazy in Belgium.... see picture.
I was so angry with myself about the miserable job that today I just took my cutter and literally cut everything out... A new coat of paint and now I'm starting over...
I look forward to seeing how you will solve it... Mustafa's solution also seems very good to me... I will take my time...
In the meantime I had started wiring the carronades....

View attachment 417001
Good decision Marc, I support you on this one. I know you can make the gallery windows much better. I had also learned this method from an another modeler.
 
I have this same model in my stash - I plan to follow your build as a reference - very nicely done.

I have yet to embrace 3D printer technology and I respect those who have - your ladder is genius.
When I was given the printer I thought it would be fun to make some cool stuff with the grandkids. Now I'm finding more ways it will help me with this build. Learning CAD is an issue but the great thing is if a part isn't quite right the design can be quickly adjusted and another one printed. The problem I have now is some parts are easier and quicker to print but I really don't want plastic parts on the ship unless I can't make them myself.
 
Dear Tony,

The Gods became crazy in Belgium.... see picture.
I was so angry with myself about the miserable job that today I just took my cutter and literally cut everything out... A new coat of paint and now I'm starting over...
I look forward to seeing how you will solve it... Mustafa's solution also seems very good to me... I will take my time...
In the meantime I had started wiring the carronades....

View attachment 417001
You made the right decision if you're not happy with a part it will be the only thing you see whenever you look at the model.
At the moment I'm on my 4th attempt I've changed the shape a little and made all the windows more or less the same size only the outsides of the frames need adjusting for size. This is not right to the real ship but it's the best looking one so far. I'm having a lot of issues with making the 1/32 inside frames very difficult to make them all line up correctly. I found making a frame and working off the ship a lot easier. I'll try and post some pictures soon.
Tony
Thx!
Marc
 
I would not mind trying a 3D printer, but I hate to say, I would not know what brand, unit, or whatever to buy that would be best suited for shipbuilding. Sadly, I know nearly zero about them. I could do some googling on my own, but I am sure there are so many brands. I know that micromark.com sells them as well as Amazon. But like anything else, I don't know where to begin. I guess the reason is that from the beginning, I had no interest in 3D printing - obviously, that would help matters more than anything -
So, off to YouTube land to see some beginner tutorials !!
:)
 
You made the right decision if you're not happy with a part it will be the only thing you see whenever you look at the model.
At the moment I'm on my 4th attempt I've changed the shape a little and made all the windows more or less the same size only the outsides of the frames need adjusting for size. This is not right to the real ship but it's the best looking one so far. I'm having a lot of issues with making the 1/32 inside frames very difficult to make them all line up correctly. I found making a frame and working off the ship a lot easier. I'll try and post some pictures soon.
Tony
Dear Tony,

Coming back to the 3D printer... Could you advise me which to by as a step-in 3D printer eg one for beginners and play a little bit around?

Cheers
 
Thanks for your post and to all who have provided comments. I will need to read this log, and others, in detail before I start on Old Ironsides (box sitting under the work bench). I think a trip up to the Charlestown Navy Yard to visit her in person will be needed as well. It has been a bit over 25-years since I was in charge of her Marine detachment for a couple of weeks; we didn't set sail but just did a harbor turn-around cruise. One of the highlights of my days in uniform.
 
JohnR - I'm originally from the Boston area; left in the late 70's to follow the paycheck. I was able to visit the old girl 2 or 3 times growing up and the last time was just before her last restoration in Nov 2015. One of these days I hope to visit her again. Nice to talk to a former Marine of the USS Constitution.

Jon
 
Back
Top