-

Win a Free Custom Engraved Brass Coin!!!
As a way to introduce our brass coins to the community, we will raffle off a free coin during the month of August. Follow link ABOVE for instructions for entering.
-

PRE-ORDER SHIPS IN SCALE TODAY!
The beloved Ships in Scale Magazine is back and charting a new course for 2026!
Discover new skills, new techniques, and new inspirations in every issue.
NOTE THAT OUR FIRST ISSUE WILL BE JAN/FEB 2026
You are using an out of date browser. It may not display this or other websites correctly.
You should upgrade or use an alternative browser.
You should upgrade or use an alternative browser.
I have found that no matter how many ships (kits) a person has built (or at least this applies to me only - not sure), each one has its own quirks and challenges. With this ship, I have to relearn how to read plans and build most parts from scratch - as with this kit, you are given a box full of raw wood and some of it - not sure where or how some of it is supposed to be used. I have to suggest Bob Hunts Practicum on this one.
The booklet (not a manual) comes with it, but it has artistic hand-drawn illustrations that do not say much about which wood planks or strips to use. Again, you must refer only to the plans to figure things out.
The booklet (not a manual) comes with it, but it has artistic hand-drawn illustrations that do not say much about which wood planks or strips to use. Again, you must refer only to the plans to figure things out.
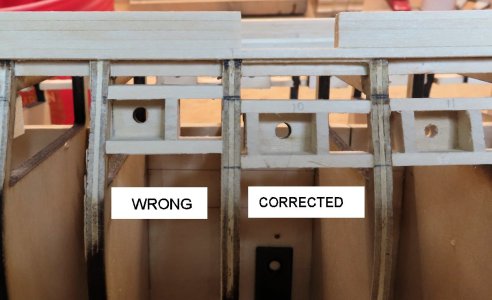
Well, I was wondering why things were going along so smoothly - I screwed up MAJOR big time - but I am not so far ahead that it can not be corrected. I deleted all my post showing the installations of the port sill framing. I was supposed to use 1/8" spacing from the lower edge of the planksheer to the bottom edge of the upper sill. I did not use this spacing. I used 3/32 --- arggggg. So, what that means is that all the gun port frames will have to be moved DOWN some.
by some, I mean at least about 1/4" or more.
So, I had just finished all the planking around the gun ports, when I realized that something was not adding up. On the frikken plans, they only give the THICKNESS of 3/64 and not the WIDTH of the planks - this is a major error as far as I am concerned.
Time to get out the water (to soften glue) and start moving gun port frames downward. Crap !!!! Well, I guess it is a good thing I caught it now.
Oh sheesh! That is very frustrating (using polite words here  ). If I had done that, I might have ended up with a pile of small sticks and no one would come near me for a week. I'm sure you will overcome this setback in amazing style !
Mistakes, major or otherwise always come along. It is great to see when someone will not just let it go, but rather will go with a "do-over" to makes things right. You are to be admired for this.o, what that means is that all the gun port frames will have to be moved DOWN some.
Allan
Thanks guys. Yes, the repair (correction) is going nicely. I need to slow down more and study the plans and make 100% sure of what I am doing.
I was not anticipating that the WIDTH of the planking changes often. I think I got it now.
I was not anticipating that the WIDTH of the planking changes often. I think I got it now.
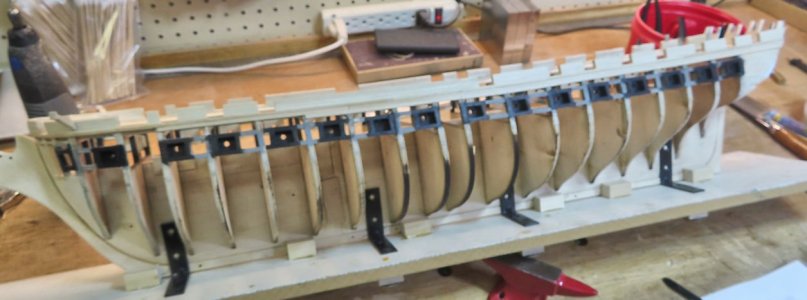
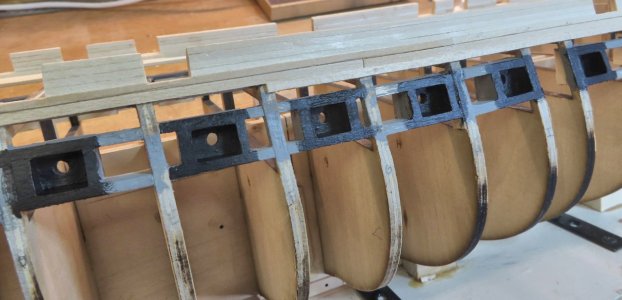
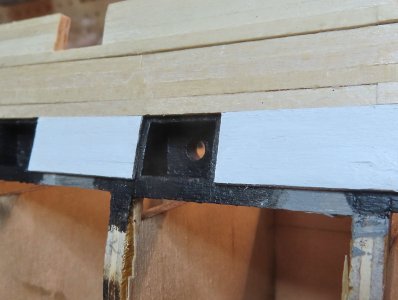
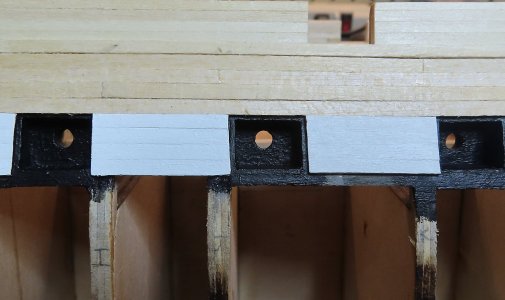
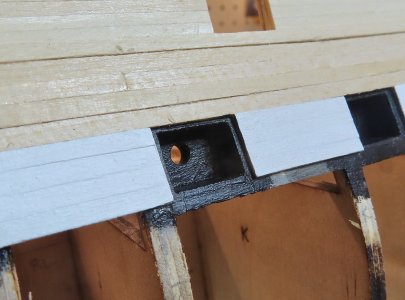
I am back in constructing where I am supposed to be—all ports on both sides had to be removed. It should have been obvious to me, but having tunnel vision, it escaped me. The ports were painted gray primer first, then black with acrylic. As a side note, the planking strips surrounding the ports will be painted white first before they are glued on. This keeps from having to mask off areas and should have a cleaner look.
The first image shows the gross mistake.
The first image shows the gross mistake.
wow. Thats quite the difference ! Great job on the fix !
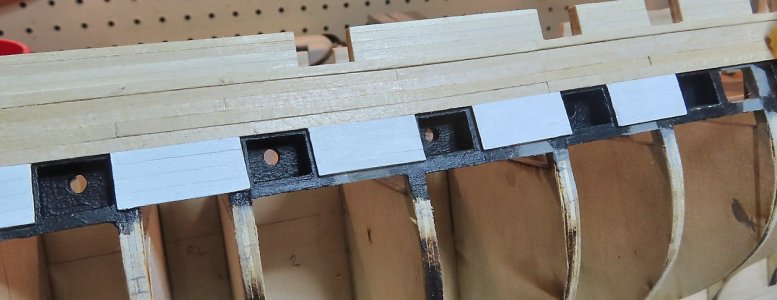
After much thinking (well, actually, not that much) comes the element of painting—when to paint, what to paint, etc. I don't really like building up the upper hull and ports and then coming back and trying to mask off everything.
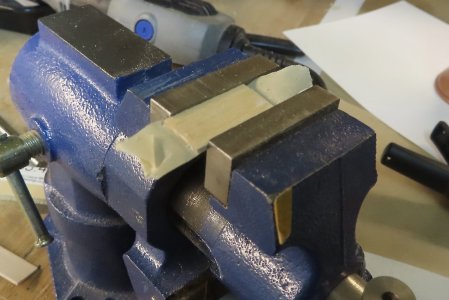
So, my thought was to make each 'panel' that goes in between each port, 1) glue the side ends together being held by tape, 2) put in vise to dry, 3) sanding a little, then 4) paint with white.
In some research, I found that only the outside "surface" of the panel is white. All of the recesses of the Gun Port are black. So, some very fine painting still has to be done by hand.
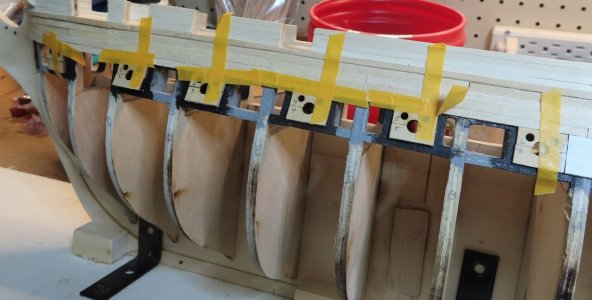
So far, here are the results. I am hoping that this will pay off in the end. When completed, I will use some type of card stock and tape or something to tape across this "strip" of ports to protect from dings and what not.
I will soon show a series of pictures of how I am making each panel (the panel that goes between the ports).
Last edited:
Very clean work, Donnie!After much thinking (well, actually, not that much) comes the element of painting—when to paint, what to paint, etc. I don't really like building up the upper hull and ports and then coming back and trying to mask off everything.
So, my thought was to make each 'panel' that goes in between each port, 1) glue the side ends together being held by tape, 2) put in vise to dry, 3) sanding a little, then 4) paint with white.
In some research, I found that only the outside "surface" of the panel is white. All of the recesses of the Gun Port are black. So, some very fine painting still has to be done by hand.
So far, here are the results. I am hoping that this will pay off in the end. When completed, I will use some type of card stock and tape or something to tape across this "strip" of ports to protect from dings and what not.
I will soon show a series of pictures of how I am making each panel (the panel that goes between the ports).
Thank you Paul and others. I appreciate the compliments !
She is looking great ! And the painting is wonderful ! Nice even finish and great cover. As I was reading I was thinking I was going to ask you what paint you used, but you heard my question before I even asked it.  Did you brush it on, or spray it with an airbrush?
In this situation, I used a brush. I am not too particular about the brush but just used what I had on hand which the bristles were about 3/16 wide and semi square at the end.
If I were building like a modern aircraft carrier, then I would use an airbrush as the plastic is not going to absorb the paint like wood does.
If I were building like a modern aircraft carrier, then I would use an airbrush as the plastic is not going to absorb the paint like wood does.
This is a step (after) I have cut each planked panel (in between each port). I have each section cut as best as I can,
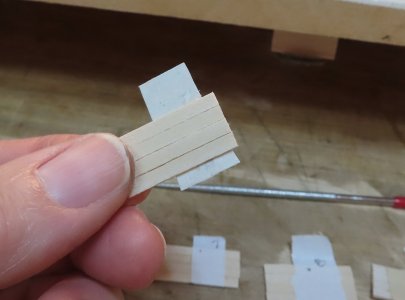
1) then while the planked panel is on the ship, I will apply some tape to keep the planks in order.
2) Then I remove the panel as seen by the first photo (being held by the tape).
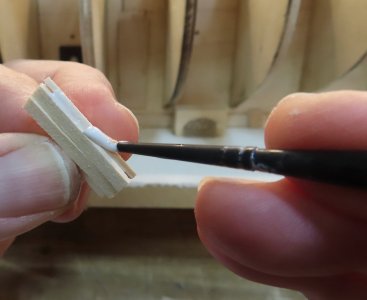
3) The good part comes is when since the planks are held in place with the tape, I can take my fingers and arch the assembly in place exposing the sides of the planks which I apply the glue.
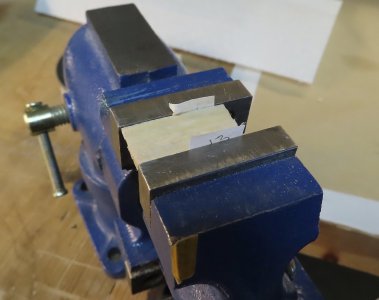
4) I will then reposition the 4 planks back together while the tape continues to hold the planks in place until I place them in a vice - not over tightening the vice, but just to grab them until the glue dries which does not take long about less than 5 min.
The tape is still there in the second photo even though it is not seen due to fingers.


