YUANQING BLUENOSE _ E J - Eugene Schmidt

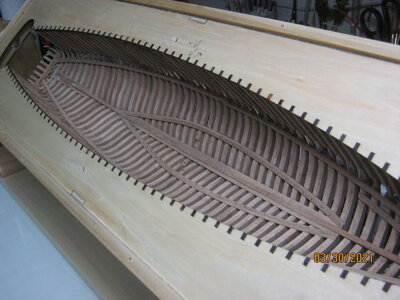
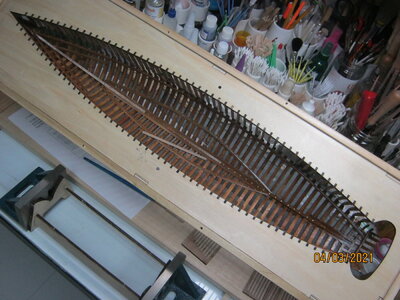
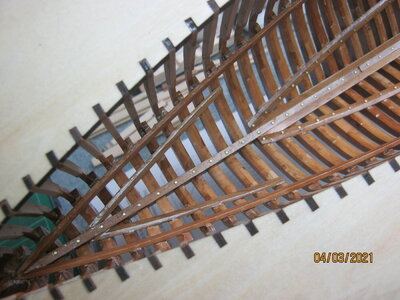
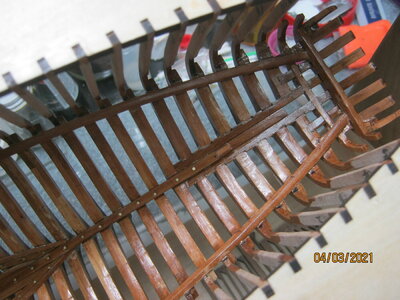
Well, I got parts #135 beveled and installed. The mini zip tie idea worked great! Tomorrow, I'll tackle the B059 strips on either side of the inner keel.
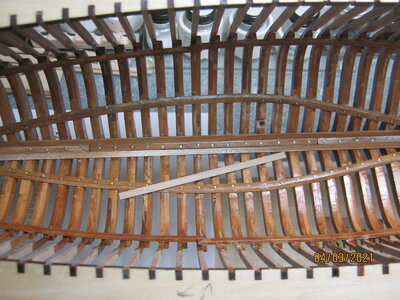
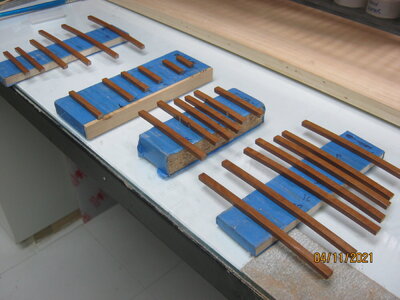
I got one of the #103 pieces beveled and installed and I'll do the second one and parts #102 tomorrow. It appears that parts # 136 are parallel to the bottom edge of parts # 102, so I'll do them after that.View attachment 223234

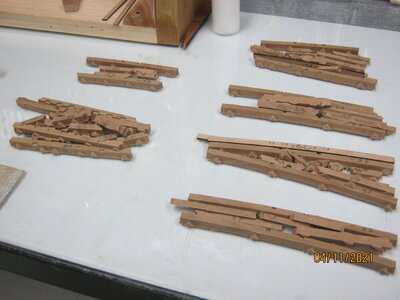
I wound up popping out the spacer ( waterway) parts, repairing the 3 broken one's. I'm not sure they will hold together because of the grain direction. But, if I have to, I think there is enough scrap from the sheets to make new ones from scratch.

After yesterday's dilemma of broken parts, I had a glass of beer, settled down a bit and decided what to do.
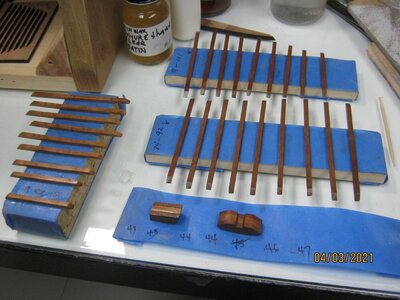
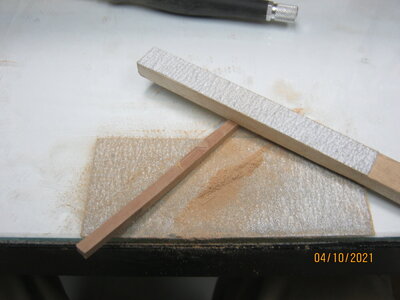
First I made some thin sanding sticks to work on the slots. I use 1/16" by 1/4" basswood strips. Got a whole bag of them from Midway Prod for $4.00. Using PSA sandpaper, I stuck some on one surface, parallel to a cut edge, rolled it over the edge of the basswood, making sure it was square, and onto the other surface, trimming it off flush. Makes two flats and one edge with grit, and one "safe" edge. That's the three sticks on the left. I buy PSA paper in several grits, both in strait rolls and in 5" disks for my power sanders, so I always have plenty of sand papers' The three on the right are aluminum extrusions and have a piece of "Slipstick" UHMW on them. Makes the sandpaper come off easier when it needs to be replaced. They have a nice handle to hang on to. I cut my own sandpaper to fit them also. The other one is an extrusion as well and have beveled edges. I make these out of wood too, in various widths, but the sandpaper doesn't come off so easy from them.
Tomorrow, I might make a curved narrow block to use to finish off the inside of the hull.

View attachment 223235

Then, I went to work on the waterways to be used for temporary spacers. Sanding the notches to fit a piece of the scrap material from the frames, and cleaning up the char. Some time, getting away from the bench a couple times to keep myself cool headed, and another beer (or 2), and I got them done and installed. Whew, I deserve another beer.

View attachment 223236
I've so enjoyed watching your build, Eugene. Thanks for sharing and for paving the way!
Vic
 
I've so enjoyed watching your build, Eugene. Thanks for sharing and for paving the way!
Vic
Thanks. This is my first POF build of any size. I have done smaller wood builds, but mostly boats, such as a flattie, canoes, several rowboats and skiff's, a number of them were scratch built, so I'm moving up in complexity. I also do wood aircraft (a DC-3, Wright Flyer, etc.) and plastic kits mostly of ships, aircraft carriers, and other US warships, and some civilian ships and boats. I've usually got 3 or so builds going at once, and move among them on a whim.
That said, I'm really committed to the Bluenose build. It's too bad there wasn't a set of English instructions with it. Several of us attempted to do a translation and post them. I got some of it done in the beginning, using text from others translations, putting pictures and text into a WORD DOC, but Dean, Don and Heinrich have really taken that project on and produced an easy to follow instruction that can be printed. And with color pictures and commentary from their builds tossed in for guidance. I have printed them and put in a binder.
A huge thanks to all that have contributed to this build. If you have problems, just post it here. Someone else has had the same issue and found a solution. It's quite a community.
It certainly is a good community.
 
Today, installed the parts # B059 on either side of the inner keel. Installed part #53. Drilled holes and installed brass pins in the keelson and parts #135. Faired out a bit here and there, sanded ready for clear coat. Will do that tomorrow, 1 coat in AM, then sand a bit and second coat in the evening.

IMG_0330.JPG

I'll start prepping the lower deck floor beams tomorrow too and get a coat on them as well.
 
Today, installed the parts # B059 on either side of the inner keel. Installed part #53. Drilled holes and installed brass pins in the keelson and parts #135. Faired out a bit here and there, sanded ready for clear coat. Will do that tomorrow, 1 coat in AM, then sand a bit and second coat in the evening.

View attachment 224365

I'll start prepping the lower deck floor beams tomorrow too and get a coat on them as well.
Looking very good!
 
Got a bit more done today.
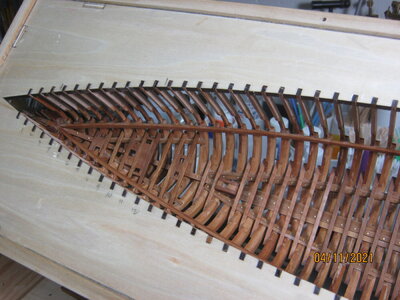
The inner hull framing is poly'd. I used Olympic marine spar poly varnish for the first coat. Touch sanded and cleaned up a few glue marks and touched up the spar varnish. Turns out the spar varnish is really glossy and I didn't care for that, but I really like the color the amber tint brings out. So, for the second coat I used Minwax x-clear satin poly to tone down the sheen a bit. I like it. I used to have a can of flattening agent that we added to varnish and lacquer to make custom gloss levels, but I can't find it. Probably tossed it out when cleaning up the shop.

IMG_0334.JPG

The last pic has a piece of raw hull plank from the inside keel side boards so you can see the color difference.

IMG_0335.JPG

IMG_0336.JPG

IMG_0337.JPG

Also got the first 27 cross beams sanded and the first coat of poly on.
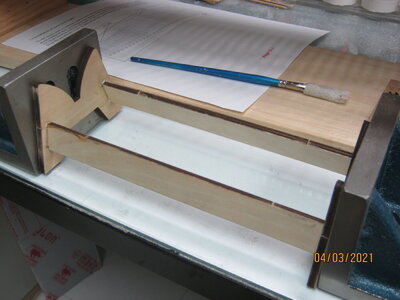
Plus, a couple of blocking assemblies.

IMG_0340.JPG

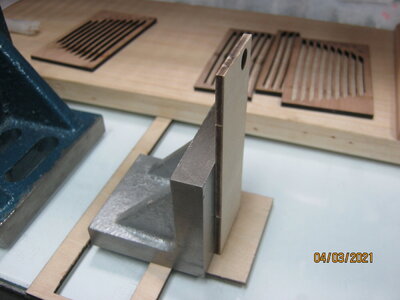
The waterline marking guage and the temporary stand assembled also. Just because. Looked easy. Wondered what the parts were for.

IMG_0339.JPG

IMG_0338.JPG

Tomorrow, sand and first coat some more cross beams and second coat the one's from today. The sanding isn't soooo bad, once you get in the swing of it.
 
Got a bit more done today.
The inner hull framing is poly'd. I used Olympic marine spar poly varnish for the first coat. Touch sanded and cleaned up a few glue marks and touched up the spar varnish. Turns out the spar varnish is really glossy and I didn't care for that, but I really like the color the amber tint brings out. So, for the second coat I used Minwax x-clear satin poly to tone down the sheen a bit. I like it. I used to have a can of flattening agent that we added to varnish and lacquer to make custom gloss levels, but I can't find it. Probably tossed it out when cleaning up the shop.

View attachment 225201

The last pic has a piece of raw hull plank from the inside keel side boards so you can see the color difference.

View attachment 225200

View attachment 225202

View attachment 225203

Also got the first 27 cross beams sanded and the first coat of poly on.
Plus, a couple of blocking assemblies.

View attachment 225204

The waterline marking guage and the temporary stand assembled also. Just because. Looked easy. Wondered what the parts were for.

View attachment 225205

View attachment 225206

Tomorrow, sand and first coat some more cross beams and second coat the one's from today. The sanding isn't soooo bad, once you get in the swing of it.
Looking good!
 
Finished clear coating the crossbeams for the tween decks area in the bow. Parts 66 and 67 rested on the beams, but did not touch the frames. part 68 just barely rested on the beams, part 69, 70, 71, 72, 73 and 74 didn't even rest on the beams at all.
By not using parts 66 and 67 and moving the rest of them forward 2 places, they seem to sit ok, plus they actually touch the backside of the frames. Also, parts 73 and 74 had a knot in them that caused them to warp., so I cant use them to replace parts 71 and 72 anyway. I noticed this when I glued the #121 part in between them.
I found enough material on the scrap frets to make replacements for them and two longer ones to finish out the run of 9 parts.

Then, it donned on me that maybe I installed the beams incorrectly. I thought I had installed them so the beveled edge of the beams were parallel to parts #102, the main deck beam.
I re-measured them and it looks like they are 13/32 apart at the bow end and 11/32 at the stern end. I'm not sure if popping them loose and lowering them the 1/16" would change the width dimension enough or not.
At this point, I'm trying to decide if I should move the beam and try it or not. If it doesn't change the dimension enough, I'll still have to make new crossbeams anyway. Plus I need to make two replacements for the warped ones too. The beams don't get any decking anyway I don't think, so I'm not sure the slight angle difference is of any real consequence. Hmmmm.

Time to put it down and have a cup of coffee.

Boy, was the weather here in Michigan nice today 75 and sunny. Cleaned out one garden for the admiral.
Hi EJ,
Difficult to give your reply "a like". But I like you deal your 'problem' with us.
Took me some time to compare your text with the pictures and the drawings.
It seems you are right that the problem is by the not parellel parts #102 and #136.
If the reconstruction gives to much damage, perhaps placing the beam between the frames is a option. Just for this part in the front.
Like this picture out of the link in my build-log to 'the practicum".
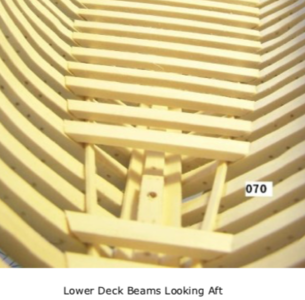
It shows the lower deck, but it's about the principle: placing the beam between the frames.

1617783048289.png
Just to consider.
Regards, Peter
 
Last edited:
Hi EJ,
Difficult to give your reply "a like". But I like you deal your 'problem' with us.
Took me some time to compare your text with the pictures and the drawings.
It seems you are right that the problem is by the not parellel parts #102 and #136.
If the reconstruction gives to much damage, perhaps placing the beam between the frames is a option. Just for this part in the front.
Like this picture out of the link in my build-log to 'the practicum".
It shows the lower deck, but it's about the principle: placing the beam between the frames.

View attachment 225796
Just to consider.
Regards, Peter
Thanks for your comments. It reinforced what I was thinking regarding placement of parts #136, the crossbeam supports.
This morning, after a cup of coffee and some thought, I decided to try with a fresh outlook, re-installing the crossbeam supports.
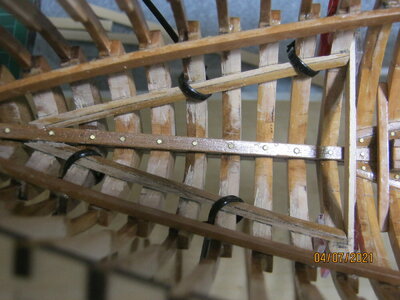
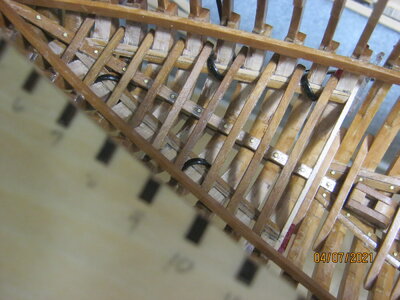
With care, I was able to "pop" them off the frames. After cleaning up the frames and beams from the glue, I made a template of the lower part of frame 12 from the frame plan, from the lower line marked on it to the keel notch. Using this, I transferred a mark to both sides of frame 12, making sure they were equal on both sides from the main deck beam. Placing a temporary piece across frame 12 at those marks and using the #136 parts, marked the frames from #4 to #12. This was to be the top of the supports beams, the cross beams would rest on top of them. So, the beam was installed below the marks, the crossbeams will be above the marks. Testing them at this point, I found all the crossbeams fit ok.
So in they went.

IMG_0341.JPG

Then, just to see, I laid the crossbeams in place. They all fit ok now, resting on the support beams and touching the bow side of the frames.

IMG_0342.JPG

These are ready now, although, while messing around with them, I separated the blocking parts and now have to re-glue them too.

Worked out well though. I just hope the clearcoat blends in the color of the moved frame locations.
 
Thanks for your comments. It reinforced what I was thinking regarding placement of parts #136, the crossbeam supports.
This morning, after a cup of coffee and some thought, I decided to try with a fresh outlook, re-installing the crossbeam supports.
With care, I was able to "pop" them off the frames. After cleaning up the frames and beams from the glue, I made a template of the lower part of frame 12 from the frame plan, from the lower line marked on it to the keel notch. Using this, I transferred a mark to both sides of frame 12, making sure they were equal on both sides from the main deck beam. Placing a temporary piece across frame 12 at those marks and using the #136 parts, marked the frames from #4 to #12. This was to be the top of the supports beams, the cross beams would rest on top of them. So, the beam was installed below the marks, the crossbeams will be above the marks. Testing them at this point, I found all the crossbeams fit ok.
So in they went.

View attachment 225872

Then, just to see, I laid the crossbeams in place. They all fit ok now, resting on the support beams and touching the bow side of the frames.

View attachment 225873

These are ready now, although, while messing around with them, I separated the blocking parts and now have to re-glue them too.

Worked out well though. I just hope the clearcoat blends in the color of the moved frame locations.
Very nice you could replace everyting!
Regards, Peter
 
Hi EJ,
Difficult to give your reply "a like". But I like you deal your 'problem' with us.
Took me some time to compare your text with the pictures and the drawings.
It seems you are right that the problem is by the not parellel parts #102 and #136.
If the reconstruction gives to much damage, perhaps placing the beam between the frames is a option. Just for this part in the front.
Like this picture out of the link in my build-log to 'the practicum".
It shows the lower deck, but it's about the principle: placing the beam between the frames.

View attachment 225796
Just to consider.
Regards, Peter
It’s odd they show a thicker beam inline with the frame, verses the YQ version of thinner beams in front of the frames. I wonder which version is correct?
 
The tween deck beams cleaned up, installed and clear coated.

IMG_0348.JPG

Separating, sanding prepping main deck beams. These are the "single" beams, clear coated on the tops and sides, need to flip and do the bottoms.

IMG_0349.JPG

I separated all the parts from the sprues. These are grouped for the pre install assembly groups, waiting to be cleaned up.

IMG_0350.JPG

I sanded the outer radius on the mini disk sander. This allowed me to remove the bevel from that side.

IMG_0345.JPG

Then, laying it on the bench on a sandpaper disk to help hold it steady, sanded the inside curve to remove the little ridge and spru bits. By holding the stick with PSA paper on it parallel to the bench, it removed the bevel from that side so it is now square.

IMG_0346.JPG

IMG_0347.JPG

Question - I have to assume that the bilge deck beams and the tween deck beams both had deck planking on them. I've been wondering if it would be appropriate to lay some deck planks on them (partially covering the beams) , similar to the partially covered main deck? Perhaps decking the port side half?

IMG_0351.JPG

I will need to make that decision now, as it would be impossible to do after the main deck beams go in. I do have some pear strips I could run through the thickness sander to thin down a bit for that purpose.

Opinions anyone?
 
Hi Ej,
In The Saga, about the BN-II, there is in the front the Forecastle, the crews accommodation. With the mess table, benches, bunks on both sides etc.
Behind the Forecastle was the lounge. And behind that, around the main mast was the cargo hold.
So the BN-II has deck planks on the lower decks.
Under the floor of those last two compartments were the fish holds.

The tween deck is shown different. I suppose the tween deck of the original BN was used for storage?
I am also looking for what the interior of the original BN was like. But so far nothing structural can be found.
In my BN there comes partially a floor.
Regards, Peter
 
Back
Top