I am very much surprised about the high quality - great work
-

Win a Free Custom Engraved Brass Coin!!!
As a way to introduce our brass coins to the community, we will raffle off a free coin during the month of August. Follow link ABOVE for instructions for entering.
-

PRE-ORDER SHIPS IN SCALE TODAY!
The beloved Ships in Scale Magazine is back and charting a new course for 2026!
Discover new skills, new techniques, and new inspirations in every issue.
NOTE THAT OUR FIRST ISSUE WILL BE JAN/FEB 2026
- Home
- Forums
- Ships of Scale Group Builds and Projects
- Group Build Archives
- Blandford Cross Section PoF Group Build
You are using an out of date browser. It may not display this or other websites correctly.
You should upgrade or use an alternative browser.
You should upgrade or use an alternative browser.
DocBlake's HMS Blandford Cross Section Build - 1/32 Scale - [COMPLETED BUILD]
Impressive, most impressive.
Can’t wait to get home and finish my Blandford. Mike’s guns are just perfect for the weather deck. He even got the monogram right (George I, not King George III). Awesome work!
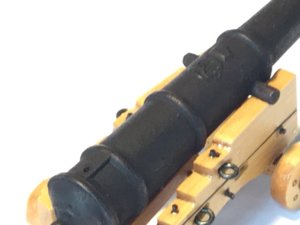
I've been busy since I'm back from vacation. I carefully removed the cannons from the billet, cleaned them up with an X-Acto and some files and dyed them black. The photos show the guns with one coat of poly. The detail is maintained even after dying and poly! There are no cap squares yet.
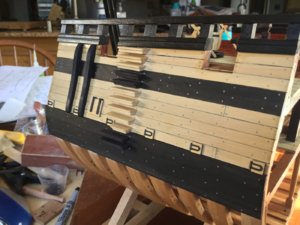
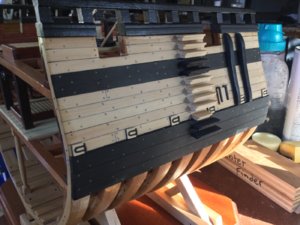
I also finished the fenders and the boarding stairs and glued them in place. No poly on any of the outside structures yet.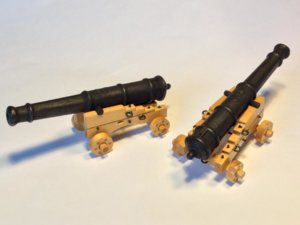
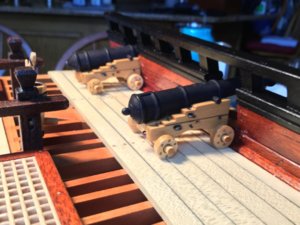
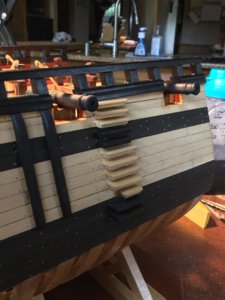
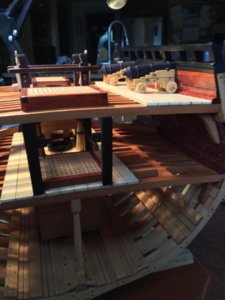
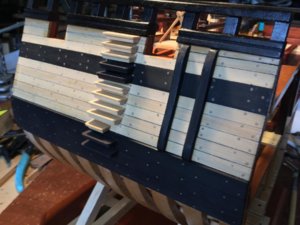
I also finished the fenders and the boarding stairs and glued them in place. No poly on any of the outside structures yet.


Hi Dave. Dyed cannons looks great! I am wonder if they (cannon barrels) can be look even more authentic after giving them a coat of metallic layer described by @Maarten when he made his anchors
or spray paint Karl (@Jeronimo) uses when fabricate his anchors
What do you think, Dave? If there such spray or similar in the US? I am impressed with the end result.
HMS Royal Caroline kit ZHL 1/30
Here you can find the photo of the capstan of the Hermione - the edges are slightly darker, but not full of tar https://shipsofscale.com/sosforums/threads/hermione-a-32-gun-concorde-class-frigate-fitted-for-12-pounder-guns-dockyards-of-rochefort-france.2595/#lg=post-43694&slide=16...
shipsofscale.com
or spray paint Karl (@Jeronimo) uses when fabricate his anchors
HMS Royal Caroline kit ZHL 1/30
Here you can find the photo of the capstan of the Hermione - the edges are slightly darker, but not full of tar https://shipsofscale.com/sosforums/threads/hermione-a-32-gun-concorde-class-frigate-fitted-for-12-pounder-guns-dockyards-of-rochefort-france.2595/#lg=post-43694&slide=16...
shipsofscale.com
What do you think, Dave? If there such spray or similar in the US? I am impressed with the end result.
Hi Dave. Dyed cannons looks great! I am wonder if they (cannon barrels) can be look even more authentic after giving them a coat of metallic layer described by @Maarten when he made his anchors
Believe it or not, a simpler technique would be to do some very subtle dry-brushing to bring out the texture highlights using a very light grey or nearly white paint. Those of you familiar with painting and weathering plastic models would be familiar with this technique. Easy to do, but requires some practice as it does require a subtle touch. A metallic color could be used but could easily be over-done. There is already texture in the carving. The primary goal is to trick the eye with a high contrast of color between dark and light. This gives the illusion of "depth of scale", especially when photographed.
No wonder I don't know those techniques. Jim and paint don't go alone...together...Those of you familiar with painting and weathering plastic models would be familiar with this technique. Easy to do, but requires some practice as it does require a subtle touch.
Jim add me also to the PAINT and DON not getting along. To MIKE have you considered doing any thing comercialy with the cnc 3-d like capoastans etc if the plans were sent to you. THANKS Don
To MIKE have you considered doing any thing comercialy with the cnc 3-d like capoastans etc if the plans were sent to you. THANKS Don
Hi Don. I pretty much have my hands full keeping up with my wife's cutting board/glass gift engraving business ( www.wellwrittengifts.com ). I personally haven't been able to "complete" a model myself in nearly 2 years. I tend to focus in on a specific topic (like Doc's cannons) and just go for it... mostly just to see if I can do it. I prefer to do my own CAD drawings to fit my style of CNC and laser machining practices. Honestly, there just isn't enough money in commercial model kit fabrication to make it worth my time. However, I will do favors for SoS members on the side if it is interesting and specific... time permitting. I much prefer to keep modeling my hobby and art form rather than calling it a job.
I love and will take this offer... (if it is an offer, thought)However, I will do favors for SoS members on the side if it is interesting and specific... time permitting
I love and will take this offer... (if it is an offer, thought)
Of course.. I have quietly offered in the past as well.
I too will TAKE YOU UP ON THAT and THANKS SO MUCH ANOTHER PLUS FOR SOS. Don
Lovely work - as ever. Particularly like the cannon!I've been busy since I'm back from vacation. I carefully removed the cannons from the billet, cleaned them up with an X-Acto and some files and dyed them black. The photos show the guns with one coat of poly. The detail is maintained even after dying and poly! There are no cap squares yet.
I also finished the fenders and the boarding stairs and glued them in place. No poly on any of the outside structures yet.View attachment 115435View attachment 115436View attachment 115437View attachment 115438View attachment 115439View attachment 115440
Ted
Looks fantastic Doc! I hope I can do half as good a job in the smaller scale.
That's absolutely incredible Dave, just beautiful.
David
David
Thanks Shane, David!
I need to get this model finished!
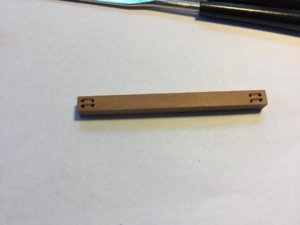
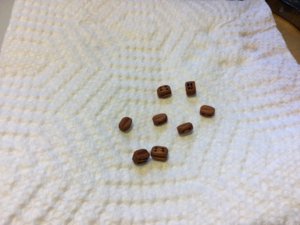
I made my own blocks from swiss pear. They are 8 scale inches long, or 1/4" on the model. The single blocks are cut from 1/8" X 3/16" stock, and the double blocks are from 3/16" square stock. The sequence is:
-Mark the location of the sheave holes and drill them through with a #60 drill
-Connect the sheave holes with a groove, using a curved X-Acto blade.
-Round one end of each block, then cut them off at 1/4" and round off the other.
-File stropping grooves into the block faces.
-Treat with boiled linseed oil to darken.


