-

Win a Free Custom Engraved Brass Coin!!!
As a way to introduce our brass coins to the community, we will raffle off a free coin during the month of August. Follow link ABOVE for instructions for entering.
-

PRE-ORDER SHIPS IN SCALE TODAY!
The beloved Ships in Scale Magazine is back and charting a new course for 2026!
Discover new skills, new techniques, and new inspirations in every issue.
NOTE THAT OUR FIRST ISSUE WILL BE JAN/FEB 2026
You are using an out of date browser. It may not display this or other websites correctly.
You should upgrade or use an alternative browser.
You should upgrade or use an alternative browser.
Bomb Ketch Salamandre 1:48
Thanks all for the B-day well wishes!
28 days of Sept chasing elk with a bow. Four close encounters (under 50yds) but no ethical shot.
Did have a beautiful moose broadside at 12yds (photo 1). Also had three wolves watch us from 250yds, as we packed up elk camp.

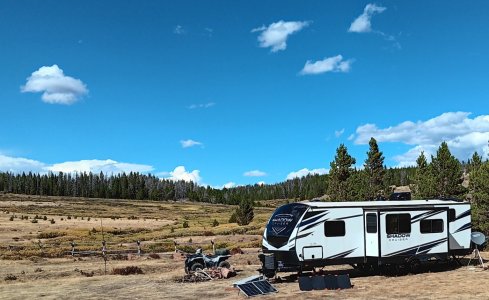
Camp was beautiful (photo 2).
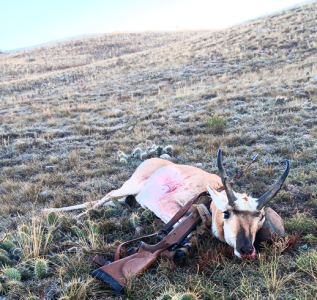
Yesterday had an early B-day present when I was able to down a superb Colorado Antelope at 210yds (photo 3).
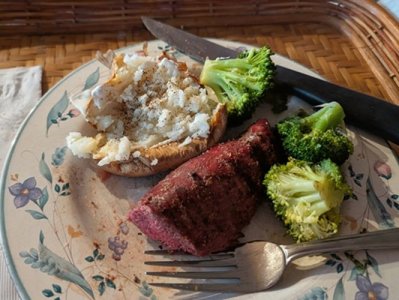
Tenderloins were incredible (photo 4).
Work on Salamandre will begin this week, after I get the skull mounted.
28 days of Sept chasing elk with a bow. Four close encounters (under 50yds) but no ethical shot.
Did have a beautiful moose broadside at 12yds (photo 1). Also had three wolves watch us from 250yds, as we packed up elk camp.

Camp was beautiful (photo 2).

Yesterday had an early B-day present when I was able to down a superb Colorado Antelope at 210yds (photo 3).

Tenderloins were incredible (photo 4).

Work on Salamandre will begin this week, after I get the skull mounted.
Happy birthday, Brad! 

I missed your birthday Brad. Looks like you had a good one. Cheers Grant.
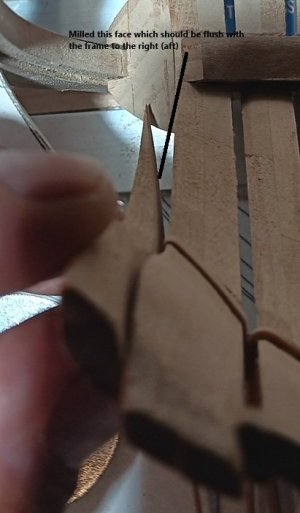
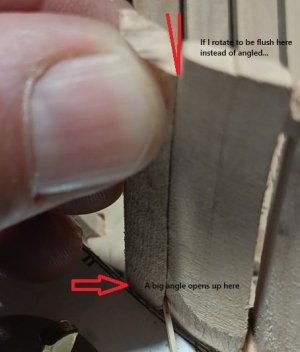
Hi Brad,On my first attempt at the bow cant frames,
I believe I milled angle on the wrong face.
See photos below and please let me know if you agree with my assessment:
1. I should not have milled the angle on the aft face of the frame.
2. I should have milled the angle on the bow face of the frame.
View attachment 551490View attachment 551489
If you hawse timbers are constructed the same way as mine on Fame - only the side of the timbers facing the next timber is beveled. The frame facing the stem is always flat. Hope this helps - believe me I may have built these a dozen times before getting an acceptable result.
Thanks!Hi Brad,
If you hawse timbers are constructed the same way as mine on Fame - only the side of the timbers facing the next timber is beveled. The frame facing the stem is always flat. Hope this helps - believe me I may have built these a dozen times before getting an acceptable result.
Exactly how I did my second attempt. It was also my first "official use" of the new Sherline Mill.
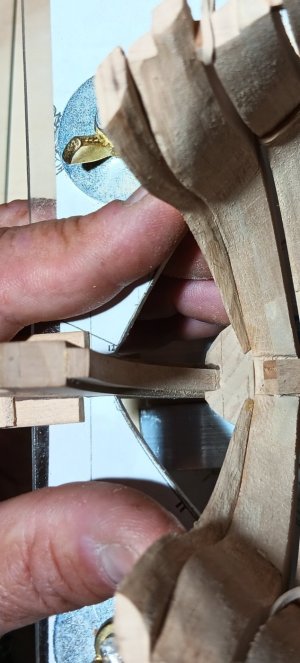
Here are the results of what looks to be the first successful set of cant frames.
1. Symmetrical from all angles and the Sherline produced a great surface.
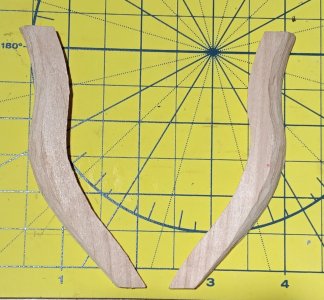
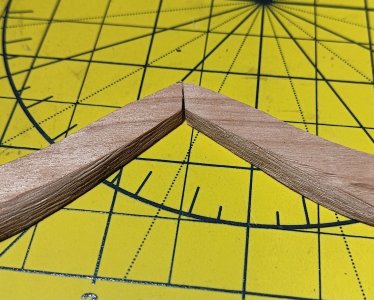
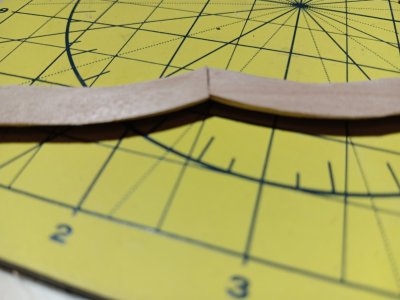
2. Flat (unmilled) edge sits flush against the last parallel frame. The beveled edge faces forward, and the next cant frame should sit flush against this edge.
I learnt something new. ThanksHi Brad,
If you hawse timbers are constructed the same way as mine on Fame - only the side of the timbers facing the next timber is beveled. The frame facing the stem is always flat. Hope this helps - believe me I may have built these a dozen times before getting an acceptable result.
Another blessed Colorado gift, to add to the Antelope meat in the freezer! Four days into a 9-day season I found this beautiful Mule Deer, with Eight lovely does, in a deep ravine.
Eight-hour recovery, with the help of my wonderful Son-in-Law (who discovered he is allergic to deer


 ).
).
1 Mile south of the Wyoming border, at 8,300ft. 30MPH winds and blowing snow flurries.
Fine Food For Friends/Family if anyone is in Loveland CO! Gear is cleaned and stowed for next year and modeling will resume shortly!
Sorry for the off-topic post but it explains my absence for the last week!


Eight-hour recovery, with the help of my wonderful Son-in-Law (who discovered he is allergic to deer

1 Mile south of the Wyoming border, at 8,300ft. 30MPH winds and blowing snow flurries.
Fine Food For Friends/Family if anyone is in Loveland CO! Gear is cleaned and stowed for next year and modeling will resume shortly!
Sorry for the off-topic post but it explains my absence for the last week!


Hi Brad. You guys are having the "best" life. Awesome. If you ever come to SA maybe my son (He just bought himself a new rifle - enjoys a good hunt once in a while) could organise something - get some Kudu ,Eland or Gemsbok.....Another blessed Colorado gift, to add to the Antelope meat in the freezer! Four days into a 9-day season I found this beautiful Mule Deer, with Eight lovely does, in a deep ravine.
Eight-hour recovery, with the help of my wonderful Son-in-Law (who discovered he is allergic to deer
).
1 Mile south of the Wyoming border, at 8,300ft. 30MPH winds and blowing snow flurries.
Fine Food For Friends/Family if anyone is in Loveland CO! Gear is cleaned and stowed for next year and modeling will resume shortly!
Sorry for the off-topic post but it explains my absence for the last week!
View attachment 553430View attachment 553428View attachment 553429
Back to work on the "La Salamandre"Cant frames. I'm knocking out a port side frame one day, then the next day, the matching starboard side.
Here is my process:
1. From the plans, I cut out the Angle that the Cant frame will be milled at (see paper triangle in foreground).
2. Then cut two shims with this angle and create an angled base that can be locked down on the mill table.
3. The frame is then spot glued using 3 drops of wood glue (each end and the middle).
a. Let the glue dry for at least two hours. I rushed it twice and the force of the rotating bit pulled the part off and ruined it.
b. The opposite frame is shown in the orientation that it will be glued (once its mate is milled)
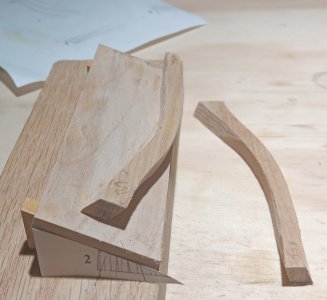
4. This base is then locked down on the table.
5. An end mill is used to slowly create the proper bevel.
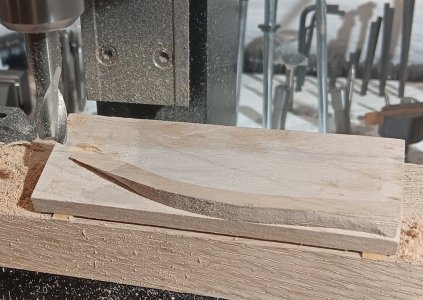
6. Water is then used to "release" the three drops of glue to free the frame.
7. Below photos show the first five Cant frames resting in position.
8. I have a feeling sixth and final pair will be tricky!!!! Hope to get them finished sometime this weekend.
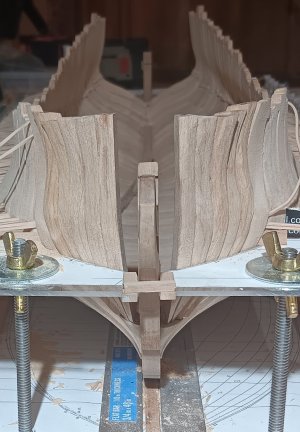
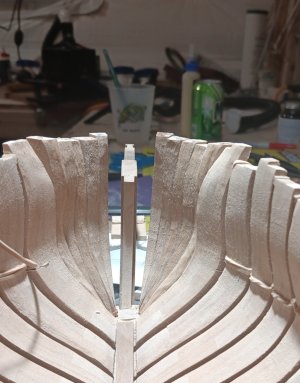
A long and detailed post but I wanted to share how I approached milling Cant frames for the first time!
Here is my process:
1. From the plans, I cut out the Angle that the Cant frame will be milled at (see paper triangle in foreground).
2. Then cut two shims with this angle and create an angled base that can be locked down on the mill table.
3. The frame is then spot glued using 3 drops of wood glue (each end and the middle).
a. Let the glue dry for at least two hours. I rushed it twice and the force of the rotating bit pulled the part off and ruined it.
b. The opposite frame is shown in the orientation that it will be glued (once its mate is milled)

4. This base is then locked down on the table.
5. An end mill is used to slowly create the proper bevel.

6. Water is then used to "release" the three drops of glue to free the frame.
7. Below photos show the first five Cant frames resting in position.
8. I have a feeling sixth and final pair will be tricky!!!! Hope to get them finished sometime this weekend.


A long and detailed post but I wanted to share how I approached milling Cant frames for the first time!
Excellent process description, Brad! I have used a similar approach for milling angles. The only difference is I use CNC double stick tape to attach the pieces for milling. This eliminates the wait time for the glue to dry but I have been known to break the finished piece trying to pry it loose from the tape. Another method I’ve used in full size woodworking is to stick blue painters tape to each surface and then use CA glue on the tape which works a treat. I haven’t tried the painters tape hack on small pieces so proceed at your own risk! 


This guy: https://www.bing.com/shop/productpa...rue"&productpage=true&FORM=SHPPDP&browse=trueBack to work on the "La Salamandre"Cant frames. I'm knocking out a port side frame one day, then the next day, the matching starboard side.
Here is my process:
1. From the plans, I cut out the Angle that the Cant frame will be milled at (see paper triangle in foreground).
2. Then cut two shims with this angle and create an angled base that can be locked down on the mill table.
3. The frame is then spot glued using 3 drops of wood glue (each end and the middle).
a. Let the glue dry for at least two hours. I rushed it twice and the force of the rotating bit pulled the part off and ruined it.
b. The opposite frame is shown in the orientation that it will be glued (once its mate is milled)
View attachment 553854
4. This base is then locked down on the table.
5. An end mill is used to slowly create the proper bevel.
View attachment 553855
6. Water is then used to "release" the three drops of glue to free the frame.
7. Below photos show the first five Cant frames resting in position.
8. I have a feeling sixth and final pair will be tricky!!!! Hope to get them finished sometime this weekend.
View attachment 553856View attachment 553857
A long and detailed post but I wanted to share how I approached milling Cant frames for the first time!
Love this forum and the advice (especially for me...learning how to use the new milling machine)!!!!
Thanks!
Thanks!
Paul, thanks (it's only money, right)? On order.... delivery ETA Sunday. I'll wait to mill the final Cant frames till the tilting table arrives, as I'm sure it will make the micro-adjustments, I envision possible!!!This guy: Tilting milling table
Olivier, Tomorrow I'll stop by Home Depot and buy some double-sided CNC tape. I've got plenty of blue tape and CA glue, so I'll experiment with that too!Excellent process description, Brad! I have used a similar approach for milling angles. The only difference is I use CNC double stick tape to attach the pieces for milling. This eliminates the wait time for the glue to dry but I have been known to break the finished piece trying to pry it loose from the tape. Another method I’ve used in full size woodworking is to stick blue painters tape to each surface and then use CA glue on the tape which works a treat. I haven’t tried the painters tape hack on small pieces so proceed at your own risk!

Love what you're doing here, Brad. Not sure if you have a thickness sander available, but that might also be an alternative to milling.
I secure this to the bed of the milling table using a double layer of double-sided tape (of course you can use hardware if the slots line up).Love this forum and the advice (especially for me...learning how to use the new milling machine)!!!!
Thanks!
Paul, thanks (it's only money, right)? On order.... delivery ETA Sunday. I'll wait to mill the final Cant frames till the tilting table arrives, as I'm sure it will make the micro-adjustments, I envision possible!!!
Olivier, Tomorrow I'll stop by Home Depot and buy some double-sided CNC tape. I've got plenty of blue tape and CA glue, so I'll experiment with that too!
As long as I'm spending your money buy a small digital angle finder and impress yourself with your new accurate milling.
Brad take it from my experience and a pile of rejected hawse timbers - normal double sided tape wont hold with more powerful mill like a sherline or taig. I use this one with success and left behind the frustration.


